
How to Grade Corset Dresses for Consistent Fit Across Sizes

Your trusted Women’s Apparel Manufacturer from China
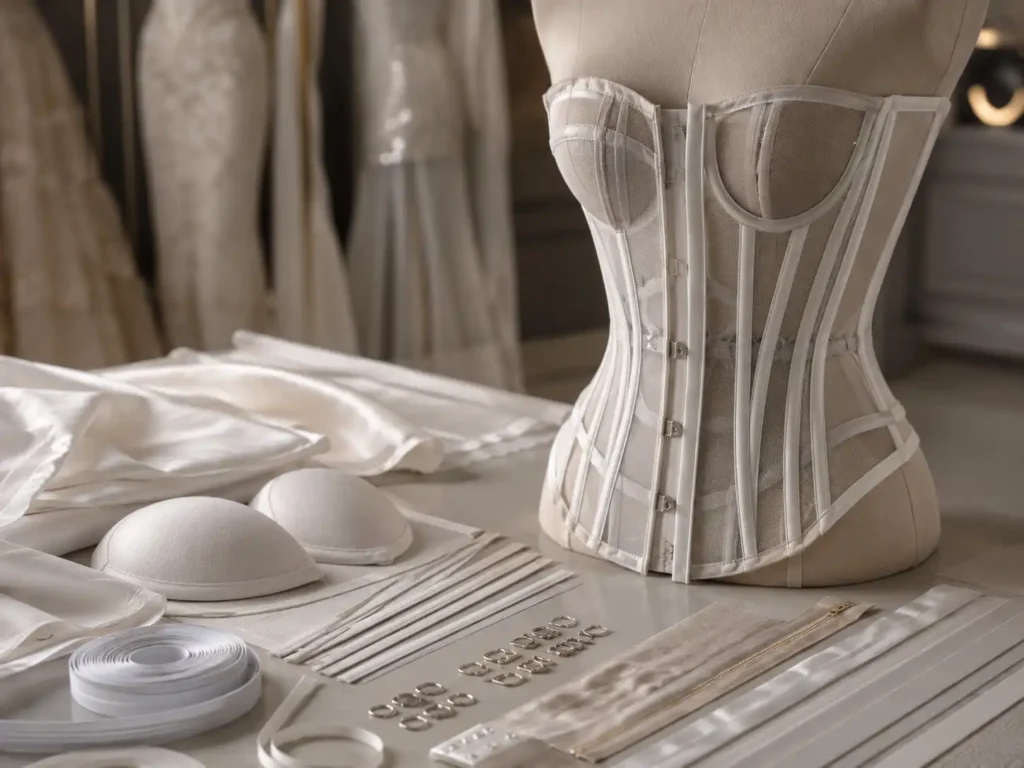
A corset dress can look perfectly balanced in the approved base size and still fail once the pattern is expanded. The neckline may become too wide, the bust point may drift outward, the waist may lose its sculpted shape, or the larger sizes may feel tighter even though their measurements increased. These problems appear because a corset dress is not simply a fitted dress with extra seams. Its outer fabric, cups, lining, interfacing, boning, closures, and skirt must behave as one connected structure. Good grading protects the design while allowing real bodies to change in width, length, projection, and proportion. The work begins before anyone moves a CAD point: the target customer, approved fit, fabric behavior, construction method, and size chart all need to be clear.
To grade a corset dress correctly, start with a verified base pattern, define horizontal and vertical increments from the brand’s size chart, distribute growth across the cups and bodice panels, preserve waist and neckline control, grade every internal component, reconnect the bodice to the skirt, and validate selected sizes through physical samples before bulk production.
Consider a lace-up satin mini dress that looks excellent in size S. The pattern is enlarged, production starts, and the first XL sample arrives with a gaping upper edge, a back opening wider than planned, and a skirt waist that no longer matches the bodice. Every individual measurement may appear close to the chart, yet the garment no longer feels like the same design. That is the central challenge of corset grading: the result must be mathematically controlled, structurally sound, visually consistent, and comfortable enough to wear beyond a fitting-room photograph.
What Makes Corset Grading Different?
Corset grading must preserve support, bust shaping, waist definition, neckline security, and panel balance across every size. Unlike a loose dress, a corset dress cannot be graded by adding width mainly at the side seams. The cup, underbust, torso length, boning positions, closures, lining, and skirt connection must develop together as one fitted structure.
Create a high-resolution technical fashion illustration showing five nested corset-dress bodice sizes from XS to XL on a clean pattern-making table. Include color-coded cup seams, princess lines, waistlines, boning channels, bust points, and graded neckline positions, with a subtle half-scale dress form in the background. Editorial apparel-manufacturing style, realistic paper textures, no logos, no decorative text.
Fit Is Controlled in Three Dimensions
A corset dress is shaped around the body rather than allowed to hang freely from the shoulders. Its fit depends on circumference, vertical position, and projected volume. Full-bust circumference alone does not describe the cup because two wearers can share the same bust measurement while having different upper-bust, underbust, cup-depth, and bust-point measurements. The waist also needs more than a simple circumference increase. Shaping is usually distributed through several seams, and each seam contributes to the contour, visual proportion, and sewing balance of the finished garment.
Vertical balance is just as important as width. As sizes increase, the bust level, underbust line, waist position, side length, and back length may need controlled downward movement. These changes are often measured in millimeters rather than centimeters, yet they strongly affect comfort and appearance. A cup positioned 8-12 mm too high or too low can distort the neckline, pull the waist seam out of position, and create pressure along the lower cup. The grader therefore works with connected body landmarks rather than treating bust, waist, and length as separate numbers.
Fit Zone | What Must Be Controlled | Common Failure |
Upper bust | Neckline contact, coverage, and upper-cup shape | Gaping at the top edge |
Full bust | Circumference, projection, and cup capacity | Compression or flattening |
Underbust | Lower-cup support and rib-cage fit | Cup lifts away from the body |
Bust point | Horizontal and vertical location | Apex sits too far inward or outward |
Waist | Shaping, breathing room, and seam balance | Pressure or lost definition |
High hip | Lower-bodice transition into the skirt | Riding up or drag lines |
Torso length | Bust-to-waist proportion | Waist seam sits too high |
Center back | Closure length and opening balance | Zipper strain or uneven lace-up gap |
Structure Does Not Scale Uniformly
The body changes between sizes, but many construction details do not. Seam allowances, zipper-tape width, boning-channel width, hook spacing, topstitching distance, and certain strap widths are usually fixed specifications. Enlarging those elements in the same proportion as the body creates inconsistent sewing methods and can make neighboring sizes look as though they were produced from different technical standards. A boning channel may shift outward and lengthen slightly, yet remain 6 mm or 8 mm wide. A strap may keep its finished width while its attachment point moves toward the shoulder.
The neckline also needs conservative treatment. If the upper edge grows at the same rate as the full bust, larger sizes may gape or lose support. Additional volume often belongs in the cup seams, side-front panels, and lower-cup shaping rather than across the neckline. This is particularly important in strapless dresses, where the upper edge, boning, waist stay, cups, lining, and closure share the work of holding the garment in position. Uniform digital scaling should therefore be avoided. Grading is a selective redistribution of shape, not a photographic enlargement of the approved pattern.

Grading Is Not Individual Alteration
Pattern grading creates a repeatable commercial size range, while alteration adapts a pattern to one person’s proportions, posture, or fit preference. A standard grade may increase the bust by 4 cm, the waist by 3-4 cm, and the hip by 4-5 cm between adjacent sizes, depending on the brand chart. Those increments describe the intended progression between sizes. They do not automatically solve a fuller cup, shorter torso, narrow back, prominent rib cage, sloping shoulder, or asymmetrical posture.
A full-bust adjustment changes cup capacity and front length without increasing the back in the same way. A standard grade normally changes the front and back according to documented rules. Before grading begins, the technical team should confirm that the base sample fits the intended customer rather than merely fitting the available model. When several sizes repeat the same problem, the base block or grade rule is usually the first place to investigate. When one wearer alone shows the problem, an individual alteration is often the more accurate solution.
Corset Type Changes the Method
Not every corset dress requires the same grading logic. A fashion bustier with decorative channels behaves differently from an overbust corset designed for meaningful waist reduction. A stretch mesh corset dress behaves differently from a non-stretch satin style reinforced with fusible, foam, and rigid boning. An underbust corset is controlled mainly by rib-cage, waist, and high-hip measurements, while an overbust style also requires cup volume, bust-point position, upper-edge coverage, and bust separation.
A lace-up back provides adjustment, but it does not remove the need for accurate grading. The intended gap still needs to remain visually consistent and structurally functional. A zipper-back style offers less adjustment, so finished measurements and tolerances become more critical. Stretch styles may use negative ease, but the amount must be based on tested stretch and recovery rather than assumed elasticity. The grading method should only be finalized after the corset type, fabric behavior, internal construction, closure, and intended wearing experience have been confirmed.
Which Measurements and Rules Are Needed?
Corset grading requires an approved base pattern, a defined body-size chart, finished-garment measurements, horizontal and vertical grade increments, cup and bust-point data, closure specifications, and tested fabric behavior. The rules must show where each size change is distributed, which dimensions stay fixed, and how the shell, lining, support layers, and skirt remain compatible.
Produce a realistic technical flat-lay of a corset dress measurement session with a graded pattern, flexible tape measure, size chart, transparent ruler, awl, and annotated dress form. Emphasize full bust, upper bust, underbust, waist, high hip, bust-point spacing, and front-waist length using clean arrows and subtle numeric callouts. Premium apparel technical-design photography, neutral studio background, no brand names.
Start with a Verified Base Size
The base size should be the most reliable and representative size in the intended range. It is not automatically the smallest size or the mathematical midpoint. A sound base size has an approved fit sample, an appropriate fit model, complete measurements, confirmed fabric, and stable construction. For a range such as XS-XL, size S or M is often used because historical blocks and fit models are readily available, but convenience is not enough if that body does not represent the brand’s actual customer.
Approval should cover full bust, upper bust, underbust, bust-point position, cup projection, waist placement, side-seam balance, center-front length, center-back length, neckline security, closure function, boning pressure, and sitting comfort. The sample should be reviewed in the intended production fabric or in a material with closely comparable weight, stretch, recovery, and stiffness. A pattern approved in soft calico can behave differently when produced in firm satin, bonded mesh, or heavily fused lace. Small seam mismatches should be corrected before grading because every grade step can make them more difficult to sew.
- Approved body and finished-garment measurements for the base size
- Confirmed fit model measurements and fit-session comments
- Stable shell, lining, support, cup, boning, and closure construction
- Matched seam lengths, notches, grainlines, and pattern version numbers
- Agreed size range, target market, and intended level of shaping or compression
Confirm Body and Garment Measurements
Body measurements describe the intended wearer, while finished-garment measurements describe how the product will fit that wearer. Both are necessary because corset dresses may use positive ease, zero ease, or negative ease depending on the material and structure. The measurement list should extend beyond bust, waist, and hip. Structured dresses usually need vertical and positional information that a basic retail size chart may not provide, particularly around the upper bust, underbust, bust point, front waist length, and side seam.
Every point of measure needs a clear method. The term bust width can refer to a flat garment measurement, a pattern measurement on the stitch line, or half of a finished circumference. A specification should state whether the garment is closed, relaxed, stretched, lined, or measured over internal padding. Stretch garments need additional detail: the file should state whether the measurement is taken relaxed, at a defined extension, or after recovery. Without that information, two competent teams can measure the same dress and produce different results.
|
Measurement |
Primary Use |
Common Adjacent-Size Change* |
|
Full bust |
Overall chest circumference and cup capacity |
4-5 cm |
|
Upper bust |
Neckline and upper-cup control |
3-4 cm |
|
Underbust |
Lower-cup and rib-cage fit |
3-4 cm |
|
Natural waist |
Corset shaping and comfort |
3-4 cm |
|
High hip |
Lower bodice and skirt transition |
4-5 cm |
|
Full hip |
Fitted skirt volume |
4-5 cm |
|
Bust-point spacing |
Cup position across the front |
0.5-1 cm total |
|
Front waist length |
Bust-to-waist balance |
0.4-0.8 cm |
|
Back waist length |
Back-body balance |
0.3-0.7 cm |
|
Side-seam length |
Underarm-to-waist balance |
0.3-0.6 cm |
Build Horizontal and Vertical Rules
Horizontal grade rules control circumference and width, while vertical rules control body landmarks and garment length. The work begins with the size chart. The difference between adjacent sizes is calculated, divided to the half-pattern or full pattern, and then distributed according to the style. If the full bust increases by 4 cm, the half-pattern increases by 2 cm, but that 2 cm should not automatically be placed at the side seam. Part may belong in the cup, side-front panel, side seam, and back.
The distribution is rarely equal. A corset with pronounced front shaping may need more of the bust grade in the cup and side-front area. A design with a narrow center-front panel may keep that panel visually stable while neighboring panels grow. Vertical grading is usually more restrained, yet the bust point, waist line, underarm, and back neckline still need controlled movement. The rule record should identify X and Y movement, direction, fixed points, intermediate curve points, sizes where the rule changes, and components that do not grade. That documentation makes the nest auditable instead of leaving unexplained CAD movements.
- Confirm the body-size interval and the finished-garment specification.
- Define ease, reduction, or compression for each key circumference.
- Calculate total horizontal and vertical changes between adjacent sizes.
- Distribute each change across the pattern panels according to fit and design.
- Record fixed dimensions such as seam allowance, channel width, and trim width.
- Overlay the graded nest and review smooth progression before sampling.
Decide Whether One Cup Profile Is Enough
Many commercial size charts increase the full bust and waist together while keeping one assumed bust proportion. That approach can work across a narrow range, but it becomes less reliable as the range expands. The difference between upper bust and full bust gives a useful indication of cup volume. When that difference changes significantly across the intended customer group, one cup profile may not provide consistent coverage, separation, and support.
A brand may keep one cup profile across a limited range, introduce a fuller cup from a defined size, offer separate cup groups, use adjustable construction, or develop a second block for extended sizes. Separate cup options increase pattern, sample, SKU, and production complexity, so they should be supported by sales data and product strategy. Even so, forcing one shallow cup across a broad range can lead to repeated neckline gaping, underbust pressure, poor campaign photography, and returns. The practical goal is not to fit every possible body, but to give the intended majority a stable and clearly communicated fit.

How Do You Grade the Corset Bodice?
Grade the corset bodice by moving neckline, cup, princess-seam, side-seam, waist, and back points according to documented horizontal and vertical rules. Add bust volume through both width and depth, distribute waist growth across several panels, preserve seam shape, reposition boning and closures, and update every corresponding lining, facing, interfacing, cup, and support component.
Show an expert pattern maker grading a structured corset bodice in CAD beside printed pattern pieces. The screen and paper should reveal nested cup curves, bust-apex movement, waist distribution, princess seams, boning channels, and zipper or lace-up allowances. Include a partially assembled satin corset sample on a dress form. Documentary factory-development style, realistic proportions, soft neutral lighting, no visible logos.
Assign Grade Points by Function
Before moving any point, identify what it controls. A neckline point affects coverage and upper-edge tension. A cup-seam point affects projection and volume. A side-seam point affects circumference and front-to-back balance. A waist point affects shaping and the connection to the skirt. A multi-panel corset may include center-front, cup, side-front, side, side-back, and center-back pieces, and each joining seam contributes to both fit and appearance.
Major grade points are normally placed at the center-front neckline, cup neckline, bust-apex reference, underbust seam, underarm, side-seam bust level, side-seam waist, center-front waist, center-back neckline, center-back waist, strap attachments, and closure endpoints. Curved seams also need intermediate control points. Moving only the endpoints of a cup curve can flatten or distort it. Establish the main body landmarks first, rebuild the curves, and then walk corresponding seams from notch to notch. The assembled group should show continuous waistlines, underbust lines, and bust levels without sudden steps between panels.
- Grade major anatomical landmarks before redrawing intermediate curves.
- Keep construction dimensions separate from body-fit dimensions.
- Walk every cup, princess, side, and waist seam on the stitch line.
- Check notches and drill marks after curves have been finalized.
- Review the full panel group rather than judging each piece in isolation.
Develop Cup Width and Depth
Cup grading is one of the most sensitive parts of corset development. A larger cup needs more than additional horizontal width; it also needs controlled projection, vertical length, and underbust seam development. Adding width without depth creates a broad, flat cup that can compress the bust and push the garment downward. Adding depth without enough width can create strong projection while squeezing the sides of the bust. Cup width, cup depth, apex position, neckline, and underbust support must therefore change as one system.
The bust point generally moves outward and slightly downward as sizes increase, but the amount should follow the target body data rather than a generic formula. The upper edge must maintain coverage without becoming loose, and the underbust seam must remain supportive without cutting into the rib cage. Purchased foam or molded cups can limit the available grade because those components exist in fixed dimensions. When inserts change at selected sizes, the shell, lining, neckline, and seam lengths need a planned transition instead of a continuous mathematical grade.
|
Checkpoint |
What to Review |
Warning Sign |
|
Cup width |
Side-to-side capacity across the bust |
Breast tissue extends beyond the shaped area |
|
Cup depth |
Projection from underbust to apex |
Cup looks flat, collapses, or pushes down |
|
Apex position |
Alignment with the intended bust point |
Seam crosses the fullest point incorrectly |
|
Upper edge |
Coverage and contact against the body |
Gaping or cutting into the upper bust |
|
Underbust seam |
Support and rib-cage fit |
Cup lifts away or creates hard pressure |
|
Cup seam length |
Sewing compatibility between joining pieces |
Forced easing, twisting, or puckering |
|
Lining volume |
Internal capacity compared with the shell |
Outer layer fits while lining compresses |
|
Foam or molded cup |
Compatibility with the graded shell |
Insert is smaller or differently shaped |
Preserve Waist Shape and Panel Balance
The waist increase should be distributed through several seams rather than concentrated at the side seam. This protects the corset silhouette and prevents one panel from becoming disproportionately wide. A half-waist increase of 1.5 cm might be shared across the side-front seam, side seam, and side-back seam, while the center-front panel receives little or no change because its narrow appearance is part of the design. The exact distribution depends on the block, fabric, and intended contour.
Panel ratios are worth comparing between the base size and the largest size. If a side panel represents 18% of the half-waist in the base size but 28% in the largest size, the garment may look structurally different even when the total waist is correct. Waist curves also need to remain sewable. Extremely sharp shaping can create puckering, difficult boning channels, and inconsistent seam allowances. The intended reduction must be explicit: a fashion corset dress may fit closely without real compression, while a shaping corset may reduce the natural waist by several centimeters. Those products should not share the same grading assumptions.
Reposition Boning and Closures
Boning channels should continue to support the same structural areas in every size. They may move outward, lengthen, or change angle, but their finished width usually remains fixed. Each bone should be reviewed in relation to the bust apex, cup seams, princess seams, side seam, zipper, waist seam, neckline, and seated body position. A bone that ends too close to the neckline can create a hard pressure point, while one that extends too far below the waist can dig into the body when the wearer sits.
Closures require independent rules. A zipper may need more length as the torso grows, but the tape width and seam allowance remain constant. Hook-and-eye spacing should stay consistent unless the specification changes. A lace-up back should maintain a deliberate visible gap and sufficient modesty-panel coverage. If the dress fits only when the lacing closes completely or opens far beyond the intended range, the size is not functioning as designed. All related pieces must be updated together, including lining, facing, fusible, foam, stay tape, underwire casing, waist stay, modesty panel, and internal support bands.
How Do You Grade the Skirt and Waist Seam?
Grade the skirt after the corset’s finished waist has been established. Match each bodice section to the correct skirt section, distribute hip and seat increases according to the silhouette, control length above and below the hip, and verify darts, ruching, slits, notches, lining, and seam lengths so the two parts join without stretching or forced easing.
Create a detailed technical illustration of a corset bodice being matched to four skirt silhouettes: bodycon, pencil, A-line, and ruched. Show waist-seam alignment, panel notches, hip lines, dart positions, slit height, and front-to-back hem balance. Include overlapping graded pattern sizes and a stitched waist-seam sample. Clean fashion production aesthetic, realistic scale, neutral colors, no logos or marketing text.
Match the Waist by Section
A correct total waist measurement does not guarantee that the bodice and skirt will sew together correctly. Multi-panel corset bodices often contain more seams than the skirt, so the technical team must define which bodice sections correspond to each skirt panel, dart, pleat, or design mark. The pattern should be compared on the stitch line rather than casually along the cut edge because a curved waist can show noticeable differences at different seam-allowance depths.
A practical method divides the half-waist into controlled sections: center front to the first bodice seam, first seam to side front, side front to side seam, side seam to side back, and side back to center back. Those sections are then matched to skirt seams, darts, or alignment marks. When one skirt panel corresponds to several bodice panels, the combined stitch-line lengths must match the correct section. Notches should identify meaningful assembly points, and the waist seam should be walked after every major correction. Stretch skirts may require stabilization so the waist does not grow while being attached to a non-stretch corset.
- Measure both components along the actual stitch line.
- Match section lengths, not only the total half-waist measurement.
- Use notches for seam intersections, darts, pleats, and controlled easing.
- Confirm whether the skirt waist is stabilized, fused, taped, or stay-stitched.
- Recheck the lining and shell separately when they use different seam structures.
Grade for the Skirt Silhouette
The distribution of width depends on the skirt shape. A fitted bodycon skirt needs careful development through the high hip, full hip, seat, thigh, and hem. An A-line skirt can carry more of the increase through side-seam flare, while a circular skirt may need relatively little hip shaping but still requires a precisely graded waist opening and stable grain balance. One rule should not be applied to all silhouettes simply because they share the same corset bodice.
A bodycon skirt should not be graded only at the side seams. Some width may need to enter through darts, princess seams, or center-back shaping to maintain the seat curve. A pencil skirt needs walking ease as well as circumference; the hip may fit while the hem remains too narrow for a comfortable stride. Ruched styles require separate control of the fitted base and the overlay. The overlay often follows a gathering ratio instead of the exact base grade. Draped styles need stable anchor points so folds continue to fall from comparable body positions rather than changing character as the size increases.

- Bodycon: control stretch, recovery, seat shape, and hem restriction.
- Pencil: balance hip fit with walking ease and slit construction.
- A-line: preserve waist fit while controlling flare and side-seam direction.
- Circular: protect the waist opening, grain balance, and hem stability.
- Ruched: grade the fitted base and the overlay as related but separate layers.
- Draped: move anchor points carefully and review fold length on the body.
Control Hip, Length, and Balance
Vertical grading should be distributed through the garment rather than added entirely at the hem. Growth may be needed between the waist and high hip, between the high hip and full hip, and below the hip. The target customer’s height profile also matters. A brand may keep one standard length, increase length gradually with size, or develop separate petite and tall ranges. Each approach can work, but the decision should be intentional and visible in the specification.
Mini dresses are particularly sensitive because a 1 cm change in waist position combined with a 1 cm change in skirt length can noticeably affect coverage. On midi and maxi dresses, seat development can lift the back hem, so front and back balance should be reviewed on the body rather than compared only as flat lengths. Slit height needs a clear reference point, whether it is controlled from the waist or the hem. Hem sweep should also be measured because a fitted skirt may need more movement allowance, while a flared skirt must maintain grain balance and stable side-seam direction.
Audit Darts, Notches, and Linings
Darts should increase in depth and may shift slightly as body width changes. Their points need to remain an appropriate distance from the bust, abdomen, or fullest hip area. Extending a dart too close to the body’s fullest point can create a sharp projection, while making one dart excessively deep can produce difficult pressing and uneven shaping. Larger sizes may benefit from distributing intake between two darts or between a dart and a seam rather than forcing all shaping into one location.
The lining should not be treated as an automatic copy of the shell. It may use different darts, pleats, ease, hem length, or seam positions. A fitted woven lining under a stretch skirt can restrict movement even when the outer garment appears correctly graded. After grading, review dart intake, seam intersections, notch order, grainlines, zipper and slit lengths, lining correspondence, waist stabilization, symmetry, and front-to-back balance. Overlaying adjacent sizes is useful because crossing lines, sudden jumps, or points moving in an unexpected direction often reveal a rule that deserves another fit check.
How Do You Validate Every Size?
Validate the graded range through digital measurement, seam walking, selected size-set samples, movement testing, and documented production approval. Check the base, smaller, larger, and boundary sizes in representative materials. Confirm cup capacity, neckline security, waist comfort, skirt balance, boning, closures, and measurements before releasing controlled pattern versions for bulk cutting.
Depict a professional size-set fitting for a corset dress with four mannequins or fit models representing smaller, base, larger, and boundary sizes. Show a technician checking neckline contact, cup position, waist, back opening, skirt balance, and movement, alongside a measurement chart and approved golden sample. Modern apparel quality-control environment, documentary realism, inclusive proportions, no brand logos.
Choose a Useful Size Set
Sampling every size may not be necessary for every project, but approving only the base size leaves the grade largely untested. The selected sizes should reveal how the pattern behaves at different points in the range. For XS-XL, a practical review may include XS, M, and XL, while another project may use S, M, and XL if S is the established fit size. Wider ranges need additional checkpoints where increments change, cup options begin, or a second block is introduced.
The fit test should include movement rather than a single standing photograph. The wearer should sit, walk, raise the arms, turn the torso, breathe deeply, and operate the closure. Strapless dresses should remain secure without constant adjustment. Lace-up styles should be evaluated at the intended back gap rather than pulled fully closed. Fitted skirts should be checked for stride length, sitting comfort, and waist-seam movement. Photographs are useful evidence, but they should be combined with measurements, wearer feedback, and technical comments because a smooth front view can hide underbust pressure or restricted breathing.
|
Size-Set Position |
Main Purpose |
Key Risks to Review |
|
Smallest size |
Check reduced coverage and narrow proportions |
Neckline too low, cups too close, strap position |
|
Base size |
Confirm the approved design and construction |
Reference point for every comparison |
|
One larger size |
Test early grade development |
Cup depth, torso length, waist distribution |
|
Largest size |
Check boundary performance |
Support, closure strain, panel distortion |
|
Block transition |
Verify a change in rule or body block |
Sudden measurement or shape jump |
|
High-sales size |
Confirm commercial fit consistency |
Return risk and repeat-order reliability |
Test the Actual Material System
Fabric changes the effective grade. A pattern approved in one satin may not fit the same way in another satin with different weight, stretch, surface friction, or stiffness. The shell, lining, fusible, cups, waist stay, boning, and closure form one material system, and that system should be tested together. Negative ease should be based on measured stretch and recovery, not on a supplier’s general description. A fabric may extend 25% but still be unsuitable for 25% negative ease because recovery, transparency, seam stress, and non-stretch internal layers limit practical use.
The material review should cover stretch in the garment direction, recovery after extension, shrinkage from pressing or testing, seam slippage, fusible shrinkage, lace or mesh stability, lining resistance, foam thickness, boning stiffness, and zipper strength. Fabric should be relaxed before cutting according to the material and factory process. When the shell stretches but the lining does not, the lining often controls the true fit. When both stretch but the zipper and boning do not, those components can become pressure points. Validation therefore belongs on the assembled garment rather than on the shell pattern alone.
- Test stretch and recovery in the direction used by the garment pattern.
- Confirm shrinkage after steaming, pressing, fusing, or wash testing where relevant.
- Check seam slippage and needle damage on satin, mesh, lace, and lightweight woven fabrics.
- Review the compatibility of shell, lining, fusible, foam, boning, and closure stiffness.
- Measure samples after the same pressing and conditioning stage used for production inspection.
Measure More Than Bust and Waist
The finished dress should be checked against a defined point-of-measure chart. Bust, waist, and hip are essential, but they are not enough to identify cup, closure, or balance problems. A useful corset-dress specification also includes upper-edge circumference, underbust, bust-point spacing, shoulder or strap to bust point, center-front length, center-back length, side-seam length, cup seam lengths, boning lengths, back opening, waist-seam sections, skirt length, slit height, and hem sweep.
Measurements must be taken at the same production stage. A garment measured before pressing can differ from one measured after pressing, and a lace-up dress measured with a 5 cm back gap will differ from one pulled fully closed. Tolerances should reflect the importance of each point. A loose skirt sweep can accept more variation than bust-point spacing or upper-edge circumference. When several garments are consistently small at the underbust, the cause may be cutting, seam allowance, fusible shrinkage, or an incorrect pattern rather than random sewing variation. Patterns in the data are more useful than isolated pass-or-fail results.
- Upper edge, full bust, underbust, waist, high hip, and full hip
- Bust-point spacing and strap-to-bust-point length
- Center-front, center-back, and side-seam lengths
- Cup seams, boning, zipper, back opening, and waist-seam sections
- Skirt length, slit height, hem sweep, and front-to-back balance
Release Controlled Production Files
A graded pattern is ready for bulk production only when the approved information is organized into one controlled package. Unlabeled files, verbal corrections, and mixed pattern versions are common causes of inconsistency. The package should include the approved body and garment size charts, grade-rule table, base and graded pattern files, pattern version and date, point-of-measure diagrams, construction details, bill of materials, boning chart, cup specification, closure specification, size-set comments, PP-sample approval, tolerance chart, and approved reference sample.
Pattern names should identify the style, component, size, version, and date. The shell, lining, fusible, and support pieces must belong to the same approved version. Before cutting, the nested patterns should show smooth progression without unexplained crossings or jumps. Seam lengths, notches, drill marks, grainlines, and cut quantities should be checked. During production, early in-line measurements can identify repeated cutting or sewing problems before the order is completed. Final inspection then confirms appearance, measurement, closure function, boning, pressing, and packing against the approved PP or golden sample.
- Approved size chart and finished-garment specification
- Grade-rule table and dated graded pattern files
- Point-of-measure diagram and tolerance chart
- Construction, cup, boning, closure, and material specifications
- Size-set comments, PP approval, and approved reference sample
- In-line and final measurement records for production traceability
From a Correct Grade to a Repeatable Product
A corset dress is successfully graded when customers in different sizes recognize the same design and experience the same intended level of coverage, shaping, comfort, and support. That consistency comes from coordinated decisions across the size chart, base block, cup geometry, panel distribution, boning, closures, fabric, skirt construction, sample review, and production controls. A smooth CAD nest is useful, but it is not final proof. The garment must still be sewn, measured, worn, moved in, and compared with the approved standard.
For fashion brands, the practical goal is not merely to receive a complete set of digital patterns. It is to build a size system that can be sampled, photographed, sold, reordered, and reproduced without solving the same fit problems each season. Keeping approved grade rules, fabric references, pattern versions, cup and boning details, measurement files, and fit comments together reduces development risk and gives future colorways or repeat orders a verified starting point.
Jinfeng Apparel supports custom corset dresses and structured womenswear from technical review and pattern development through sampling, size grading, PP approval, bulk production, private-label packing, and repeat-order record keeping. The Guangdong-based production system has focused on women’s fashion manufacturing since 2008 and includes six owned factories, more than ten long-term satellite partners, two sample rooms, seven or more senior pattern makers, and over twenty sample machinists. These resources are organized for brands that need controlled development rather than one-off garment alteration.
Share This Article :

Jerry Lee
Categories

Latest blogs


Table of Contents
Here, developing your OEM/ODM private label clothing collection is no longer a challenge—it’s an excellent opportunity to bring your creative vision to life.

