
How to Control Cut-Out Placement in Custom Dress Production

Your trusted Women’s Apparel Manufacturer from China

A cut-out dress can look effortless on a campaign model, but behind that clean waist opening, side curve, underbust gap, or back detail is one of the hardest control points in women’s fashion manufacturing. The problem is not only where the designer wants the opening to sit. The real challenge is whether that placement can stay stable after pattern correction, fabric stretch, grading, cutting, sewing tension, fitting, lining, finishing, packaging, and bulk production. A cut-out that is 1 cm too high can expose more than intended. A side opening that shifts after grading can break symmetry. A waist cut-out that looks sharp on a sample can become distorted when produced in stretch mesh or satin across XS to XL. For brands selling party dresses, bodycon dresses, resort dresses, occasionwear, clubwear, or private-label collections, this detail is not decoration. It is a fit, safety, and brand reputation issue. The customer may not know why the dress feels wrong, but she will know when it does. That is why experienced product teams treat cut-out placement as a measured construction zone, not a last-minute style effect.
To control cut-out placement, brands should lock the opening with body reference points, pattern notches, grading rules, fabric behavior tests, fit reviews, PP sample approval, and bulk QC tolerances. The goal is to keep the cut-out visually balanced, safe to wear, symmetrical, and consistent across sizes and production batches.
Think of cut-out placement like the camera focus of a dress. When it is right, the whole garment looks intentional. When it is off, even premium fabric and clean stitching cannot save the style. A buyer may approve a sample because it photographs well, but the real test comes later: does the same opening still sit correctly after sizing, sewing, pressing, packing, and real-life movement?
Control Stage | What Must Be Checked | Why It Matters |
Design Review | Placement zone, exposure level, style intent | Prevents unrealistic or unsafe openings |
Pattern Development | Reference points, notches, seam distance, balance | Converts the idea into repeatable construction |
Fitting | On-body position, movement, coverage, tension | Shows whether the cut-out works on real bodies |
Grading | Size-by-size ratio and safety zone | Prevents placement drift across sizes |
Fabric Testing | Stretch, recovery, transparency, shrinkage | Predicts movement and distortion |
PP Sample | Final approved position before bulk | Locks the production standard |
Bulk QC | Measurement tolerance, symmetry, visual check | Maintains consistency at scale |
What Is Cut-Out Placement?
Cut-out placement is the exact controlled position of an intentional opening in a garment. In dress production, it is measured against body lines, seam lines, pattern points, and fit zones. Good placement keeps the design attractive, wearable, symmetrical, and repeatable from sample to bulk production.
Professional fashion production photo showing a pattern table with a cut-out dress pattern, waistline reference marks, side seam notches, measurement tape, fabric swatches, and a technical designer reviewing placement points; clean studio lighting, premium womenswear manufacturing mood, no brand logos.
Design Position
Cut-out placement begins as a visual decision, but it cannot stay only in the designer’s imagination. A sketch may show a side waist opening, a center-front keyhole, a back cut-out, or an underbust gap, but production needs more than a general location. It needs exact control points.
In real dress development, placement means answering practical questions. Where does the opening start? Where does it end? How far is it from the side seam? Does it sit above, on, or below the natural waist? Does it cross a dart, panel, princess seam, zipper, lining edge, or support structure? Is it placed for a slim model body only, or can it work across a commercial size range?
For fashion brands, especially those producing party dresses, bodycon dresses, clubwear, resort dresses, occasionwear, or private-label collections, the cut-out is often the selling point of the garment. If the placement is right, the dress looks sharp and intentional. If the placement is wrong, the whole product can feel cheap, risky, or uncomfortable.
Fit and Coverage
A cut-out removes fabric from a garment, and fabric is what provides coverage, support, and balance. This is why placement affects fit so strongly. A small opening at the waist may seem simple, but once the wearer moves, sits, raises her arms, or turns her body, the fabric around that opening must still hold the garment in place.
Coverage is especially sensitive near the bust, underbust, side waist, high hip, lower back, and center front. A 0.5 cm to 1 cm shift may not matter much on a shoulder cut-out, but near the bust or underbust area, that same shift can create a serious wearing issue. For ecommerce brands, this matters even more because customers judge fit after receiving the product, not in a fitting room before purchase.
A good cut-out dress should not only look good in a front photo. It should feel safe when worn in real life. That means the placement must be checked on the body, not only on the flat pattern.
Production Risk
Cut-out placement becomes difficult because every production stage can change it. Pattern correction can move the edge. Fabric stretch can widen the opening. Sewing tension can distort the curve. Lining can pull the cut-out inward. Pressing can stretch the edge. Grading can change the visual ratio across sizes.
The risk increases when the style uses stretch mesh, jersey, rib knit, satin, lace, sequins, lightweight chiffon, or bias-cut woven fabric. These materials do not behave the same way. Stretch fabric may expand after wear. Satin may show pulling lines. Mesh may expose inner construction. Lace may require motif positioning. Sequin fabric may create bulk around the cut-out edge.
This is why cut-out placement must be controlled before bulk production begins. Once hundreds or thousands of panels are cut, an unclear placement rule becomes an expensive problem.
Approval Standard
A cut-out should be approved with measurements, not only with photos. A useful approval standard includes the cut-out height, width, distance from the center front or center back, distance from the side seam, distance from the waistline, and distance from high-risk coverage zones.
The approved sample should become the visual and technical reference. The pattern should show clear notches. The measurement sheet should include placement points. The QC team should know which areas are critical and which areas have more tolerance. Without this information, different people may interpret the same design differently.
In custom dress production, a cut-out is not just an opening. It is a controlled construction detail. Treating it this way is what separates a well-developed garment from a style that only looks good in the first sample.
Which Areas Need Placement Control?
The areas that need the strictest cut-out placement control are the bust, underbust, side waist, natural waist, high hip, center front, and lower back. These zones affect exposure, body confidence, symmetry, and garment stability, so they need clear measurements, fit review, and bulk QC standards.
Front, side, and back view of a neutral dress form wearing a technical cut-out dress sample, with subtle measurement callouts for waist, underbust, side waist, back opening, and high hip zones; fashion technical design style, realistic garment studio, clean background.
Waist and Side Waist
Waist and side waist cut-outs are common because they create a strong visual effect without changing the whole dress category. A simple bodycon dress can become a statement party dress with one clean side opening. A maxi dress can look more resort-driven with a curved waist cut-out. A satin midi dress can feel more occasion-focused when the side waist is shaped correctly.
Waist cut-outs are usually easier to control than bust-area cut-outs because the waistline gives the pattern maker a clear reference. However, the natural waist and the design waist are not always the same. A high-waist cut-out may sit closer to the ribs. A low-waist design may move toward the high hip. Both can look good, but they require different control rules.
For waist and side waist openings, practical control usually focuses on vertical position, cut-out width, side seam distance, and left-right balance. A common issue is that the cut-out looks clean on the base sample but shifts after grading. This is why the side waist needs both pattern control and size-set review.
Bust and Underbust
Bust and underbust cut-outs carry higher risk because they sit close to sensitive coverage areas. A small movement can change the dress from confident to uncomfortable. These areas often interact with straps, cups, darts, boning, elastic, lining, neckline tension, and bust volume.
A bust-area cut-out should never be approved from a flat photo alone. The garment needs to be checked on a body or proper mannequin because fabric tension changes everything. A curve that looks modest on the table may open wider when worn. A center-front keyhole may pull downward if the neckline does not have enough support. An underbust opening may lift or distort if the waist seam is too tight.
For commercial production, larger sizes need special attention. Bust volume and bust point position change across sizes. If the cut-out is graded mechanically, it may move into a risky area. A safer method is to define minimum coverage distances and protect those zones during grading.
Back and Shoulder
Back and shoulder cut-outs are often more flexible, but they still need structure. A shoulder cut-out may look decorative, but it can affect armhole shape, sleeve movement, and neckline stability. A back cut-out can affect zipper placement, strap balance, bra coverage, and how securely the dress stays on the body.
The larger the back opening, the more the garment depends on the remaining structure. If the back cut-out removes too much fabric, the front neckline may shift, the straps may slide, or the waist may feel unstable. In fitted dresses, the back is not just a display area; it helps hold the whole garment in place.
Back cut-outs should be checked from multiple views. A straight back photo may look fine, but the side view may show gaping. Sitting and turning can also reveal whether the opening is too large or too loose. For brands selling online, this matters because customers notice these issues immediately when taking photos or wearing the dress to events.
High Hip and Asymmetry
High hip cut-outs and asymmetric openings are visually powerful but technically sensitive. The high hip area changes a lot with body shape and size. If the cut-out sits too low, it can create exposure risk. If it sits too high, it may distort the waistline or shorten the torso visually.
Asymmetry needs even more discipline. An asymmetric cut-out should look intentional, not like a production error. This means the pattern must define exact reference points. The distance from the waistline, side seam, center front, or hem should be recorded clearly. If the design has one side open and one side closed, the garment still needs visual balance.
For bulk production, operators should not be left to follow the sample by eye. Asymmetric designs need notches, sewing sequence notes, and visual QC photos. Otherwise, small differences can appear across the production lot.
Cut-Out Area | Risk Level | Common Control Focus | Practical Tolerance Range |
Shoulder | Low to Medium | Shape, arm movement, edge finish | +/- 0.8-1.2 cm |
Back Waist | Medium | Gaping, zipper balance, strap stability | +/- 0.6-1.0 cm |
Side Waist | Medium to High | Symmetry, waist position, exposure | +/- 0.5-0.8 cm |
Underbust | High | Coverage, support, size grading | +/- 0.3-0.6 cm |
Bust Edge | High | Safety zone, cup position, neckline tension | +/- 0.3-0.5 cm |
High Hip | High | Movement, exposure, size balance | +/- 0.4-0.7 cm |
How Do Patterns Control Placement?
Patterns control cut-out placement by turning the design into fixed reference points, notches, seam relationships, balance lines, and measurable rules. A reliable pattern does not simply draw a beautiful opening; it locks the cut-out to body landmarks and garment structure so the result can be repeated in samples, sizes, and bulk production.
Close-up of a womenswear pattern maker marking a cut-out dress paper pattern with anchor points, grainline, side seam notches, waistline, and cut-out edge measurements; premium apparel factory sample room, realistic hands, ruler, French curve, technical fashion workflow.
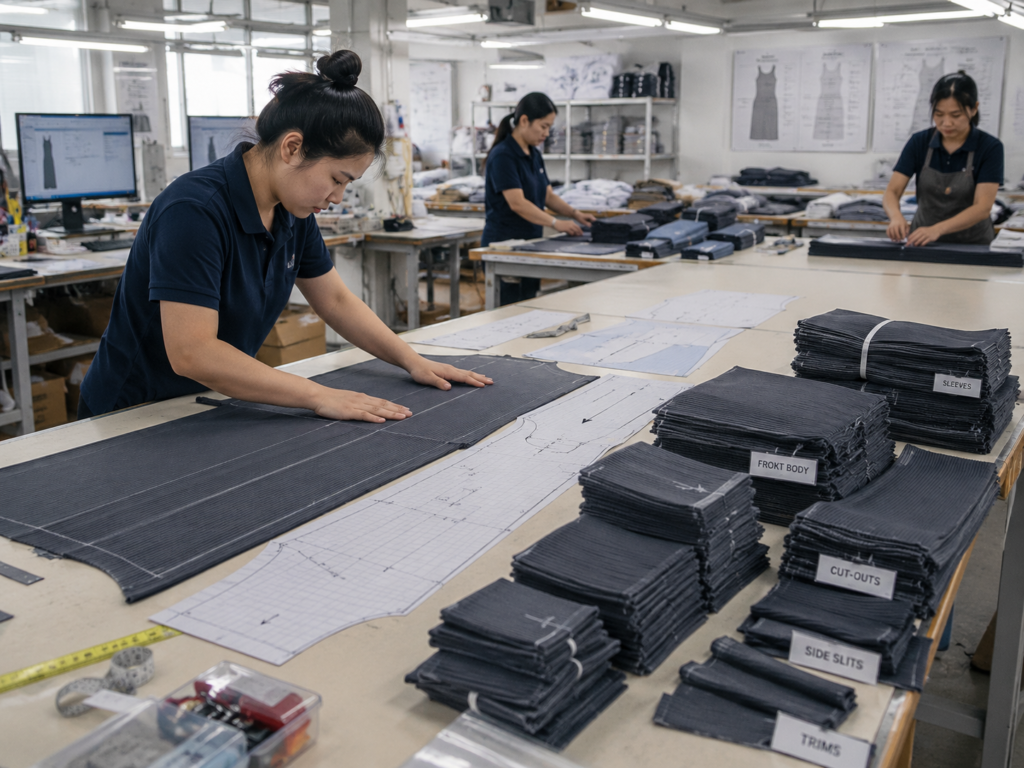
Anchor Points
Anchor points are the foundation of cut-out control. They tell the pattern maker where the opening belongs in relation to the body and garment. Useful anchor points include center front, center back, shoulder point, side neck point, bust point, underbust line, natural waistline, side seam, high hip, armhole, zipper line, and hem balance line.
A vague note such as side waist cut-out is not enough. A production-ready instruction should define where the top edge begins, where the lower curve ends, how far the opening sits from the side seam, and whether the curve follows the waistline or cuts across it. The more sensitive the area, the more exact the anchor points should be.
For example, a waist cut-out can be controlled by measuring from the center front to the front edge, from the side seam to the widest point, and from the waistline to the upper and lower edges. These numbers create a repeatable standard. They also give the brand and factory a shared language when correcting samples.
Notches and Seams
Notches are small marks, but they prevent large problems. When a cut-out meets a seam, facing, lining, binding, panel, or zipper, notches help the sewing operator align the pieces correctly. Without notches, the operator may stretch, ease, or position the edge by eye, especially on curved openings.
Seams also influence placement because they carry garment tension. A cut-out near a side seam, princess seam, waist seam, or dart can shift when the garment is sewn and pressed. If the seam allowance is too wide, too narrow, or handled unevenly, the final cut-out shape may change. This is common in fitted dresses where the fabric is under body tension.
Before sample making, the technical team should check whether the cut-out interrupts a key support seam. If it does, the pattern may need reinforcement, reshaping, extra facing width, or a different sewing sequence. Clean cut-out placement is rarely about the opening alone. It depends on the structure around it.
Edge Construction
The construction method can change the final placement. A cut-out edge may be finished with facing, lining, binding, elastic, self-fabric turning, narrow hemming, or clean-finished seam construction. Each method affects the final size and shape of the opening.
Facing can stabilize a woven cut-out, but if the facing is too narrow, it may roll out. Binding can create a clean edge, but it may tighten the curve if pulled too much. Elastic can help stretch styles stay close to the body, but too much tension can shrink the opening and distort the placement. Lining can improve coverage, but mismatched lining tension can pull the cut-out inward.
This is why the approved pattern and approved construction must work together. If the sample uses one edge finish and bulk production uses another, the cut-out may not remain the same. The PP sample should confirm both the placement and the construction method before bulk cutting starts.
Symmetry Rules
Symmetrical cut-outs should be built from mirrored pattern logic whenever possible. If the left and right openings are drawn separately, small differences can enter the pattern. These differences may become more obvious after sewing, especially on side waist, bust, or back cut-outs.
Symmetry should be checked on the flat pattern, the sewn sample, and the body. The flat pattern confirms the left-right measurements. The sewn sample shows whether construction has shifted the shape. The body review shows whether the garment twists or pulls when worn.
For intentional asymmetry, the rule is different but equally important. The design does not need to be mirrored, but it must still be measured. The asymmetry should have fixed distances from key points, clear notches, and reference photos. Otherwise, production teams may not know whether a difference is part of the design or a mistake.
|
Pattern Control Point |
What to Measure |
Why It Matters |
Best Checked At |
|
Center Front to Cut-Out Edge |
Horizontal distance |
Controls front visual balance |
Pattern and sample |
|
Waistline to Top Edge |
Vertical distance |
Controls body placement |
Pattern, fit sample, PP sample |
|
Side Seam to Widest Point |
Width relationship |
Controls exposure and symmetry |
Sample and bulk QC |
|
Underbust to Cut-Out Edge |
Safety distance |
Protects coverage |
Fit and size set |
|
Cut-Out Height |
Opening size |
Controls visual proportion |
Pattern and final inspection |
|
Edge Length After Sewing |
Finished shape |
Detects stretching or shrinking |
Inline QC |
How Does Grading Affect Cut-Outs?
Grading affects cut-outs by changing their position, size, and relationship to body landmarks across the size range. A cut-out should not always be scaled mechanically. It needs grading rules that protect coverage, preserve visual balance, and keep the design wearable from smaller to larger sizes.
Technical apparel grading scene showing multiple dress pattern sizes stacked from XS to XL with a cut-out shape marked in different grading points, measurement chart, pencil notes, and size-set sample review board; clean fashion development office, realistic production detail.
Size Movement
When a dress moves from the base size into a full size range, the body does not simply enlarge in one direction. Bust, waist, hip, shoulder width, torso length, and body depth all change differently. If the cut-out follows only one grading direction, it may drift away from the intended position.
This is especially common with side waist and underbust cut-outs. The opening may look correct in size S, but in size L it may move too close to the bust or high hip. The design still uses the same pattern concept, but the customer experience changes. That is where returns, fit complaints, and poor reviews can begin.
A good grading process treats the cut-out as a controlled design feature. Some points may move with the side seam. Some may stay tied to the waistline. Some may need reduced movement to protect coverage. This is more precise than automatic scaling, but it is necessary for commercial fit consistency.
Visual Ratio
A cut-out does not need to have the exact same mathematical ratio in every size. What it needs is the same design intention. A waist opening should look balanced, flattering, and wearable across sizes. Sometimes that means the opening increases slightly. Sometimes it means it stays nearly the same. Sometimes the curve changes to suit the body proportion.
For example, if a cut-out takes up 18% of waist width in the base size, directly applying that same ratio to larger sizes may create too much exposure. But keeping the exact same cut-out width across all sizes may make the larger size look visually different from the approved design. The technical decision should balance proportion and safety.
This is where experienced pattern makers add value. Grading is not just math. It is judgment. The cut-out must stay true to the design while respecting real body changes.
Safety Zones
Safety zones are protected areas where the cut-out edge should not cross. They are especially important near the bust, underbust, high hip, center front, and side bust. A safety zone helps prevent the opening from becoming too revealing after grading, sewing, or wearing.
For practical production, safety zones can be defined by minimum distances. For example, an underbust cut-out may need a minimum distance from the bust coverage line. A high hip opening may need a minimum distance from the lower body exposure zone. These distances vary by style, market, fabric, and brand positioning, but the principle is the same: not every edge is allowed to move freely.
Safety zones should be reviewed on larger sizes, not only on the base size. Many placement problems appear only after the garment is graded. If the style is fitted or made from stretch fabric, body review becomes even more important because the opening can expand when worn.
Size Set Review
A full size set is the most reliable way to check cut-out grading. At minimum, brands should review the base size, one smaller size, and one larger size for any high-risk cut-out style. If the product is expected to sell in a wide size range, more sizes should be checked.
The review should include flat measurements and on-body visual checks. Flat measurements show whether the pattern follows the grading rule. On-body checks show whether the grading rule actually works. A cut-out can be technically correct on paper but still look too high, too wide, or too exposed when worn.
For repeat styles, the approved size grading record should be saved. This helps future orders move faster and reduces the risk of placement changes between seasons or batches.
|
Cut-Out Zone |
Grading Risk |
Practical Grading Rule |
Size Set Priority |
|
Shoulder Cut-Out |
Shape distortion |
Scale moderately with shoulder and armhole |
Medium |
|
Back Cut-Out |
Gaping or strap shift |
Anchor to center back and waist balance |
Medium |
|
Side Waist Cut-Out |
Exposure and asymmetry |
Control movement from side seam and waistline |
High |
|
Underbust Cut-Out |
Coverage risk |
Protect minimum bust and underbust distance |
Very High |
|
High Hip Cut-Out |
Lower body exposure |
Limit downward movement across larger sizes |
High |
|
Asymmetric Cut-Out |
Visual imbalance |
Grade from fixed anchor points, not free scaling |
High |
Which Fabrics Change Placement?
Fabrics change cut-out placement through stretch, recovery, drape, weight, shrinkage, transparency, surface texture, and sewing behavior. Stretch mesh, jersey, satin, lace, chiffon, and sequin fabrics can all affect the final cut-out differently, so fabric testing and sample review are essential before bulk production.
Premium womenswear fabric testing scene with stretch mesh, satin, lace, chiffon, jersey, and sequin swatches next to a cut-out dress sample, measuring ruler, tension test marks, and production notes; realistic textile studio lighting, clean editorial composition.

Stretch and Recovery
Stretch fabric can make a cut-out larger, lower, or more open than intended. The issue is not only how much the fabric stretches, but how well it recovers. A fabric may stretch easily around the body but fail to return to its original shape after wear. When that happens, the cut-out can grow, sag, or lose its clean curve.
The direction of stretch also matters. A cut-out placed across the strongest stretch direction may widen. A vertical stretch direction may pull the opening downward. Four-way stretch can be comfortable, but it also requires strong edge control. For fitted bodycon dresses, jersey dresses, rib dresses, and stretch mesh party styles, stretch and recovery should be checked before final sample approval.
A practical review should include fabric stretch percentage, recovery after pulling, transparency under tension, and edge stability after sewing. These checks help prevent the common problem where the sample looks good for a short fitting but changes after real wear.
Mesh and Sheer Layers
Mesh needs special attention because it is often stretchy, sheer, and visually exposed. With mesh cut-outs, the customer can see not only the opening but also the construction around it. Lining edges, seam allowances, binding, thread color, and inner finishing all affect the final look.
A mesh cut-out may need power mesh, lining, elastic, binding, or layered panels to stay stable. If the outer mesh and inner lining do not stretch the same way, the cut-out may twist or pull. If the mesh is too soft, the edge may collapse. If it is too firm, the garment may feel tight or uncomfortable.
Lighting is also important. Mesh can look modest in factory lighting but more transparent under studio lighting, flash photography, or daylight. For brands selling partywear, clubwear, and event dresses online, photo testing can help avoid customer disappointment.
Satin and Woven Fabric
Satin and many woven fabrics are more stable than stretch fabrics, but they are not automatically easier. Satin shows tension, drag lines, and uneven pressing very clearly. A cut-out edge that is slightly pulled during sewing may create visible ripples. Lightweight woven fabrics can also stretch along curved or bias areas, especially around rounded openings.
Woven fabrics do not forgive placement errors the same way stretch fabrics sometimes do. If the cut-out is too tight, the body cannot stretch it into place comfortably. If it is too loose, it may gape. If the edge is not shaped well, the problem remains visible.
For satin, crepe, chiffon, and lightweight woven dresses, the edge finish should be tested carefully. Facing, lining, and pressing must support the cut-out without adding bulk or distortion. If the style is bias-cut, the sample should be allowed to hang before final review because the fabric may drop slightly over time.
Lining and Support
Lining can improve coverage, comfort, and edge stability, but it can also change placement. If the lining is tighter than the outer shell, it may pull the cut-out inward. If it is looser, it may show or wrinkle near the opening. If the lining has different stretch behavior, the whole cut-out can shift when worn.
Support is especially important near the bust, waist, and back. Some cut-out dresses need hidden elastic, facing, tape, bonding, boning, or reinforced seams. These details may not be visible, but they help the opening stay in the right place.
A good sample review checks the garment from the inside as well as the outside. The outer look may seem correct, but the inside construction often explains whether the placement will survive bulk production and real wear.
|
Fabric Type |
Common Placement Issue |
What to Test |
Production Control |
|
Stretch Jersey |
Opening expands after wear |
Stretch and recovery |
Control edge tension and grading |
|
Stretch Mesh |
Transparency and distortion |
Sheerness under tension |
Check lining and binding alignment |
|
Satin |
Ripples and drag lines |
Pressing and seam tension |
Use clean facing and careful handling |
|
Chiffon |
Edge movement and instability |
Bias stretch and drape |
Stabilize curves and avoid over-pulling |
|
Lace |
Motif mismatch |
Pattern placement |
Align visible motifs around openings |
|
Sequin Fabric |
Bulk around edge |
Seam thickness |
Reduce bulk and test edge finishing |
How Is Placement Checked Before Bulk?
Cut-out placement is checked before bulk through first sample review, fit correction, revised sample comparison, size-set review, PP sample approval, and inline QC. The goal is to confirm the approved cut-out position, fabric behavior, construction method, grading rule, and acceptable production tolerance before mass cutting begins.
Quality control scene in a womenswear factory showing a finished cut-out dress sample on a mannequin, a QC inspector checking side waist placement with a tape measure, PP sample photos on a clipboard, and bulk garments on a rack; realistic apparel production environment.
First Sample Review
The first sample should answer a basic but important question: does the cut-out work as a real garment, not just as a design idea? The review should check the flat measurement, body placement, symmetry, edge shape, coverage, and movement.
Flat review is useful for checking whether the sample follows the pattern. Body review is useful for seeing whether the pattern works when worn. Both are necessary. A cut-out may measure correctly on the table but still gape on the body. It may look balanced from the front but pull from the side. It may feel fine while standing but become uncomfortable when sitting.
Sample comments should be specific. Instead of writing cut-out too big, the comment should say whether the width, height, curve, or edge tension needs adjustment. Instead of move cut-out down, the correction should give an approximate amount, such as lowering the upper edge by 1 cm or shifting the front curve inward by 0.8 cm. Clear corrections save time and reduce misunderstanding.
Fit and PP Samples
A fit sample and a PP sample do not serve the same purpose. The fit sample confirms whether the garment works on the body. The PP sample confirms whether the garment is ready for bulk production.
A fit sample may still use substitute fabric, temporary trims, or unfinished internal construction. That is acceptable at the early stage. But a PP sample should use the approved fabric, lining, trims, sewing method, edge finish, measurements, and packaging standard. For cut-out dresses, the PP sample is especially important because small changes in fabric or edge finish can change the placement.
The PP sample should be reviewed from the front, back, side, inside, and on body when possible. The approval should include photos and written measurements. Once approved, the PP sample becomes the standard for bulk production. Any change after PP approval should trigger another placement check.
Bulk Tolerances
Bulk production needs tolerances because small variation is normal. The key is to decide which variations are acceptable and which are not. For high-risk zones such as bust, underbust, and side waist, tolerance should be tighter. For lower-risk decorative zones such as shoulder openings, tolerance can be slightly more flexible.
A practical tolerance may include cut-out height, width, distance from side seam, distance from waistline, left-right balance, and edge smoothness. The tolerance should be written in the QC document and checked against the approved PP sample.
Visual comparison is just as important as measurement. A cut-out can be within measurement but still look wrong if the edge is wavy, stretched, twisted, or unevenly pressed. For fashion products, the customer judges the final look, not only the measurement chart.
Inline QC
Inline QC is the best way to catch placement drift before it spreads across the whole order. Placement drift can happen after cutting, during sewing, after lining attachment, during pressing, or at final finishing. If the factory waits until final inspection, too many garments may already be affected.
The first bulk pieces should be checked carefully before full-line production continues. QC should compare them with the PP sample and confirm the cut-out position, edge shape, symmetry, and construction. If something is wrong, the team can adjust sewing tension, notch alignment, pressing method, or handling before producing more pieces.

For brands working on custom cut-out dresses, the most useful project files are a clear tech pack, reference photo, size chart, target fabric, sample comments, approved PP sample photos, and final QC tolerance sheet. When these documents are complete, the factory can control placement more consistently across different sizes, colors, and production batches.
Work With Jinfeng Apparel on Cut-Out Dress Development
Cut-out placement is not a small detail. It is where design, body fit, fabric behavior, pattern skill, grading logic, sewing discipline, and QC all meet. When brands treat it casually, they risk poor fit, unsafe exposure, uneven bulk, customer returns, and weak product reviews. When brands control it properly, a cut-out dress can become a strong-selling fashion piece that looks intentional across sizes, colors, fabrics, and production batches.
Jinfeng Apparel is a Guangdong-based custom women’s fashion manufacturer supporting global fashion brands and mid-to-large apparel clients with dress development, fabric sourcing, pattern making, sampling, bulk production, quality control, private-label packaging, and export delivery. The company focuses on premium custom womenswear including dresses, skirts, jumpsuits, matching sets, party dresses, occasionwear, bodycon styles, mesh dresses, satin dresses, lace dresses, sequin dresses, resortwear, and private-label collections.
For cut-out dresses, the right development partner should help review placement risk before sampling, define pattern anchor points, test fabric behavior, check size grading, confirm PP samples, and control bulk consistency. This is especially important for bodycon dresses, mesh party dresses, satin occasionwear, resort dresses, jumpsuits, and fashion sets where the cut-out is a visible selling point.
To start a custom cut-out dress project, send your tech pack, reference photo, original sample, size chart, target fabric, order quantity, and private-label requirements. If your design is still in early development, share the style direction and target market first. The team can help evaluate whether the cut-out placement is practical, wearable, gradeable, and ready for production.
Share This Article :

Jerry Lee
Categories

Latest blogs

Table of Contents
Here, developing your OEM/ODM private label clothing collection is no longer a challenge—it’s an excellent opportunity to bring your creative vision to life.

