Skip to content

A successful dress does not begin at the sewing machine. It begins when a creative idea is translated into decisions that pattern makers, fabric suppliers, sample machinists, production teams, quality inspectors, packing workers, and logistics partners can all interpret in the same way. A sketch may communicate mood and proportion, but it does not automatically define fit, fabric behavior, internal support, workmanship, cost, or production tolerance.
A dress moves from concept to finished product through six controlled stages: design briefing, material selection, pattern engineering, sample validation, pre-production approval, and bulk manufacturing with quality and packing checks. Each stage converts creative intent into measurable instructions so fit, appearance, cost, and delivery remain consistent from the approved sample to every shipped garment.
The real challenge is not producing one attractive sample. It is building a repeatable product that looks right across several sizes, survives cutting and sewing, reaches the intended cost level, and arrives ready for retail, ecommerce fulfillment, or a seasonal launch. A dress may appear simple from the outside while hiding a difficult relationship between neckline tension, bust shaping, waist position, lining, stretch recovery, zipper behavior, and hem balance.
Consider a fitted satin dress with a low back and narrow straps. The original sketch may take a few minutes to understand, yet the first pattern must answer dozens of practical questions. The development team has to decide how the neckline is stabilized, whether the lining stretches with the shell, how the zipper is supported, how much ease is allowed at the hip, and how the back remains secure during movement. The following process shows how those decisions become a finished garment rather than a collection of unresolved assumptions.
What Turns a Dress Concept into a Production Brief?
A dress concept becomes a usable production brief when its visual idea is translated into measurable requirements for silhouette, fit, fabric, construction, size range, color, quantity, branding, cost, and delivery. The brief gives designers, pattern makers, sample machinists, merchandisers, production teams, and quality inspectors one shared definition of the finished product.
What Should the Design Brief Include?
A useful design brief explains more than whether the dress should be mini, midi, or maxi. It tells the development team what the finished garment must achieve for the label and the person wearing it. A description such as “a fitted red party dress” sounds clear in conversation, yet it leaves nearly every production decision unanswered, including the shade of red, fabric stretch, bust support, coverage, lining, closure, size range, and intended retail environment.
The first part of the brief should define the commercial purpose. The manufacturer needs to know the target market, wearing occasion, season, retail position, sales channel, expected launch date, and the customer profile the dress is designed to fit. A lightweight resort maxi dress developed for an Australian summer collection requires a different approach from a fully lined satin occasion dress planned for a winter launch in the United Kingdom.
The second part should describe the product in practical terms. That includes silhouette, garment length, neckline, sleeve, back design, fit level, coverage, support, lining, closure, colorways, size range, and any visual detail that cannot be changed. Reference images help communicate style, but written notes should identify which elements define the design and which details may be adjusted to improve fit, cost, material availability, or bulk-production stability.
The third part should define the commercial boundaries. Approximate quantities, target cost, packaging requirements, testing expectations, shipping destination, and delivery window affect material sourcing and production planning from the beginning. A practical brief also separates fixed requirements from flexible preferences. The silhouette may be non-negotiable while fabric composition remains open, allowing the development team to preserve the product identity without treating every early idea as technically final.
| Brief Field | Practical Information to Provide | Production Decision Affected |
| Product use | Party, office, resort, occasion, club, wedding guest, graduation | Fabric, support, coverage, finishing and care |
| Silhouette | Bodycon, A-line, slip, corset, fit-and-flare, draped or layered | Pattern shape, ease and internal construction |
| Fit direction | Compression fit, close fit, regular fit or relaxed fit | Stretch reduction, ease and grading rules |
| Size range | For example, US 2-14 or UK 6-18 | Base size, graded measurements and material consumption |
| Main materials | Composition, weight, stretch, texture, lining and approved color | Pattern, sewing method, comfort and cost |
| Order structure | Quantity by style, color and size | MOQ, cutting plan, line allocation and packing |
| Branding | Labels, hangtags, barcodes, polybags and carton marks | Trim development and warehouse readiness |
| Timing | Sample deadline, campaign date, launch date and delivery date | Sourcing, sampling, production and freight schedule |
Which Files Can Start Development?
Dress development can begin from a complete tech pack, but many commercially successful projects start from less formal information. A manufacturer may receive a fashion sketch, technical drawing, reference photograph, original garment, line sheet, mood board, size chart, fabric swatch, trim card, or a combination of these materials. The important question is not whether one perfect document exists, but whether the available files answer enough questions to begin pattern and material development responsibly.
Each starting file communicates different information. A tech pack may define measurements and construction but fail to show the intended hand feel, movement, or visual mood. A reference garment reveals real fit, balance, seam placement, and internal structure, yet it may not include grading rules or commercially available material specifications. A photograph communicates appearance quickly, but it rarely shows the back view, lining, closure, seam allowance, or support system.
The safest approach is to review all available information together. A reference image can define the appearance, a size chart can establish the fit framework, and a swatch can communicate expected weight, stretch, texture, and color. Written notes should identify uncertain areas before pattern work begins. No single file guarantees a correct first sample, because even detailed files may contain conflicts between artwork, measurements, fabric descriptions, and construction notes.
A development team should also verify ownership and confidentiality. Reference garments and market images can help explain structure or proportion, but the final product should be developed for the client’s own brand identity and production requirements. Tech packs, samples, patterns, trims, private-label details, and unpublished designs should be handled through controlled access and, when required, an NDA-based workflow.
How Is the Design Assessed?
A design assessment determines whether the proposed dress can be made, worn, graded, inspected, and repeated in bulk without losing its intended appearance. An experienced manufacturer should not simply confirm that a style is possible. The more useful response identifies where the design may become unstable, expensive, uncomfortable, difficult to source, or difficult to reproduce across several sizes and production batches.
The first review concerns structure. A strapless dress needs a clear support strategy. A deep neckline may require concealed mesh, stabilizing tape, cups, or revised seam placement. An open back changes how the bodice is held in position, while heavy ruching can affect both garment length and measurement consistency. A long slit needs reinforcement and a review of how far it opens when the wearer walks or sits.
The second review concerns fabric compatibility. A soft satin may create attractive drape but lack the stability required for a corset bodice. A lace may look impressive in a swatch but contain a motif that makes symmetrical cutting difficult. A jersey may stretch enough during fitting but fail to recover after wear. These issues cannot always be solved by adding more stitches; they may require another material, a support layer, or a pattern adjustment.
The third review concerns repeatability. A highly skilled sample machinist may create a delicate detail once, but a production team must reproduce it hundreds or thousands of times within a controlled tolerance. Sewing sequence, handling time, seam access, pressing, inspection method, and likely operator variation should be considered before the style is approved. The best assessment protects the visual idea while finding the most reliable way to manufacture it.
Which Materials Define the Finished Dress?
The finished dress is defined by the combined behavior of its outer fabric, lining, reinforcement, trims, closures, and decorative components. These materials control drape, stretch, support, transparency, comfort, durability, color, surface appearance, and production stability. Material selection should therefore follow the silhouette and performance requirements, not appearance alone.
Which Fabric Suits the Silhouette?
The right fabric allows the intended shape to happen naturally. The wrong fabric forces pattern makers and sewing teams to work against its behavior throughout sampling and production. A bodycon dress needs controlled stretch and reliable recovery, while a slip dress depends on drape, surface quality, and clean seams. A corset dress requires enough stability for support, and a resort maxi dress needs movement without excessive transparency or an unstable hem.
Weight and composition are useful references, but they do not predict every result. Two satin fabrics with similar fiber content and weight can differ in shine, thickness, snag resistance, drape, stretch, and seam appearance. Two jerseys with the same nominal stretch can have very different recovery force. A swatch that looks suitable on a table may behave differently across the bust, hip, neckline, or bias-cut skirt.
Fabric should be assessed in the garment’s most demanding area. A soft satin may flow beautifully through a skirt but collapse across a structured bodice. A lace may work as an overlay but require additional lining or motif placement to achieve coverage. A stretch mesh may provide a clean fitted silhouette but distort at the neckline unless it is stabilized. Sampling should confirm not only the visual effect but also comfort, recovery, seam quality, shrinkage, opacity, and pressing behavior.
| Fabric Type | Common Working Range | Typical Stretch | Suitable Dress Directions | Main Risks |
| Chiffon | 60-110 GSM | Usually below 5% | Maxi, resort, bridesmaid and layered dresses | Transparency, seam slippage, unstable cutting and uneven hems |
| Satin | 90-220 GSM | 0-20%, depending on quality | Slip, cocktail, corset and evening dresses | Snagging, puckering, shade variation and pressing marks |
| Jersey | 160-260 GSM | About 20-60% crosswise | Bodycon, casual, draped and ruched dresses | Growth, twisting, poor recovery and visible undergarments |
| Ponte or Roma | 250-380 GSM | About 15-35% | Structured knit, office and fitted dresses | Bulk, heat, seam thickness and inconsistent recovery |
| Stretch mesh | 70-160 GSM | About 30-80% | Club, layered, fitted and cut-out styles | Distortion, holes, edge growth and transparency |
| Lace | 80-220 GSM | Varies widely | Occasion, cocktail, overlay and panelled dresses | Motif matching, fraying, damage and coverage differences |
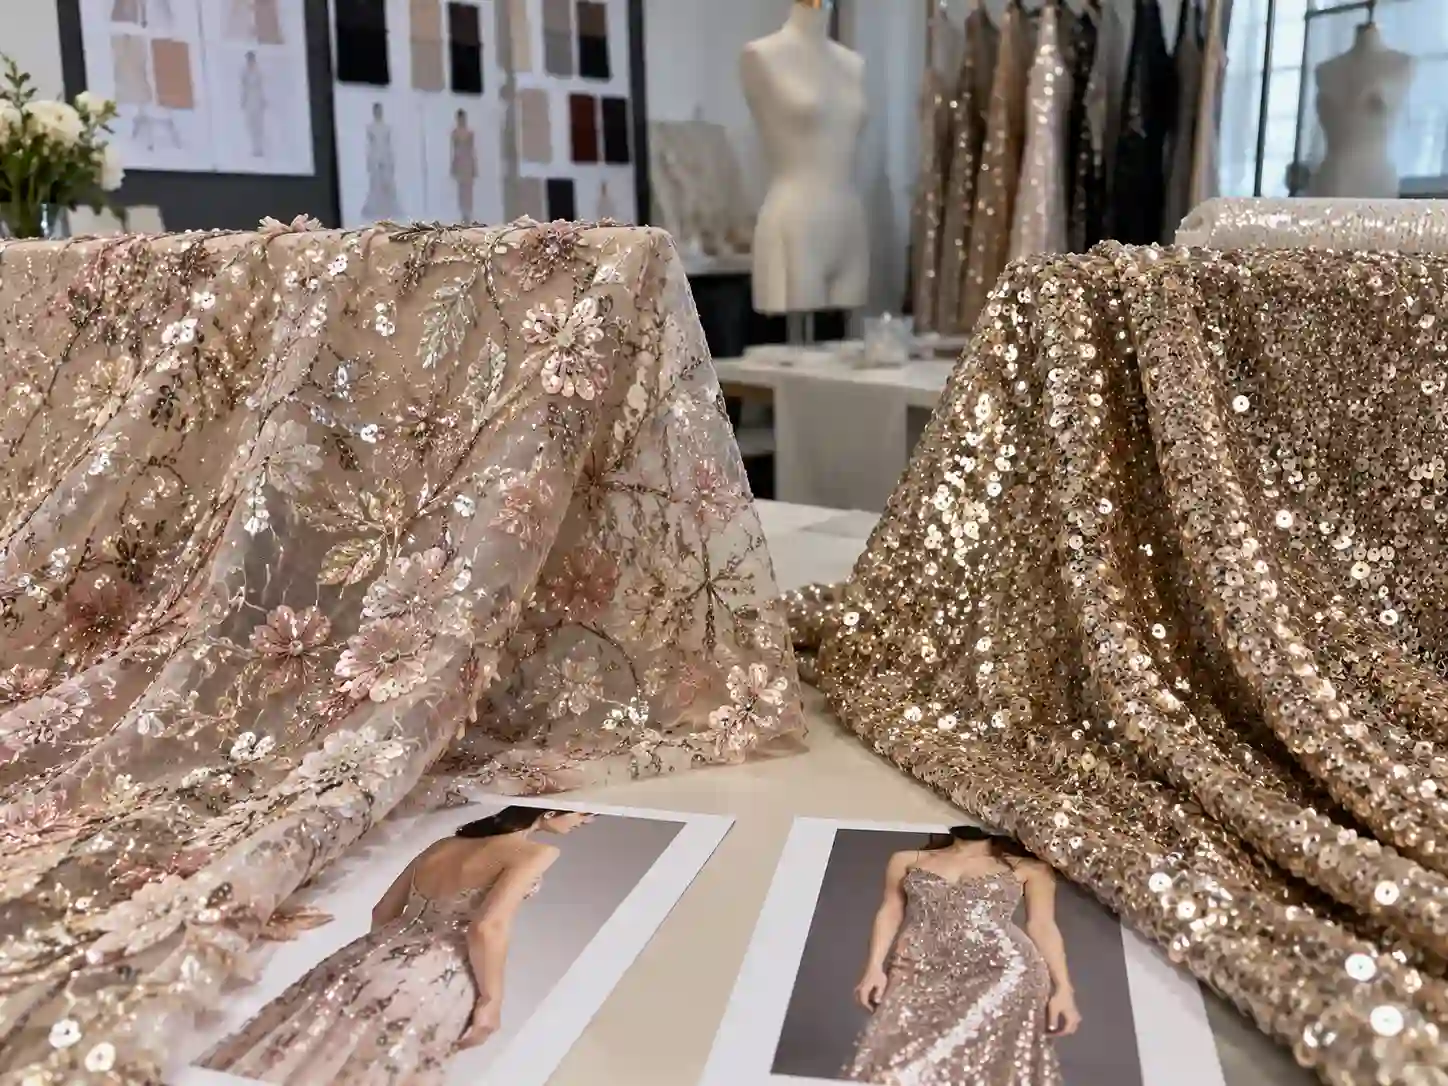
| Sequin fabric | 180-350+ GSM | Depends on base cloth | Party, club and evening dresses | Needle damage, scratching, seam bulk and sequin loss |
The numerical ranges above are practical starting points rather than universal specifications. Fabric suppliers measure and describe materials differently, and finishing processes can change the hand feel or performance. Approval should be based on the actual swatch and sample yardage intended for production, supported by stretch, recovery, shrinkage, colorfastness, and garment-level testing where the project requires it.
How Are Trims and Linings Selected?
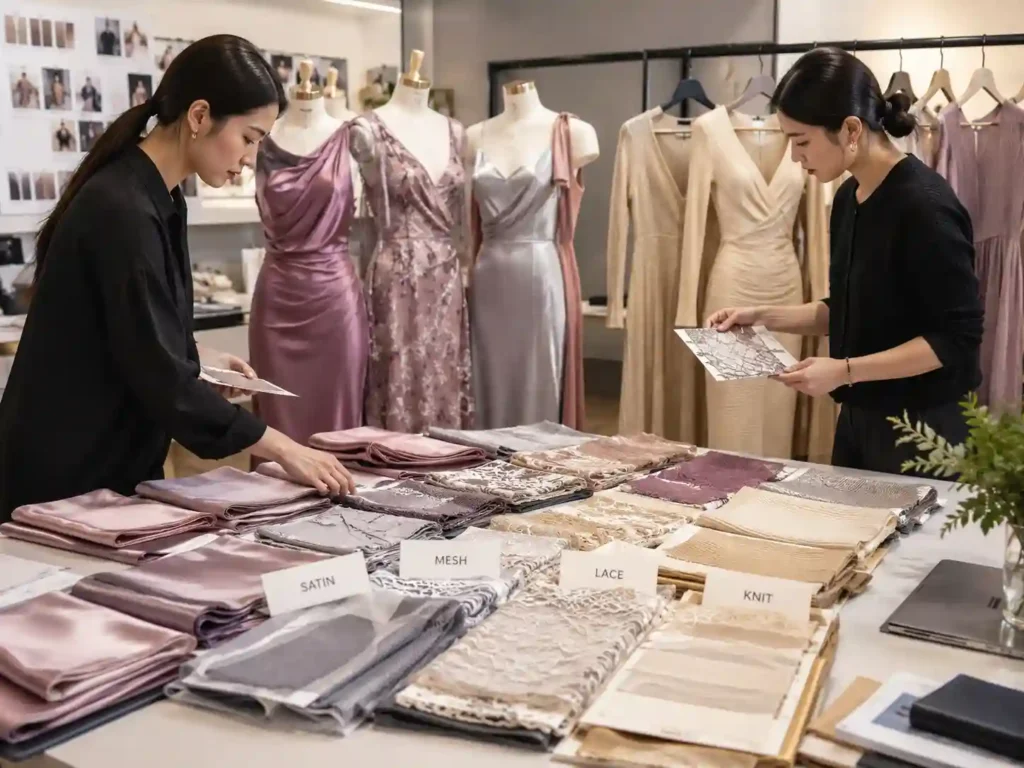
Trims are often visually small but technically decisive. Zippers, hooks, cups, boning, elastic, strap adjusters, anti-slip tape, shoulder pads, decorative hardware, and internal tapes can control support, comfort, fit, durability, and appearance. A trim should be selected for specification, color, strength, comfort, availability, minimum quantity, lead time, cost, and the way it interacts with the surrounding fabric.
An invisible zipper must match the garment weight and seam construction. A lightweight zipper in a heavily structured dress may distort or fail under tension, while a bulky zipper in fine satin can create a visible ridge. Bra cups require more than a size name; their width, projection, thickness, spacing, and position must suit the pattern. Boning must provide enough support without producing uncomfortable pressure or obvious ridges.
Linings should be selected as part of the garment system rather than treated as the least visible material. Their stretch, weight, color, shrinkage, and surface friction need to work with the shell. A non-stretch lining under a stretch dress can restrict movement and distort the outer fabric. A heavy lining can change the drape of chiffon or satin, while a poor color match may become visible through mesh, lace, or pale fabric.
Decorative components require practical testing. Rhinestones and beads should be checked for attachment strength and surface damage. Lace edges need a suitable finish. Sequins can scratch the skin or catch on nearby panels. Metal parts may require documentation or testing for the destination market. Private-label elements, including woven labels, size labels, care labels, hangtags, and barcode stickers, should be confirmed early enough to avoid delaying the packing stage.
How Do Materials Affect Cost and MOQ?
Material cost is more complicated than the price per meter. The real garment cost also includes consumption, cutting waste, shrinkage allowance, defect allowance, handling time, sewing difficulty, reinforcement, inspection, and rejected pieces. A directional fabric may require every panel to face the same way, reducing marker efficiency. Velvet, one-way prints, lace motifs, sequins, bias cuts, long trains, and layered skirts can all increase consumption beyond the finished dimensions of the dress.
Minimum order quantities are often influenced by mills and trim suppliers rather than the sewing factory alone. Stock fabrics and standard colors are generally easier to source in moderate quantities. Custom dyeing, custom weaving, exclusive prints, certified fabrics, special lace, unusual sequin bases, custom hardware, and branded packaging may each carry independent minimums. A total order may meet the garment MOQ while one color or trim still falls below a supplier’s workable quantity.
Color splitting also changes the production structure. Six hundred pieces in one color do not create the same workload as six hundred pieces divided across six colors. Every color may need separate fabric ordering, thread and zipper matching, cutting, line setup, inspection, labeling, and carton planning. The standard production starting point for Jinfeng Apparel is 200 pieces per style and color, while custom materials and specialist trims may require higher commitments.
Cost optimization works best before sample approval. Practical options include selecting a stock color, using a comparable fabric construction, replacing a difficult trim, adjusting an internal finish, improving marker efficiency, or removing a detail that adds cost without improving the retail appearance. The cheapest fabric is not always the lowest-cost production choice; a slightly more stable material can sew faster, create fewer defects, and deliver a more consistent finished garment.
How Does Pattern Making Create the Intended Fit?
Pattern making turns the design into an engineered set of shapes that control fit, balance, volume, seam placement, and construction. The pattern determines how the dress sits on the body and how its parts join together. Good fit comes from the relationship between body measurements, garment ease, fabric behavior, support structure, and visual proportion.
How Is a Sketch Converted into Patterns?
A fashion sketch presents an idea, while a pattern defines how that idea occupies three-dimensional space. The pattern maker studies the silhouette, design lines, base measurements, intended fit, fabric type, and construction method before dividing the dress into workable pieces. These may include front and back bodices, skirt panels, sleeves, facings, linings, straps, cups, collars, waistbands, ruffles, pockets, support layers, and separate pieces for reinforcement.
Each pattern piece needs grain direction, seam allowance, notches, drill marks, balance points, gathering positions, pleat locations, trim placement, and identification. These markings help the sample machinist assemble the garment as intended. The pattern maker must also decide how shaping is created. A fitted bodice may use darts, princess seams, panels, stretch reduction, or internal support, while a full skirt may use gathers, pleats, godets, circular cutting, or layered panels.
Fabric behavior influences nearly every decision. Woven fabric generally requires enough ease for movement and dressing. Stretch fabric may use negative ease, meaning that the pattern is smaller than the body measurement and relies on controlled stretch. Bias-cut fabric behaves differently from straight-grain fabric and may lengthen after cutting, hanging, or wearing. The same visual design can therefore require a different pattern when the fabric changes.
Pattern development is closely connected to sample sewing. A pattern that appears correct on paper may reveal unexpected tension, thickness, seam access, or balance problems during assembly. That information should return to the pattern maker before another sample is cut. A structured sample-room workflow reduces the risk that important corrections remain as verbal knowledge held by one person instead of becoming controlled production data.
Which Measurements Control Dress Fit?
The most important measurements depend on the style. Bust, waist, and hip remain central, but a dress can match those three figures and still fit badly. A strapless style depends on upper-bust circumference, underbust position, cup placement, back height, waist level, and bodice length. A halter dress depends on neckline tension, strap length, armhole depth, and bust coverage, while a jumpsuit adds torso length, rise, crotch depth, and sitting comfort.
Measurements should be reviewed as relationships rather than isolated numbers. A correct waist circumference is not useful if the waist seam sits two centimeters above the intended position. A correct bust circumference does not solve incorrect cup spacing or a neckline that gapes. A correct total length can still produce an uneven hem when the front and back balance are wrong or when the fabric drops unevenly after hanging.
The following tolerances are common starting points for fashion dresses, but they are not universal standards. Every label should establish tolerances according to garment type, fabric, price level, construction, and critical fit areas. Small dimensions such as strap length, cup position, neckline depth, cut-out placement, and waist level may need tighter control because a minor variation can create a visible or functional problem.
| Measurement Point | Typical Starting Tolerance | Practical Reason |
| Bust, waist and hip | ±1.0 cm | Controls overall fit, comfort and size consistency |
| Shoulder width | ±0.5-0.7 cm | Affects neckline, sleeve position and garment balance |
| Strap length | ±0.5 cm | Changes bust position, neckline depth and underarm coverage |
| Neckline depth | ±0.5 cm | Influences coverage, appearance and wearer confidence |
| Waist-seam position | ±0.5-0.7 cm | Controls body proportion and skirt starting point |
| Dress length | ±1.0-1.5 cm | Affects silhouette, visual consistency and grading |
| Slit height | ±0.7-1.0 cm | Important for exposure, walking movement and symmetry |
| Hem sweep | ±1.5-2.0 cm | Influences movement, fullness and visual balance |
Stretch garments require additional attention to recovery. Two fabrics may show similar stretch percentages but create different fit because one returns firmly while the other remains extended. The approved pattern should therefore remain linked to the approved bulk fabric. When the fabric changes, the pattern may need to be reviewed rather than assumed to perform in the same way.
How Are Complex Structures Engineered?
Complex dress structures require decisions that are not visible in a fashion sketch. Corset bodices, strapless necklines, open backs, cut-outs, deep V shapes, asymmetric draping, heavy ruching, and layered skirts all redirect tension through the garment. A corset-style bodice may include cups, boning, fusible materials, stabilizing tape, lining, multiple panels, and a strong closure, with every component affecting support, comfort, and the outer surface.
Strapless dresses need enough grip and structure to stay in position without becoming painful. Anti-slip tape can help, but it cannot correct an inaccurate upper-bust pattern. A stable waist, suitable back height, correct cup position, and balanced support system are usually more important than simply making the dress tighter. Open-back and deep-neck styles reduce the number of places where the garment can support itself, so concealed mesh, narrow elastic, tapes, or revised seams may be needed.
Ruching and draping also need controlled instructions. Production files should define the direction, density, starting point, ending point, and secured length. Without these references, each operator may distribute fullness differently. Lace and sequin styles create additional placement problems. Large lace motifs may need matching across seams, while sequins may need to be removed from seam allowances before sewing and repaired afterward to reduce bulk and needle damage.
Good engineering does not mean adding the greatest possible number of internal components. It means using the fewest necessary elements to achieve the required appearance, support, comfort, grading, and production stability. A successful solution should remain understandable to the sewing line and measurable by the quality team, not merely impressive on one sample made by the most experienced machinist.

How Are Dress Samples Tested and Approved?
Dress samples are tested by comparing measurements, fit, material performance, construction, appearance, comfort, branding, and production feasibility against the agreed specifications. Approval should be documented rather than based on a general statement that the garment looks good. The final sample must align with the pattern, measurement chart, bill of materials, workmanship instructions, labels, and packing requirements.
Which Sample Types Are Needed?
Different samples answer different questions. Producing every possible sample is not always necessary, but skipping a critical stage can transfer unresolved problems into bulk production. The first sample shows how the design has been interpreted and allows the team to review silhouette, material direction, proportions, construction, and obvious fit issues. It should be treated as a development tool rather than a final promise.
A fit sample focuses more closely on measurements, body balance, comfort, support, and movement. A revised sample confirms whether documented corrections have been completed. A photo-ready sample may be prepared for ecommerce photography, campaigns, line sheets, or presales, but it should not automatically replace the pre-production sample because production materials, labels, grading, and packaging may still be different.
The pre-production sample is the technical bridge to bulk manufacturing. It should use the confirmed fabric, trims, measurements, construction, labels, and finishing methods intended for production. The golden sample is the sealed physical reference used by production and quality teams. Sample timing depends heavily on complexity and material availability; structured corset, strapless, lace, mesh, sequin, and evening styles normally require more development time than a simple jersey dress.
| Sample Stage | Main Question | Common Working Window* | Key Approval |
| First sample | Has the design been interpreted correctly? | 7-15 days | Shape, material direction and construction |
| Fit sample | Does the garment fit and move correctly? | 7-15 days | Measurements, balance, support and comfort |
| Revised sample | Were the agreed corrections completed? | 7-15 days | Updated pattern, measurements and details |
| Photo-ready sample | Is the garment ready for visual content? | Project dependent | Appearance, color and presentation |
| PP sample | Is the style ready for bulk production? | 7-15 days after materials are ready | Final material, fit, workmanship, labels and packing |
| Golden sample | What physical standard will production follow? | Sealed after approval | Bulk production and inspection reference |
The working windows in the table are indicative rather than guaranteed. Material development, custom color approval, specialist trims, embroidery, printing, complex pattern corrections, shipping time, and client review speed can extend the calendar. A realistic launch plan should allow time not only to make the sample but also to review it, document corrections, source final materials, and complete the next development round.
How Is the Fit Sample Reviewed?
A fit sample should be reviewed on the intended body profile or an agreed fit model. Approving it only on a hanger or mannequin can hide problems with movement, balance, support, and comfort. The garment should first be measured using the same points and method stated in the specification. Measuring the waist at different locations across review rounds creates false differences and leads to incorrect pattern decisions.
The next step is visual balance. Front, side, and back views should be checked. Side seams should hang as intended, the waistline should sit in the correct position, and necklines, armholes, straps, cups, cut-outs, and slits should appear balanced. The wearer should sit, walk, raise the arms, turn, and move in ways appropriate to the garment, because a dress can look correct while standing still but ride upward, twist, gape, or expose too much during movement.
Review comments need to identify the cause as closely as possible. A statement such as “the top is loose” gives the pattern maker little direction. A more useful comment might request a one-centimeter reduction at the upper back while maintaining bust circumference, or a shorter strap without changing the neckline width. Photographs should be taken from repeatable angles, and critical issues should be marked directly on the image.
The team should also separate pattern problems from fabric problems. A fabric with different stretch, weight, or drape can change the fit even when the pattern is unchanged. A major material substitution may therefore require another fitting or pattern review. The purpose of fitting is not merely to make the sample smaller or larger; it is to align the intended silhouette, comfort, support, movement, and visual proportion.
How Are Revisions Documented?
Revisions should move through a controlled record rather than remain in a chain of informal messages. Every approved correction must reach the pattern, measurement chart, bill of materials, construction instructions, and inspection criteria where relevant. Raising the waist seam may change the bodice length, skirt length, zipper length, and cut-out placement, so one comment can affect several documents and components.
A practical revision record includes the sample version, date, photograph or drawing, current condition, required change, measurement before and after correction, pattern action, material or trim update, workmanship correction, responsible person, and approval status. Version control is essential. The sample room and client need to know whether they are reviewing the first sample, the second revised sample, a photo sample, or the final PP sample.
A physical correction made directly on a sample is not enough. If the zipper is moved, the pattern and sewing instruction need to change. If the neckline is stabilized with tape, that tape belongs in the bill of materials and workmanship notes. If the lining length is adjusted, the pattern and measurement chart should agree. Old files should be archived rather than left active in the production folder.
This discipline allows sample approval to become production information rather than personal knowledge held by one pattern maker, sample machinist, or merchandiser. It also reduces disputes because both parties can see which version was approved, what changed, and which requirements were carried into the final sample.
Is the Approved Sample Ready for Bulk Production?
A visually attractive sample is not automatically ready for production. The final decision should be based on whether every critical variable has been confirmed and can be repeated at scale. Before cutting begins, the team should confirm the final shell fabric, lining, color, trims, closure, cups, boning, elastic, labels, measurements, grading, tolerances, workmanship, pressing, packaging, carton requirements, and approved quantity by style, color, and size.
The PP sample should be produced from the intended bulk materials whenever possible. A sample made in substitute fabric may prove the silhouette, but it cannot confirm final drape, stretch, shrinkage, seam appearance, color, or pressing behavior. The approved size chart should also reflect every fitting correction. It is risky to approve the physical sample while leaving an old measurement version active.
Grading needs special attention for structured or revealing styles. Cup position, neckline depth, strap width, cut-out placement, slit height, and back coverage may not scale successfully through a simple proportional increase. Some measurements need controlled grade rules or a review in a larger size. A written approval should confirm that the PP sample, final pattern, graded size chart, bill of materials, workmanship instructions, quality checklist, packaging files, and order breakdown agree.
This approval point marks the transition from development to manufacturing. It protects both parties by defining the product that the production line is expected to reproduce. Any change made after approval should be treated as a controlled alteration with a review of cost, timing, material availability, and the effect on previously approved components.
How Does Bulk Production Match the Approved Sample?
Bulk production matches the approved sample when every department works from the same controlled references: approved materials, final patterns, graded measurements, construction instructions, PP or golden sample, quality checklist, and packing specifications. Consistency depends on preventing uncontrolled substitutions, checking the first production pieces, monitoring critical operations, and correcting problems before they spread through the order.
How Is the Pre-Production Sample Used?
The pre-production sample is the bridge between development and manufacturing. It confirms that the style can be made using the final or approved production inputs rather than sample-room substitutes. Production teams use it to understand silhouette, fit, seam construction, trim placement, lining, finishing, pressing, and overall appearance. Quality inspectors use it as a visual reference, while merchandisers use it to confirm that the production documents match what was approved.
The sample should not operate alone. Some details are difficult to judge after a garment has been assembled. An operator cannot reliably determine the required seam allowance, stitch density, reinforcement method, or measurement tolerance only by examining the finished sample. Those instructions belong in the technical file, which should include the final pattern, graded size chart, bill of materials, construction notes, placement information, and packing requirements.
A golden sample is usually sealed or clearly identified to prevent accidental alteration. Depending on the project, one approved reference may remain with the client while another stays with the manufacturer. Before production begins, a pre-production meeting should review fabric face and direction, shade groups, cutting restrictions, critical measurements, support components, trim placement, sewing risks, inspection points, pressing limits, and folding methods.
Any difference between the sample and the file should be resolved before cutting. Production teams should never be asked to choose which reference is correct. When the sample, pattern, and written instructions disagree, consistency becomes a matter of personal interpretation, and that is precisely what a controlled production process is designed to avoid.
How Are Cutting and Sewing Controlled?
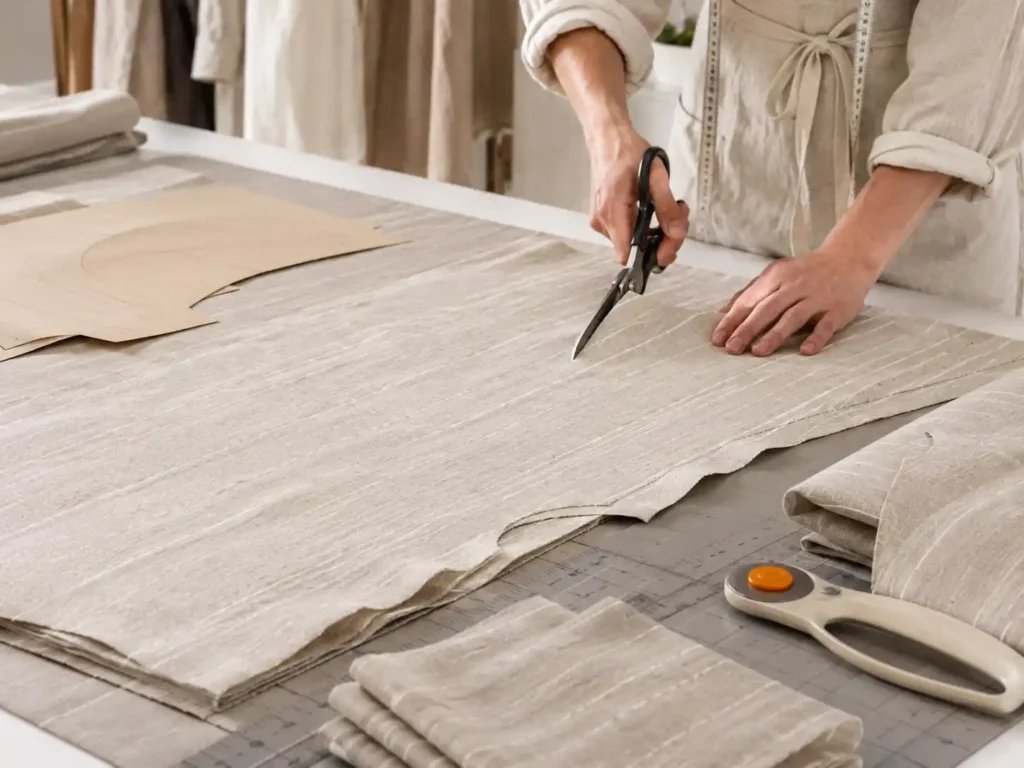
Bulk consistency begins before sewing. Fabric should be checked for width, shade, visible defects, stretch, shrinkage, weight, print quality, and surface condition according to the project requirements. Knits and stretch fabrics may need relaxation after being released from the roll because cutting them immediately can create size variation. Bias-cut panels and fluid woven fabrics may need controlled handling and resting because they can lengthen or distort under their own weight.
Shade management is especially important for satin, velvet, dark solid colors, and garments with large uninterrupted panels. Rolls from different dye lots should be recorded and separated, and components of one garment should come from compatible shade groups. Marker planning must follow grain and direction requirements. One-way prints, velvet pile, sequins, and directional shine may require every piece to face the same way, which reduces fabric efficiency but protects appearance.
After cutting, bundles should be identified by style, color, size, fabric lot, and quantity. This prevents parts from being mixed between shades or pattern versions. The first production pieces deserve careful review before the line continues at full speed. A small pilot run of several garments can confirm measurements, construction, machine settings, trim placement, and appearance. Correcting an issue after ten pieces is manageable; finding it after one thousand pieces is not.
Inline control should focus on operations that influence fit or appearance, including neckline stabilization, zipper insertion, cup and boning position, waist-seam alignment, strap length, ruching distribution, lace joining, side-seam balance, slit reinforcement, lining attachment, and hem preparation. Final inspection cannot efficiently repair a repeated pattern error or seam distortion across an entire order, so quality checks need to occur while correction remains practical.
How Are Sizes and Colors Kept Consistent?
Size consistency begins with one approved pattern set and controlled grading. Production should not contain several active pattern versions unless they are clearly separated for different markets or product variations. Cutting teams need the final pattern version, while sewing and inspection teams need the matching size chart. When a pattern is corrected after fitting, the change should be carried into every size rather than applied informally only to the base size.
Critical measurements should be checked early. The first pieces from each size can be reviewed before the line continues, followed by checks at defined intervals or by production batch. Stretch fabrics create additional risk because bulk lots may vary in stretch and recovery even when the composition is unchanged. If the difference is significant, the approved pattern may not create the same fit and should be reassessed against the actual production fabric.
Color consistency requires more than approving a digital image. Practical controls include lab-dip or standard approval, bulk-fabric review, dye-lot records, roll-to-roll shade comparison, matching thread, zipper and lining, shade-group separation, and viewing under agreed lighting. Multi-color orders should be managed as separate production units because each color can require different lining, thread, handling, inspection, labels, and packing controls.
Light colors reveal stains, transparency, and mismatched linings more easily, while dark materials may show shine marks, dust, and shade variation. The same pattern can therefore require different handling and inspection priorities across colorways. Consistency comes from linking every color and size to controlled material, pattern, measurement, and packing records rather than assuming that one approved base sample answers every production question.
Do Complex Dresses Need Extra Controls?
Complex dresses need targeted controls because their problems are rarely distributed evenly across the garment. One or two high-risk operations can determine whether the finished product looks premium or poorly made. Satin requires careful machine settings, handling, pressing, and packing because needle marks, puckering, pulled threads, water spots, and shine marks may remain visible. Unpicking should be minimized because the original needle holes can remain on the surface.
Mesh can stretch differently in each direction, so necklines and openings may need tape, elastic, binding, or controlled seam methods. Lace should be checked for motif direction, left-right balance, seam placement, edge finishing, and damage. Sequin fabric creates needle breakage, seam bulk, scratching, and sequin-loss risks. Sequins may need to be cleared from seam allowances before stitching and repaired afterward, followed by protective folding and packing.
Corset and strapless styles require checks at cup placement, boning channels, upper-bust circumference, waist tension, back height, zipper strength, anti-slip components, and internal lining. Long dresses need hem control. Chiffon, satin, bias-cut fabric, and layered skirts may need time to hang before final leveling because the fabric can drop unevenly after sewing. A tape measurement alone may not reveal whether the hem appears balanced from the front, side, and back.
Complex styles do not simply need more inspection; they need inspection at the correct operation. It is more effective to check cup placement before the bodice is closed, lace matching before panels are fully assembled, and hem balance before final finishing than to discover the problems after pressing and packing. Risk-based control uses technical understanding to place the inspection where it prevents the greatest amount of rework.
How Is the Finished Dress Checked and Delivered?
A finished dress is checked through measurement, workmanship, appearance, function, pressing, branding, and packing controls before shipment. Delivery preparation then confirms quantities, size and color assortments, labels, barcodes, cartons, export documents, and transport arrangements. A complete final process protects the approved product standard until the garments reach the client’s warehouse or fulfillment partner.
Which Final Inspections Are Required?
Final inspection confirms that production has reached the agreed standard, but it should not be the first time quality is examined. Effective control begins with materials and continues through cutting, sewing, finishing, and packing. The finished-garment review normally covers measurement, workmanship, appearance, function, cleanliness, pressing, and packing readiness, with extra attention given to critical areas identified during sampling or inline inspection.
Measurement checks compare selected garments with the approved size chart and tolerance. Bust, waist, hip, shoulder, strap length, neckline depth, waist position, dress length, slit height, and jumpsuit rise may receive additional attention depending on the style. Workmanship checks look for skipped stitches, broken threads, open seams, twisting, puckering, uneven stitching, incorrect seam allowance, poor zipper insertion, weak reinforcement, loose trims, lining problems, and unfinished internal areas.
Appearance and function are compared with the approved sample. Inspectors review silhouette, symmetry, drape, color, trim placement, ruching, lace direction, pressing, and overall presentation, while also operating zippers, hooks, buttons, straps, drawcords, and snaps. Cleanliness checks look for stains, oil, chalk, loose threads, dust, odors, scorching, shine marks, and surface damage. Light colors, satin, velvet, sequins, and embellished materials usually require stricter handling.
Many apparel programs use an agreed AQL sampling plan for final inspection, while some also require every finished garment to receive a visual check before packing. The appropriate method depends on order risk, garment complexity, client requirements, and the inspection agreement. Defects should be classified consistently so the team can decide what must be repaired, replaced, rejected, or accepted without creating uncertain standards at the end of production.
How Is Private-Label Packaging Prepared?
Private-label packing converts a finished garment into a retail-ready or warehouse-ready product. The process may include a main woven label, size label, care label, country-of-origin information, hangtag, hang string, barcode, SKU sticker, polybag, tissue, protective insert, carton mark, and warehouse label. Every item must connect to the correct style, color, and size, because a well-made dress with the wrong barcode can still create inventory errors, chargebacks, or fulfillment delays.
Care labels should reflect the actual material composition and care method rather than a generic template. Label wording, language, fiber content, country-of-origin marking, and other required information should be reviewed for the intended market. Barcode files should be checked for readability and correct SKU assignment, and label placement should remain consistent without damaging delicate fabrics.
Folding instructions matter as well. Structured bodices may need cup support or tissue, sequins may require surface protection, and long dresses may need controlled folds to avoid hard creases. Garments intended for hanging delivery require a different carton and protection method from flat-packed ecommerce stock. Carton planning should define the quantity per carton, size and color assortment, dimensions, gross weight, carton numbering, shipping marks, and warehouse-specific labels.
Packaging should be approved before the end of production rather than treated as an afterthought. Custom woven labels, care labels, hangtags, printed polybags, stickers, inserts, and cartons can each have separate artwork approvals, material lead times, and supplier minimums. Early confirmation reduces the risk that completed garments wait in the factory because one label or barcode file has not been released.
How Is Export Delivery Coordinated?
Delivery planning should begin before bulk production is complete. The suitable transport method depends on order volume, carton size, weight, destination, launch date, warehouse appointment, and cost priority. Express courier is commonly used for samples, documents, or very small urgent shipments. Air freight can support urgent commercial quantities, while sea freight is generally more economical for larger orders but requires a longer planning window.
Some projects use split shipping. A limited quantity may travel by air to support photography, an early launch, or urgent stock needs, while the balance moves by sea. This can be more practical than sending the entire order by the fastest method. Before shipment, the parties should confirm packed quantity, carton count, dimensions, gross and net weight, packing list, commercial invoice, shipping marks, forwarder information, pickup arrangement, warehouse labels, and the recipient of the documents.
Common trade arrangements include EXW, FOB, CIF, DAP, and project-specific DDP solutions. The correct option depends on the destination, importer arrangement, customs responsibility, and freight provider. DDP should be confirmed by country and project rather than assumed to be available everywhere. The client may nominate a forwarder, or the manufacturer may coordinate with a regular logistics partner, but responsibility for booking, customs information, destination charges, and delivery appointments should be clear.
A realistic delivery date includes more than factory completion. It may also need time for final inspection, rework, packing, carton booking, pickup, export documentation, port handling, transit, customs clearance, and final-mile delivery. Working backward from the required warehouse date gives the development and production teams a more reliable calendar than treating shipment as a single event at the end of the order.
How Are Repeat Orders Kept Consistent?
Repeat orders are not automatically identical to the first production run. Mills may supply a new dye lot, trims may be discontinued, operators may change, and files may have been revised. Consistency depends on retaining accurate records and verifying what has changed. A repeat-order file should include the final pattern, grade rules, size chart, bill of materials, fabric specification, color standard, trim references, construction instructions, quality checklist, golden sample, packing method, carton plan, and previous inspection findings.
The manufacturer should first check material continuity. Is the same fabric still available from the same mill and construction? Has the color or finishing process changed? Are the zipper, lace, elastic, cups, boning, labels, and packaging components still current? When the original material is unavailable, a substitute should be sampled or approved rather than introduced silently, because a similar fabric can still change stretch, recovery, shrinkage, drape, opacity, seam appearance, or fit.
Historical quality information is equally valuable. If the first order experienced zipper puckering, shade variation, loose threads, difficult hem leveling, or measurement pressure at one point, the next production plan should include stronger control at that operation. Repeat-order efficiency comes from using previous knowledge to reduce risk, not from assuming that the line can reproduce the style from memory.
A well-managed repeat order begins with a comparison between the previous approved standard and the current materials, quantities, colors, sizes, timing, and market requirements. This approach supports faster replenishment while protecting consistency. It also creates a reliable base for seasonal extensions, such as adding new colors, changing fabric weight, or developing a matching set from an established dress block.