
How to Control Hand-Embellishment Placement in Garment Production

Your trusted Women’s Apparel Manufacturer from China

A hand-beaded neckline can look perfect on a development sample and noticeably uneven once the same design reaches bulk production. The difference is rarely caused by one careless operator. Placement errors often begin much earlier, when artwork has no fixed coordinates, a pattern changes without an updated guide, stretch fabric is marked while relaxed, or an approved sample is never converted into measurable production instructions. For a fashion brand, those small gaps can lead to expensive rework, delayed launches, inconsistent campaign images, and garments that feel less premium even when shoppers cannot explain exactly what looks wrong.
Hand-embellishment placement is controlled by fixing measurable garment reference points, defining motif dimensions and tolerances, approving the result on production materials, and repeating it with size-specific templates, first-piece checks, inline inspection, and a sealed Golden sample. Every approved change must also be transferred into the current tech pack and QC file.
The practical goal is to stop treating handwork as a loose artistic instruction and start managing it as a repeatable manufacturing operation. Picture two identical black dresses on the same rail: one crystal curve frames the collarbone, while the other sits only a few millimeters lower and makes the neckline look heavy. The second garment may still pass a casual glance, yet the difference becomes obvious beside the approved sample. The following control methods are designed to prevent that quiet inconsistency from spreading across an order.
What Causes Placement Errors?
Hand-embellishment placement errors usually come from vague specifications, unstable garment references, fabric movement, inconsistent marking, or uncontrolled operator judgment. The visible fault may appear during beading or appliqué work, but the root cause often begins in pattern making, cutting, sample approval, or production sequencing. Effective correction starts by finding the stage where variation first entered the process.
Common Placement Defects
The easiest defect to recognize is a motif positioned too high, low, left, or right, yet bulk failures are often less obvious. A beaded neckline may begin at the correct point and slowly drift around the curve. Two lace appliqués may be beautifully sewn but sit at different angles. A repeated sequin row may hold its overall shape while the spacing grows wider toward the end. These variations become especially visible around the neckline, bust, waist, shoulder, cuff, or center front, where the eye naturally looks for balance.
A placement defect should be described in measurable language. Saying that a rhinestone row looks uneven gives the production team little guidance. Stating that the right-side row sits 5 mm lower at the second checkpoint identifies the exact problem and makes rechecking possible. The defect record should note the location, measured deviation, affected quantity, likely cause, and corrective action. This turns a visual complaint into a production issue that can be traced, corrected, and prevented on the next bundle.
- Unequal left-and-right placement at matched garment points
- Incorrect distance from a neckline, seam, waistline, or finished edge
- Gradual spacing changes across repeated beads, pearls, or sequins
- Rotated, reversed, missing, duplicated, or substituted components
- Puckering, pulling, or loss of stretch around a dense motif
Difficult Materials
Small individual components are generally harder to control than continuous trims because every piece creates another decision about position, spacing, direction, thread tension, and attachment. Beads, pearls, rhinestones, crystals, sequins, bugle beads, and metal ornaments can accumulate tiny variations across a large motif. A one-millimeter spacing change may appear harmless at the start, but after thirty repeats it can alter the full width and balance of the design. Directional shapes, including leaves and teardrops, add another risk because slight rotation is easy to miss during application.
Large appliqués create a different challenge. Their overall location is easier to measure, but irregular edges can make alignment subjective. One operator may align the flower center while another aligns the outer leaf. A reliable specification therefore identifies a central anchor, top direction, finished width and height, and several measurements from stable seams. Mixed-media designs need the most planning because lace, pearls, sequins, and stones have different weights, attachment methods, and working sequences. Each component should have a code, size, finish, quantity, position, fastening method, and approved replacement rule.
Fabric Movement
Placement cannot be separated from the behavior of the base fabric. A mark can be accurate while a panel lies flat and still move after the garment is stretched, gathered, assembled, or worn. Stretch mesh may expand between stones when the dress is on the body, while dense beadwork may reduce local elasticity and create pulling around the motif. Bias-cut satin can lengthen or twist as it hangs. Chiffon may shift during handling and may not support heavy elements without reinforcement. Lace offers uneven attachment points because the open structure changes across the repeat.
The placement standard should be approved on production fabric whenever possible. Development teams should record fabric weight, stretch and recovery, transparency, drape, pile direction, needle-mark sensitivity, pressing limits, and the weight of the decoration. Fitted styles should be reviewed on a mannequin or fit model rather than only on a table. The review is not limited to appearance; it should confirm that the embellished area still moves, stretches, and rests as intended after construction. A motif that works on a stable sample cloth may fail when the final fabric is lighter, softer, or more elastic.
- Fabric weight, dimensional stability, and bias movement
- Stretch percentage, recovery, and local loss of elasticity
- Transparency, lining, reinforcement, and needle-mark sensitivity
- Component weight, pressing limits, and expected movement during wear
Pre-Sewing Causes
Many handwork problems are already built into the garment before the first bead is attached. An off-grain panel, stretched neckline, inaccurate center notch, uneven seam, or incorrect cutting direction creates an unstable base. The operator may follow the guide exactly and still produce a result that appears crooked. Stable references should therefore come from verified construction lines such as finished center front, center back, neckline seams, waist seams, princess seams, or panel joins. Raw cut edges are less reliable because trimming, binding, turning, and pressing can change their final position.
Pattern grading and bundle control also affect placement. One guide may not suit every size, while automatic enlargement can make larger sizes look sparse or unnecessarily heavy. Cutting bundles must remain clearly identified so reversed panels, mixed sizes, or inaccurate marks do not repeat the same error across dozens of pieces. Approved production patterns, grainlines, center notches, size labels, first-panel checks, and controlled transfer of placement marks create the stable foundation that handwork requires. When the base garment is wrong, asking operators to be more careful will not solve the real problem.
Visible defect | Typical root cause | Practical control |
Entire motif shifted | Incorrect starting point or unstable reference | Measure from finished centerlines or seams |
Left and right sides differ | Separate guides or weak symmetry control | Use one mirrored full-width template |
Spacing widens gradually | Freehand application without repeat marks | Mark fixed center-to-center intervals |
Motif rotates | No orientation line or anchor points | Add center axis, top direction, and angle reference |
Decoration enters seams | Artwork not checked against production pattern | Overlay placement on pattern with seam allowance shown |
Fabric puckers | Excess thread tension, weight, or weak stabilization | Test attachment and reinforcement on production fabric |
Bulk differs from sample | Approved details not transferred to current files | Issue revised placement sheet and sealed sample |

How Is Placement Specified?
Hand-embellishment placement is specified through a measurable map showing the motif’s center, start, end, dimensions, orientation, spacing, component details, size rules, and allowed tolerance. The specification must connect the artwork to stable garment reference points so sample makers, operators, supervisors, and inspectors all use the same definition of an acceptable result.
Tech Pack Details
A front-view fashion sketch is useful for showing the idea, but it is not enough to control production. The tech pack must translate the design into instructions that can be measured, repeated, and inspected after the style moves from development to sampling and bulk. The placement page should include front, back, and close-up views; accurately scaled artwork; finished width and height; center, start, end, and turning points; horizontal and vertical coordinates; component codes; attachment method; reinforcement; tolerance; size grading; and the approved sample revision.
Every visible component that matters should have a separate bill-of-materials code. A description such as silver stones is too broad when the style uses multiple sizes, finishes, or shapes. The drawing should link each code to a specific position or zone, while the work instruction explains thread, adhesive, heat-fix, or combined fastening. Negative requirements are equally useful: no embellishment inside seam allowance, no visible knots, no exposed glue, no sharp backing, no unapproved substitutions, and no density changes. Clear exclusions remove assumptions before they become defects.
- Scaled artwork with center, start, end, and turning points
- Finished motif dimensions and horizontal and vertical coordinates
- Component code, size, shape, color, finish, and quantity
- Attachment, reinforcement, marking, grading, and tolerance rules
- Current sample reference, approval date, and revision status
Reference Points
A good reference point is stable, visible, and repeatable after construction. Center front and center back are often the strongest axes for symmetrical motifs. Finished neckline seams, shoulder seams, waist seams, princess seams, panel joins, pocket edges, and zipper lines can also work when their construction is controlled. Soft folds, gathered edges, raw cut lines, and irregular lace edges should not be the only reference because they may move from one garment to another. Important motifs normally need both horizontal and vertical coordinates.
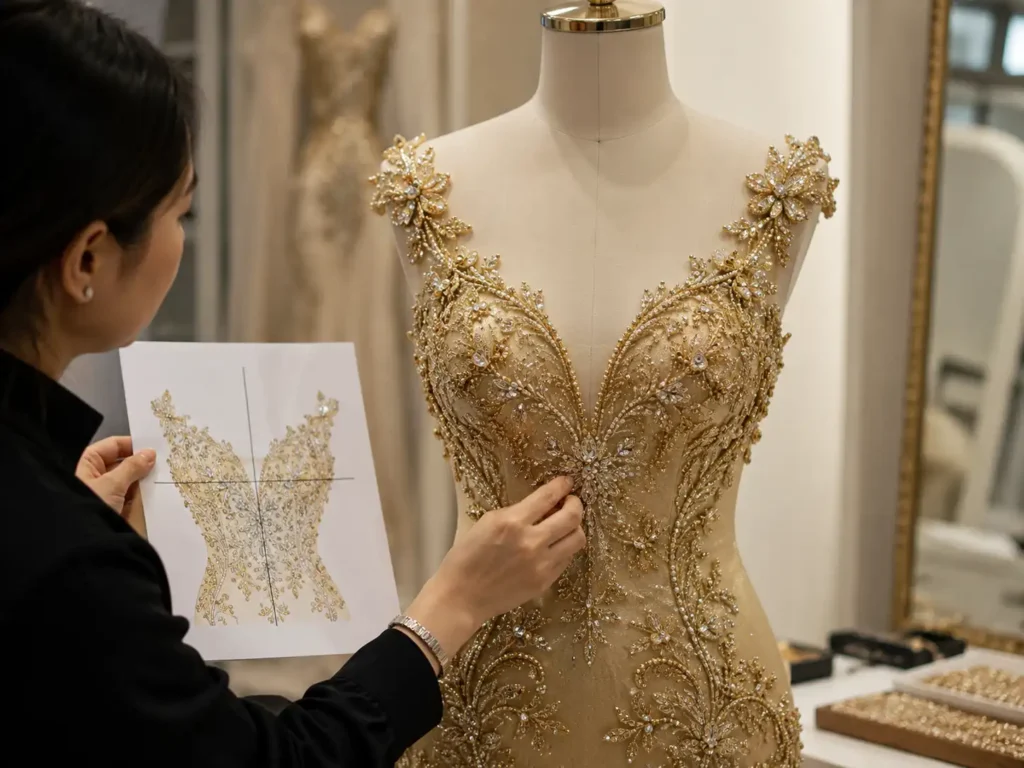
A neckline design, for example, might be centered on finished center front, with the highest stone 20 mm below the completed neckline, both end points 15 mm from the princess seams, and a specified point-to-point width. Curved motifs need intermediate checkpoints at the widest, highest, lowest, and turning areas. Correct start and end points do not guarantee the correct curve between them. Two or more measurable anchors make the instruction easier to place, easier to inspect, and less dependent on an operator’s visual estimate.
Spacing and Tolerances
Spacing defines the intended relationship between components, while tolerance defines how much deviation is allowed before the result becomes unacceptable. Both should be measurable. Instructions such as evenly spaced, close to the edge, or approximately centered are open to interpretation. Repeated components can be controlled by center-to-center spacing, edge-to-edge spacing, row distance, number of parts per repeat, total motif width, total motif height, and distance from finished edges. The chosen method should match the visual feature that matters most.
Tolerance should reflect component size, base-fabric stability, visual sensitivity, price level, attachment method, and the approved sample. A large irregular appliqué may tolerate a few millimeters at its outer edge without changing the overall look, while a single center-front crystal can appear obviously wrong with the same deviation. The figures in the table are practical starting points for development discussion, not universal standards. Each project should confirm its own limits through sampling and realistic production trials rather than copying a generic number into every tech pack.
Size Grading
Placement rules often change across the size range, but the motif does not always need to grow proportionally. A compact logo or center-front ornament may remain fixed in size and centered on the same axis. A bust-side appliqué may remain the same size but move relative to a princess seam or cup. A decorative border may need additional repeats or revised spacing. The correct approach depends on the garment pattern, the body area, and the visual intention, not on a simple percentage enlargement.
Automatic scaling can create new problems. Increasing bead gaps may make larger sizes look sparse, while adding components raises weight, cost, and production time. Body-sensitive designs should be reviewed on the base size and at least one smaller and one larger representative size. Separate guides are often justified for cup-based styles, corset dresses, full neckline motifs, waist-to-hip appliqués, stretch bodycon dresses, and asymmetrical designs. The approved grading rule must appear in the specification so the production floor never has to estimate placement by eye.
Placement feature | Illustrative project tolerance | Control note |
Single focal stone | ±2-3 mm | Use two-axis measurement from a stable centerline |
Large appliqué position | ±4-5 mm at checkpoints | Check center, top direction, width, and height |
Repeated bead spacing | ±1-2 mm | Control center-to-center or edge-to-edge interval |
Decorative border from finished edge | ±2-3 mm | Measure from the completed seam or binding |
Left-to-right symmetry | Maximum 3 mm difference | Compare matched checkpoints, not only endpoints |
Overall motif width | ±3-5 mm | Confirm component count and repeat spacing |
Component count | No missing parts unless approved | Record quantity by component code |
Directional component angle | Match approved artwork | Use orientation line and visual sample |
How Is Placement Approved?
Placement is approved in stages. The first sample confirms visual scale and garment interaction, fit samples check body position, the pre-production sample locks final materials and methods, and the Golden sample becomes the physical bulk standard. Approval is complete only when measurements, photographs, revision status, component records, tolerances, and comments are stored in the current production file.
First Sample Review
The first sample should prove that the embellishment works on the garment, not merely that the workshop can copy the artwork. A motif may look balanced on a flat sketch and sit poorly once it follows the bust, neckline, waist, hip, or shoulder. The review should assess overall scale, body position, symmetry, density, component weight, fabric reaction, comfort, stretch restriction, attachment visibility, production practicality, and approximate handwork time. These factors determine whether the design can become a repeatable product rather than a one-off display piece.
The sample should be inspected flat, on a mannequin, and preferably on a fit model for body-sensitive styles. Front, side, and back photographs reveal different problems, while simple movement checks show whether the motif pulls, twists, scratches, or restricts the garment. Substitute materials may be acceptable during early development, but every substitution must be recorded. A sample made with lighter stones, different thread, or a more stable fabric cannot automatically predict the bulk result. Any observation affected by the substitution should be reconfirmed with production materials.
- Visual balance on the body rather than only on a flat table
- Fabric distortion, local stiffness, weight, and movement restriction
- Comfort around neckline, armhole, bust, waist, hip, and slit areas
- Production practicality, handwork time, and likely cost effect
PP Sample Approval
The pre-production sample is the point where design intent becomes a manufacturing standard. It should use the final approved pattern, fabric, color, lining, trims, embellishment components, construction, labels, and finishing method. For handwork, the approval should lock motif dimensions, coordinates, component codes, quantity, direction, spacing, fastening method, reinforcement, temporary marking, work sequence, size rules, tolerance, inspection method, pressing limits, and packing protection. Production should be able to repeat this sample without relying on memory or informal messages.
Late changes need formal control because even a small visual adjustment can affect more than appearance. Moving a motif by 10 mm may require a revised template, altered seam clearance, new component count, updated handwork time, different reinforcement, and a new inspection point. The PP sample must be compared with the current tech pack, not an older sample. If the neckline, cup, seam position, or stretch behavior changes, placement should be reviewed again even when the artwork itself has not changed. A near match is not enough when bulk repeatability is uncertain.
Golden Sample
A Golden sample is especially valuable when the decoration is symmetrical, visually dominant, expensive, difficult to measure, or likely to create disagreement during inspection. It gives operators and QC staff a physical reference for the full approved condition: motif position, density, orientation, thread visibility, edge treatment, fabric support, pressing, and overall balance. Measurements remain essential, but the sealed sample captures visual qualities that are difficult to communicate through numbers alone, such as the smoothness of a crystal curve or the acceptable irregularity of a hand-beaded edge.
The Golden sample should be used during the pre-production meeting, operator briefing, first-piece approval, inline inspection, final inspection, packing review, third-party inspection, and repeat-order preparation. It should be labeled with style number, color, size, approval date, and revision, then stored so stones are not lost and the garment is not crushed or altered. The reference is not permanent when the product changes. New fabric, revised sizing, a different trim supplier, or an altered attachment method may require a new or reconfirmed Golden sample.
Approval Records
Approval records connect the physical sample to the documents used on the production floor. This is important because comments often arrive through email, annotated photographs, spreadsheets, online meetings, or messaging applications. A bulk-relevant decision should never remain only in a chat history. The final package should include the style and sample version, review date, front and detail photographs, placement measurements, artwork revision, component codes, fabric and reinforcement references, fit comments, required corrections, cost or lead-time impact, approval status, and the current PP or Golden sample reference.
A disciplined record also protects future repeat orders. Months later, the team should be able to identify which template was used, which stone finish was approved, how the motif was graded, and what tolerance applied. Without that history, a repeat order becomes a new development exercise and may not match the earlier delivery. Records are most useful when they are specific enough for a different team member to reproduce the approved result. Good documentation reduces dependence on individual memory and gives both the brand and manufacturer a shared basis for resolving questions.
Sample stage | Main placement decision | Evidence to retain |
First sample | Does the concept work on the garment? | Photos, initial measurements, material substitutions, visual comments |
Fit sample | Does the position remain correct on the body? | Fit images, movement review, body-reference notes, pattern changes |
Revised sample | Were identified placement problems corrected? | Updated measurements, before-and-after photos, revision notes |
PP sample | Are bulk materials, methods, and tolerances finalized? | Final tech pack, BOM, placement map, QC points, packing protection |
Golden sample | What is the physical standard for bulk and repeats? | Sealed labeled garment matched to current production documents |
How Is Bulk Placement Controlled?
Bulk placement is controlled by converting the approved sample into repeatable tools, size rules, work instructions, and inspection points. Operators need stable garment references, accurate templates, clear material identification, and first-piece approval. Supervisors then compare work in progress with the Golden sample and correct drift early, before a small variation spreads through an entire bundle or production line.
Placement Templates
The template should match the complexity of the design. A single focal ornament may need two crossed coordinates, while a full neckline arrangement may require a transparent, full-width guide showing every major stone and bead position. Common tools include paper patterns, clear plastic overlays, perforated pouncing guides, positioning boards, printed films, laser-cut guides, washable pens, tailor’s chalk, thread-traced centerlines, basting outlines, numbered component maps, and photographic instructions. Transparent guides are particularly useful because seams and centerlines remain visible beneath the template.
The marking method must be tested on the production fabric before bulk use. Chalk may disappear too early, ink may remain visible, heat-sensitive marks may return in cold conditions, and pouncing holes may damage satin or coated fabric. Pinning can distort stretch mesh, while pressure boards may mark velvet. Every template should show style number, size, orientation, revision, and date. Obsolete versions should be removed immediately. A perfectly repeated defect often begins when an operator uses an accurate template from the wrong sample revision.
- Transparent overlays for viewing centerlines and seams beneath the guide
- Perforated, printed, or laser-cut guides for repeated motif positions
- Thread tracing or removable marks for delicate and high-risk fabrics
- Revision, size, orientation, and style identification on every guide
Symmetry Control
Symmetry starts with the garment, not the embellishment. Center front, center back, neckline, shoulders, waist seams, and panel joins should be checked before handwork begins. A symmetrical guide cannot correct a garment whose base construction is already unbalanced. Operators should establish major anchor points first: the center feature, outer endpoints, highest and lowest positions, and important turning points. These anchors allow the full shape to be reviewed before smaller components are permanently attached and make early correction much easier.
Useful controls include one verified center axis, a mirrored full-width guide, matched left and right checkpoints, equal distances from corresponding seams, component counts by side, and vertical review on a hanger or mannequin. Human vision is good at noticing imbalance but poor at estimating small distances consistently, so visual judgment should support measurement rather than replace it. Even intentionally scattered decoration needs limits. The specification should define the permitted zone, excluded areas, approximate density, minimum spacing, component ratio, and acceptable clustering so random still produces a controlled visual effect.
Sewing Sequence
Hand embellishment can be applied to flat panels, during partial assembly, or after the garment is almost complete. Flat-panel work offers easy access and accurate marking, which is useful for central motifs and decorative borders. The risks are seam interference, damage during later sewing, and movement when panels are assembled. Partial construction works well when placement depends on a finished neckline, bust structure, waist seam, or panel alignment. The garment can be built far enough to create stable references while still allowing access to the reverse side.
Final-garment application gives the clearest view of fit, drape, ruching, and body position, but it is slower and may make reinforcement, knot concealment, and operator access more difficult. The approved operation sequence should state when the panel is marked, when backing is added, when appliqués and beads are attached, when lining is closed, when pressing occurs, and how the decoration is protected between operations. Production should not change the sequence merely to gain speed unless a complete trial confirms that placement, attachment strength, appearance, and cost remain acceptable.
Size-Specific Guides
One template does not always suit the full size range. Separate guides are needed when neckline width, bust position, cup shape, seam location, motif coverage, or pattern geometry changes enough to affect the visual result. Corset dresses, cup-based styles, princess-seam decoration, full neckline motifs, waist-to-hip appliqués, asymmetrical designs, and stretch bodycon garments often need more than one guide. Adjacent sizes may share a template only after pattern overlay and sample review confirm that the same placement remains balanced.
Every guide should be clearly labeled and stored so similar-looking sizes cannot be mixed. Large size codes, color identification, bundle separation, and controlled issue records reduce mistakes. The first completed piece from each size group should be checked before the rest of the bundle continues. Production teams should also compare component count and handwork time across sizes. A larger guide may require more materials, while a fixed motif may only move relative to seams. These decisions should be planned in development rather than discovered after bulk handwork has started.
How Is Placement Inspected?
Placement inspection compares measurable checkpoints, visual balance, component completeness, attachment security, fabric condition, and wear safety with the latest specification and Golden sample. Inspection should begin with the first production piece and continue during handwork, assembly, pressing, finishing, and packing. Early checks are essential because removing or relocating embellishment can damage delicate fabric and create additional defects.
Inline QC
Inline inspection is more effective than waiting until final inspection because decorative rework is slow and can damage the garment. The first completed piece should be checked before an operator continues with the full bundle. This confirms that the correct template, components, marking method, sequence, and fastening are being used. Inspection should cover motif position, finished width and height, symmetry, spacing, direction, component count, thread tension, glue visibility, fabric distortion, seam clearance, missing parts, and comparison with the Golden sample.
Inspection frequency should match the risk. A single appliqué on stable fabric needs fewer checks than dense beading on stretch mesh or satin. New operators, new material lots, revised templates, and the start of production require closer monitoring. A practical plan includes first-piece approval for each operator, first-bundle review, checks after material or template changes, periodic checks during the shift, post-pressing inspection, and final comparison before packing. Inspectors should record the likely cause as well as the defect so corrective action addresses the process, not only the affected garment.
- First-piece approval for each operator or workstation
- Recheck after any template, component, fabric, or method change
- Periodic comparison with the Golden sample during the shift
- Post-pressing and pre-packing review for movement or damage
Rework Limits
Genuine handwork naturally contains minor variation, so inspection should distinguish harmless character from a visible defect. Rework is usually required when the motif falls outside approved tolerance, left and right sides are obviously unbalanced, components are missing or reversed, decoration enters seam allowance, attachment is loose, glue is visible, fabric is cut or puckered, or an unapproved color or finish has been substituted. The location matters: a 3 mm difference in a scattered hem detail may be acceptable, while the same shift at center front can be immediately noticeable.
Repair must not create a second problem. Removing glued stones can mark satin or tear mesh. Repeated needle entry can weaken the base fabric. Dark thread may leave visible holes on light colors, and moving an appliqué can leave an outline that pressing will not remove. Before authorizing rework, the team should decide whether the component can be removed cleanly, whether the corrected attachment remains secure, whether the fabric will retain damage, and whether replacing the panel is safer. The harder a design is to repair, the more valuable early inline control becomes.
Attachment Strength
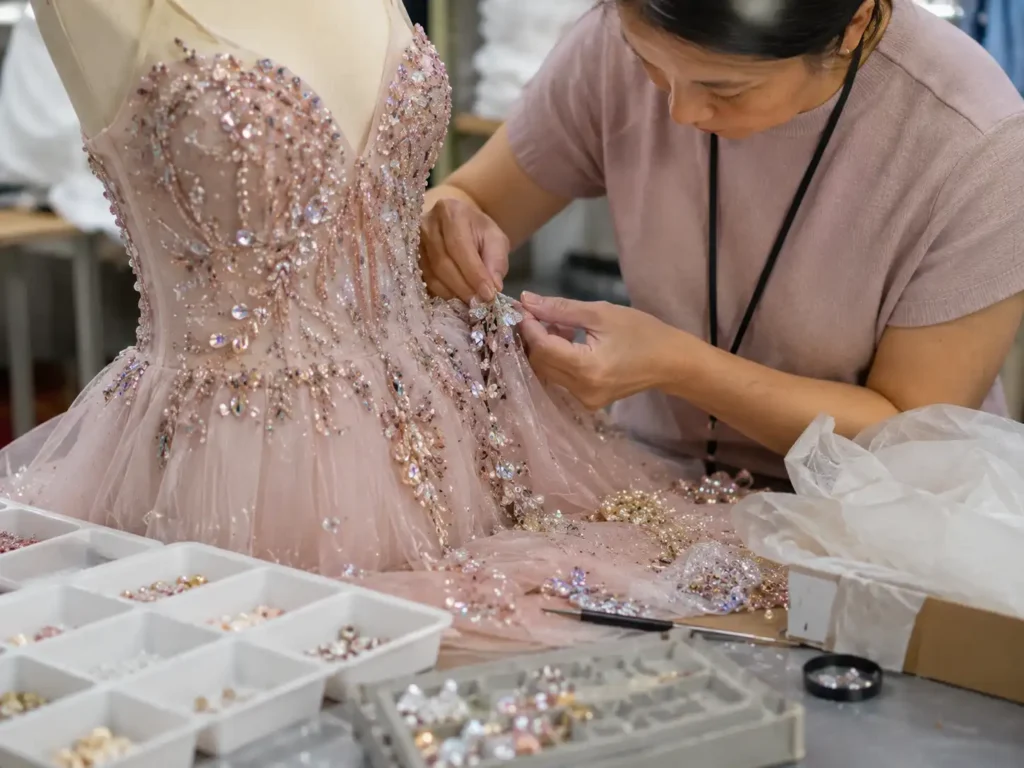
Correct placement is only part of quality. Components must remain secure during fitting, transport, retail handling, and normal wear. Hand-sewn beads and sequins should have suitable thread, controlled tension, secure start and finish points, adequate stitch frequency, and reinforcement where movement is high. Long unsecured thread runs should be avoided because one break can release several components. Rhinestones and heat-fixed parts should have full contact, no lifting edges, no visible adhesive spread, and no scorching or finish damage.
Large appliqués should be checked around the outer edge and at internal areas where the fabric can lift or buckle. Heavy pieces may need both edge stitching and additional internal anchors. Simple handling checks can reveal weak attachment, but the exact test should match the component, garment use, customer specification, and destination market. The goal is not to apply excessive force that damages the fabric. It is to confirm that normal handling and movement will not release the decoration or expose sharp backing. Any recurring failure should trigger a review of thread, adhesive, temperature, pressure, reinforcement, and application sequence.
Wear Safety
An embellished garment can meet visual placement standards and still be uncomfortable or unsafe. Inspection should check sharp edges, exposed wire, rough knots, scratching sequins, hard backing, excessive weight, snagging risk, restricted stretch, and components that press against the body. Necklines, armholes, underbust areas, side waists, cuffs, inner thighs, and close-fitting hips deserve extra attention because repeated movement increases friction. Lining and backing should cover or isolate rough attachment points without changing the garment’s intended drape.
The completed garment should be fitted and moved under realistic conditions. A party dress intended for dancing should be checked while walking, sitting, raising the arms, and turning, not only while standing still. Packing also affects safety and quality because heavy stones can crush delicate fabric or snag neighboring garments. Tissue, protective covers, separators, controlled folding, and suitable carton pressure may be required. Defect photographs, approved repair methods, template revisions, and component-failure records should be retained so repeat orders start with better controls instead of repeating the same problems.
Inspection stage | Main checks | Typical action |
First piece | Template, position, motif size, symmetry, component codes | Approve before the operator continues the bundle |
Inline handwork | Spacing, count, direction, loose parts, fabric distortion | Correct immediately and recheck following pieces |
After assembly | Seam clearance, shape change, pulling, hidden attachment | Repair, replace panel, or revise sequence |
After pressing | Adhesion, pressure marks, color change, motif movement | Adjust heat, pressure, protection, or method |
Final inspection | Overall balance, completeness, security, cleanliness | Rework outside limits and record defect cause |
Packing inspection | Crushing, snagging, folding pressure, component protection | Add tissue, covers, separators, or carton controls |
Controlling hand-embellishment placement is not about eliminating every trace of handwork. It is about protecting the intended visual character while making the result measurable, repeatable, inspectable, and safe. Brands gain the best outcome when placement is treated as a connected chain: stable patterns, clear specifications, realistic samples, approved materials, controlled templates, trained operators, early inspection, and records that remain available for repeat orders. When one link is missing, even skilled craftsmanship can produce inconsistent garments.
Wear Safety
An embellished garment can meet visual placement standards and still be uncomfortable or unsafe. Inspection should check sharp edges, exposed wire, rough knots, scratching sequins, hard backing, excessive weight, snagging risk, restricted stretch, and components that press against the body. Necklines, armholes, underbust areas, side waists, cuffs, inner thighs, and close-fitting hips deserve extra attention because repeated movement increases friction. Lining and backing should cover or isolate rough attachment points without changing the garment’s intended drape.
The completed garment should be fitted and moved under realistic conditions. A party dress intended for dancing should be checked while walking, sitting, raising the arms, and turning, not only while standing still. Packing also affects safety and quality because heavy stones can crush delicate fabric or snag neighboring garments. Tissue, protective covers, separators, controlled folding, and suitable carton pressure may be required. Defect photographs, approved repair methods, template revisions, and component-failure records should be retained so repeat orders start with better controls instead of repeating the same problems.
Inspection stage | Main checks | Typical action |
First piece | Template, position, motif size, symmetry, component codes | Approve before the operator continues the bundle |
Inline handwork | Spacing, count, direction, loose parts, fabric distortion | Correct immediately and recheck following pieces |
After assembly | Seam clearance, shape change, pulling, hidden attachment | Repair, replace panel, or revise sequence |
After pressing | Adhesion, pressure marks, color change, motif movement | Adjust heat, pressure, protection, or method |
Final inspection | Overall balance, completeness, security, cleanliness | Rework outside limits and record defect cause |
Packing inspection | Crushing, snagging, folding pressure, component protection | Add tissue, covers, separators, or carton controls |
Controlling hand-embellishment placement is not about eliminating every trace of handwork. It is about protecting the intended visual character while making the result measurable, repeatable, inspectable, and safe. Brands gain the best outcome when placement is treated as a connected chain: stable patterns, clear specifications, realistic samples, approved materials, controlled templates, trained operators, early inspection, and records that remain available for repeat orders. When one link is missing, even skilled craftsmanship can produce inconsistent garments.
For custom embellished dresses, partywear, occasionwear, lace styles, sequin garments, or private-label womenswear, Jinfeng Apparel can review a tech pack, reference sample, placement artwork, fabric choice, size range, and target quantity before development begins. The company has focused on women’s apparel manufacturing since 2008 and supports sampling, bulk production, quality control, private-label packing, NDA-based design protection, and repeat-order management through its Guangdong production network. Custom production starts from 200 pieces per style and color, subject to material and construction requirements. Send the current development file to info@jinfengapparel.com for a production review and quotation. |
Share This Article :

Jerry Lee
Categories

Latest blogs


Table of Contents
Here, developing your OEM/ODM private label clothing collection is no longer a challenge—it’s an excellent opportunity to bring your creative vision to life.

