Skip to content

A dress zipper is a small component sitting at the intersection of several much larger systems: fabric behavior, pattern shape, fit pressure, seam construction, lining, pressing, and the zipper hardware itself. That is why replacing a zipper does not always solve a recurring defect. A zipper that looks straight on a cutting table may wave after sewing, become difficult to close on the body, or bulge at the lower end once the garment is pressed and worn. For brands producing fitted or visually clean dresses, the real cost is not the zipper alone; it is the rework, delayed approval, inconsistent bulk appearance, and return risk that follow a poorly diagnosed problem.
The most common dress zipper defects include puckering, waviness, bulging, jamming, separation, misalignment, exposed invisible-zipper coils, damaged tape, broken elements, and difficult operation. Causes may come from the zipper itself, but many begin with fabric stretch, sewing tension, differential feeding, weak stabilization, lining interference, garment fit, construction bulk, pressing, or an unsuitable zipper specification. Reliable diagnosis starts by identifying when the defect first appears.
A useful production investigation therefore starts with a more specific question than, “Is the zipper bad?” It asks, “At what point did the zipper stop behaving correctly?” That distinction can separate a trim issue from a sewing issue, or a sewing issue from a pattern and fit issue, before the same defect is repeated across hundreds or thousands of garments. The sections below follow that logic from symptom recognition to root-cause tracing and prevention, with particular attention to satin, stretch, bodycon, corset, lace, mesh, and other zipper-sensitive dress constructions.
What Are the Most Common Dress Zipper Defects?
The most common dress zipper defects are puckering, waviness, bulging, misaligned seams, exposed invisible-zipper coils, jamming, difficult pulling, zipper separation, damaged tape, broken elements, and failed sliders or stops. Some are mainly appearance problems; others affect function and wearing safety. Correct diagnosis starts by identifying exactly when the defect appears: before sewing, after installation, after pressing, or only when the dress is worn.
Appearance Defects
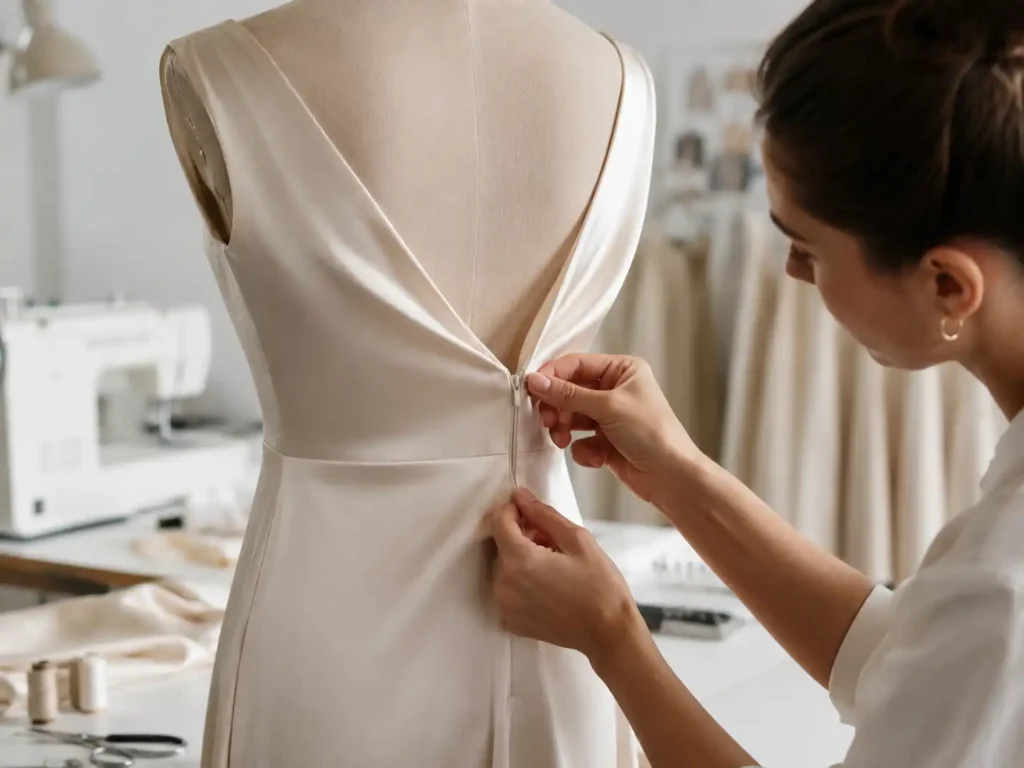
A zipper can work perfectly and still make a dress unacceptable. This is especially common in satin, fitted occasionwear, bodycon dresses, minimalist evening styles, and other garments where the center-back or side seam is visually exposed. Puckering normally appears as repeated short wrinkles beside the zipper seam, while waviness causes a broader ripple along the zipper line. Bulging is different because part of the zipper area projects away from the body, often around the lower zipper end, waist, or upper hip. On smooth fabrics, these defects become more visible because reflected light exaggerates even modest three-dimensional distortion.
Invisible zippers create their own visual failure modes. If the stitching line sits too far from the coil, the zipper can remain visible when the seam is closed. If the operator sews too aggressively toward the coil, slider movement can become restricted or the fabric can be pulled into a distorted line. Waist seams, lace joins, yokes, and decorative panel lines also need to meet cleanly across the zipper. A zipper may therefore be functionally sound but still fail appearance inspection because the left and right garment sections no longer align as one continuous design.
| Defect | Typical Appearance or Behavior | First Areas to Check | Most Informative Stage |
| Puckering | Fine wrinkles beside zipper | Thread tension, feed, shrinkage | Immediately after sewing / after pressing |
| Waviness | Rippled zipper line | Fabric stretch, differential feeding | After installation |
| Bulging | Zipper projects away from body | Fit, seam shape, zipper length | On-body fitting |
| Seam mismatch | Waist or design lines do not meet | Marking, notches, sewing accuracy | After sewing |
| Exposed coil | Invisible zipper remains visible | Needle position, seam allowance | After installation |
| Jamming | Slider catches or stops | Lining, bulk, slider, elements | During operation |
| Separation | Chain opens behind slider | Slider, elements, excessive load | During fitting / wear |
| Hard pulling | High force needed | Fit tension, bulk, distorted tape | Compare hanging vs worn garment |
| Tape damage | Fraying, tearing, distortion | Abrasion, stitching, excessive load | Incoming trim / wear simulation |
Functional Defects
Functional defects include jamming, separation after closing, hard pulling, tape tearing, damaged teeth or coil, failed stops, and slider malfunction. These problems should be judged under more than one condition. A zipper that moves smoothly while the garment hangs may become difficult around the waist or hip during fitting because the dress introduces lateral load. Conversely, a zipper that is already stiff before it is sewn into the garment points much more strongly toward the component itself, contamination, or a damaged slider path rather than garment fit.
The exact point where resistance occurs often reveals more than the complaint itself. A slider that repeatedly catches at a waist seam suggests localized bulk from seam allowances, lining, lace, or internal structure. Resistance near the lining edge may indicate that loose fabric is entering the slider. Separation concentrated at one tight body level raises a different question from random separation along the full chain. A good inspection therefore records the location, garment condition, size, and production stage instead of simply writing “zipper problem” on the repair ticket.
Defect or Symptom?
One of the most useful habits in zipper troubleshooting is separating the visible symptom from the underlying cause. “Zipper bulging” describes what the garment looks like, but it does not explain whether the problem came from zipper length, a stretched fabric panel, excessive waist suppression, weak stabilization, lining tension, seam geometry, or pressing. The same applies to difficult closing. A failed slider is possible, but an undersized finished waist or a bulk fabric with lower stretch than the approved sample can produce a similar complaint even when the zipper itself is within specification.
Experienced teams usually begin with three observations: did the zipper operate correctly before sewing, at which operation did the defect first become visible, and does the problem change when the garment is placed under realistic wearing tension? Those questions create a timeline. A problem that first appears after lining attachment should not be investigated in the same way as a problem that is present in incoming trim. That timeline is often the fastest route from a vague defect description to a testable root cause.
Why Do Dress Zippers Pucker, Wave, or Bulge?
Dress zippers usually pucker, wave, or bulge when the zipper tape, shell fabric, stitching, lining, and garment shape do not behave dimensionally in the same way. Common causes include excessive thread tension, uneven feeding, fabric stretching during sewing, weak stabilization, pressing shrinkage, incorrect zipper length, and excessive fit pressure. The defect location and the production stage where it first appears usually indicate which factor should be investigated first.
Sewing Tension and Feeding
Zipper puckering is often blamed on the trim, but sewing conditions are frequently involved. Excessive thread tension can contract the stitch line after the seam leaves the machine, making the sewn area slightly shorter than the surrounding fabric. On a textured crepe, that contraction may be visually forgiving. On satin, lightweight polyester, or fine occasionwear fabric, it can form a repeated row of wrinkles that becomes especially obvious under directional light. The risk rises further when the shell fabric moves easily under the presser foot and the operator compensates by holding or pulling the material during sewing.
Differential feeding creates a related problem. The zipper tape and shell fabric need to travel through the machine at nearly the same effective rate. If the fabric is stretched while the zipper remains stable, the two layers finish the seam with different natural lengths. Once released, the stretched layer tries to recover and the zipper area ripples. Stitch density, presser-foot pressure, needle selection, thread type, seam allowance, and operator handling all influence this balance, so changing only one machine setting without observing the full sewing system can hide the real cause rather than correct it.
Fabric and Zipper Stability
A zipper tape and a dress fabric rarely have identical stretch, recovery, thickness, bending stiffness, or dimensional stability. That mismatch is usually manageable in stable woven dresses, but it becomes more important in jersey, stretch satin, power mesh, bias-cut constructions, and other fabrics that move easily. Stretch percentage by itself is not enough to predict the result. Recovery matters just as much: two fabrics can extend to a similar percentage, yet one returns almost completely while the other remains slightly lengthened after handling, sewing, or wearing.
This is why a zipper method proven in one fabric should not automatically be copied to another just because both materials look similar. A stable polyester satin and a stretch satin may require different handling even if their color and surface sheen are nearly identical. The same applies to structured styles. A soft zipper assembly can distort when inserted beside heavy lining, interfacing, boning, or bulky seam intersections. The practical objective is not to find a universally “best” zipper but to achieve compatible behavior between zipper tape, shell fabric, internal layers, and the expected load of the finished dress.
Bottom-Zipper Bulging
Bulging near the lower zipper end deserves its own diagnosis because it often survives repeated re-sewing. The zipper end creates a transition between two zones: above it, the seam is reinforced and relatively stable; below it, the garment fabric is freer to move. If the pattern curve, fabric extension, lining length, seam allowance, or body tension changes sharply at that point, the transition can push outward. An incorrect zipper length can contribute, but it is only one possibility and should not be treated as the automatic explanation.
A useful check compares the dress flat and on-body. If the zipper looks clean on a hanger but forms a bubble at the back waist or upper hip during fitting, pattern shape and fit pressure become more important suspects. If the bulge is present before fitting, examine zipper length, seam construction, fabric growth, lining balance, and the lower termination of the zipper. Satin makes this defect particularly noticeable because the smooth reflective surface turns a small projection into a visible highlight and shadow, which can become even more obvious in ecommerce photography.
Pressing Effects
A zipper seam can leave the sewing machine looking acceptable and change after pressing. Steam, heat, pressure, and moisture can relax or shrink the shell fabric differently from the zipper tape, especially when the fabric has not been tested under the same finishing conditions used in production. The seam can also be stretched while warm if the garment is handled or pulled aggressively during pressing. When distortion first appears after this operation, the pressing method deserves investigation before the sewing team is asked to reinstall every zipper.
The comparison should be simple and repeatable: inspect the zipper immediately after sewing, after lining is attached, after pressing, and again after the garment has cooled and stabilized. Recording the first point where the appearance changes is far more useful than inspecting only the final dress. On heat-sensitive surfaces such as satin or velvet, pressing tools and pressure also affect appearance around the zipper even when dimensions remain correct. Treating pressing as a controlled production step rather than a purely cosmetic finish reduces unnecessary rework and makes root-cause tracing more precise.
Why Do Dress Zippers Jam, Separate, or Fail to Close?
Dress zippers jam, separate, or become difficult to close because of slider or element problems, lining interference, distorted zipper tape, bulky seam intersections, unsuitable zipper specification, or excessive garment tension. A practical test is to compare performance before installation, after sewing, and during fitting. When a zipper works freely until the dress is worn, fit pressure or construction load is often more important than the zipper component alone.
Zipper Jamming
A jammed zipper is not automatically a broken zipper. The first check should be for material entering the slider path: loose lining, seam allowance, threads, lace edges, mesh, or sequins. These causes are particularly common when an invisible zipper has been sewn close to a soft lining or when decorative fabric has not been cleared from the operating path. Repeated forcing is a poor response because it can damage the slider, distort the zipper tape, or pull stitches from a delicate garment fabric and turn a manageable construction issue into a permanent component failure.
The location of the jam provides useful evidence. If the slider stops at the waist seam but moves smoothly above and below it, accumulated thickness is more likely than a uniformly defective chain. Several layers can meet at that junction, including shell fabric, lining, facing, lace, interfacing, or internal reinforcement. A reliable production check operates the zipper before sewing, after installation, after lining attachment, after pressing, and at final inspection. The first operation after which resistance appears dramatically narrows the list of possible causes and avoids changing trim specifications without evidence.
Separation After Closing
When the chain opens again behind the slider, the slider and zipper elements should be inspected immediately, but the garment cannot be ignored. In fitted dresses, lateral tension around the bust, waist, or hip can continually pull the zipper halves apart. If the finished garment is smaller than the approved measurement, or if bulk fabric stretches less than the approved sample, the zipper may experience substantially more load even though the construction drawing has not changed. A replacement slider may temporarily improve performance while leaving the underlying fit problem untouched.
The defect location is valuable. Separation concentrated at the tightest part of the dress suggests a different investigation from random separation along the complete chain. Size distribution also matters. If one size shows the problem much more frequently, finished measurements and grading should be compared with the approved specification. Material substitution deserves attention as well. A visually similar fabric with lower extension or different recovery can transfer more force to the zipper, which is one reason bulk fabric approval and fit confirmation should remain connected to trim performance rather than being managed as separate topics.
Excessive Pulling Force
A zipper does not need to be completely stuck to create a quality issue. If the wearer must apply noticeably high force to move the slider, repeated use can stress the puller, slider body, tape stitching, shell fabric, and seam. A basic open-close test on a flat garment may therefore be insufficient for fitted styles. The useful comparison is unloaded operation, operation on the finished hanging garment, and operation under representative wearing tension. The point where resistance first increases indicates where the investigation should move next.
Structured corset dresses deserve special attention because boning, cups, interlining, lining, waist shaping, and non-stretch panels can concentrate load around the closure. A bulky waist seam can also create a local ridge that the slider struggles to cross. In those cases, the practical correction may involve reducing seam bulk, grading allowances, changing internal placement, adjusting pattern measurements, or revising the zipper specification. Pulling harder is not quality control. The objective is a closure that operates consistently under the conditions the customer will actually experience while wearing the dress.
When Fit Is the Real Problem
Repeated zipper complaints in the same size and at the same body level should trigger a measurement review. If the waist is undersized, the zipper is being asked to compensate for missing garment circumference. The same principle applies when a fitted style uses a bulk fabric with less stretch than the development sample. Strengthening the zipper may postpone failure, but the load can simply migrate to the seam, tape stitching, surrounding fabric, or wearer comfort, creating a different defect instead of solving the first one.
A useful fit investigation compares actual finished bust, waist, and hip measurements with the approved size specification, then evaluates fabric extension and recovery against the development standard. Side-seam position, drag lines, and garment balance also provide clues. If side seams rotate toward the zipper or strong horizontal stress lines converge near the closure, the garment may be distributing tension incorrectly. Functional zipper performance should therefore be read as part of fit behavior, especially in bodycon, corset, stretch satin, and other close-fitting constructions where the closure carries more load than in a relaxed dress.
How Do Fabric and Dress Construction Cause Zipper Problems?
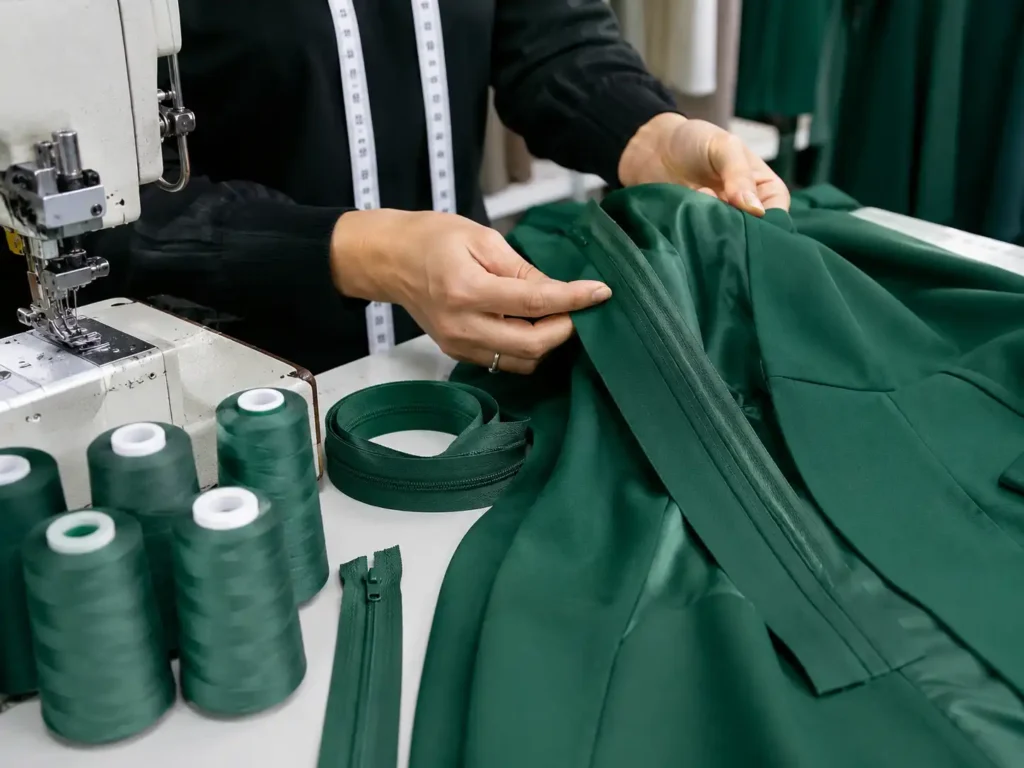
Fabric and dress construction affect zipper performance through stretch, recovery, stiffness, thickness, friction, seam bulk, lining behavior, and fit tension. Satin can reveal small puckers, stretch fabrics can ripple around stable zipper tape, lace and sequins can obstruct the slider, and corset structures can increase closure load. Reliable production therefore evaluates the zipper as part of the complete garment system rather than as an isolated trim component.
Fabric-Specific Risks
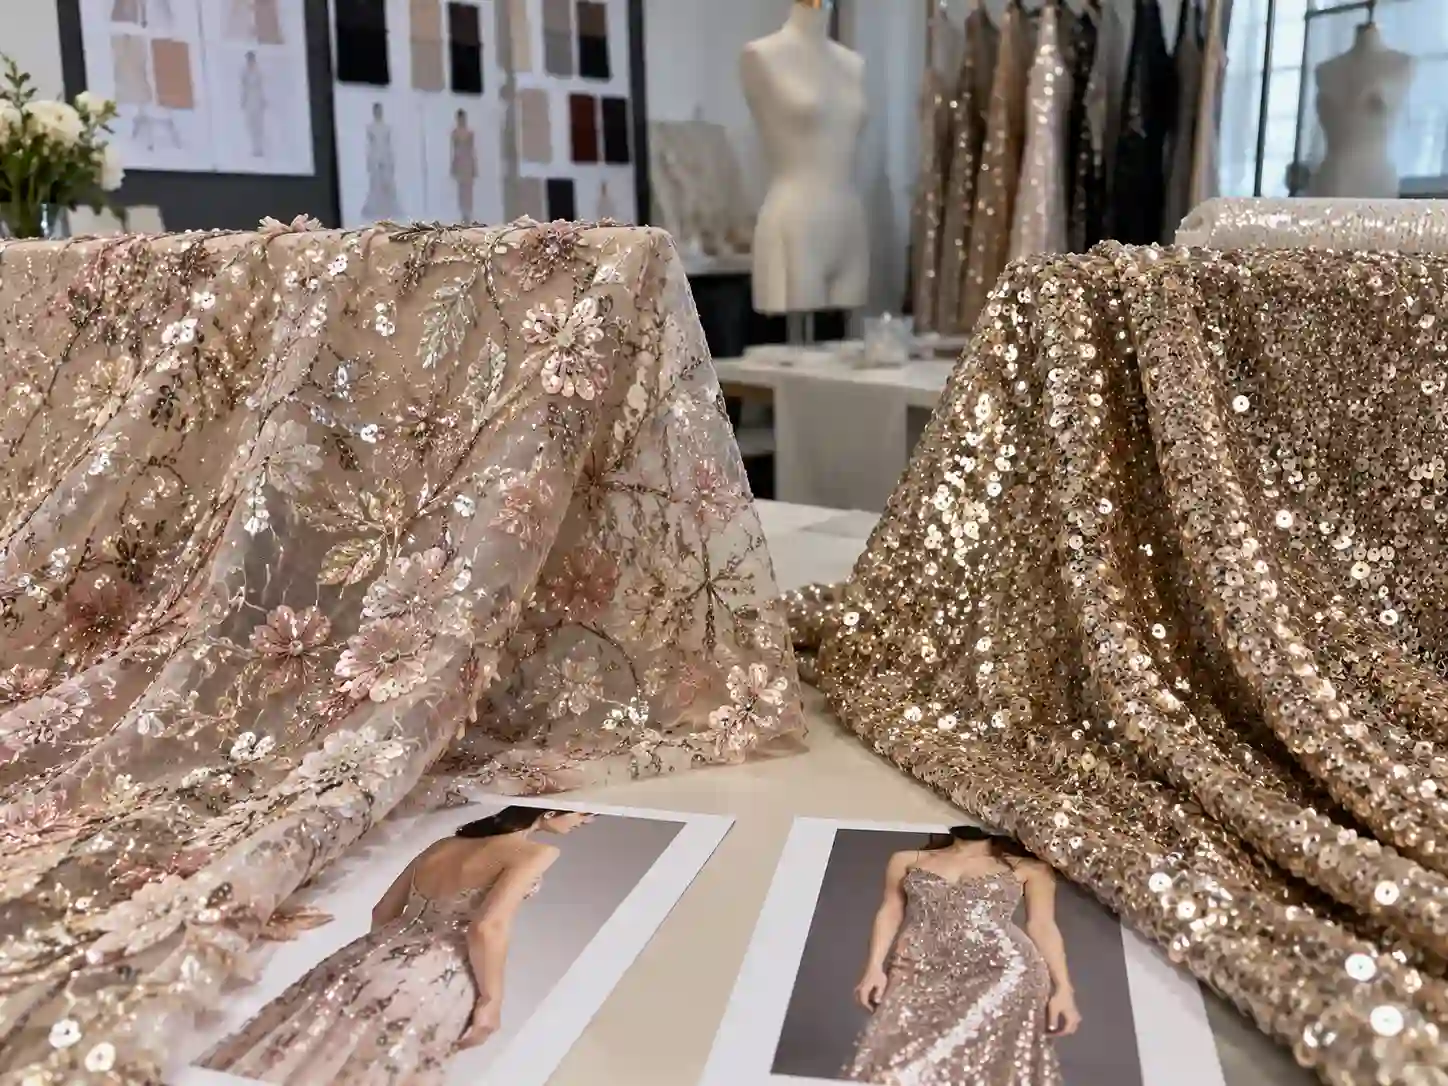
The word “dress” covers very different material systems, so one zipper method cannot be expected to perform identically across every style. Satin demands unusually clean surface control because its smooth face and directional reflection make small distortions easy to see. Stretch satin adds movement and recovery to that visual sensitivity. Jersey and power mesh can elongate during sewing while the zipper tape remains comparatively stable. Lace introduces irregular thickness, especially around motifs, while sequin fabrics can place hard decorative elements directly in the slider and needle path if the zipper zone is not prepared correctly.
Velvet presents a different combination of risks because the pile can shift between layers and may show pressure marks after sewing or pressing. Lightweight woven fabrics can be less bulky but more prone to feed movement, while heavier structured fabrics may create thickness around the zipper opening. These differences show why fiber content alone is not enough for process planning. Fabric weight, construction, finish, stretch direction, recovery, surface friction, drape, and internal support should all be considered when selecting the zipper and defining how it will be installed.
| Fabric / Construction | Typical Zipper Risk | What to Control First | Useful Development Check |
| Satin | Puckering, visible waviness | Feed balance, thread tension, pressing | Compare seam before and after pressing |
| Stretch satin | Rippling, fit-related resistance | Stretch/recovery, stabilization | Fit test with approved bulk-equivalent fabric |
| Jersey | Fabric growth beside zipper | Avoid stretching during sewing | Measure seam length before/after installation |
| Power mesh | High extension, edge instability | Reinforcement and controlled feeding | Test edge stability with selected zipper tape |
| Lace | Uneven bulk, slider interference | Motif placement and clearance | Check thick motifs at zipper path |
| Sequin fabric | Jamming, seam thickness | Clear decorative elements near zipper | Operate slider through all decorated zones |
| Velvet | Layer shifting, pressure marks | Feed control and pressing pressure | Inspect pile direction and seam marks |
| Corset structure | High closure load | Fit, boning, seam bulk | Operate zipper during representative fitting |
Bodycon Dress Loads
A bodycon dress continuously balances stretch and recovery around the bust, waist, and hips. When the pattern and fabric work together, that tension is distributed through the garment and the zipper remains relatively stable. When the pattern is too tight or the fabric does not recover as expected, the zipper can become a high-stress line. Side seams that rotate toward the back, strong horizontal drag lines, or localized distortion beside the zipper can indicate that the closure is receiving load generated elsewhere in the garment rather than failing on its own.
Bulk fabric variation can amplify the problem. A sample developed in a fabric with strong recovery may fit cleanly, while a later lot with weaker recovery can grow more during handling and change the way the zipper seam sits. A substitute fabric with lower extension may produce the opposite effect and make the zipper harder to close. For fitted dresses, finished circumference, stretch direction, extension, recovery, seam position, and the approved fit effect need to be reviewed together. The zipper should not become the component that compensates for a mismatch between the approved pattern and the behavior of the actual production fabric.
Corset Dress Loads
Corset dresses behave differently from ordinary fitted dresses because the bodice can include shell fabric, lining, interfacing, boning, cups, underwire, grip tape, and reinforced waist sections. These layers reduce how much the bodice can deform around the closure, so zipper performance becomes more sensitive to pattern balance and internal placement. A zipper positioned beside boning or a thick seam allowance may also encounter additional stiffness and bulk, which can increase pulling resistance even when the zipper is not defective.
The waist is the most important zone to assess because strong shaping can concentrate load at the closure. A professional fitting checks bust stability, waist circumference, cup position, boning placement, upper-edge security, lining tension, and zipper operation as one system. When the zipper is difficult to close, simply specifying a stronger zipper may not be the most appropriate first correction. If waist reduction is excessive or internal structure is crowding the closure, the revised component may carry more load but the dress can still feel uncomfortable, distort visually, or fail at another seam.
Lining and Internal Construction
Lining causes more zipper problems than many teams expect because it can influence both appearance and operation. If the lining is attached shorter or tighter than the shell, it may pull the zipper area inward and create rippling. If it is too loose, it can fold into the slider path. Uneven attachment can twist one side of the opening. These problems may remain hidden during flat inspection and appear only when the garment is dressed, moved, or repeatedly opened and closed.
Seam intersections create another layer of risk. At a waist seam, shell fabric, lining, facing, lace overlay, corset reinforcement, or other materials may converge in a small area. The slider then has to move across a sudden thickness change. Careful trimming, grading, pressing, and construction sequencing can reduce that bulk before the zipper is installed or before the lining is closed. The inside of the finished dress should therefore be inspected as seriously as the outside. A clean external seam can still contain loose allowances or lining positioned close enough to become a customer complaint after several wears.
Is the Zipper Defective or Is the Installation the Root Cause?
A zipper is more likely to have a component defect when it performs poorly before sewing or when the same problem follows a zipper batch across different garments. Installation is more likely when a zipper works normally before sewing but develops waviness, resistance, twisting, misalignment, or bulging after stitching, lining, pressing, or fitting. Comparing performance at each production stage is the clearest way to separate the two.
Signs of Component Failure
Component problems generally remain visible when garment variables are removed. A slider may move irregularly along an unused zipper, teeth or coil may show inconsistency, tape may be frayed or distorted, or stops may be insecure. Separation during simple unloaded operation also deserves immediate attention. Batch behavior is particularly informative: if several zippers from the same trim lot show the same resistance before sewing, the component should be investigated before the sewing line is asked to modify its method.
The opposite pattern is equally useful. If one zipper lot performs normally across several dresses but develops problems only in a particular stretch-satin or corset style, the garment environment becomes a stronger suspect. Component inspection should include the tape, chain or coil, slider, puller, top and bottom stops, straightness, and repeated opening and closing. For programs with defined performance requirements, brands may also use supplier or laboratory tests for strength and operability, but the acceptance criteria should match the intended dress application rather than applying a single generic value to every garment.
Signs of Installation Failure
Installation defects often reveal themselves through timing. The zipper arrives straight and works smoothly. After sewing, it waves. After lining attachment, it starts catching. After pressing, puckering becomes more visible. During fitting, the lower end bulges. Each change adds a limited set of variables, which makes the production timeline one of the most effective diagnostic tools available. If the symptom appears immediately after one operation, that operation should be investigated before a completely different part of the supply chain is blamed.
Common installation indicators include inconsistent seam allowance, unequal feeding, stretched shell fabric, poor stabilization, misaligned waist seams, excess bulk, lining interference, and asymmetry between the two sides of the opening. Comparing several garments matters as well. A single defect can be caused by one-off handling, while the same problem appearing repeatedly in the same location suggests a method, pattern, material, or specification issue. A simple record containing style, size, zipper lot, sewing line, defect position, and first observed stage can reveal patterns that are easy to miss when garments are reviewed one at a time.
Root-Cause Sequence
A practical investigation works from the simplest independent variable toward the complete garment. Start with the zipper: does it operate correctly before sewing? Then check the fabric for stretch, growth, shrinkage, and directional instability. Review the pattern and fit to confirm that the opening length and body measurements are correct. Move next to sewing, lining, internal structure, pressing, and finally the finished garment under representative wearing conditions. At each step, ask the same question: was the defect already present before this operation?
For example, if an invisible zipper runs smoothly before sewing and immediately after installation but becomes difficult after the lining is closed, lining clearance and seam bulk become stronger suspects than the slider. If the seam stays flat through pressing but bulges only on the body, fit and seam geometry deserve closer review. This stepwise method prevents teams from changing several variables at once. When the zipper supplier, thread tension, pattern, and pressing method are all altered simultaneously, a better result may appear, but the team still does not know which change actually fixed the problem.
Corrective Action Verification
Finding a plausible cause is only half the work; the correction needs to be verified under controlled conditions. If fabric stretching during sewing is suspected, sew a short trial using the revised handling method while keeping the zipper, fabric, thread, and pattern unchanged. If the waviness disappears consistently, the evidence becomes stronger. If fit pressure is suspected, compare a corrected measurement or pattern adjustment using the same zipper. The purpose is to change one meaningful variable at a time whenever production conditions allow.
Once the correction is proven, it should be transferred into the approved construction method, PP sample, Golden sample, work instruction, or QC reference rather than remaining as verbal knowledge with one technician. This becomes especially important for repeat orders, new colors, and fabric substitutions. Without recorded corrective action, a factory can solve the same zipper defect again every season. With the cause and solution documented, the next production run can begin from the corrected standard and focus its early inspection on the known risk point instead of rediscovering the problem after bulk sewing.
How Do Manufacturers Prevent Dress Zipper Defects?
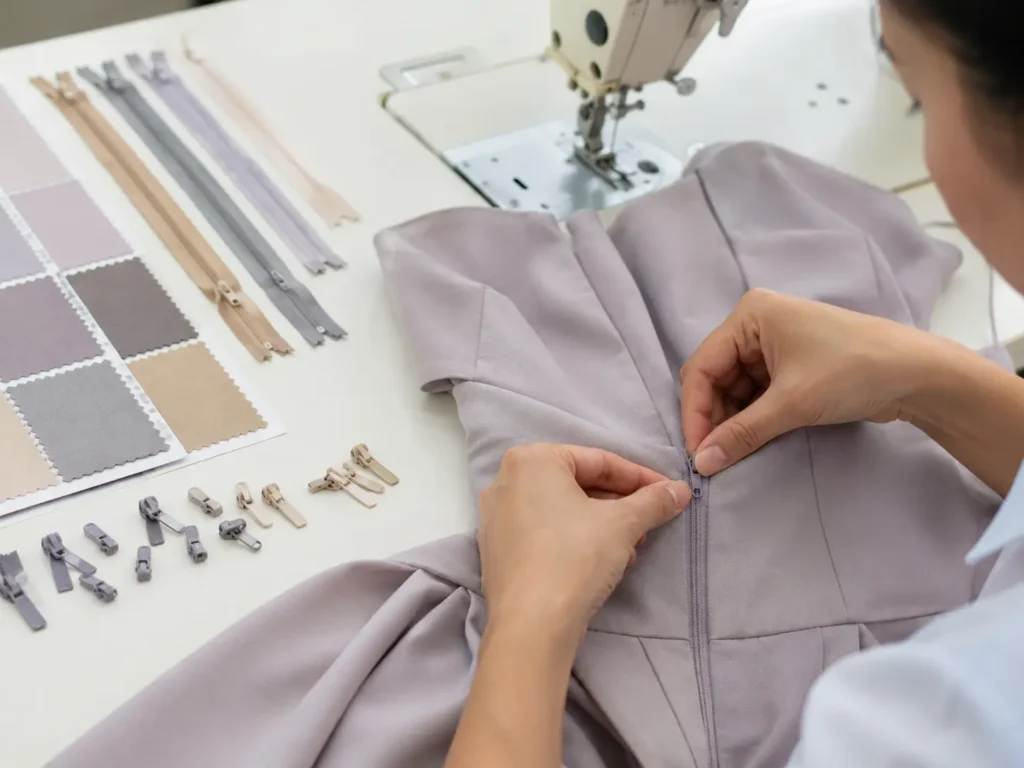
Manufacturers prevent zipper defects by controlling the full sequence: zipper approval, fabric compatibility, sample development, fit confirmation, sewing setup, inline inspection, pressing, finished-garment testing, and bulk reference standards. Prevention is more effective than sorting defects at final inspection because zipper problems often begin several operations earlier. The approved sample, technical specifications, and QC records should clearly define what acceptable zipper appearance and operation look like.
Before Sewing
The first control point is trim approval. Confirm the zipper type, usable length, tape color, chain appearance, slider design, stops, puller security, and basic operation before it enters production. The pattern opening should also be checked against the actual zipper rather than assuming that a nominal purchased length automatically suits the garment. This becomes more important when a style changes from a stable woven to a stretch fabric, from an unlined to a lined construction, or from a relaxed silhouette to a more structured fit.
A short sewing trial is often worthwhile when the material is stretch satin, lightweight satin, power mesh, unstable jersey, velvet, lace, or sequin fabric. The trial can show whether the fabric grows during sewing, whether the selected zipper creates an obvious stiffness mismatch, whether reinforcement is needed, and whether pressing changes the seam appearance. Bulk production should not begin simply because the zipper specification looks correct on a bill of materials. The actual zipper, actual fabric, actual seam construction, and expected fit load need to work together before the method is treated as production-ready.
| Production Stage | Core Zipper Check | Evidence to Keep | Typical Action if Failed |
| Trim approval | Type, length, color, slider, tape, stops | Approved trim sample / BOM | Hold, replace, or re-specify trim |
| Development sample | Flatness, operation, fit | Sample comments and photos | Adjust construction or pattern |
| Revised sample | Previous defect correction | Revision record | Verify root cause |
| PP sample | Bulk-ready construction | Approved PP / Golden sample | Approve or revise method |
| Early bulk | First-piece consistency | First-piece QC record | Correct line setup immediately |
| Inline QC | Flatness, alignment, operation | Line inspection record | Stop, repair, retrain, recheck |
| Finished QC | Appearance, function, measurements | Garment QC report | Repair and investigate |
| Final inspection | Lot consistency | Final inspection report | Release, rework, or hold |
| Repeat order | Match approved reference | Previous BOM, pattern, QC record | Revalidate changed materials |
During Sewing
Inline inspection catches zipper defects while they are still relatively inexpensive to correct. Inspectors should look at flatness, symmetry, seam allowance, stitch condition, waist-seam or design-line matching, and slider clearance. The zipper should be operated after installation rather than waiting until the garment is completely lined and finished. If resistance, twisting, or waviness is already visible at this point, continuing the garment through several more operations increases repair time and can make the original cause harder to identify.
Early-bulk comparison is particularly important. If the first five to ten garments from a new line begin to show the same ripple, that is a process signal, not something to be ignored until final inspection. The approved sample should be available to operators and QC so that “flat enough” does not depend on personal opinion. For designs with waist seams, back yokes, lace joins, or strong horizontal lines, alignment across the zipper should be checked at the same time. A closure can function normally while the garment still looks poorly constructed because visual landmarks do not meet cleanly.
Finished-Garment Checks
Finished zipper QC should combine operation, appearance, and fit. The slider needs to travel through the complete opening without abnormal catching, but inspectors should also review puckering, waviness, bulging, twisting, exposed coils, top-edge alignment, and seam matching. A fitted dress that passes only while hanging has not been fully evaluated. Where appropriate, a dress form or fit check should confirm that the closure remains functional under intended bust, waist, and hip tension and that the zipper does not become the point where excessive garment stress is concentrated.
The inspection method should be defined before shipment. Brands can classify zipper findings within their own defect standards, distinguishing serious functional failure from appearance deviations according to garment category and market expectations. Consistency matters more than inventing a universal tolerance after a dispute occurs. For large programs, the final inspector also needs a clear reference for what was approved during development. That reference can include the PP or Golden sample, technical measurement sheet, zipper specification, and photographs of critical details so decisions remain consistent across lines, colors, sizes, and inspection days.
Samples and Bulk Consistency
A good development sample does not guarantee good bulk production because sample rooms and production lines operate under different conditions. Sample machinists usually spend more time on each piece, while bulk sewing introduces more operators, repeated handling, higher throughput, and potentially wider fabric variation. The successful sample therefore needs to be converted into a repeatable method covering zipper type, opening length, seam allowance, stitch method, stabilization, lining attachment, waist-seam treatment, pressing, critical measurements, and the expected final appearance.
The PP sample and Golden sample are especially valuable because they provide a physical benchmark for production and QC. Jinfeng Apparel’s documented quality process includes incoming, cutting, sewing, finished-garment, pressing, and packing checks, with zipper flatness reviewed during sewing and zipper operation reviewed at garment inspection. Its internal case records also include a roughly 20,000-piece US occasionwear program where satin color consistency, zipper flatness, lining comfort, and multi-color bulk stability were key control points. The lesson is practical: the goal is not one perfect sample, but a method that reproduces the approved result consistently across bulk production and repeat orders.
Conclusion
A zipper defect is rarely just a “zipper problem.” In professional dress manufacturing, the visible symptom can originate from the component, but it can just as easily be created by fabric movement, pattern shape, fit pressure, seam bulk, lining, sewing tension, or pressing. The most reliable diagnosis follows the problem through production and identifies the exact stage where performance or appearance changed. That approach reduces unnecessary trim replacement, prevents repeated rework, and makes corrective action easier to carry into bulk and repeat production.
For fashion brands developing satin, bodycon, corset, lace, mesh, party, occasion, or other zipper-sensitive dresses, the manufacturer’s ability to explain the cause matters as much as the ability to repair one garment. A useful development partner should be able to compare the approved sample with bulk fabric, pattern measurements, zipper specification, sewing method, lining construction, pressing, and final fit before deciding what needs to change. When a recurring zipper defect is documented with clear photos, garment measurements, fabric information, and the stage where it first appears, technical review becomes much faster and more objective.