Skip to content


The smallest construction detail can change how an entire mesh dress feels. A sheer sleeve may look delicate until a thick seam creates an obvious line against the arm. A fitted dress may stretch beautifully across the body while its side seam pulls, puckers, or snaps when someone sits down. Those problems are not always caused by careless sewing. Often, the seam was simply designed for a different fabric or a different amount of movement.
For most stretch mesh garments, a balanced four-thread overlock is a dependable starting point because it joins the panels while allowing useful flexibility. French seams suit lightweight, relatively stable sheer mesh when hidden raw edges matter most. Narrow zigzag stitching provides another flexible option, while binding works well at selected necklines and openings. The best finish depends on mesh structure, required stretch, transparency, and seam location.
At Jinfeng Apparel, we develop custom women’s clothing in which fabric choice and garment construction have to work together. Mesh dresses, fitted silhouettes, sheer overlays, and lined designs each raise different sewing questions. A good-looking sample is only the beginning: the approved seam must also survive fitting, handling, and consistent production. The interesting part is that two nearly identical-looking meshes may need different stitches, even when they are used in the same dress. Understanding that difference can prevent an expensive change after the sample has already been approved.
What Is the Best Seam Finish for Mesh?
A four-thread overlock is usually the most practical starting choice for stretch mesh, provided the stitch remains secure and the fabric does not wave. French seams can give stable sheer mesh a neat enclosed edge, while narrow zigzag stitches accommodate stretch without overlocking. No method is best for every mesh: the right seam must suit the fabric, garment shape, expected movement, and desired appearance.
What Makes a Mesh Seam Work?
A mesh seam has several jobs, and they do not always agree with one another. It must hold two panels together without tearing the yarns around the mesh openings. It may need to stretch as someone moves, while still returning to a smooth shape afterward. If the garment is transparent, the seam allowance can be as visible as the outside of the dress, so appearance matters just as much as mechanical performance. A narrow seam that looks refined can fail if the fabric has too little material to support the stitches.
Consider a simple extension comparison. Mark a 100 mm length along the direction the garment will stretch. If the material reaches 135 mm under a consistent test condition, that is 35% extension: (135 − 100) ÷ 100 × 100. This does not mean every seam must stretch by 35%. A fitted side seam may need substantial movement, while a neckline may intentionally be stabilized to prevent it from growing. What matters is whether the stitched area handles the movement required by its location. We also inspect recovery, because a seam can survive stretching yet remain permanently wavy when released.
Does Mesh Need Edge Finishing?
Many knitted meshes do not unravel like loosely woven fabric, but that does not make an unfinished seam automatically acceptable. Joining the panels, controlling the raw allowance, and presenting a tidy interior are three related but different requirements. An overlock can join and neaten the edge in one operation; a French seam encloses the allowance; and a zigzag joining seam may leave a raw edge that still needs a separate appearance decision. Open-hole mesh can also allow stitches to pull against relatively few yarns, creating local distortion even where the cut edge itself does not fray.
The right decision depends on the garment. An exposed allowance inside a transparent evening dress may create a dark strip that spoils the intended lightness. The same allowance may be hidden beneath a lining in a fitted style, making flexibility more important than concealment. At a neckline or armhole, an exposed edge can also rub against skin. Instead of finishing everything by habit, identify what each area needs: joining strength, edge security, a discreet look, comfort, or deliberate reinforcement. A finish that adds thickness without solving one of these problems is not necessarily an improvement.
What Should Be Checked Before Choosing?
Start with the actual fabric rather than the label on the sample card. Two materials sold as “stretch mesh” may have different hole sizes, yarn strength, weight, stretch direction, and recovery. Check whether the greatest stretch runs across or along the fabric and whether the garment pattern places that direction where the wearer needs it. Then examine the seam location. A straight side seam in a bodycon dress faces different demands from a curved, lightly loaded seam in a sheer sleeve or an opening that needs shape control.
We find it useful to compare two or three short construction samples when the answer is uncertain. Use the intended production mesh, thread, and lining arrangement, and mark the samples so the machine settings are recorded. Examine each seam relaxed and gently extended, looking for broken yarns, skipped stitches, a visible ridge, uneven allowances, or permanent waves. The decision should be based on how the seam looks and functions in the garment, not just the speed of the machine. This early comparison is especially worthwhile when a brand plans to use the same mesh across several styles in a collection.

Which Seam Finishes Work for Mesh?
Four-thread overlock, French seams, narrow zigzag stitching, and binding are useful mesh finishes, but they solve different problems. Overlock combines secure joining with edge neatening on many stretch meshes. French seams hide raw allowances on relatively stable sheers. Zigzag stitching offers flexibility with a conventional machine, while binding controls selected exposed openings. Compare stretch, thickness, visibility, and fabric damage before choosing.
Is Overlock Best for Stretch Mesh?
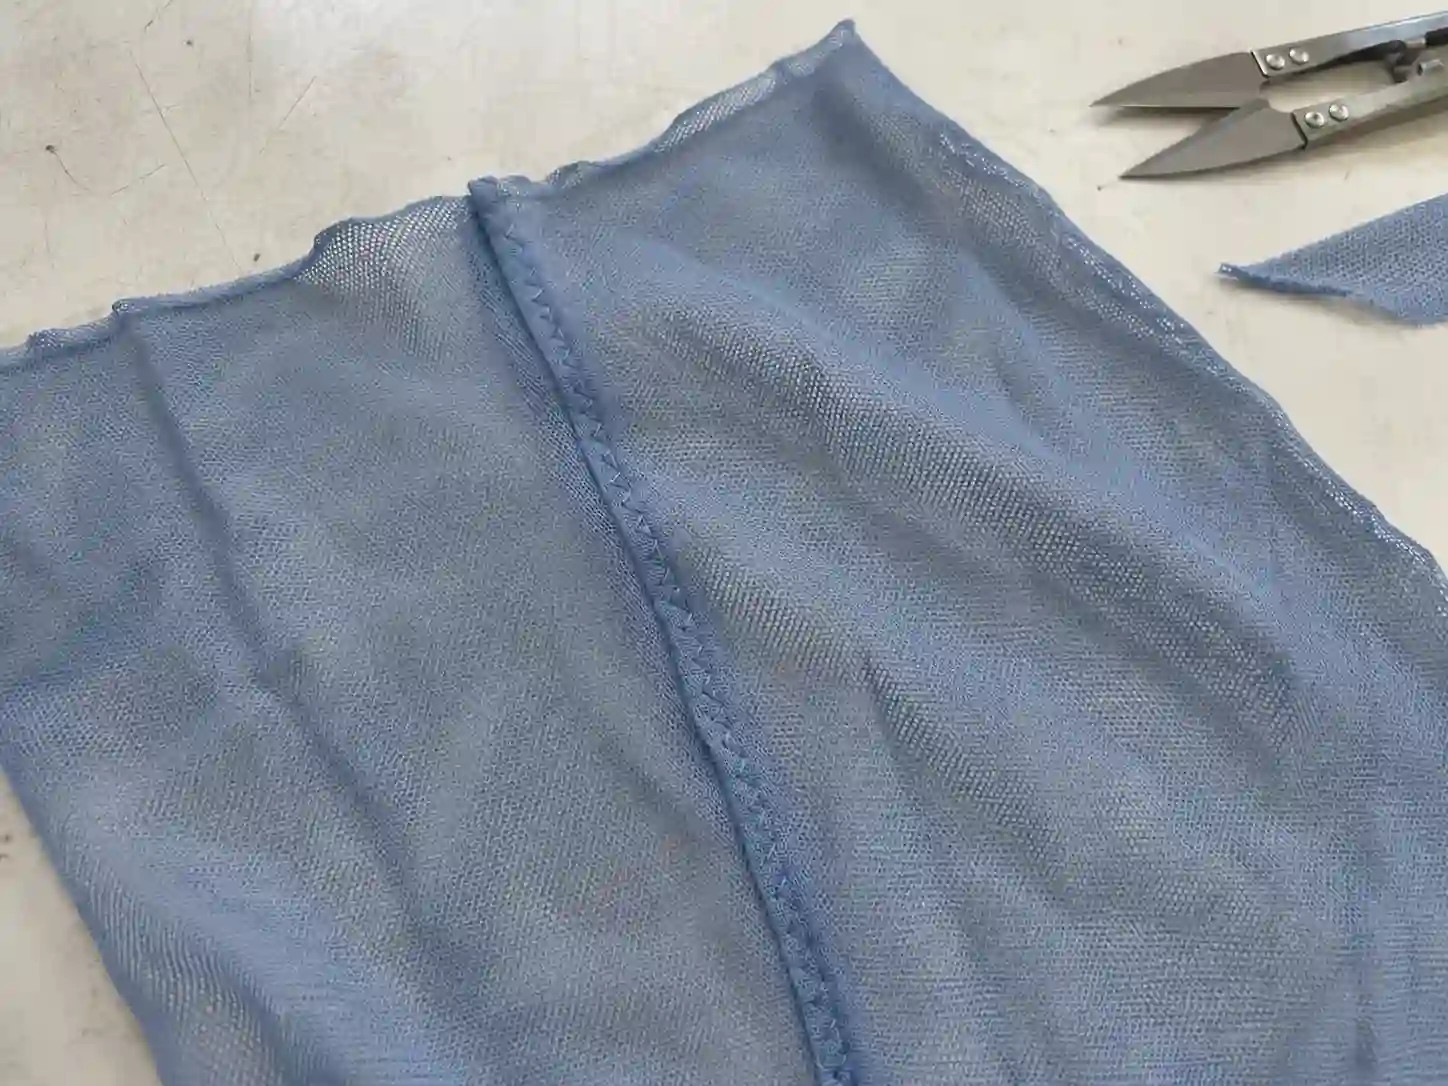
A four-thread overlock uses two needle threads and two looper threads. That construction can join stretch panels while wrapping the cut edge, often making it a sensible choice for side seams on fitted mesh dresses and stretchy tops. It is also efficient in repeat production because joining and edge finishing happen together. Efficiency, however, does not excuse a poorly adjusted seam. An overlock edge may ripple if the machine stretches the fabric as it feeds, and heavy looper coverage may create a dark, visible line through fine sheer material.
Three-thread overlock is sometimes useful for neatening an edge or for carefully selected low-stress applications, but it should not automatically replace a more secure joining construction in a highly stressed area. Open-hole mesh creates another challenge: if the openings are large, too little yarn may lie beneath the stitching to resist pull-out. A compatible support or a different seam arrangement may be needed. On any overlock sample, check the relaxed length, seam flatness, visible thread bulk, and behavior after extension. The right setup is the one that does not exchange attractive speed for poor garment performance.
Are French Seams Suitable for Mesh?
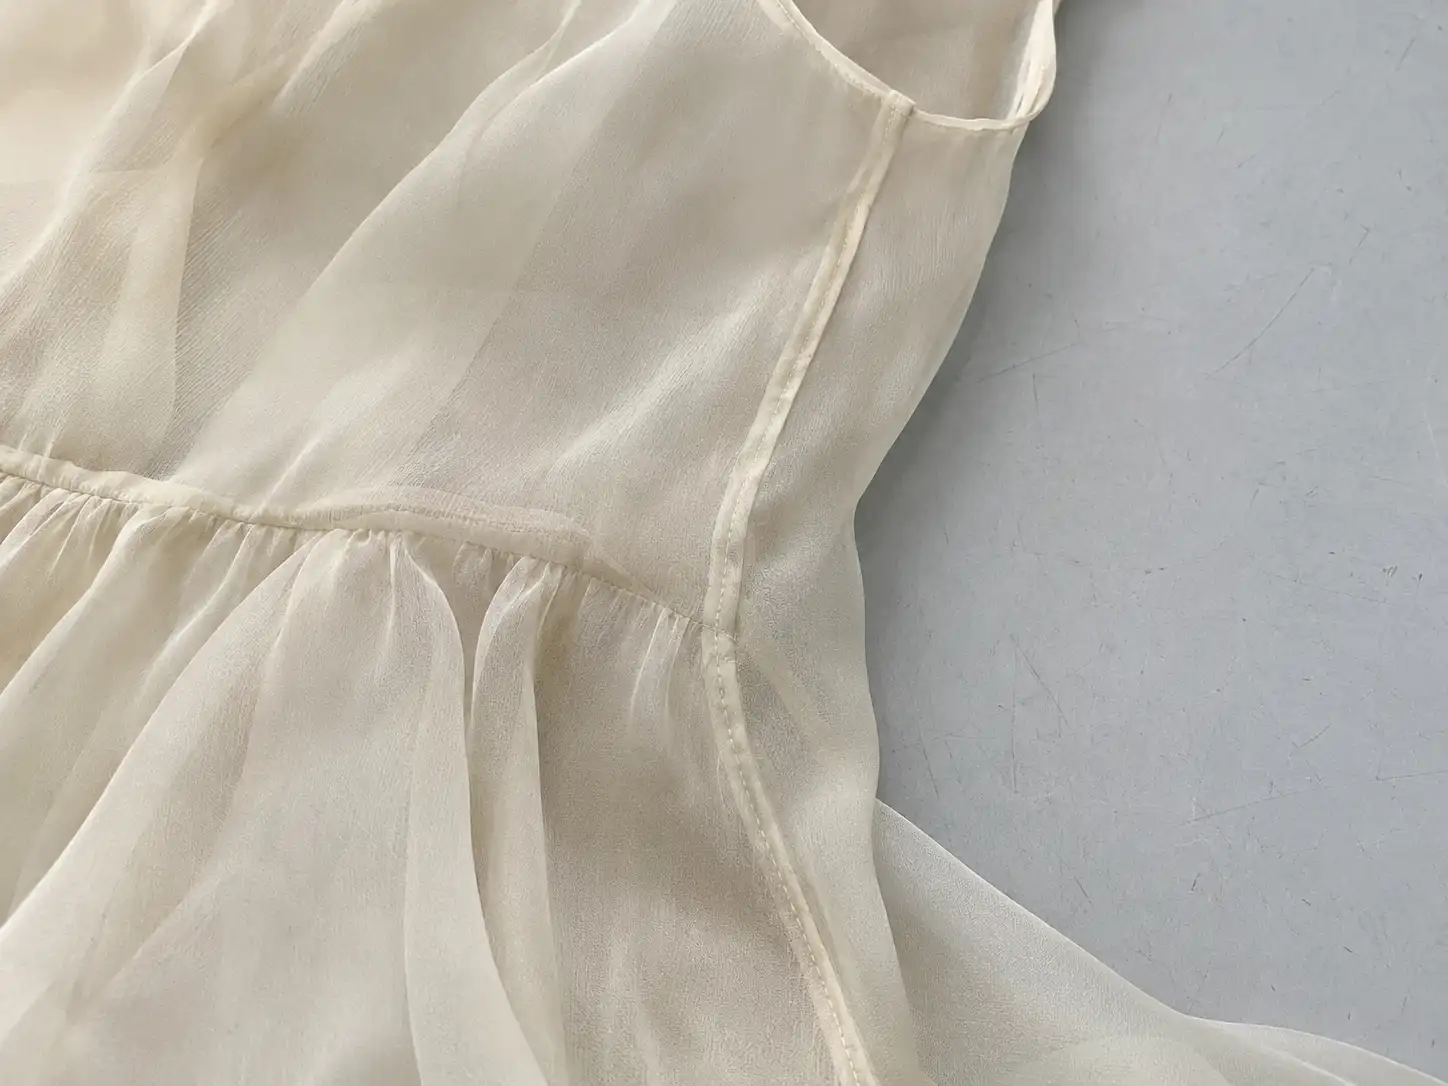
A French seam hides the cut allowances inside a second line of stitching. On lightweight, relatively stable sheer mesh, it can give both sides of the garment a clean appearance without exposed overlock loops. This makes it attractive for selected sleeves, loosely fitted overlays, and delicate eveningwear. Accurate trimming and a consistently narrow first seam are essential, because an uneven allowance becomes trapped inside the finished seam and can create an irregular line visible through the fabric.
The drawback is restricted movement. A conventional French seam generally uses straight stitching and folded allowances, so it may not tolerate the extension demanded by power mesh or a tight bodycon panel. It can also become bulky on dense or embroidered materials and awkward around a sharply curved armhole. A French seam should therefore be chosen for the right combination of fabric stability and seam location, not simply because it sounds more luxurious. If a sheer dress needs a little stretch, a carefully controlled flexible seam may provide a better result, even when its stitching is more visible.
How Does Zigzag Stitching Compare?
A narrow zigzag is a useful option when stretch is required and a serger is unavailable or unsuitable for the detail. The thread travels from side to side, allowing the seam to extend more readily than a comparable ordinary straight stitch. On suitable lightweight stretch mesh, initial trial settings might use approximately 1–2.5 mm stitch width and 2–3 mm stitch length. These are development starting points, not universal specifications: the mesh structure, thread, and machine may call for different values.
A zigzag joining seam does not automatically enclose its raw edge, and the stitching itself may be visible through sheer fabric. Setting the width too high can create a conspicuous line; setting it too low may reduce the useful stretch. Thread tension and feeding matter just as much as the stitch shape. Test several samples by changing one variable at a time, then check both the relaxed appearance and the required extension. A seam that seems fine on a flat swatch may still become a tight, uncomfortable line once it is fitted across the waist or hip.
When Is Binding the Better Choice?
Binding is usually more useful at an exposed opening than along every joining seam. A neckline, armhole, or cutout may need a defined edge that does not stretch out during fitting. Compatible stretch binding or fold-over elastic can provide that control while allowing some movement, provided its extension and recovery suit the mesh. The binding material should be tested with the exact garment fabric, because adding even a narrow strip changes weight, thickness, and the way an edge lies against the body.
For sheer garments, the added layer may be highly visible. Sometimes that is desirable: a crisp bound neckline can look intentional on a structured mesh dress. On a soft transparent overlay, the same finish may look heavy or feel stiff. Binding width, color, attachment method, and the direction of stretch all influence the result. At Jinfeng Apparel, neckline and armhole treatment is considered alongside lining placement and overall fit, rather than left as a last-minute edge-finishing detail. The best binding feels like part of the design, not a repair applied to it.
| Seam finish | Typical application | Illustrative trial allowance | Main strength | Watch for |
| Four-thread overlock | Stretch mesh body seams | About 6–10 mm, subject to equipment | Flexible joining and edge control | Waviness and visible thread bulk |
| Three-thread overlock | Edge neatening; selected low-stress areas | About 3–6 mm | Lightweight edge coverage | Insufficient security for stressed joins |
| French seam | Relatively stable sheer overlays | About 6–10 mm total planned allowance | Enclosed raw edges | Limited extension and bulk |
| Narrow zigzag | Stretch seams and development samples | About 6–10 mm | Flexible conventional-machine option | Skipped stitches or exposed allowance |
| Binding / fold-over elastic | Necklines, armholes, selected cutouts | Set by binding method | Controlled, deliberate edge | Restriction, thickness, color contrast |
The allowances shown are examples for initial development, not fixed industry requirements. Machine specifications, fabric openness, garment stress, and approved construction details determine the final allowance. A narrow allowance can reduce visible bulk on transparent mesh, but cutting too close to the stitching may leave too little yarn support. When comparing finishes, the actual allowance should be measured after sewing and checked against the sample-approved construction rather than chosen from a table alone.
How Does Mesh Type Affect Seam Choice?
Mesh structure changes the seam decision. Fine sheer mesh generally needs a light, discreet finish; stretch and power mesh usually need flexible stitches that remain secure under movement. Large-hole mesh may require more fabric support at the stitch line, while embroidered mesh creates bulk and alignment concerns. Evaluate the actual knit or net structure, stretch direction, recovery, transparency, and decoration before selecting the seam.
Which Finish Suits Sheer Mesh?
On a sheer dress, the seam is rarely invisible. Overlapping allowances create a strip with more fabric layers, and the strip can appear darker against skin or lining. A narrow enclosed seam may work beautifully on a relatively stable overlay, while an elastic sheer panel often needs a finer flexible stitch. A clean appearance is therefore not just about choosing French seams over overlock. It also depends on how much fabric is folded into the allowance, where the join is placed, and what sits behind the transparent layer.
Thread color should be judged in the garment’s intended context. A thread that blends with beige mesh on a white table may stand out against a darker lining; black stitching can look elegant when it follows an intentional style line but heavy when it unexpectedly cuts across a transparent sleeve. Try the sample over the actual lining and, where appropriate, against a neutral or skin-toned background under ordinary lighting. If a line remains visible, consistency may be more valuable than attempting to hide it completely. A straight, even seam can look deliberate; irregular allowances almost never do.
What Works for Stretch and Power Mesh?
Stretch mesh and power mesh are not interchangeable simply because both can extend. Some stretch meshes are soft and decorative, while firmer power meshes provide resistance and recovery for support panels. A four-thread overlock or suitably adjusted stretch stitch is often a good starting point, but the needed extension depends on the seam position. A mesh sleeve may need easy movement; a firm internal support layer may need a different balance of flexibility and stability.
Measure stretch in the direction that the pattern uses. A fabric may extend freely across the width but much less along the length, and rotating the cutting direction can change garment fit dramatically. Recovery matters as much as maximum extension. If a 100 mm marked section extends to 140 mm but returns to 103 mm after a consistent recovery interval, it retains 3% residual elongation relative to its starting length. That observation is useful for comparing materials, although it is not a universal pass-or-fail threshold. The finished seam should be examined for the same loss of shape, because thread security alone does not guarantee a stable garment.
How Do Fine, Open, and Embroidered Mesh Differ?
Fine mesh and large-hole mesh need different kinds of care. Fine mesh can be damaged by an overly large needle or excessive stitch density. Large-hole mesh may lack enough continuous yarn at the edge to hold a narrow stitch securely. For fine mesh, the aim is a light, carefully balanced seam with limited unnecessary penetration. For open mesh, consider whether the stitch line needs additional support or a slightly different placement, while avoiding an allowance so narrow that the edge can pull away.
Embroidered mesh adds another layer of complexity. Dense motifs can make a seam uneven as it crosses from a thin open area into a heavily stitched area, and decorative threads can be damaged by trimming or sewing. Inspect the motif layout before cutting, especially where panels must meet symmetrically. Removing selected embellishments from a seam allowance may sometimes help, but only when the embroidery construction permits it without loosening neighboring threads. The more decorative the fabric, the more important it becomes to test the actual seam placement instead of relying on a plain-mesh sample. A beautiful finish must protect the decoration as well as the underlying net.

How Do You Sew Mesh Without Puckering?
To sew mesh without puckering, match the needle and thread to the fabric, balance stitch tension, and let the machine feed the material without pulling it. Use a stretch-compatible stitch where movement is needed. On suitable overlock machines, differential feed can reduce wavy edges; delicate meshes may benefit from temporary support. Approve settings on the actual fabric and lining combination, not a substitute swatch.
Which Needle and Thread Should You Start With?
The needle is often the first thing to check when mesh stitches skip or the fabric develops tiny holes. For elastic knitted mesh, a suitable stretch or jersey needle may reduce yarn damage and improve stitch formation. Needle makers such as SCHMETZ offer stretch needles in sizes including 75/11 and 90/14, but the right size depends on mesh weight, yarn thickness, thread, and equipment. Fine stable net may behave differently from elastane-rich knit mesh, so a single needle type should not be prescribed for every fabric sold as mesh.
Use thread that is consistent, compatible with the needle, and appropriate for the seam’s function. Fine polyester sewing thread is a common starting choice for many fashion meshes because it avoids unnecessary bulk while offering useful durability. Heavy thread can make a transparent seam look like a drawn line; thread that is too fine or unsuitable for the load can fail under wear. Examine several centimeters of stitching for skipped loops, broken yarns, and excessive thread tension before sewing a whole sample. A needle-and-thread combination that looks tidy on opaque knit may still be too aggressive for open transparent mesh.
Which Stitch Settings Reduce Puckering?
Puckering can result from excessive thread tension, unsuitable stitch density, or differences in how fabric layers travel through the machine. A narrow zigzag may be a sensible trial for stretch mesh, but the smallest visible stitch is not automatically the best. Very short stitch lengths increase needle penetration, potentially damaging fine yarns. As a simple illustration, a 2 mm straight-stitch length corresponds to approximately five stitches per centimeter, while a 3 mm length corresponds to about 3.3 stitches per centimeter. Those figures describe stitch spacing, not a recommended mesh setting.
When comparing settings, change one factor at a time. Sew a 100–150 mm sample using the intended layers, inspect its relaxed shape, and check whether it recovers after an appropriate stretch. If tension is adjusted at the same time as needle size, stitch width, and differential feed, it becomes difficult to tell what actually fixed the problem. More importantly, do not mistake a seam that has been stretched flat by hand for a successful result. It should lie naturally without persistent ripples or small gathered ridges along the needle line.
How Do Handling and Differential Feed Help?
Even perfect stitch settings can be undermined by poor handling. Mesh should lie relaxed while it is laid out and cut, with its stretch direction matched to the pattern. During sewing, guide the panels instead of pulling them through the machine. If the operator stretches one layer more than the other, the seam may become wavy or the lining may gather. A removable stabilizer can sometimes help fragile material feed evenly, but it must be tested to ensure that removal does not enlarge holes or leave unwanted residue.
Differential feed is especially useful on a compatible serger. At a setting of 1.0, the feed systems generally advance fabric at equal rates. Increasing the ratio above 1.0 on many machines can counteract the stretching that produces wavy seams; some machine instructions describe adjustment toward 2.0 for very elastic materials. That is a machine-specific range, not an instruction to use 2.0 on every mesh. Too much differential feed can gather the edge or shorten the seam. Begin close to neutral, make small changes, and compare the stitched length with the original panel. The aim is a flat seam that retains the garment’s intended dimensions.
| Trial variable | Useful starting reference | Check before approval |
| Fine knit mesh needle | Jersey 70/10 or suitable stretch 75/11 | No skipped stitches or yarn damage |
| Heavier elastic mesh needle | Suitable stretch 75/11–90/14 | Needle and thread compatibility |
| Narrow zigzag width | About 1–2.5 mm | Stretch versus stitch visibility |
| Zigzag stitch length | About 2–3 mm | Puckering and seam security |
| Differential feed | Start near 1.0; adjust on compatible machines | Flat edge without gathering |
| Comparison specimen | About 100–150 mm stitched length | Consistency, recovery, no holes |
These are exploratory machine and sample settings, not Jinfeng Apparel production test results or universal acceptance limits. The actual fabric, equipment manual, and approved specification determine the final values. A useful machine trial changes one setting at a time and records the effect on flatness, stitch security, and fabric damage. If the mesh, lining, or thread changes between sampling and bulk production, the original settings should be reviewed rather than assumed to remain suitable.
Which Seams Suit Mesh Dresses?
Mesh dresses need different seam treatments at different locations. Flexible seams are often appropriate for fitted side panels, while relatively stable sheer overlays can use discreet enclosed construction. Necklines and armholes may need compatible binding or stabilization, and mesh-to-lining joins must account for different stretch and recovery. Seam choices should preserve the intended silhouette, transparency, comfort, and movement of the finished garment.
How Can Sheer Seams Stay Discreet?
The best way to make a sheer seam look refined is to consider it while developing the pattern. A seam placed along an existing style line may look natural, while one crossing an otherwise uninterrupted transparent panel can draw the eye. On relatively stable mesh, an enclosed seam can hide raw edges; on elastic mesh, a fine overlock or narrow zigzag may be more functional. Reducing seam allowance bulk can help, but trimming so close that the material pulls away defeats the purpose of a clean finish.
Look at the seam over the intended lining, not only on the worktable. The overlap of two transparent allowances can create a darker line even when the thread closely matches the fabric. This is especially visible in pale colors or under bright light. We also examine how the seam appears after the garment is fitted, because tension can change both the width and visibility of the allowance. A deliberately even line is usually preferable to a supposed invisible seam that becomes irregular once the wearer moves. For premium occasionwear, visual consistency deserves its own sample approval, alongside construction strength.
How Should Necklines and Armholes Be Finished?
Mesh necklines and armholes combine curves, visibility, skin contact, and movement. A curved opening can stretch during cutting or sewing, leaving a neckline that gaps or an armhole that loses its intended shape. Depending on the design, compatible stretch binding, fold-over elastic, or carefully planned stabilization may help. The finish must give enough control to hold the shape without making the opening rigid or uncomfortable. A neckline that looks perfect on a mannequin but cannot stretch during dressing is not a successful construction.
Binding width, color, and thickness should be evaluated as part of the design. A narrow edge can look delicate but require careful handling; a wider edge may be easier to stabilize but more visible through sheer fabric. The underarm deserves extra attention because a bulky allowance or stiff binding can rub against skin. At Jinfeng Apparel, mesh garment development includes neckline stability, armhole appearance, and edge treatment alongside fabric and lining choices. These details are checked during fitting because a flat sample alone cannot show whether the opening remains comfortable during normal movement.
How Do Mesh, Lining, and Bodycon Seams Work Together?
A mesh dress rarely behaves like a single piece of fabric once it includes lining, shaped panels, and a closely fitted pattern. The outer mesh may stretch easily while the lining is firmer, or the lining may have a different stretch direction. If the layers are joined without considering those differences, the mesh can pull, wrinkle, or develop unexpected stress at the seam. Some designs work better with selected attachment points, while others need the layers joined more continuously. The correct decision depends on coverage, fit, transparency, and the desired drape.
Bodycon dresses make these differences particularly clear. A flexible overlock side seam may be appropriate, but its performance depends on the fabric’s recovery and the combined garment structure. If corresponding panels are cut with inconsistent stretch directions, the side seam may twist even when the stitches themselves remain sound. During sample fitting, examine movement around the bust, waist, and hips, and check that the lining does not restrict the outer material. For layered mesh styles, also inspect lining length and whether it becomes visible through or below the outer garment. These are construction decisions, not finishing touches that can always be corrected at the end.

How Do You Check Mesh Seam Quality?
Check mesh seams for secure stitching, flatness, consistent allowances, acceptable stretch, recovery, and freedom from fabric damage. Watch for puckering, skipped stitches, broken yarns, enlarged openings, and distorted necklines. Compare the finished result with an approved sample under realistic wearing conditions. Before bulk production, confirm the seam method and the quality characteristics that must remain consistent across material batches and garment sizes.
Which Defects Matter Most?
Mesh defects often look similar at first glance but have different causes. Puckering shows as small wrinkles drawn toward the stitch line, often involving tension or feeding. A wavy seam is more likely to reflect unwanted lengthening during sewing. Skipped stitches may indicate a needle or stitch-formation problem, while broken yarns or enlarged holes can show that the material is being damaged. On transparent garments, uneven allowances create visible stripes even if the join remains mechanically secure. Each problem needs a different response; repeatedly increasing tension can make some defects worse.
Inspect more than the seam center. Look at the mesh immediately beside the stitches, particularly where openings are large or embroidery crosses the seam. At necklines and armholes, check whether the finished opening has been stretched out of shape. In a bodycon dress, look for side-seam twisting and tension differences after fitting. A useful quality review separates cosmetic concerns from problems affecting comfort, durability, or fit, while recognizing that a visible defect can still make an otherwise functional garment unacceptable for a premium collection. Correcting the cause during sewing is generally more effective than relying on pressing to hide it afterward.
How Can Stretch and Recovery Be Checked?
Start with an inspection method appropriate to the garment’s real use. A relaxed sheer overlay may not require the same extension as a fitted stretch panel, so applying one arbitrary stretching target to every mesh would not be meaningful. Use a marked measurement, consistent pulling conditions, and the actual seam construction for an initial comparison. For example, if a 100 mm section reaches 135 mm, its extension is 35%. If it returns to 102 mm after the same defined recovery interval, the remaining elongation is 2% relative to the original marked length.
Those measurements are useful for comparing development samples, but they are not universal pass/fail values. Record the method, force or load condition, holding time, recovery time, and direction of stretch whenever results need to be compared. Inspect for broken threads, yarn damage, seam slippage, and a permanently altered shape after release. Formal strength testing requires a method suited to the material; for example, ASTM D1683/D1683M addresses sewn-seam failure in woven fabrics and should not simply be applied to all knitted meshes. A clear, repeatable test is more valuable than an impressive number measured under undefined conditions.
What Must Be Approved Before Bulk Sewing?
The approved sample should establish exactly how the seam is made, not merely how the finished dress looks in a photograph. Record stitch type, allowance, thread, needle, edge treatment, binding where used, and any stabilization. Identify differences between garment areas: side seams, necklines, armholes, overlays, and lining connections may require distinct constructions. For transparent styles, confirm the lining color and placement because a change behind the mesh can alter seam visibility even when the stitches remain identical.
At Jinfeng Apparel, construction specifications and sample approval are part of moving a custom womenswear style toward production. Our documented mesh garment checks include transparency, stretch direction, recovery, neckline shape, lining length, seam flatness, holes, and printed-mesh placement where applicable. A sample can look attractive on a hanger yet reveal uncomfortable tension during fitting, so the approval process should consider movement and the garment’s intended silhouette. Clear records are particularly valuable when one brand develops several mesh styles or plans repeat orders, because they allow the approved method to be reproduced without depending on someone’s memory of the first sample.
How Is Quality Kept Consistent in Production?
Production consistency begins before the sewing machines run. The incoming mesh should be compared with the approved fabric reference, especially for stretch, recovery, transparency, and visible defects. Cutting should preserve the intended fabric direction without stretching panels out of shape. Operators then need a clear construction specification rather than a picture of the finished sample alone. If a batch starts producing wavy seams, the team should investigate feeding, machine settings, fabric variation, and handling before the defect spreads to additional garments.
In-process and final checks serve different purposes. In-process inspection can catch stitching problems while they are still practical to correct; final inspection confirms appearance, measurements, lining relationships, and overall workmanship against the approved sample. Retaining fabric references, construction details, and quality findings also supports future repeat production. Jinfeng Apparel’s documented workflow covers incoming material checks, cutting inspection, sewing-stage checks, finished garment review, and comparison against approved references. The purpose is not to claim that every fabric behaves identically. It is to make the differences visible early enough to keep the final garments consistent with the brand’s approved design.
| Control point | Example measurable check | Evidence to retain |
| Material identification | Record mesh type and main stretch direction | Approved swatch and specification |
| Trial seam | Compare 2–3 methods when the choice is uncertain | Dated seam samples and settings |
| Appearance | Inspect a 100–150 mm trial length | Close-up photos and comments |
| Extension | Record marked length before and during a controlled stretch | Extension calculation and method |
| Recovery | Record marked length after a defined recovery period | Residual elongation and observations |
| Fabric integrity | Count or describe skipped stitches, holes, or broken yarns | Defect record and corrective action |
| Sample approval | Confirm seam, lining, fit, and edge treatment | Approved sample and construction sheet |
| Bulk inspection | Compare workmanship with approved references | In-process and finished-garment QC records |
The sample counts and lengths above are practical examples for development comparison, not universal garment standards or published company test statistics. Actual acceptance criteria should follow the product specification and appropriate test method. A measured result is meaningful only when the test direction, loading condition, timing, and construction are documented. Keeping those details beside approved samples gives a production team something concrete to compare when a fabric delivery or garment style changes.
A good seam is not necessarily the one with the most stitching or the least visible thread. It is the one that keeps the garment attractive and comfortable while handling the movement, laundering, and wear the design reasonably demands. Two similar mesh dresses can look almost identical on a rack yet perform very differently after fitting. One may develop a stretched, uneven side seam; the other may retain its shape because the fabric, stitch, allowance, and lining were considered as one construction rather than separate production tasks.
Conclusion
The best seam finish for mesh is a decision about the garment, not a rule about the fabric alone. Four-thread overlock is often the sensible starting point for stretch mesh, while French seams can give relatively stable sheer overlays an elegant enclosed finish. Narrow zigzag stitching provides flexibility, and binding helps control selected openings. Each choice has trade-offs in visibility, thickness, movement, and manufacturing consistency, so the most reliable answer comes from testing the intended fabric in the intended construction.
At Jinfeng Apparel, our custom women’s fashion work includes mesh dresses, fitted styles, layered garments, and designs that combine transparency with stretch. Since 2008, our work has centered on turning design references and technical requirements into samples and production-ready garments, with attention to material selection, fit, seam specifications, and quality checks. For a new mesh collection, a well-judged seam can protect the design long before the finished dress reaches a customer. That practical connection between appearance and performance is what makes an apparently small stitching decision worth getting right.
Frequently Asked Questions
What Is the Best Stitch for Stretch Mesh Fabric?
A balanced four-thread overlock is a common starting choice for stretch mesh because it creates a secure joining seam with useful flexibility. A narrow zigzag can also work, particularly for selected construction details or when using a conventional sewing machine. The final stitch should be tested in the same direction and to the degree of extension the garment actually needs. Check for thread breakage, damaged yarns, and permanent waves rather than judging the seam only while it lies flat.
Can You Use a French Seam on Stretch Mesh?
A conventional French seam is usually better suited to relatively stable, lightweight sheer mesh than to high-stretch mesh. Its straight stitching and enclosed folded allowance can limit extension, which may cause pulling or broken stitches in a fitted garment. It can be appropriate on a loose overlay or an area that experiences little stretch, but the actual material and seam location must be tested. When extension is essential, a suitable flexible seam will often be more practical.
Does Mesh Fabric Fray When Cut?
Some knitted meshes resist traditional edge fraying because their yarns are held in loops, while other mesh and net constructions may behave differently. Even when a cut edge does not unravel, a garment seam may still need secure stitching, a cleaner appearance, or protection from rubbing against the skin. Large openings can also make it harder for the seam to grip enough yarn. Examine the actual fabric and the intended seam location before deciding whether raw edges can remain exposed.
How Do You Keep Mesh Seams from Puckering?
Start with a needle appropriate for the mesh structure, compatible thread, and balanced tension. Avoid pulling the panels through the machine, and check whether the layers are feeding evenly. On a compatible overlock machine, differential feed can help reduce unwanted stretching and wavy edges. Extremely fine materials may benefit from temporary support, provided it can be removed safely. Make one setting change at a time and compare trial seams after they have relaxed and been gently extended.
Should You Use a Ballpoint or Stretch Needle for Mesh?
For many knitted meshes, a suitable jersey or ballpoint needle is worth testing because it is designed to work with knitted yarn structures. Elastane-rich and highly elastic mesh may respond better to a stretch needle, which is designed to improve stitch formation on elastic fabrics. Stable net and other constructions may need a different point type. The correct decision depends on the yarns, mesh openings, sewing machine, and thread. The trial should show clean stitching without skipped stitches or visible yarn damage.
How Do You Finish Mesh Necklines and Armholes?
Mesh necklines and armholes often benefit from a carefully selected binding, compatible stretch elastic, or other controlled edge treatment. The finish must prevent unwanted growth while retaining enough flexibility for dressing and movement. Test the edge on the actual garment because its curved shape, skin contact, lining, and stretch direction all affect the result. A finish that is too rigid may feel uncomfortable, while one with too little control can ripple or gape after fitting.