Skip to content


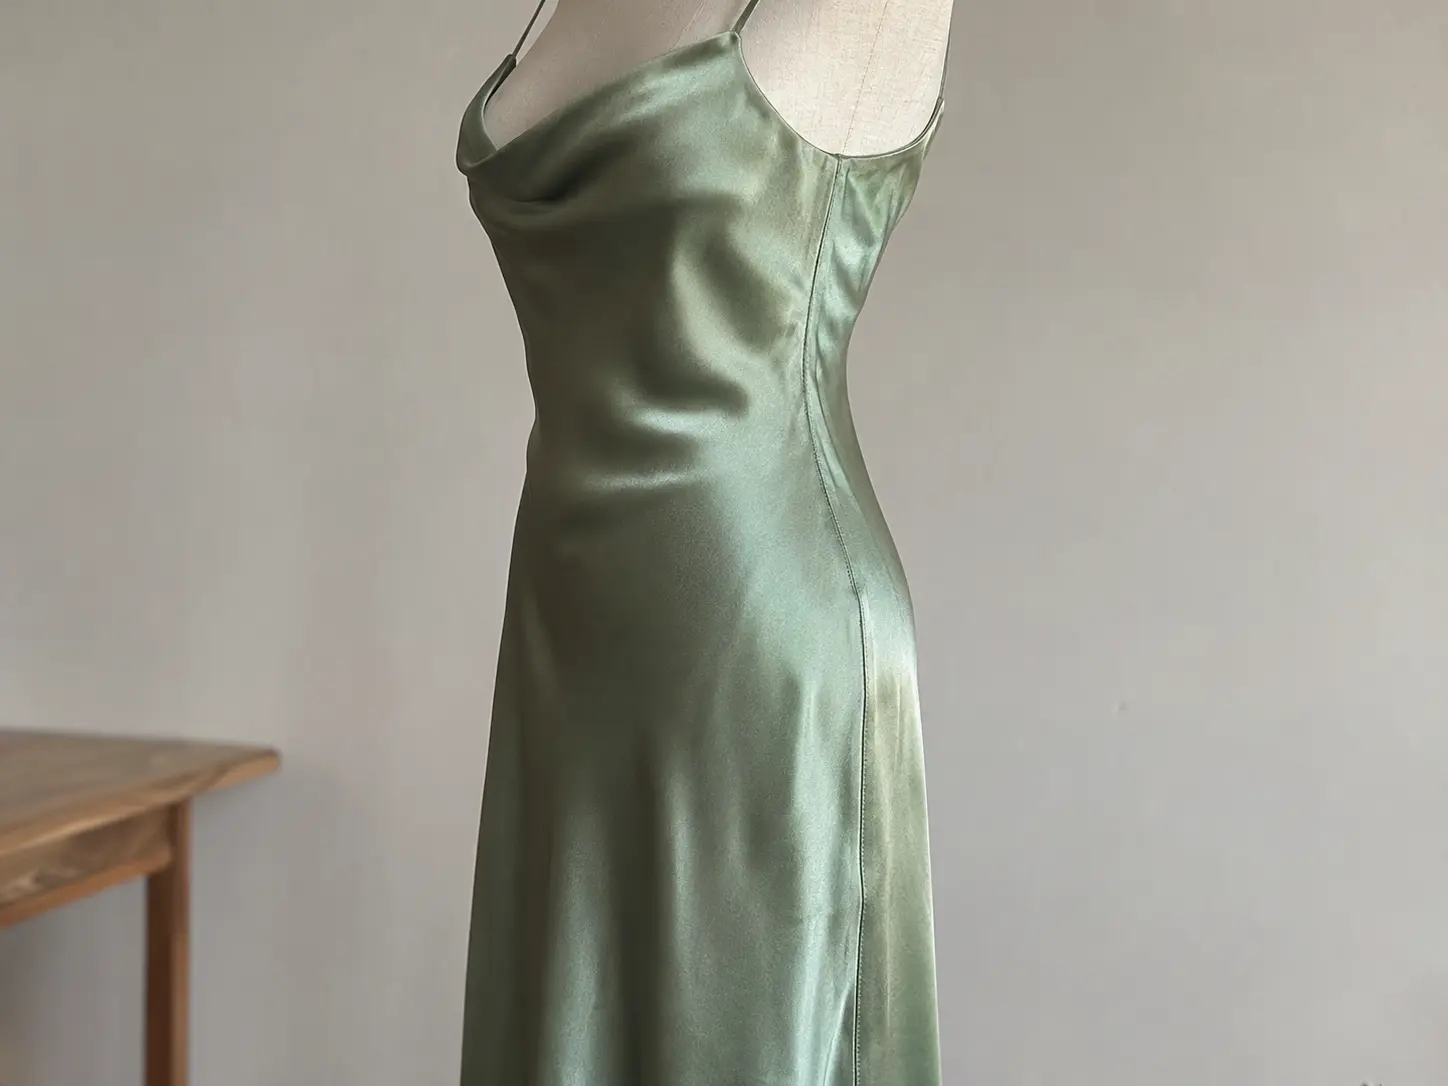
A satin dress can look flawless on a hanger and still reveal every sewing shortcut when someone puts it on. The smooth, reflective surface catches a slight ripple along the side seam, a raised allowance near the hip, or tiny needle marks beside a zipper. Inside the garment, a fraying edge may appear harmless during sampling but become a recurring quality problem after repeated fittings. For a fashion collection, the best seam finish is not simply the prettiest technique. It must suit the fabric, the shape of the garment, and the way the finished piece will actually be worn.
For lightweight, non-stretch satin, French seams are often the best choice because they enclose raw edges and create a neat interior. Overlocked seams are usually more practical for lined garments, shaped panels, and repeatable production, while Hong Kong binding can suit structured, unlined styles. The right finish depends on fabric weight, stretch, seam location, expected movement, and sample performance—not on satin’s glossy appearance alone.
Consider a champagne satin slip dress that photographs beautifully at the first fitting. Once the model walks and sits, however, the side seam puckers and a bulky allowance casts a shadow through the fabric. The solution might involve changing the finish, but it might also require a finer needle, less thread tension, a revised allowance, or better fabric feeding. Those are the choices that separate a promising sample from a dependable finished garment, and they are worth examining before the first production run.
Which Seam Finish Is Best for Satin?
French seams are a strong first choice for lightweight woven satin when enclosed raw edges and a clean interior matter most. Overlocking is often more practical for lined dresses or complex construction, while bound finishes may suit unlined, structured garments. Zigzag finishing can work on stable satin when properly tested. No method is universally best; fabric behavior, seam location, appearance, and durability should determine the decision.
Is a French Seam the Best Choice?
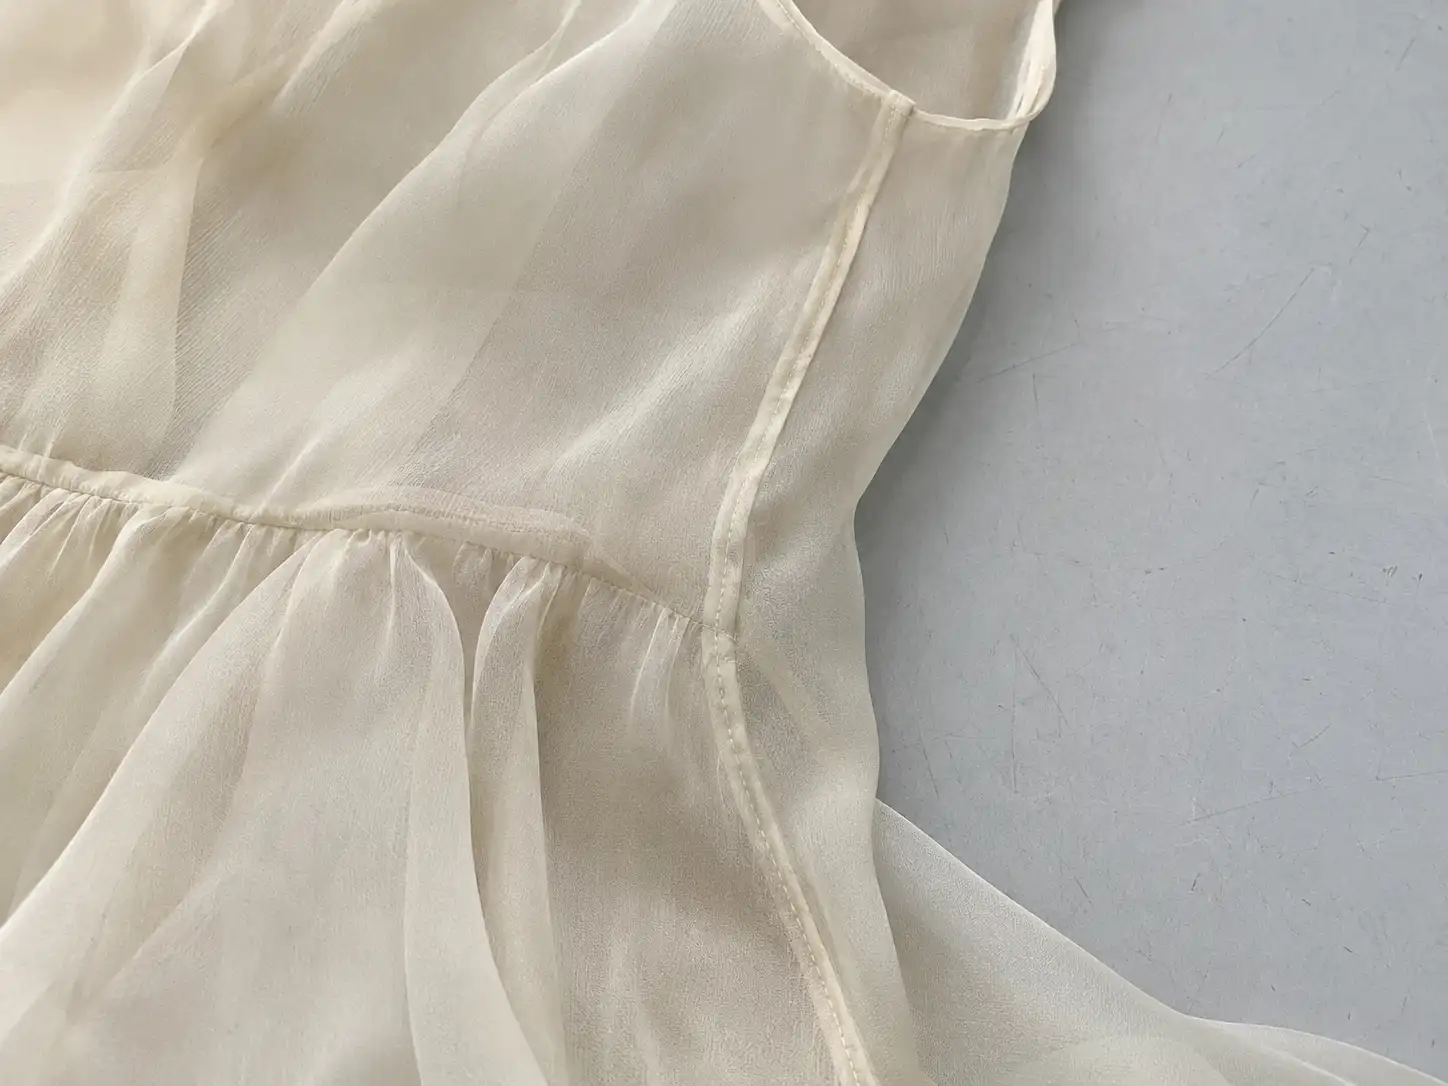
A French seam encloses the cut edges between two lines of stitching, leaving no exposed fabric edge on the inside. That makes it particularly useful for an unlined satin blouse or a fluid slip dress, where an ordinary seam allowance might be seen when the garment moves. It can protect vulnerable edges from handling and create a polished interior without a separate overlock operation. The narrow enclosed construction is often attractive on relatively straight seams, especially when the satin is light enough to fold without building a noticeable ridge.
Yet the same enclosed construction can become a disadvantage at a deeply curved armhole, a fitted princess seam, or a waist join where several layers overlap. Extra layers create bulk, and adjusting a French seam after fitting requires more unpicking than altering a conventional seam. For a fitted satin dress, we judge the finish from the outside as well as the inside: an elegant interior is not an improvement if the surface shows a raised line or the wearer feels a thick ridge. French seams are an excellent option, not a universal badge of premium quality.
How Do Different Seam Finishes Compare?
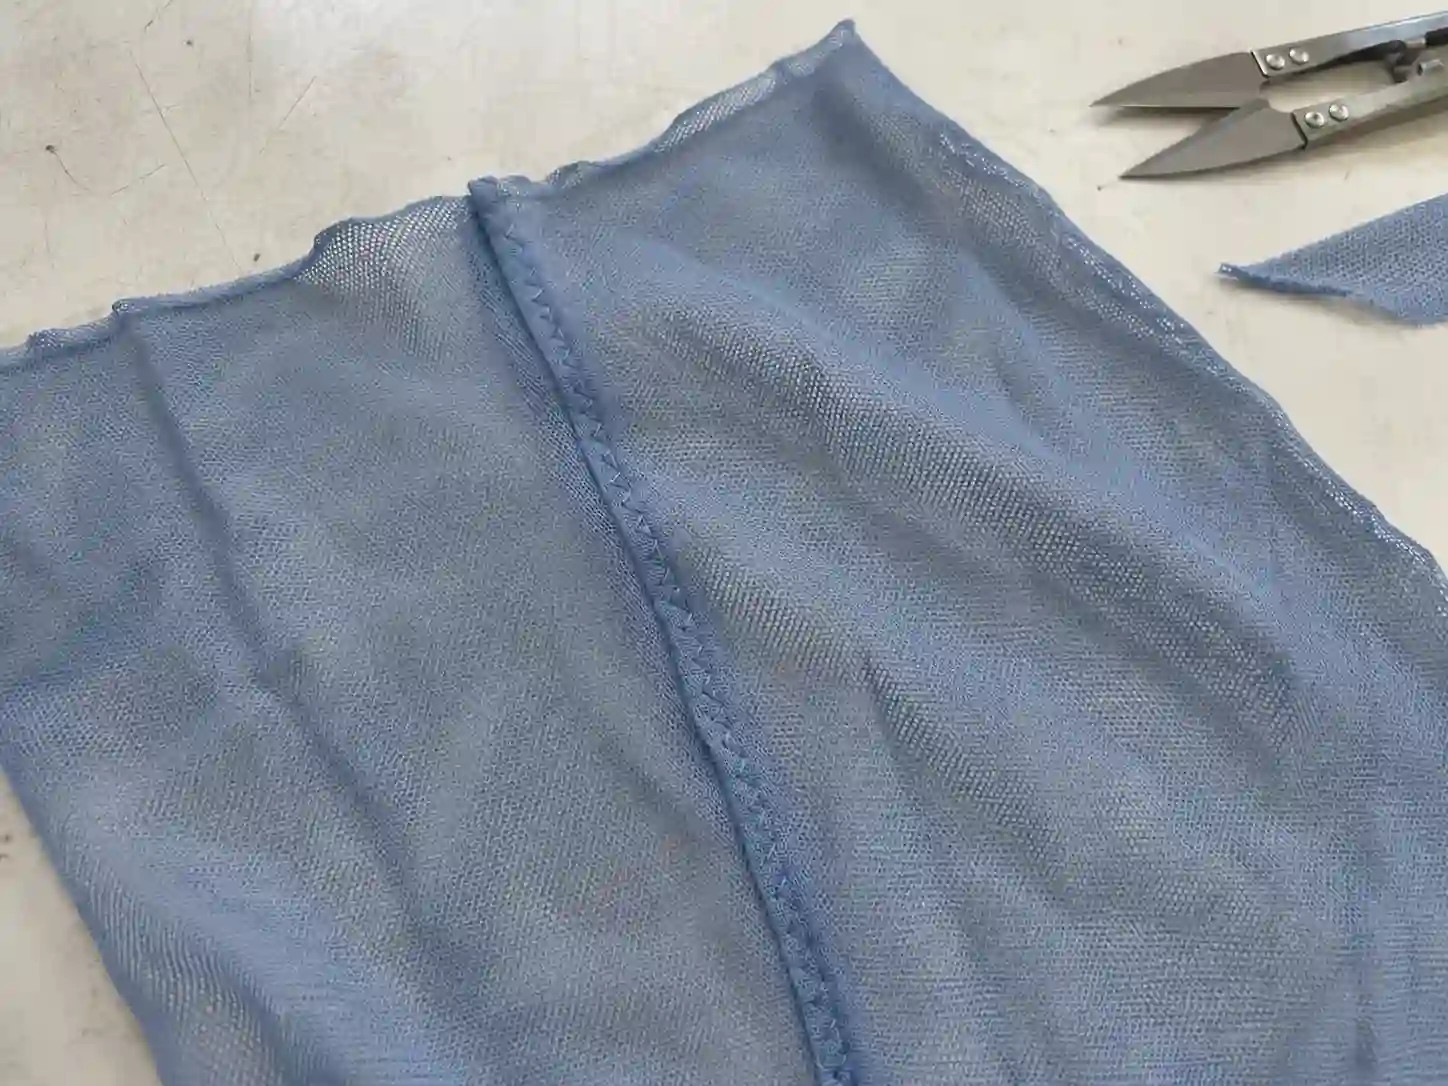
Overlocking wraps thread around the raw fabric edge, generally with a trimming operation, and is common in production because it can handle a wide variety of garment shapes. A zigzag finish performs a simpler edge-control function on an ordinary sewing machine, although it leaves the edge visible and may not control severe fraying. A Hong Kong finish uses bias-cut binding to cover individual allowances, giving a refined appearance when the inside of an unlined garment remains exposed. Each method changes the number of operations, how the allowance is pressed, and the thickness felt beneath the outer layer.
| Seam finish | Edge treatment | Often suitable for | Main trade-off |
| French seam | Raw edges enclosed by two stitching passes | Lightweight satin, straight or gently curved seams | Added layers; difficult to adjust or clip |
| Overlock / serged | Looping threads cover trimmed edge | Lined dresses, shaped panels, many production styles | Incorrect settings can curl or pucker the edge |
| Zigzag / overcast | Zigzag stitches stabilize exposed edge | Samples, stable satin, limited equipment | Less complete edge protection |
| Hong Kong binding | Bias fabric covers each allowance edge | Unlined structured skirts and occasionwear | More operations and potential bulk |
A finish should be compared on fabric taken from the actual proposed production lot, not on a convenient substitute. Two satins of similar weight can behave differently when sewn, and the contrast is even greater between fluid charmeuse and firm Duchess satin. The comparison also changes with lining: a highly decorative internal finish offers little visible advantage when it will be completely enclosed, while a narrow and stable finish might make all the difference to a sheer or unlined design. The useful question is which construction delivers the approved appearance repeatedly, not which one sounds most luxurious.
What Factors Affect Seam Selection?
Begin with fabric composition, weight, yarn stability, and elasticity. Satin describes a weave rather than a particular fiber, so silk satin, polyester satin, acetate satin, and polyester-elastane satin can require different needle, thread, and pressing choices. A fluid fabric may show seam shadows and distort under feeding pressure, whereas a heavier fabric may create bulk at folded allowances. Stretch introduces another issue: the joining stitches must tolerate the movement expected at the hips, bust, and waist without breaking or restricting comfort. The care label also matters because the seam should survive the garment’s intended cleaning treatment.
Garment geometry supplies the second half of the decision. A long, gently shaped skirt seam may accept French finishing, but a close-fitting bodice with a concealed zipper is more demanding. During development at Jinfeng Apparel, fabric selection, pattern correction, sample construction, and appearance review are linked rather than treated as independent tasks. That matters because a change to seam allowance can affect finished measurements, while a change in fabric can alter both drape and sewing behavior. The correct finish supports the design from fitting through production and wear, with the approved sample serving as the practical reference.

How Do You Sew French Seams on Satin?
To make a French seam, sew the first pass with wrong sides together, trim the exposed allowance, press the seam, and fold the fabric right sides together. Stitch the second pass so the remaining raw edge is completely enclosed. Precise seam allowances, even fabric feeding, a suitable fine needle, and careful pressing are essential; otherwise, the enclosure can trap stray fibers or create puckering.
What Seam Allowance Is Needed?
A common French-seam arrangement uses a total allowance of approximately 16 mm (5/8 inch), with an initial seam about 6 mm (1/4 inch) from the edge and a second pass about 10 mm (3/8 inch) from the fold. The first allowance is trimmed enough to remain inside that second seam. Narrower arrangements are possible for fine satin, but they require greater cutting and stitching control. Importantly, the final stitching line must remain at the position assumed by the pattern; sewing a different total allowance without adjusting the pattern can change garment dimensions.
| Total pattern allowance | First stitching pass | Second stitching pass | Practical note |
| 16 mm | 6 mm | 10 mm | Familiar starting arrangement with trimming room |
| 15 mm | 6 mm | 9 mm | Useful trial on lightweight woven satin |
| 12 mm | 5 mm | 7 mm | Requires careful edge trimming and alignment |
| 10 mm | 4 mm | 6 mm | Narrow trial only for suitably stable fine fabric |
These figures describe illustrative construction trials, not industry-wide mandatory allowances. Whether an enclosed seam is successful depends on whether the first edge remains completely covered, the final seam sits at the intended pattern line, and the satin retains an acceptable drape. Very narrow allowances can become unreliable when the material slips under the presser foot or frays rapidly after cutting. For production, the confirmed dimensions belong in the sewing instructions and should be checked against the approved sample, especially where multiple shaped panels contribute to the finished bust or waist measurement.
How Are Raw Edges Enclosed?
The first stitching pass begins with the fabric’s wrong sides together, which can feel backward to anyone accustomed to ordinary seams. After stitching, trim loose fibers and excess allowance carefully, then press the seam according to the fabric’s heat sensitivity. Fold the pieces so the right sides face each other, with the first row of stitching at the folded edge. The second pass encloses the trimmed allowance within the fabric. The final result should be even, with no whiskers of raw yarn escaping through the stitching and no noticeable waviness along the seam.
Handling is more important on satin than a neat sequence of instructions might suggest. Pulling a slippery panel through the machine can stretch one layer relative to another, while a blunt needle can leave pulls or visible holes. SCHMETZ lists Microtex needles in sizes including 60/8, 70/10, and 80/12 for fine or densely woven materials, but its satin guidance also varies needle type according to fabric weight. These are trial options, not a command to use one needle on every satin. Press with a tested temperature, appropriate protection, and a supported seam so the allowance does not imprint onto the shiny outer surface.
Are French Seams Suitable for Curves?
French seams can work along gentle curves, but tight curves expose their limitations. An enclosed allowance has to bend around a path that differs from the main seam line; on one side it may resist spreading, while on the other it may bunch. A lightly shaped skirt side seam may remain smooth, but a sharply curved princess seam or narrow armhole can become bulky. Trimming and controlled clipping can help in selected situations, although clipping too deeply risks exposing yarns or weakening the seam enclosure. A small trial on the exact curve is safer than assuming the finish will behave the same way everywhere.
The answer is often to use more than one finish within the same dress. A fluid satin skirt might use French seams along its long panels, with separately finished allowances around the bodice and zipper. That does not make the garment inconsistent; it makes the construction responsive to stress, shaping, and surface appearance. During sampling, fitting and pressing reveal whether a curved seam lies smoothly or pulls against the fabric. If the enclosure creates a ridge or changes the intended silhouette, a controlled overlocked or other approved finish may give a better result without compromising the garment’s overall quality.
Are Serged or Bound Seams Better for Satin?
Serged seams are often a practical alternative for lined satin dresses, curved panels, and production where repeatability matters. Hong Kong binding is particularly useful when a structured, unlined garment needs a polished interior. Neither finish is inherently better than a French seam. The decision should reflect raw-edge stability, the amount of bulk created, the visible outer surface, and the work required to reproduce the result consistently.
When Should You Use Overlocking?
Overlocking uses looped threads to wrap a fabric’s cut edge, commonly trimming excess material at the same time. For a lined satin cocktail dress, this can be efficient because the finished allowance will normally sit between the outer shell and lining. It also accommodates seam shapes that are awkward for enclosed French construction. The machine’s differential feed, thread tension, cutting width, and stitch formation must be adjusted to the fabric; a poorly set overlock can pull the edge into a roll or create ripples that show through the glossy face. The goal is reliable edge coverage without changing the panel shape.
As a practical starting point, sewing teams may trial overlock stitch lengths near 2–3 mm on suitable woven satin, then alter the settings according to the fabric and thread. That is a trial range, not a universal specification or a performance claim. The seam should be checked after pressing and on the garment, because the allowance can lie flat on the bench yet form a visible ridge when stretched over a body. In higher-volume production, fewer handling operations can be valuable, but the saving means little if the finish repeatedly requires repair. Consistent appearance, suitable strength, and low rework are more useful measures than machine speed alone.
Can Zigzag Stitching Finish Satin?
Zigzag stitching can stabilize the raw edge when a serger is unavailable, particularly during early sample development or on a relatively stable satin. Its alternating stitches help keep loose yarns near the allowance, but the edge remains exposed rather than enclosed. Some fine satin fabrics curl when the zigzag is too wide or densely stitched, so settings should be explored on offcuts before applying the finish to a garment. An initial trial might use a stitch width around 2–3 mm and a length around 1.5–2.5 mm, then adjust both until the edge stays flat and adequately covered.
Placement matters as much as the numbers. A stitch positioned too far from the raw edge leaves fraying fabric beyond it; one placed too close may fail to secure enough yarn. Because satin can show puncture marks, repeatedly unpicking an unsuccessful zigzag may permanently damage the panel. The finished sample should be handled and subjected to the intended care process before approval. If the fabric still sheds yarns or the stitch line creates a ridge, a French, overlocked, or bound finish may be preferable. Zigzag finishing is a valid technique when it meets the garment’s requirements, not an automatic compromise or a guarantee of durability.
Is a Hong Kong Finish Worth Using?
A Hong Kong finish wraps each raw seam allowance with bias-cut binding, allowing the main seam to be pressed open while keeping the interior tidy. It can be attractive in an unlined structured skirt, formal top, or selected occasionwear piece where the inside is intentionally visible. Binding has a visual advantage over exposed overlocking, but the binding fabric must be chosen carefully. A thick strip can add an unwanted ridge, and a dark color beneath pale champagne satin may show through in bright light. Even a smooth binding can distort the edge if it is stretched during application.
This finish requires additional cutting, attaching, wrapping, and checking operations. The extra effort can be worthwhile when the inside of the garment forms part of the product experience, but it has less value when every seam will be hidden behind a lining. For a structured satin skirt, individually bound allowances may sit neatly when pressed open; around a dense waist join, those same bindings might create too many overlapping layers. The technique therefore deserves a sample comparison against simpler finishing options. The most refined garment is usually the one whose construction feels effortless in wear, even when considerable care has gone into selecting and testing each detail.

Which Seam Finish Suits Each Satin Type?
The best finish changes with the satin itself. Lightweight silk or polyester satin often suits French seams along suitable straight sections, while firm Duchess satin may benefit from separately finished allowances that can lie open. Stretch satin needs seam construction that accommodates movement. Fabric composition, thickness, elasticity, and garment shape are more reliable guides than the generic label “satin,” and each proposed combination should be tested.
What Works for Lightweight Satin?
Lightweight satin is valued for its drape, but that same fluidity can make cutting and sewing difficult. Fine silk satin and lightweight polyester satin may shift under the foot, fray at the edge, and reveal bulky allowances through the outer layer. A French seam can enclose those vulnerable edges neatly on a slip dress or unlined blouse, provided the allowance is narrow enough to preserve the fabric’s flow. A controlled overlocked finish may work better on shaped sections or where the garment will be fully lined. The right choice becomes clear only when the sewn sample hangs naturally and is viewed under realistic lighting.
For initial trials on fine woven satin, a needle around 60/8 to 70/10 and a straight-stitch length around 2.0–2.5 mm may be reasonable starting points, depending on the material and machine. These figures should not be copied blindly: too many needle penetrations can damage a delicate weave, while a larger needle may leave visible holes. Bias-cut designs need particular care because a seam may stretch or settle differently from the surrounding fabric after hanging. Pressing should be tested separately, especially on fibers sensitive to heat or water marking. A smooth sample that stays smooth after fitting is more persuasive than one that looks perfect only immediately after stitching.
Which Finish Suits Duchess Satin?
Duchess satin generally has more body than charmeuse-style satin and is widely used where a dress needs visible structure. It can create dramatic skirts and shaped bodices, but folded allowances may become bulky where several components meet. Separately overlocked seam allowances, pressed open when the construction permits, can help control that thickness. Hong Kong binding may also be attractive in an unlined formal garment, provided the additional binding does not show through the satin. A French seam can still work in selected areas, but its enclosed layers should be tested before it is used along shaped or heavily intersecting seams.
The biggest visual issue is often the seam impression rather than the raw edge itself. Heavy or firm satin may show a ridge when allowances are pressed to one side, especially under direct lighting. Use a suitable seam roll or other support and test pressure, heat, and moisture on an offcut. In structured eveningwear, the outer seam must also work with lining, interfacing, and any internal support. A finish that looks excellent on two layers of satin may become too thick when additional construction materials are added. Inspecting the complete assembly at the waist and bust avoids approving a detail that later interferes with fit or surface smoothness.
Do Stretch Satins Need Different Seams?
Stretch satin may contain elastane and can extend mainly across the width or in more than one direction. That movement changes how the seam should function. A conventional straight lockstitch may lack enough extensibility for a fitted dress, while a suitable overedge or other stretch-capable construction can accommodate more movement. The stitch type still needs testing because an overlocked edge can tunnel or become wavy if tension and differential feed are not balanced. A seam that stretches must also return to its intended shape rather than remaining elongated after the wearer sits or bends.
Needle choice should follow the exact fabric construction. Some stretch woven satins respond well to a fine sharp needle; other elastic materials need a needle designed to reduce skipped stitches. SCHMETZ distinguishes stretch needles from needles for many fine woven fabrics, so trial sewing is the sensible approach rather than assuming that every elastane blend needs the same point. Check the seam at the hip, waist, and other high-movement areas on a complete garment. If the fabric itself does not recover well, changing the seam alone will not repair the garment’s fit. Pattern ease, fabric recovery, and stitch extension need to work together.
Which Finishes Suit Satin Dresses?
A dress can legitimately use several seam finishes without losing construction consistency. The long side panels of a fluid slip dress may suit French seams, while a lined cocktail dress can use overlocked allowances hidden inside the garment. A structured evening dress may need separately finished bodice seams, and a stretch satin bodycon style may require an extensible seam in high-stress areas. Concealed zipper openings and shaped waist joins deserve their own evaluation because a slightly distorted seam can cause zipper bulging or an uneven waistline, defects that become obvious on satin’s shiny surface.
For a seasonal collection, we recommend recording approved finishes by seam location rather than giving every satin style the same generic instruction. At Jinfeng Apparel, the documented development workflow connects fabric selection, pattern work, sample revision, and pre-production approval, which is useful when a collection includes slip dresses, fitted mini dresses, and formal styles with different construction needs. A sample should confirm not only that the edge is finished, but also that the garment hangs correctly, feels comfortable, and retains its visual quality after the specified care treatment. That approach turns an individual sewing decision into a repeatable product standard.

How Can Satin Seam Defects Be Prevented?
Prevent satin seam defects by addressing their actual causes: protect fraying edges, control feeding and thread tension, select suitable needles, and verify seam behavior after pressing and movement. Puckering, yarn slippage, and visible needle or pressing marks are different problems and should not be treated as one. A clean seam finish helps, but fabric stability and the joining construction are equally important.
How Do You Prevent Fraying?
Fraying occurs when yarns loosen at a cut edge. Some satins are particularly prone to it because their yarn arrangement and finishes allow movement during cutting, handling, and sewing. Accurate cutting with a suitable blade and careful handling of the panels can reduce disturbance before the edge is finished. French seams protect the cut edge by enclosing it, while overlocking covers it with looping threads. Zigzag stitching may be enough on a stable satin, but it does not provide the same complete enclosure. The method should be checked after handling and the proposed cleaning treatment, not only immediately after the first stitching pass.
A key distinction is that fraying happens at the raw edge, while seam slippage occurs beside the stitching when woven yarns are displaced by stress. An allowance can be perfectly overlocked and still suffer slippage in a tight-fitting dress. Making the edge stitch denser is not necessarily a cure and can introduce new needle damage. If loose yarns appear during sample handling, first establish where they originate. That simple diagnosis avoids unnecessary construction changes and helps the team select whether better edge enclosure, revised allowance, different material, or a stronger joining design is actually needed.
What Causes Seam Puckering?
Puckering appears as ripples along a stitch line, and satin’s reflective surface makes even small distortions visible. Thread tension is one cause, but not the only one. The fabric layers may feed at different speeds, the needle and thread may displace yarns in a tightly woven material, or the seam may change after cleaning and finishing. Coats’ technical guidance distinguishes tension-related, structural, feeding, and material-instability puckering, which explains why turning a tension dial is not a reliable solution to every wavy satin seam.
Diagnosis should be controlled and practical. Compare test seams with different thread tensions, feeding conditions, and suitable needle-and-thread combinations, changing one important factor at a time. Do not pull the fabric through the machine to force a smooth-looking result, particularly along bias-cut panels. Allow the sample to relax and inspect it after pressing; if the puckering returns, pressing has only hidden the symptom. A finer thread may improve structural puckering but must still meet the required seam performance. The successful setting is the one that creates a stable, smooth seam without weakening the garment or marking the fabric surface.
How Can Seam Slippage Be Reduced?
Seam slippage happens when woven yarns shift away from the stitch line under load, producing a gap even though the sewing thread may remain unbroken. It can be a concern at the hip, bust, or waist of a fitted satin dress, particularly when the fabric has mobile yarns or limited resistance to displacement. The problem depends on the fabric construction as well as the seam, so adding stitches or applying a stronger overlock does not automatically solve it. Test the fabric in the direction and seam arrangement that will occur in the real garment.
Where formal laboratory evaluation is needed, ISO 13936-2:2004 provides a fixed-load method for assessing yarn-slippage resistance at sewn seams in woven fabrics; ISO confirmed this edition as current in 2023. ASTM D1683/D1683M addresses failure in sewn seams of woven apparel fabrics, including rupture and slippage-related behavior. These methods do not provide one universal pass-or-fail number for all satin dresses, and a laboratory result does not by itself predict every wear condition. Appropriate acceptance requirements should be agreed for the garment, its fit, and its intended use. Construction trials may then examine seam allowance, stitch configuration, reinforcement, or fabric suitability rather than relying on cosmetic edge finishing.
How Do You Avoid Visible Seam Marks?
A visible seam mark may come from a raised allowance, an oversized needle, repeated unpicking, or excessive pressure during pressing. Pale champagne, ivory, and blush satin can reveal such defects particularly clearly, but darker satin is not immune. Before committing to a finish, inspect the seam from the right side when the fabric is lying flat and again when it is held under the tension expected during wear. A neat French seam can still create a ridge if its enclosed layers are too thick, while an overlock can leave a line if the thread coverage is heavy or uneven.
Needle marks can be difficult to remove once the fabric yarns have been damaged, so trial sewing on an offcut matters more than repairing defects afterward. Pressing should also be tested on the actual fabric: polyester, silk, and acetate satins respond differently to heat, steam, and moisture. Use appropriate protection and support to avoid imprinting the allowance onto the glossy face. A finished dress should be examined under diffuse and directional light, since the reflection can reveal problems not seen on a sewing table. The objective is a seam that feels sound internally and remains discreet externally.
How Are Satin Seams Approved for Bulk Production?
Satin seams should be approved through fabric-specific trials, a complete garment sample, documented sewing specifications, and pre-production confirmation. Review raw-edge protection, stitch quality, seam appearance, fit, movement, and pressing behavior. Record the agreed construction for each relevant seam location, then use the approved sample and quality checkpoints to check whether production garments reproduce the intended result consistently across sizes and colors.
What Should Sample Testing Cover?
Early trials should use the actual proposed production satin whenever possible. A convenient substitute may help explore ideas, but it cannot prove how the approved fabric will feed, pucker, fray, or respond to pressing. Compare only the finishes relevant to the garment: perhaps a French seam and narrow overlock for a lightweight slip dress, or an open overlocked seam and bound allowance for a structured skirt. Record the needle, thread, stitch length, finished allowance, and pressing method used. Without those details, a promising sample is difficult to reproduce, and later teams may not know which adjustment caused the improvement.
The chosen construction then needs to be tested in a complete garment. A straight test strip does not reveal what happens around a curved bust seam, concealed zipper, or tight waist join. Fit the garment and check normal walking, sitting, and bending, paying attention to whether seams pull open, form ridges, or restrict movement. Where the proposed care label permits washing, evaluate the relevant care treatment rather than assuming the garment will behave as it did after initial pressing. When the project requires measurable seam strength or yarn-slippage performance, specify an appropriate laboratory method and acceptance criterion in advance, instead of inventing a universal standard after testing.
How Are Seam Specifications Confirmed?
An approved sample needs a matching written instruction. A useful seam specification identifies the location, seam type, allowance width, edge finish, thread and needle requirements where relevant, stitch settings, and any special pressing treatment. It should also refer to the correct pattern and fabric version. A 15 mm pattern allowance cannot casually become 10 mm at the sewing machine without changing the finished dimensions; that mistake becomes significant across multiple bodice panels. Different seam locations may have different specifications, and that is preferable to an oversimplified instruction such as “French seam all satin pieces.”
Jinfeng Apparel’s documented development process includes fabric and trim review, pattern development, sample revisions, sewing-instruction review, pre-production sample approval, and a retained reference sample. These controls are useful because construction changes made during fitting must reach the production team as updated requirements, not remain only in messages between individuals. If a curved French seam is replaced with an overlocked finish after review, the instruction and approval reference should agree. For brands running several satin styles in one collection, this connection between physical samples and written details reduces avoidable misunderstandings when styles enter production or return for a later season.
What Seam Defects Should QC Check?
Quality inspection must look at both seam integrity and visual appearance. A satin seam might remain intact but fail the desired look because the allowance shows as a ridge; another may lie perfectly flat but have poorly controlled raw edges. Inspect stitching continuity, exposed yarns, seam alignment, puckering, needle pulls, and pressing impressions. Check the outside as well as the inside, especially at waist joins, side seams, princess seams, and concealed zipper openings. Light-colored and close-fitting garments deserve particular attention because their reflective surface can make small irregularities stand out.
| Checkpoint | Observable concern | Useful verification or response |
| Allowance width | Uneven seam or fit deviation | Measure against approved millimeter specification |
| Stitch consistency | Skips, loops, or excessive density | Check stitch formation and settings over a defined length |
| Edge protection | Stray yarns or exposed raw edge | Review trimming and finishing coverage |
| Surface smoothness | Puckering or a raised seam ridge | Inspect flat, after pressing, and on the garment |
| Seam integrity | Opening or yarn slippage under stress | Review construction; test where required |
| Pressing result | Shine changes, marks, or impressions | Compare with approved fabric and pressing trial |
These checkpoints are meaningful only when they reference agreed criteria. Stitch density can be counted over 25 mm, for example, but the acceptable count must come from the approved construction rather than an invented rule for all satin. Likewise, a quality team may measure seam allowance against a stated tolerance, but a universal tolerance would be inappropriate for garments with different fabric weights and shaping requirements. The aim of inspection is to spot real departures from the approved sample while understanding which variations are material-related and which indicate a sewing problem that needs correction.
How Is Bulk Consistency Maintained?
Bulk consistency starts before sewing. Confirm that the production fabric matches the approved reference in relevant characteristics such as weight, stretch, color, and surface appearance. Different lots may behave differently at the machine, even if their shade looks similar. Then establish the seam-finishing method, stitching settings, allowance, and pressing treatment from the approved sample. During production, in-line inspections should identify recurring puckering, unfinished edges, or visible marks early enough for machine settings or handling practices to be corrected. Repairing finished pieces one by one is a poor substitute for controlling the source of a repeated defect.
The approved method should also be checked across sizes and colorways. A seam that lies smoothly on a loose sample size may be stressed differently in a fitted larger size, while ivory satin may reveal an internal ridge that is difficult to see in black. Jinfeng Apparel’s recorded workflow includes pre-production approval, fabric checks, in-line sewing inspection, pressing and final garment review, and retention of development information for later orders. For custom collections, the company works from the approved design and production plan rather than supplying ready-stock garments; its published starting minimum is 200 pieces per style and color, subject to material and construction requirements. A well-managed repeat order builds on the original approved seam details while checking any changes in fabric or fit.
Conclusion
The best seam finish for satin is the one that stays unobtrusive on the outside, controls the raw edge on the inside, and performs as expected when the garment moves. French seams deserve their reputation on many lightweight, unlined styles, but an overlocked or separately bound allowance may be better for a lined dress, firm satin skirt, or fitted bodice. What matters is not choosing the most elaborate finish; it is confirming that the fabric, pattern, stitch settings, and pressing method produce a reliable result. At Jinfeng Apparel, that approach fits naturally into custom satin dress development, from fabric review and sampling to approved construction and bulk quality control. A carefully finished seam is a small detail that people may never notice, and that is often exactly the point.
Frequently Asked Questions
1. Is a French seam always the best finish for satin?
No. French seams are excellent for many lightweight, non-stretch satin garments because they hide fraying edges and create a tidy interior. They are less convenient around tight curves, bulky intersections, and locations that may require substantial fitting adjustments. For a lined satin dress or structured bodice, a conventional seam with separately overlocked allowances may lie flatter and be easier to control. The best finish should be judged in the actual garment, especially after pressing and movement, rather than selected because it is associated with premium sewing.
2. Can you overlock satin without causing puckering?
Yes, although a good result depends on the fabric and machine adjustment. Check thread tension, differential feed, stitch length, cutting width, and the way the fabric is supported as it enters the machine. A satin edge can curl when the stitch is too tight or become wavy when the layers feed unevenly. Begin with a sample on the actual fabric, make controlled changes, and inspect the result after pressing. If the outer surface shows a ridge, the allowance or finishing method may need to change even when the overlock stitches themselves look neat.
3. What stitch length is best for sewing satin?
A straight-stitch length around 2.0–2.5 mm is a common trial starting range for many lightweight woven satins, but it is not a rule that applies to every weave or machine. Tightly woven satin may pucker when stitch density is excessive, while a very long stitch may not suit the required seam performance. Thread size, needle type, fabric density, and garment stress all influence the outcome. Sew samples in relevant fabric directions and choose the settings that give balanced stitches, a smooth surface, and sufficient seam integrity for the finished garment.
4. How do you stop satin seams from fraying or slipping?
First determine whether the problem is fraying at the cut edge or yarn slippage beside the stitching line. French seams, well-adjusted overlocking, and suitable binding can control fraying by enclosing or covering the exposed edge. Seam slippage is different and may require evaluation of fabric stability, seam design, allowances, and garment fit. A neatly overlocked allowance does not prove that a fitted dress will resist slippage during wear. When the risk is significant, a suitable woven-fabric seam test can provide measurable evidence before the construction is approved.
5. Which seam finish works best for a satin slip dress?
For a lightweight, unlined satin slip dress with relatively straight seams, a narrow French seam is often a strong option. It hides the raw edge and gives the inside a neat appearance without a separate visible overlock. However, bias-cut panels can stretch and settle, and a close-fitting silhouette may reveal an enclosed allowance as a ridge. The seam should therefore be checked after the garment has hung, been pressed, and been fitted on the body. Zipper openings, curved details, and lining may justify a different finish in specific locations.
6. How can a brand approve satin seam quality before production?
Approve the actual fabric and compare the relevant seam constructions in samples before confirming a complete garment. Record allowance widths, stitching requirements, edge finishing, and pressing instructions, then check appearance, fit, movement, and any specified care treatment. Review high-stress seams and locations where the glossy surface reveals marks. The agreed construction should be represented in the pre-production sample and written sewing specification, with production inspections comparing finished garments against that reference. This creates a much more dependable process than approving a seam solely because it looks clean in a photograph.