A dress lining is easy to overlook because, when it is working properly, nobody notices it. Yet the last few centimeters at the lining hem can decide whether a finished dress looks clean in motion or flashes an inner layer whenever the wearer walks, sits, turns, or climbs stairs. The challenge is that there is no single number that works for every dress. A fitted mini, satin slip midi, chiffon maxi, lace occasion dress, and stretch bodycon style can all need different lining relationships even when their overall garment lengths are similar.
For most dresses with a separate, free-hanging lining, a finished lining hem about 2-3 cm (roughly 3/4-1 1/4 in) above the outer hem is a practical starting point. Short fitted dresses may need less separation, while long, fluid, bias-influenced, or highly mobile shells may need more. The final difference should be confirmed on the actual sample after sewing, pressing, fitting, and any necessary fabric relaxation.
The useful question, then, is not simply, “How many centimeters should be removed from the lining pattern?” It is, “Where should the lining finish after both layers have become a real garment?” That distinction matters because hem allowances, grain direction, stretch, transparency, body movement, and pressing can all change the answer. A lining that is perfect on the cutting table can still show at the side seam after hanging, or ride upward on the thigh after sitting. The sections below explain how experienced dress developers diagnose those situations before they become bulk-production problems.
How Much Shorter Should Dress Lining Be?
For a conventional dress with a separate, free-hanging lining, a finished difference of about 2-3 cm is a sound starting point. Mini dresses often need the lower end of the range, while midi, maxi, fluid, or bias-influenced styles may need more. The approved sample should determine the final specification because shell fabric, lining fabric, silhouette, hem method, transparency, and movement can all change the correct relationship.
Is 1 Inch a Good Starting Point?
About 1 inch, or 2.5 cm, is a sensible development reference for many lined dresses because it creates enough clearance to keep the lining visually inside the shell without sacrificing too much coverage. It is especially useful for a stable woven midi or a conventional A-line dress. The mistake is turning that reference into a universal factory rule. A straight crepe midi can hold its measurement quite consistently, while a satin slip dress may settle after hanging and a chiffon maxi can move substantially during walking even when its static measurement looks correct.
A more reliable technical approach is to define the desired finished relationship instead of simply telling a sewing room to “cut the lining 2.5 cm shorter.” Pattern length and finished length are not necessarily the same because the shell and lining may use different hem allowances, seam finishes, or construction methods. A specification that records the finished shell length, finished lining length, measurement point, and intended separation is much easier to reproduce through sampling and bulk production than an informal instruction based on raw pattern pieces.
The figures below are practical development ranges rather than universal tolerances. They are useful for deciding where to start a first sample, but the final value should be approved only after the dress has been assembled in the intended materials and checked on the body or an appropriate dress form. Fabric behavior, silhouette, wearer movement, and the intended visual coverage should always take priority over copying a number from another style.
| Dress Type | Practical Starting Difference | Main Check |
| Short mini dress | 1.5-2.5 cm | Coverage and ride-up |
| Standard midi dress | 2-3.5 cm | Hem visibility and balance |
| Long/maxi dress | 3-5 cm | Fabric drop and movement |
| Fitted stretch dress | 1.5-3 cm | Stretch and recovery |
| Fluid chiffon dress | 2.5-5 cm | Shell movement and transparency |
| Sheer overlay dress | Design-specific | Intended visible sheer section |
When Should the Lining Be Shorter?
A clear height difference is most useful when the lining hangs independently from the shell and is intended to remain invisible. During normal wear, the outer skirt rarely stays at one fixed vertical position. It swings outward during a stride, lifts in moving air, shifts when the wearer sits, and can rise temporarily when she climbs stairs. The lining usually remains closer to the legs, so two hems that looked perfectly aligned while standing can separate dramatically once the garment starts moving.
Longer or fuller dresses often justify more clearance because there is more fabric available to move. A full chiffon maxi can lift and swing much more than a structured woven sheath. Bias-influenced styles deserve additional attention because the shell may also continue to change length after it has been hung for a period of time. In these cases, the correct lining position is established after the shell has reached a reasonably stable condition rather than immediately after the first sewing operation.
Short dresses create the opposite problem. A 5 cm difference that looks modest on a floor-length dress can remove a large share of usable coverage from a mini. For this reason, fitted party, bodycon, cocktail, and short satin dresses often benefit from a smaller starting difference combined with more careful movement testing. The lining should be shortened only as much as necessary to remain visually controlled while still providing the coverage, comfort, and opacity the design requires.
Can the Lining Be Too Short?
Yes. An excessively short lining can create problems that are just as visible as a lining that hangs below the shell. Transparency is one of the most common examples. In chiffon, mesh, lace, lightweight crepe, or pale-colored fabrics, the lining controls a large part of the garment’s opacity. If it stops too far above the shell, the lower section can suddenly become much more transparent and form a horizontal visual break that is obvious in daylight or flash photography.
The proportional effect becomes particularly important on short dresses. If a mini skirt section measures 40 cm from waist to finished hem, shortening the lining by 5 cm removes 12.5% of that skirt length. On a 90 cm maxi skirt section, the same 5 cm represents only about 5.6%. The same numerical adjustment therefore has very different consequences depending on the garment. This is one reason experienced sample rooms do not treat lining shortening as a simple arithmetic step that can be copied from one silhouette to another.
A short lining can also migrate upward when the dress is fitted closely around the hip or thigh. If the lining circumference is insufficient, normal walking and sitting can push the inner layer upward even when its original vertical length looked correct. In that situation, cutting it longer may not solve the underlying issue. Length, circumference, stretch, recovery, and attachment points need to be reviewed together because the most visible symptom is not always the true cause.
What Is the Better Factory Specification?
A dependable production specification describes the finished result instead of relying on phrases such as “slightly shorter lining.” A practical record might state that the finished outer dress length is 112.0 cm, the finished lining length is 109.0 cm, and the intended difference is approximately 3.0 cm at center front, with supporting checks at the side seams and center back. If the dress has a high-low hem, train, asymmetric panel, or slit, more than one measurement point may be necessary.
Movement should also be part of sample approval for fitted or complicated styles. A static measurement can confirm dimensions, but it cannot show whether the lining catches around the thigh, becomes visible through a slit, pulls the shell inward, or remains bunched after the wearer stands up from a chair. For brands developing several sizes, the larger sizes deserve specific attention because insufficient lining circumference can create what looks like a length problem even when the vertical measurement technically matches the specification.
In professional dress development, lining length is therefore controlled in the same way as other fit-sensitive measurements: it is defined on the pattern, checked in the sample, reviewed after the fabric has behaved under realistic conditions, and then translated into repeatable bulk-production checkpoints. That approach is more reliable than correcting the lining only when it appears at final inspection, because by then the actual problem may already be embedded in cutting, grading, sewing, or material selection.
Why Is Dress Lining Shorter Than the Dress?
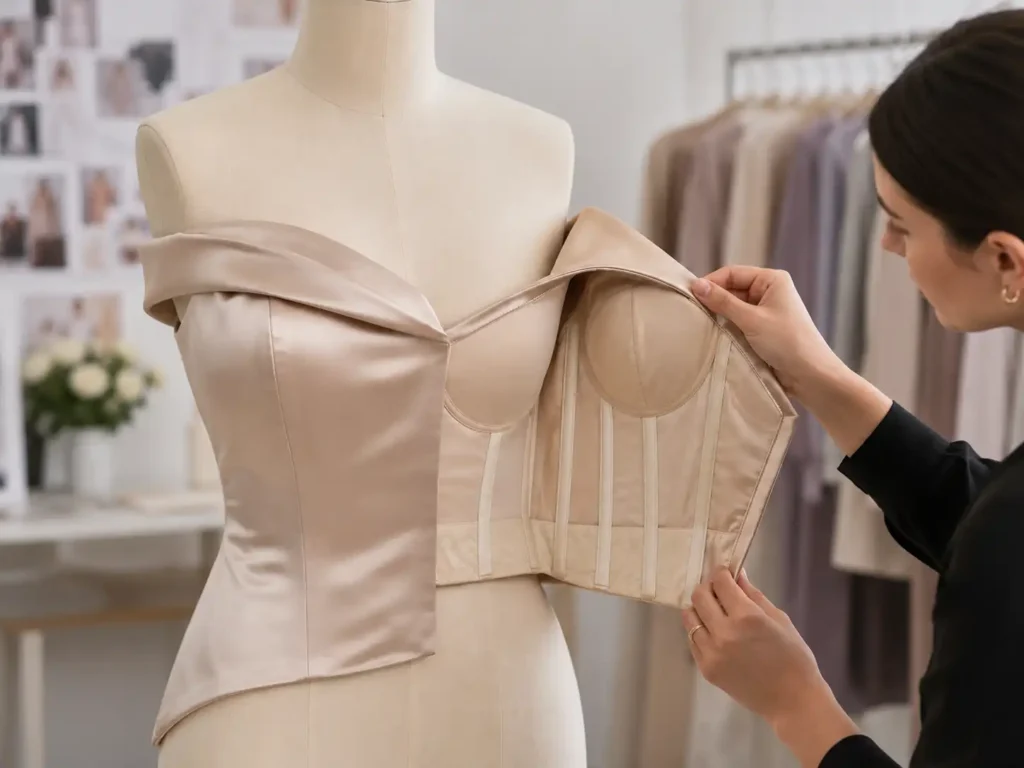
Dress lining is normally shorter because the shell and lining do not move in exactly the same way. A controlled difference helps keep the inner hem hidden, reduces interference between the two layers, and gives the shell freedom to drape naturally. The lining still needs enough length for coverage, comfort, opacity, and movement, so the goal is a balanced separation rather than simply making the inner layer as short as possible.
How Does a Shorter Lining Prevent Showing?
Most lining problems appear during movement rather than while the wearer stands still in front of a mirror. The outer layer responds directly to walking, turning, sitting, and moving air. A lightweight chiffon or organza shell can lift outward and upward, while the lining remains closer to the legs. A full A-line skirt can also swing noticeably during each stride, changing the apparent vertical relationship between the two hems even though their flat measurements have not changed.
If the shell and lining finish at exactly the same height, there is almost no margin for these normal differences in movement. Raising the lining by 20-30 mm gives the garment a useful visual safety zone before the inner edge can become exposed. The correct margin still depends on fabric and silhouette. A floor-length chiffon style may need more room because the shell is highly mobile, while a structured sheath may need less because both layers stay relatively controlled near the body.
Color contrast can make a small exposure more noticeable. A black lining under black fabric may remain visually discreet even when it comes close to the shell edge, while a bright white or pale lining under a dark dress can be obvious after only a few millimeters of exposure. This is why a sample that looks technically acceptable under factory lighting should also be viewed under the kind of daylight, retail lighting, or event lighting the finished garment is likely to encounter.
How Does Lining Length Affect Movement?
A good lining should move with the wearer without unnecessarily controlling the shell. In a loose A-line or flowing dress, the lining needs enough sweep and length to permit a natural walking stride. If it is too narrow, the wearer may feel resistance before the outer skirt reaches its intended movement. The shell can then pull inward, and a style designed to look fluid may appear unexpectedly stiff even though the external pattern seems correct.
Fitted dresses create a different relationship. The lining may stretch across the hip and thigh every time the wearer walks or sits. If the shell stretches by 15-20% in use but the lining offers much less extension, the lining becomes the restrictive layer. It can ride upward, create drag, or prevent the shell from returning smoothly to its original position. The opposite can happen when the lining stretches more than the shell but has weaker recovery, leaving the inner layer lower or looser after movement.
For this reason, lining performance is usually easier to diagnose when four variables are checked together: finished length, hem circumference, shell stretch, and lining stretch. Attachment points between layers also matter because a lining that is locally fixed under tension can distort the shell even when the main body measurements are correct. When a lining repeatedly rides upward, adding length without reviewing circumference and material compatibility often treats the symptom rather than the cause.
What Happens When Both Hems Are Equal?
Equal shell and lining hems are not automatically incorrect. Some dresses use enclosed, bagged, or partially connected constructions where the lining is deliberately attached to the shell, and the pattern controls the relationship through seam geometry and internal ease. The risk is greater when a free-hanging lining is given the same finished length as the shell and both layers are assumed to behave identically after sewing, pressing, hanging, and wear.
Consider a dress where both layers measure 105 cm immediately after construction. The shell contains sections influenced by the bias and settles another 12 mm after hanging, while the stable lining changes only 2 mm. The finished relationship has shifted by about 10 mm even though both layers started equal. Another fabric combination can create the reverse situation, where the lining relaxes more than the shell and begins to show. The raw measurement therefore does not predict the final visual result by itself.
Pressing can also alter the relationship. Some shell fabrics react differently to steam, tension, and mechanical handling than their lining fabrics. A hem that looked safe before final pressing may become marginal afterward, especially on satin, viscose blends, or lightweight woven fabrics. Final approval is most reliable after the garment has completed the relevant sewing and finishing operations rather than at an early stage when one or both layers may still change.
Why Does the Shell Need Freedom?
Many fashion fabrics are selected because of the way they move. Satin is expected to glide, chiffon to float, crepe to fall naturally, and a full skirt to swing without looking trapped. A lining that is too tight, too long, or attached under tension can interfere with those characteristics. The finished dress may not look obviously “wrong”; instead, it can appear slightly pulled, stiff, uneven, or heavier than the original design intended.
The shell and lining do not always need identical volume. A full skirt might have a shell hem circumference of 300 cm while the lining uses a simpler silhouette to reduce bulk and friction. That can work well if the lining still provides adequate walking room and does not control the shell at attachment points. Problems arise when a simplified lining is also too narrow around the thigh or finished too close to the shell hem, because the inner layer then starts governing the movement of the outer garment.
Good lining construction is almost invisible to the wearer. She notices that the dress feels smooth, comfortable, opaque, and easy to move in, but she should not feel the inner layer pulling against her stride or see it competing with the outer hem. That is why experienced pattern development considers lining length together with shape, sweep, grain, stretch, and attachment instead of treating the lining hem as an isolated finishing measurement.
Which Lining Length Works for Different Dresses?
Lining length should change with silhouette and garment length. Mini dresses generally need less shortening because coverage is limited, while midi and maxi dresses can tolerate more separation. Fitted, A-line, full, and bias-influenced garments also behave differently. A useful development process starts with a practical range and then confirms the final relationship on the actual sample rather than applying one identical lining rule across an entire collection.
How Short Should Mini Dress Lining Be?
Mini dresses leave very little room for error because even a small numerical adjustment represents a significant share of the total skirt length. For many conventional mini dresses, approximately 1.5-2.5 cm is a useful starting difference. That usually creates enough visual separation to keep the lining inside the shell without reducing coverage excessively. Very fitted bodycon or club styles often benefit from testing closer to the lower end of that range because the entire garment can travel upward on the body during movement.
Sitting tests are particularly important. A mini that appears perfectly safe while standing can rise several centimeters once the wearer sits. If the outer shell travels upward 4-6 cm and the lining has already been shortened aggressively, the effective coverage can be far less than expected. The problem becomes more visible in styles with side slits, wrap-like openings, high stretch, or very smooth lining fabrics that can slide independently against the body.
A practical fit check should include relaxed standing, a full walking stride, and a normal seated position. After the wearer stands again, the lining should recover reasonably close to its original location without requiring repeated manual adjustment. This simple sequence often reveals more than a static fitting because it exposes whether the problem is truly vertical length or whether the lining is being pushed upward by insufficient circumference, poor stretch recovery, or friction between the inner fabric and the body.
How Short Should Midi Dress Lining Be?
A finished difference of around 2-3.5 cm is a practical starting point for many midi dresses, but the correct value still depends heavily on silhouette and fabric. A straight woven midi made from a stable crepe may remain close to its approved measurement throughout production. A satin slip midi can behave differently because bias influence and fabric weight allow the shell to redistribute length over time, while a pleated or flared midi can create more movement at the outer hem than the lining experiences.
Slits introduce another variable. If a midi dress has a 40 cm side slit, the lining opening must work with both the slit height and the intended coverage. A lining edge visible through the slit may be acceptable when it is part of the design, but it looks unfinished when the technical file never defined that relationship. The same issue appears in wrap-effect skirts, overlapping panels, and asymmetric hems where a conventional center-front measurement cannot describe the full lining behavior.
Opacity also deserves attention on pale or semi-transparent midi dresses. If the lining finishes 5 cm above a lightweight shell, the final 5 cm may become noticeably more transparent against the legs even though the lining itself never appears below the dress. The best lining length therefore balances two different goals: enough separation to stay hidden during movement and enough coverage to avoid an accidental transparency band that changes the intended visual quality of the garment.
How Short Should Maxi Dress Lining Be?
A 3-5 cm difference is a reasonable development range for many free-hanging maxi linings, particularly when the outer fabric is fluid, lightweight, or highly mobile. The final measurement should still come from the actual style because long fabric panels accumulate small distortions. A difference that is negligible near the waist can become visible after more than a meter of fabric has settled under its own weight, especially in circular, bias-influenced, or very full skirt shapes.
The hem should be checked at several points rather than only at center front. A lining can be 4 cm shorter at the front while finishing only 1 cm above the shell near a side seam because the outer fabric has dropped unevenly. Center front, left side seam, right side seam, and center back are useful baseline checkpoints, with additional measurements around slits, trains, or asymmetric panels where the shape requires them.
Long chiffon and other transparent fabrics also force a design decision about the lower sheer area. If the lining intentionally stops above the shell, the exposed transparent section becomes part of the style and should be controlled as a visible proportion. If that effect is not intended, the lining may need to remain longer even if a larger safety gap would make the inner hem easier to hide. On long dresses, visual continuity and opacity can be just as important as the numerical distance between two hems.
Do A-Line and Full Skirts Need Different Linings?
Usually, yes. Skirt fullness affects both movement and hem stability. An A-line shape widens gradually from the hip and typically produces moderate movement. A full-circle or heavily gathered skirt contains much more circumference, so the outer hem can swing significantly farther away from the body. The lining may use a simpler shape and less volume, but it still needs enough width to permit walking and enough length to maintain coverage without controlling the shell.
Circular skirts deserve extra caution because their hems contain many grain directions. Sections closer to the bias can relax more than sections near the straight grain, which is why a freshly sewn circle skirt may look level at first and become uneven after hanging. The lining can respond differently if it uses another fabric or a less circular pattern shape. Those differences should be evaluated before the outer and inner hems are finally approved.
The table below summarizes useful development ranges by silhouette. They are not production tolerances and should not replace sample approval, but they help explain why one “lining minus” measurement rarely works across every dress in a seasonal collection. The practical value is in comparing the garment’s movement, opacity, and hem balance against the starting range and then recording the approved finished relationship for production.
| Silhouette | Practical Starting Difference | Key Development Check |
| Fitted mini | 1.5-2.5 cm | Sitting and ride-up |
| Straight midi | 2-3 cm | Hem level and slit |
| A-line midi | 2-3.5 cm | Swing and side balance |
| Bias slip dress | 2.5-4 cm | Post-hanging length |
| Full maxi | 3-5 cm | Circumference leveling |
| Sheer overlay | Variable | Intended opacity transition |
How Do Fabrics Affect Lining Length?
Fabric properties can change the correct lining position even when the dress pattern remains similar. Drape, weight, stretch, transparency, grain direction, friction, shrinkage, and recovery influence how shell and lining settle on the body. Stable woven fabrics often allow tighter control, while chiffon, satin, stretch jersey, lace, mesh, and bias-influenced materials need more fitting, movement testing, and observation after construction.
How Should Chiffon Lining Be Set?
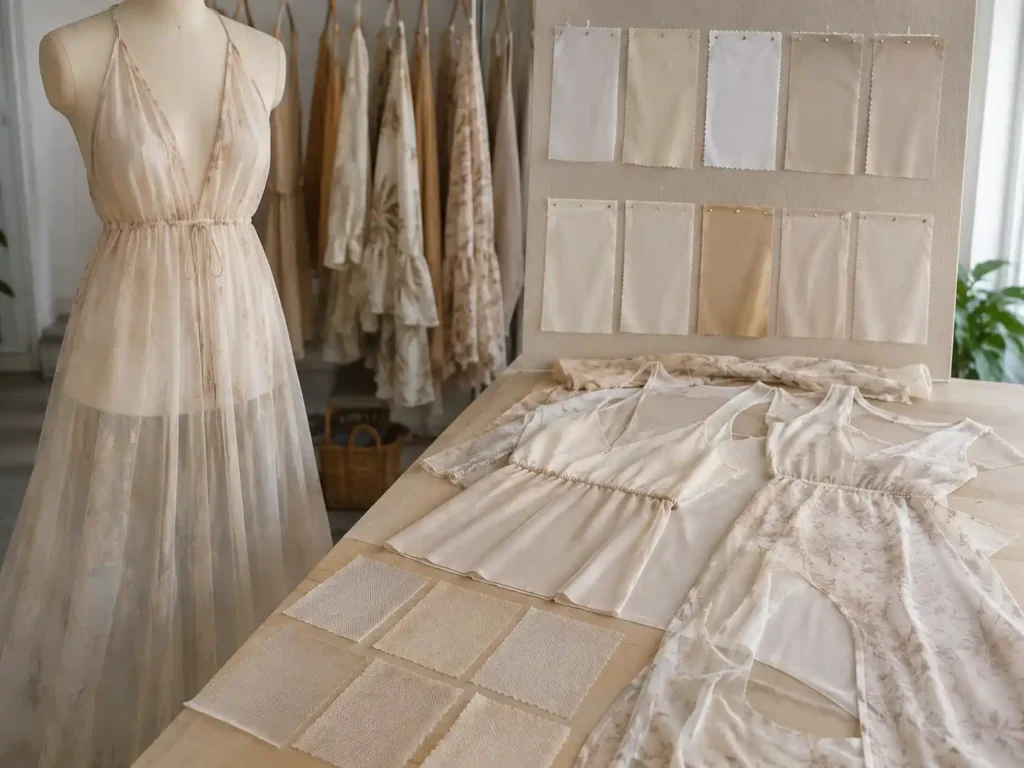
Chiffon needs more attention than its light weight might suggest because the shell is highly mobile while the lining often provides most of the garment’s opacity. For many chiffon dresses, approximately 2.5-5 cm can be a useful testing range, with shorter dresses generally using less and full or maxi silhouettes potentially requiring more. The final value should be determined only after the actual chiffon and lining have been assembled because transparency and movement can change the visual result dramatically.
Opacity is often the limiting factor. A pale chiffon maxi with a lining that stops 5 cm above the shell may be physically safe from lining exposure, yet the last 5 cm of the dress can become noticeably more transparent in daylight. That change may look attractive in a resort design where a sheer lower section is intentional, but it can look unfinished in a bridesmaid, wedding guest, or evening dress that was expected to maintain continuous coverage.
Hem balance also becomes more difficult because chiffon shifts easily during cutting and sewing. A 10 mm difference around different parts of a long hem can become visible once the dress is hung. The most reliable final check therefore combines four things: the vertical lining difference, the level of the outer shell hem, the visual transparency transition, and the way both layers behave while the wearer walks and turns. Treating only one of those factors can leave a garment that technically measures correctly but still looks wrong.
How Should Satin Lining Be Set?
Satin requires control because its reflective surface makes small construction problems visible. A 2-3.5 cm starting difference works for many conventional satin dresses, while fluid or bias-influenced slip styles may need additional relaxation before the final relationship is approved. Straight-grain, structured satin generally behaves more predictably, but even then the lining fabric, zipper attachment, pressing method, and hip fit can change how the outer surface hangs.
Friction is an important factor that is easy to overlook. A smooth lining can help satin glide over the body, but a lining that grips the shell or is too narrow around the hip can produce drag lines, horizontal pulling, or distortion near the zipper. Those problems may appear as surface defects even though the shell pattern itself is correct. The lining can therefore affect the visible quality of the satin long before its hem is close to showing.
Directional lighting is useful during sample review because satin reflects small ripples that diffuse fitting-room light may hide. Side lighting can reveal zipper waves, seam tension, uneven pressing, and places where the lining is pulling against the shell. A technically hidden lining is not enough; the internal construction has to support the outer surface. For premium-looking satin dresses, the correct lining length is one part of a broader system that also includes compatible material behavior, smooth attachment, and stable pressing.
Do Lace and Mesh Need Different Linings?
Yes, because lace and mesh often use the lining as part of the visible design rather than as a completely hidden inner layer. A lace mini might intentionally show a 3 cm transparent scalloped section below the lining, while another style may expose 10-15 cm of lace for a more dramatic effect. Both can be correct when the relationship is deliberate, balanced on the body, and clearly defined in the technical file.
Mesh can involve an even greater difference. A fitted mesh midi or maxi dress may use an opaque mini-length base layer underneath, making the lining endpoint part of the silhouette. In that case, asking whether the lining is “too short” is incomplete unless the intended opacity design is known. Useful specifications may define the lining by distance from the shell hem, position relative to a slit, relationship to a lace motif, or front and back reference points when the visible transparency is intentionally different.
Color and lighting influence the result as well. Black lining under black mesh creates a softer transition than pale lining under white or nude mesh. On light-colored lace, an inner hem can become visually obvious through the outer fabric even when it is several centimeters above the shell edge. For transparent materials, the best lining length is therefore judged both structurally and visually, because the edge of the lining can become a design line even when it never physically appears outside the dress.
How Do Stretch Fabrics Affect the Hem?
Stretch changes lining behavior because garment dimensions are no longer fixed once the dress is worn. A bodycon shell can expand substantially across the hip, and horizontal stretch can reduce its apparent vertical length. If the lining stretches less, the two layers move at different rates. If the lining stretches more but recovers slowly, it may remain looser or lower after the wearer stands up again. Nominal stretch percentage alone does not describe that behavior because recovery is equally important.
A practical fit sequence can reveal most problems without specialized laboratory equipment. Measure the relaxed garment, fit it on the intended body size, walk 10-15 normal steps, sit for approximately one minute, and then stand again without manually pulling the dress into place. The shell and lining should return reasonably close to their intended positions. If the lining remains bunched above the thigh, the cause may be insufficient circumference, poor recovery, or excessive friction rather than a simple shortage of vertical length.
Stretch direction also matters. A lining with strong crosswise stretch but very little lengthwise movement behaves differently from a shell with multi-directional elasticity. Size grading can amplify the issue because larger hip measurements demand more expansion. For fitted dresses, the lining should therefore be evaluated on the body and across the intended size range. Flat measurements are necessary for production control, but they cannot replace a movement test when the materials themselves change dimension during wear.
How Should Dress Lining Be Measured?
Dress lining should be measured by its finished position relative to the finished shell, not only by how much shorter the paper pattern appears. Pattern length, raw cut length, hem allowance, seam construction, pressing, and fabric relaxation can all change the final result. Clear technical specifications should record both finished dress length and finished lining length at defined points so sampling and production teams are working toward the same visible outcome.
Is Lining Length Measured From the Finished Hem?
For finished-garment control, the most useful reference is the vertical difference between the completed shell hem and the completed lining hem. This avoids confusion between departments. A pattern maker may interpret “lining 3 cm shorter” as a paper-pattern adjustment, a sample machinist may understand it as a final finished difference, and a quality inspector will naturally measure the completed garment. Unless the technical file identifies which meaning is intended, all three people can follow the instruction and still produce different outcomes.
A clearer specification might record a finished dress length of 118.0 cm, a finished lining length of 115.0 cm, and a target difference of 3.0 cm at center front, with supplementary checks at both side seams and center back. For asymmetric styles, one figure may not be enough. A high-low dress can require separate front and back relationships, while a dress with a train may intentionally keep the lining much farther above the shell at the back.
The measurement reference point also has to be consistent. Depending on the garment, length may be taken from high shoulder point, waist seam, center front, or another defined location. If the shell and lining are measured from different starting points, the resulting numbers are not directly comparable. The most useful factory specification therefore states what the finished garment should look like, where the measurement begins and ends, and how the result should be checked rather than assuming everyone will interpret a single number in the same way.
How Do Hem Allowances Change the Length?
Hem allowances can change the final shell-to-lining relationship by several centimeters even when the raw pattern pieces initially look similar. Imagine a shell and lining that both reach the same raw hem level. If the shell uses a 4 cm turned hem while the lining uses a 1.5 cm narrow hem, the shell loses approximately 4 cm from the raw edge and the lining only 1.5 cm. Without another pattern adjustment, the finished lining would actually end about 2.5 cm lower relative to the shell.
The pattern team therefore needs to calculate backward from the intended finished result. If a dress should finish at 100 cm and the lining at 97.5 cm, each pattern piece must include the correct allowance for its own sewing method. The shell might require roughly 104 cm before hemming if a 4 cm turn-up is used, while the lining might need approximately 99 cm if its hem allowance is 1.5 cm. The exact figures depend on the construction, but the principle remains the same: raw length and finished length are not interchangeable.
This distinction becomes especially important when a style moves from development into another sewing line or factory unit for bulk production. Sample-room shorthand can work when the same people handle every operation, but it becomes unreliable when information must travel through pattern, cutting, sewing, finishing, and QC. Finished measurements reduce interpretation and help preserve the approved relationship even when the production route becomes more complex.
Should Shell and Lining Be Hemmed Separately?
For many dresses with a free-hanging lining, separate hems are the simplest and most practical construction because each layer can relax independently. If the shell drops slightly after hanging, its hem can be leveled without disturbing the lining. If the lining needs a small correction, it can also be adjusted independently. This flexibility is particularly useful for fluid fabrics, long dresses, and materials with different weights or grain behavior.
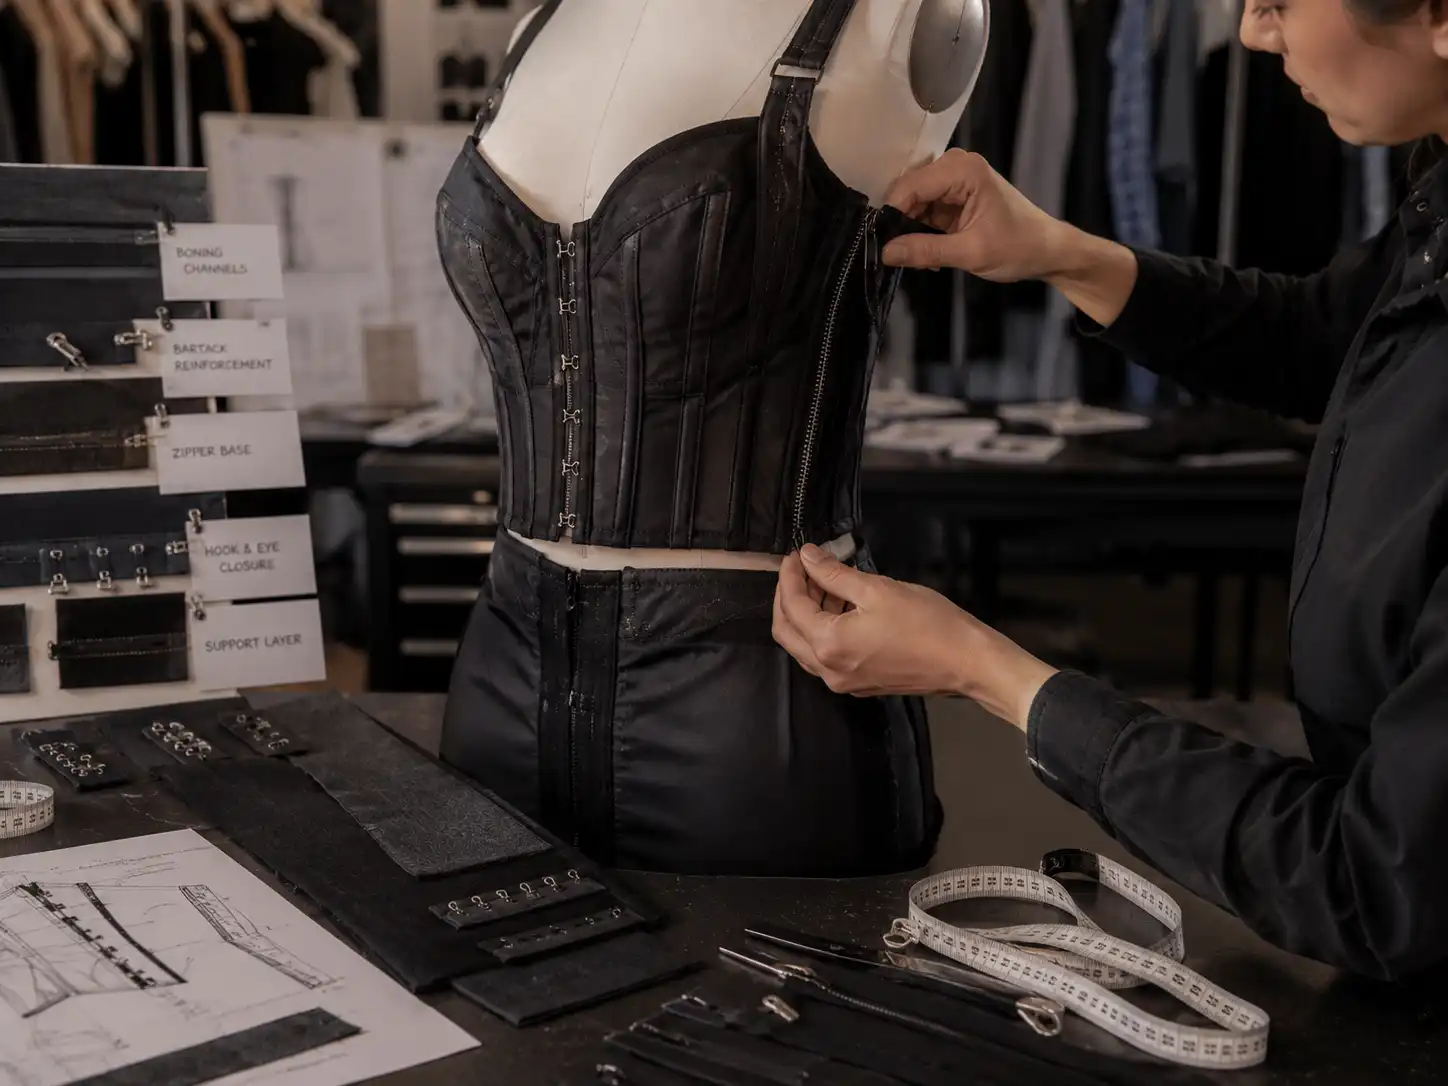
There are many legitimate exceptions. Some garments use bagged hems, partial attachments, facings, enclosed construction, or internal tacks that limit movement between the layers. Structured occasionwear can also connect the lining to corsetry, boning channels, cups, waist stays, zipper areas, or multiple skirt layers. These methods need planned ease because a lining attached too tightly can pull the shell upward or create a visible ridge, while too much internal ease can bunch inside the garment.
The hem method should therefore be decided before the lining pattern is finalized. Construction affects sewing time, access for pressing, ease of alteration, internal bulk, movement, and cost. A simple free-hanging lining in a casual midi dress should not be treated the same way as the internal structure of a fitted corset dress or multi-layer evening style just because both products are described as “lined.” The correct hem relationship comes from the construction system, not from the label alone.
When Should the Final Hem Be Checked?
The final lining position should be checked after the garment has reached a reasonably stable condition. Stable woven mini dresses may need only normal construction and pressing before their measurements become dependable. Long skirts, bias-influenced dresses, chiffon, satin, full-circle shapes, and some stretch fabrics often benefit from additional relaxation because the shell can continue to redistribute length after sewing. Finalizing the lining too early can mean correcting it against an outer hem that has not yet settled.
A practical development sequence is to complete the main construction, allow the garment to relax when the fabric requires it, place it on the correct dress form or fitting model, verify the outer hem level, confirm the shell measurement, and then check the lining around the full circumference. Any necessary adjustment can be made before final pressing, followed by one more visual and numerical review. Checking the full circumference matters because a correct 30 mm difference at center front does not guarantee the same relationship at the side seam or back.
For repeat production, the approved sample becomes the visual standard while the measurement specification provides numerical checkpoints. That combination is more dependable than asking every operator or inspector to decide by eye. In Jinfeng Apparel’s documented development system, lining is one of the controlled pattern points alongside garment length, bust, waist, hip, neckline, and slit height, supported by 7+ senior womenswear pattern makers, two sample rooms, and 20+ sample machinists. The value of that structure is not the number itself, but the ability to turn a sample decision into a repeatable production requirement.
What Causes Dress Lining to Show?
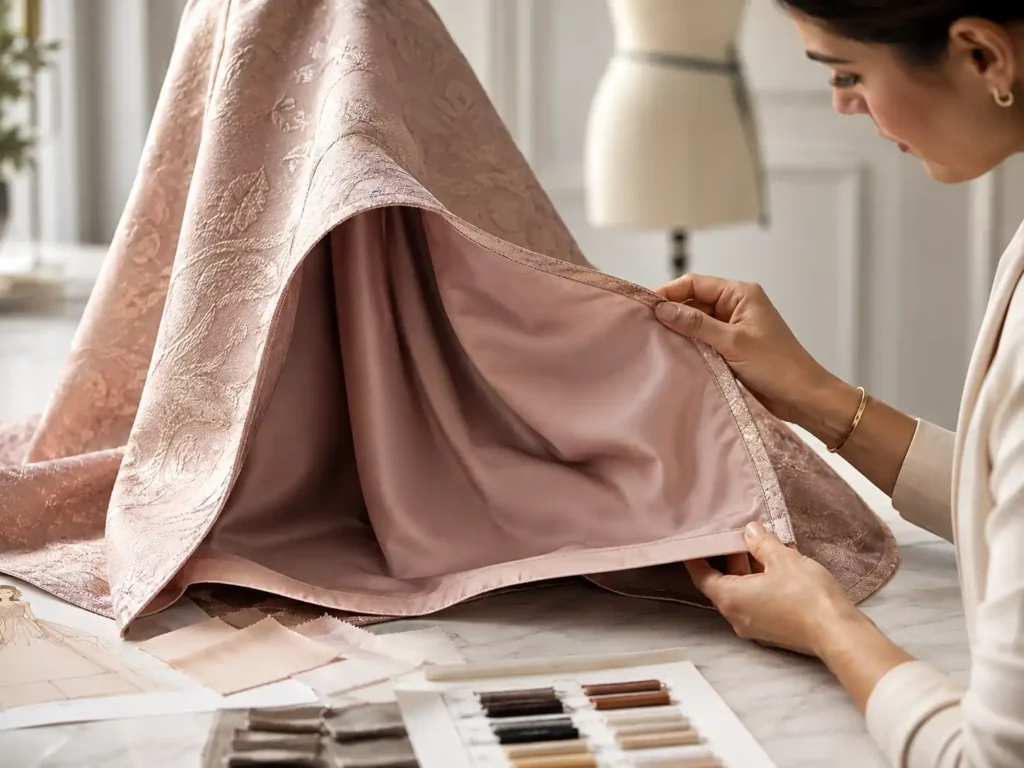
Visible lining does not always mean the lining was cut too long. The shell may be too short, the outer fabric may have relaxed unevenly, the lining may have stretched, side seams may be distorted, or hemming may be inconsistent. Effective correction starts by measuring both layers and identifying which component changed before any fabric is removed from the lining, because trimming can easily hide a symptom while leaving the real production problem untouched.
Is the Lining Too Long?
Sometimes the answer is simple, particularly when the lining is visible by roughly the same amount around most of the hem. Even then, measurement should come before trimming. Suppose the approved specification requires a shell length of 110.0 cm, a lining length of 107.0 cm, and a 3.0 cm target difference. If the finished garment measures 108.5 cm at the shell and 107.0 cm at the lining, the lining has actually met its requirement. The shell is 1.5 cm short.
Shortening the lining in that situation would hide the immediate symptom but leave the true shell-length problem unresolved. That distinction becomes important in bulk production because repeated “quick fixes” can gradually move an order away from the approved sample. If different operators keep trimming lining whenever it appears, one batch can end with excessive coverage loss while the original shell variation continues unchecked in cutting or hemming.
Uniform exposure and localized exposure should also be treated differently. If the lining shows only at the left side seam, shortening the full circumference may create an unnecessarily large gap everywhere else. A basic diagnosis compares shell and lining at center front, both side seams, and center back. The pattern of those measurements usually reveals whether the issue is overall length, local distortion, uneven fabric relaxation, or sewing balance, which makes the correction more precise and easier to prevent in later pieces.
Why Does Lining Hang Unevenly?
Uneven lining can come from cutting accuracy, grain direction, sewing feed, pattern balance, zipper installation, pressing, or fabric relaxation. Long lightweight dresses make these differences easier to see because small errors accumulate over a large vertical distance. A circular skirt is particularly sensitive because different sections of the hem sit on different grain angles, meaning some areas can settle more than others even when the original pattern was mathematically symmetrical.
Side seams are another common source of imbalance. If one layer is stretched slightly while being sewn, the seam can appear acceptable on the table but hang differently on the body. The lining may also twist when it is attached to a zipper or waistline under uneven tension. A problem that appears to be a “long lining” at one side can therefore originate much higher in the garment, where the inner layer was fed differently or pulled off grain during construction.
Back length deserves its own check because the garment travels over the seat differently from the front. If the shell and lining do not accommodate that body shape in the same way, the lining may appear lower at center back even though both flat pattern measurements looked balanced. The table below helps separate common visual symptoms before a correction is made.
| Visible Problem | First Points to Check | Common Cause |
| Lining shows all around | Shell and lining finished lengths | Overall length error |
| Shows at one side | Side seam and grain | Sewing or cutting distortion |
| Shows mainly at back | Back length and seat fit | Pattern balance |
| Appears after hanging | Shell hem level | Fabric relaxation |
| Appears after sitting | Hip fit and recovery | Stretch incompatibility |
| Only some bulk pieces fail | Operator and hem consistency | Production variation |
Can Fabric Growth Change the Hem?
Yes. Fabric relaxation can change the relationship between shell and lining after the garment has been sewn correctly. Bias-influenced fabrics are the obvious example because yarns sitting diagonally to gravity can redistribute under their own weight. Satin slip dresses, circular skirts, and fluid crepes may therefore develop more length in some areas after hanging, while the lining can behave differently because it uses another weave, fiber composition, weight, or grain direction.
The term “growth” should not be treated as a fixed percentage that applies to every fabric. Actual change depends on material construction, garment length, cut direction, moisture, seam tension, pressing, and handling. Two satins that look almost identical on a swatch card can behave differently once they become long skirts. If the shell settles 15 mm while the lining changes only 3 mm, their relationship shifts by 12 mm; if the lining relaxes more than the shell, the risk can move in the opposite direction.
The safest development approach is to identify fabrics with relaxation risk before the bulk pattern and hem position are frozen. Adding a very large lining difference “just to be safe” is not a good substitute because excessive shortening can create transparency breaks and reduce coverage. The objective is not maximum separation but controlled stability. Once the actual fabric combination has been tested, the approved sample provides a much better reference than a generic numerical rule taken from another dress.
How Is Lining Length Checked in Production?
Once a sample is approved, bulk production needs a repeatable checking method rather than individual judgment. The first reference is the measurement specification, which should identify the relevant shell length, lining length, measurement locations, and any tolerances set by the brand. The second reference is the approved sample, which shows the visual relationship, fabric behavior, and overall balance that numbers alone cannot fully describe.
Inspection should normally cover more than one point. Center front, side seams, and center back may be sufficient for a basic dress, while a style with a slit, asymmetric hem, train, lace border, or sheer panel requires additional locations. Inspectors should also confirm side-seam alignment, twisting, the final pressed condition, and whether the relationship remains consistent through the intended size range. Larger sizes can reveal insufficient lining circumference that was not obvious in the base sample.
The main production risk is not one garment being 5 mm different from another. It is an unstable process that produces random relationships of 5 mm, 15 mm, and 25 mm across the same order. A reliable system converts the approved sample into clear pattern, sewing, and QC checkpoints so the first production pieces and later production pieces behave in the same way. Exposed lining is specifically treated as a garment-development risk in Jinfeng Apparel’s objective manufacturing documentation, alongside measurement instability, zipper distortion, fabric problems, and sample-to-bulk inconsistency, which is why the issue is controlled from development rather than left to final inspection alone.
Conclusion
The most useful answer to “How much shorter should dress lining be?” is a starting range combined with a method for confirming it. Around 2-3 cm works well for many free-hanging dress linings, but mini dresses may need less, long or fluid styles may need more, and sheer or intentionally layered designs can follow completely different visual rules. The final relationship should be decided from the finished garment after the shell and lining have been sewn, pressed, fitted, and allowed to behave as their materials require. When something goes wrong, measuring both layers before trimming prevents a quick repair from hiding the real cause. For brands developing custom dresses, lining length is a small specification with a surprisingly large effect on movement, opacity, comfort, and the impression of overall workmanship, so it deserves the same disciplined sample-to-production control as the more obvious fit measurements.