Skip to content

How to Develop a Wrap Dress Pattern: From Basic Block to Production-Ready Fit

Your trusted Women’s Apparel Manufacturer from China

A wrap dress is one of those garments that looks almost effortless when it works well. Two front panels cross the body, a tie closes the waist, and the fabric falls into a flattering V-shaped neckline. Yet the apparent simplicity is exactly what makes pattern mistakes so visible. There may be no heavily structured corset, complicated seam map, or oversized trim to distract from an unstable neckline, inadequate overlap, twisting waist, or skirt that opens too far during a normal stride. A few millimeters of unwanted neckline length can change how the entire upper body looks, while an otherwise attractive pattern can fail simply because it was tested in a fabric with different drape or recovery from the intended production material. For a dress that is expected to work across several sizes and hundreds or thousands of finished garments, developing the pattern means solving fit, movement, fabric behavior, closure tension, and production repeatability together rather than treating the wrap as a decorative front detail.
To develop a wrap dress pattern, start with an accurate bodice or dress block, establish the crossover and V-neckline, create enough front overlap, control the bust dart and waist shaping, then connect the bodice to the skirt and tie system. Test the pattern in the intended fabric, correct fit and movement through samples, grade the approved base size, and finalize production marks before bulk cutting.
That sequence sounds logical on paper, but the most useful lessons usually appear once the first sample is worn. A neckline that looked perfectly smooth on a mannequin may open when the wearer reaches forward. A skirt overlap that appeared generous while standing may separate when she sits down. A belt that creates a clean waist in a fitting room may pull one side seam toward the front after fifteen minutes of wear. Those are not random problems; they are clues that tell the pattern maker where the geometry, fabric, or closure system still needs work. Understanding those clues is what turns a basic crossover draft into a reliable wrap dress pattern.
What Makes a Wrap Dress Pattern Different?
A wrap dress pattern is different because the overlapping front panels simultaneously control closure, neckline depth, bust coverage, waist fit, and lower-body coverage. Unlike a conventional dress with a fixed center front, the wrap must remain balanced as the wearer moves and adjusts the waist. Pattern development therefore requires the front geometry, body shaping, tie position, and skirt overlap to function as one coordinated system.
True Wrap vs. Faux Wrap
A true wrap dress opens through the front. One front panel crosses the torso while the other sits underneath, and the garment is normally held in place with an inner fastening plus an external tie, belt, button, or similar closure. The adjustable waist is part of the appeal because it can accommodate small differences in body shape or styling preference. That adjustability, however, should not be confused with an unlimited fitting range. Shoulder width, bust volume, armhole shape, neckline length, front body length, and waist position still need to match the intended wearer. Tightening the belt harder cannot correct an inaccurate bodice without creating tension elsewhere.
A faux wrap produces a similar diagonal neckline without allowing the entire front to open. The overlapping appearance may be permanently secured into a waist seam, stitched into the opposite side seam, or fixed internally before the skirt is assembled. Stretch jersey dresses frequently use this approach because the wearer can pull the garment over the head while still getting the familiar wrap silhouette. Faux wraps can offer more predictable coverage and make certain production operations simpler, but the fixed construction removes some of the waist adjustment available in a true wrap.
The distinction needs to be made early because the two constructions do not necessarily share the same pattern. A true wrap requires enough underlap to dress and secure the body, whereas a faux wrap may need only enough extension to create the visual crossover. The waist seam, skirt construction, neckline stabilization, internal fastening, and dressing method can all change. Two finished dresses may look almost identical in a product photograph while requiring noticeably different pattern engineering underneath.
For a true wrap, pay particular attention to the relationship between the inner and outer fastening points. If the inner tie is positioned too high, too low, or too far toward the side seam, it can drag the underlapping front away from its intended position. If the outer tie is then tightened to compensate, the whole dress may rotate around the torso. A successful wrap feels adjustable to the wearer without looking as though the garment is being held together by excessive belt tension.
Pattern Piece Logic
A wrap dress may look fluid and uncomplicated from the outside, but its pattern usually consists of several carefully coordinated pieces. A basic style can include two front bodice sections, a back bodice, front and back skirt pieces, inner and outer ties, sleeves, facings, bindings, pockets, and partial or full lining. More elaborate versions may introduce separate waistbands, gathered panels, asymmetric skirts, ruffles, cuffs, or additional support components around the bust and neckline.
The important question is not simply how many pieces are involved; it is how their reference points connect. The bodice crossover needs to meet the skirt overlap naturally at the waist. The waist position on the underlap and overlap must align when the garment is tied. Neckline finishing pieces need to follow the final corrected edge rather than an earlier draft, while lining and facing patterns should support the shell without pulling it out of shape.
Production information is equally important. Grainlines, balance marks, notches, dart points, waist marks, closure positions, cut quantities, seam allowances, and pattern identification must be clear enough that the pattern can move from a development room to a cutting and sewing team without relying on verbal explanations. During early sampling, a pattern maker may understand an unfinished paper pattern because the intended construction still exists in memory. Once several styles, sizes, and revisions are moving through production simultaneously, that informal knowledge is no longer reliable.
Version control becomes particularly important after multiple fitting rounds. A corrected neckline means the associated facing, binding, lining, or fusible pattern may also require an update. If only the outer front is changed, the pieces can stop matching during production. Treat the pattern as a linked system rather than a collection of independent shapes, and every approved correction should be checked against the pieces affected by it.
Fit Is Built Into the Wrap
Wrap dresses are often described as forgiving because the waist can be adjusted, but most serious fit problems happen in areas the tie cannot truly fix. Bust projection changes the distance the front fabric must travel. Shoulder width affects where the V-neckline starts. Front waist length determines whether the waist remains level, and upper-chest shape influences whether the neckline lies cleanly against the body. When those areas are wrong, pulling the tie tighter usually shifts the problem rather than solving it.
The flat pattern can also create a false sense of security. Two front sections may overlap generously on a cutting table, but once the fabric travels over the bust, some of that horizontal width is consumed by three-dimensional body shape. When the wearer walks, reaches, sits, or bends, the relationship changes again. A pattern that appears modest in a static photograph can expose much more skin once the body moves naturally, particularly through the neckline and lower skirt opening.
For that reason, professional fit evaluation should include both static and movement checks. The wearer should stand normally, walk several meters, sit in a regular chair, take a longer stride, raise the arms, reach forward, and turn the torso. Observe whether the crossover stays in position, whether the waist twists, whether the neckline opens, and whether the lower overlap continues to provide the intended coverage.
The goal is not to make every wrap dress conservative or rigid. A party dress can intentionally have a deep neckline and high leg exposure, while an office or occasion dress may require considerably more coverage. The difference between deliberate exposure and a fitting failure is predictability. The pattern should behave the way the design intends when the wearer actually lives in it, not only while she is standing still for a fitting photograph.

Which Measurements and Blocks Do You Need?
Start with a reliable bodice or dress block and measurements that describe both circumference and vertical body balance. Bust, high bust, waist, hip, shoulder-to-waist length, front waist length, and neckline depth are particularly important. The block should reflect the intended target market because the crossover is built on existing shoulder, bust, torso, and waist geometry rather than on an isolated V-shaped line.
Core Measurements
Full bust is an obvious starting measurement, but it cannot describe the entire upper body. Two people can share the same full-bust circumference while having noticeably different high-bust measurements, bust projection, shoulder width, torso length, and bust position. Those differences affect how much fabric is required in front of the body and where the wrap neckline naturally wants to sit.
High bust helps separate upper-chest size from bust volume. Waist measurement establishes the basic closure circumference, while hip becomes increasingly important as the skirt becomes straighter or more fitted. Front waist length is especially useful because a fuller bust requires the fabric to travel a greater vertical distance from shoulder to waist. If that extra length is missing, the front waistline may rise even when the horizontal bust circumference appears correct.
Neckline depth should also be treated as a controlled measurement rather than a purely visual decision. Depending on the brand’s technical system, the point can be referenced from the high shoulder point, center front, bust line, or another fixed position. Once the base size is approved, using a defined reference makes it easier to compare revisions and maintain the design intention through grading.
The following figures are practical development references commonly used as starting points for regular woven dresses rather than universal standards. Fabric behavior, silhouette, body shape, and individual brand fit standards may require noticeably different values.
Development Check | Common Starting Reference | What to Confirm in Fitting |
Woven bust ease | About 4–8 cm | Comfortable breathing without loose neckline |
Woven waist ease | About 2–5 cm | Waist closes without excessive tie tension |
Woven hip ease | About 4–8 cm | Walking and sitting remain comfortable |
Stretch test | 10 cm reference sample | Stretch percentage and recovery |
Neckline depth | Style-specific | Intended coverage during movement |
Front waist length | Block-specific | Waist remains level across the front |
Skirt overlap | Style-specific | Coverage during walking and sitting |
These measurements should be checked as relationships, not isolated numbers. A dress may contain enough total bust circumference but distribute too much of it across the upper chest, causing the neckline to stand away from the body. Another may measure correctly at the waist while still pulling upward because the front bodice lacks sufficient vertical length. Good pattern development asks not only whether a measurement matches the specification, but whether the volume and length are located where the body actually needs them.
Choosing the Right Block
For commercial development, a tested block is usually more reliable than drafting a completely new bodice for every wrap style. A good block already contains decisions about shoulder slope, armhole position, bust shaping, back width, waist length, ease distribution, and the relationship between the front and back body. The pattern maker can then concentrate on transforming the style rather than rebuilding basic fit from the beginning.
The most important question is whether the block represents the intended customer. An established fashion brand may already have a recognizable house fit. Its dresses might use a particular waist position, shoulder width, bust proportion, armhole height, or hip ease that returning customers have learned to expect. Replacing that block with a generic supplier standard can make the new wrap dress feel unfamiliar even though the size label remains the same.
When a brand supplies a tested base block, reliable measurement chart, or well-fitting reference garment, those materials provide useful fit evidence. They can be used to preserve the customer’s existing proportions while introducing the new crossover, neckline, skirt shape, and styling details. For a new line without an established block, it is usually more efficient to stabilize one base size first and treat it as the controlled reference for future development.
A poor starting block creates a chain of confusing corrections. If the shoulder slope was already wrong before the wrap was drafted, a neckline problem may be incorrectly blamed on the crossover. If the front length was too short, additional overlap may be added when the actual issue is vertical balance. Starting from proven geometry makes the later fitting conversations much clearer because the team can separate new design problems from old fit problems.
Ease and Body Balance
Ease is often presented as a number added to circumference, but distribution matters as much as the total. Four centimeters of bust ease does not automatically mean adding one centimeter evenly to every quarter of the pattern. Depending on the target body, some of that room may need to sit through the bust, upper back, armhole, or side seam rather than being spread mechanically.
Wrap dresses make poor ease distribution easy to see. Excess volume in the upper chest can become a loose neckline, while insufficient space over the bust produces diagonal drag lines, a rising waist, or an overlap that pulls farther toward the side than intended. Those problems are often incorrectly treated as neckline or belt issues even though the real cause lies in body balance.
Stretch materials require an additional layer of testing because fiber composition alone does not tell you how a fabric behaves. Two jerseys labeled with similar polyester and elastane percentages can have very different mechanical stretch, thickness, recovery, and growth during wear. One may recover almost completely after stretching, while another becomes visibly longer or wider after repeated tension.
A simple 10 cm swatch test provides useful early information. Measure the relaxed fabric, stretch it comfortably in the direction that will run around the body, record the extended length, and then release it. If 10 cm reaches 12 cm, the observed extension is about 20%. The more important second observation is whether the fabric returns close to 10 cm afterward. A material that remains at 10.5 or 11 cm may gradually loosen around the neckline, waist, or hip during wear.
The waist tie can accommodate modest variation, but it should refine the fit rather than rescue an incorrect size. If the intended silhouette only appears after the wearer pulls the tie several centimeters tighter than natural, the base circumference, dart shaping, or body length deserves another look. A comfortable wrap should feel adjustable without depending on excessive tension to hold its shape.
How Do You Draft the Wrap Bodice?
Draft the wrap bodice by keeping the original front block references visible, establishing the shoulder-to-waist crossover, extending the front beyond center front, and adjusting bust volume so the diagonal neckline follows the body. Once the bodice is stable, connect its crossover to the waist fastening and skirt overlap. Neckline shape, dart control, front extension, and closure position should be developed together rather than independently.
Front Extension and Neckline
Begin with a complete front bodice block and preserve the original center front, waistline, bust point, shoulder, armhole, and dart references during early development. These lines help explain what changes later if the neckline begins to gape, the waist moves upward, or the crossover lands too far toward one side of the body. Removing the construction references too soon makes troubleshooting much harder.
Mark the intended neckline start at the shoulder, then determine where the visible crossover should pass the opposite side of the body. That decision establishes the broad direction of the V-neckline. The first diagonal line drawn between those points should be treated as a working line, not automatically as the final cutting edge, because bust projection and fabric drape can change the way the neckline follows the body.
The front panel then needs to extend beyond the original center front. Instead of approving that extension simply because it measures a certain number of centimeters, check where the finished edge actually lands on a three-dimensional body or dress form. A front that looks generous on paper may lose meaningful coverage once it travels over the bust.
A practical development sequence is:
- Mark center front, bust point, waistline, and original dart.
- Establish the shoulder neckline point.
- Mark the preliminary crossover position at the waist.
- Draw the first wrap neckline.
- Extend the front beyond center front.
- Test the extension on a body or suitable dress form.
- Correct bust shaping and neckline contact.
- Add the final facing, binding, or lining pattern only after the edge is stable.
Deep V-neck dresses should still follow the same discipline. A lower neckline can be intentional and commercially appropriate, particularly for partywear or evening styles, but the edge should remain controlled. A garment that exposes more because the neckline stretched during sewing is behaving differently from one that was deliberately designed with greater exposure.
Bust Dart Control
The bust dart is one of the most useful tools for making a wrap neckline lie cleanly against the body. Its visible location can change substantially while preserving the same underlying three-dimensional shaping. A side dart may be rotated into the waist, shoulder, neckline, armhole, princess seam, or converted partly into gathers or pleats depending on the style.
What should not happen is simply deleting the volume because the design sketch does not show a dart. The body still has three-dimensional projection even when the garment surface appears visually clean. If necessary suppression disappears from the pattern, that extra fabric frequently appears somewhere else as neckline gaping, excess fullness, drag lines, or an unstable waist.
During fitting, several visual signals help diagnose the problem. Diagonal wrinkles pointing toward the bust often indicate that the available length or volume is not being distributed correctly. A neckline that stands away from the upper chest may contain too much edge length. A waistline rising at center front may indicate insufficient front length, while a side seam pulling forward can suggest that the front bodice is borrowing fabric from the back.
Pinning out excess during a fitting is useful because it identifies where the garment wants to change, but the pin itself is not a production solution. The correction must be transferred into the master pattern through dart rotation, neckline reshaping, front-length adjustment, or another controlled modification. The next sample should reproduce the improvement without needing the same temporary pinning.
It is also wise to make one major correction at a time when diagnosing a difficult fit. If the shoulder, bust dart, front length, and neckline are all changed aggressively in a single revision, the second sample may look different without revealing which adjustment solved the original problem. Clear pattern development is partly about creating a traceable cause-and-effect relationship between a fitting observation and the correction that follows.
Waist Ties and Skirt Connection
The waist tie is not merely an accessory added after the dress shape is complete. Its length, width, attachment point, and direction of pull affect how the entire front behaves. A tie that closes at the side needs a different length from one designed to wrap around the back and return to the front in a bow, while a heavy satin tie may need less width than a very soft lightweight tie to avoid unnecessary bulk.
The internal fastening deserves the same attention. Many true wraps use a narrow inner tie, button, or loop to control the underlapping panel before the outer front is secured. If that fastening sits too far toward the back, it can pull the underlap across the body and drag the side seam forward. If it sits too close to center front, the inner panel may remain too loose.
The skirt overlap needs to continue the structural logic established by the bodice. A fitted midi skirt generally requires careful movement testing because a smaller hem circumference concentrates movement around the front opening. A flared skirt has more sweep available to absorb a stride, but its extra volume can change the way the overlapping layers fall and how much fabric accumulates around the waist.
Three movement conditions reveal a great deal during early development:
- Stand naturally without holding the skirt.
- Walk with a normal and slightly extended stride.
- Sit in a standard chair with the knees naturally positioned.
Observe how much of the underlap remains covered in each condition. The goal is not to achieve the same amount of coverage for every product category, but to make the behavior consistent with the intended design. A resort maxi, office midi, and fitted party mini will naturally use different standards.
Finally, look at the waist seam from the front, side, and back after the dress is tied. It should remain balanced unless asymmetry is part of the design. If the bodice appears correct but the skirt twists or the waist slopes after tying, the upper and lower crossover points may not be working together. Treat the waist as the hinge of the wrap system rather than just another horizontal seam.

How Do You Control Overlap and Fit?
Overlap should be controlled through three-dimensional fitting and movement rather than a universal extension measurement. It needs to provide the intended bust and skirt coverage without creating unnecessary bulk around the waist. Neckline length, bust shaping, front body balance, fabric stretch, skirt silhouette, and closure tension all influence the result, so secure wrap fit depends on several coordinated pattern decisions rather than overlap width alone.
Overlap and Coverage
Pattern makers are often asked how many centimeters of overlap a wrap dress needs. A single figure is appealing because it sounds easy to standardize, but the same extension can behave very differently across body shapes, sizes, fabrics, and silhouettes. The more useful question is where the edge of the underlap should sit on the body and whether it remains there during realistic wear.
At the bodice, the underlapping front should normally remain hidden beneath the outer panel under the movements expected for the design. If it is visible every time the wearer reaches forward, the overlap may be insufficient or the neckline may be shifting for another reason. At the waist, the two fronts should close without requiring excessive tension from the tie.
The lower overlap needs similar attention. A skirt can appear well covered when the wearer stands with both feet together but separate dramatically during a longer stride. Sitting changes the effective hip circumference and often lifts the front hem slightly, creating another opportunity for the panels to open.
Evaluate five areas separately during a fit review:
- Bust coverage
- Waist security
- Lower-front coverage
- Bulk through the crossover
- Freedom of movement
Adding more overlap is not always the safest answer. Extra fabric can increase bulk at the waist, make the skirt hang unevenly, or create a heavy front. These problems become more noticeable with lined constructions, structured crepe, ponte, heavier satin, or styles where several folded tie layers already meet near the waist.
Coverage also needs to reflect the brand and intended wearing occasion. A nightlife mini may deliberately have a narrower crossover and higher opening than a wedding-guest midi or office dress. Both can be technically successful if the behavior is predictable, the garment remains wearable, and the intended exposure has been approved rather than appearing accidentally.
Neckline Gaping
Neckline gaping is one of the most common wrap-dress complaints because the long diagonal edge passes through an area affected by bust projection, shoulder balance, fabric bias, and movement. The neckline itself is not always the original cause, which is why simply shortening the edge can sometimes create a new problem instead of solving the old one.
Start by observing when the gap appears. If the neckline stands away from the chest even while the wearer is relaxed, excess edge length, bust shaping, shoulder geometry, or front balance is likely involved. If the edge lies smoothly at first but becomes loose during fitting, handling stretch or poor fabric recovery deserves more attention. If gaping occurs mainly when an arm is raised, inspect the armhole and shoulder before removing length from the neckline.
Possible corrections include:
- Redistributing or rotating bust dart intake
- Removing controlled excess from a specific neckline zone
- Adjusting shoulder width or angle
- Moving the crossover position
- Correcting front waist length
- Stabilizing sections close to the bias
- Revising binding tension
- Adding appropriate stay tape or lightweight support
The correction needs to match the cause. Shortening an entire neckline when only the upper third contains excess can pull the waist upward and change the shoulder position. Tight binding can temporarily close a knit neckline while producing visible puckering or an uncomfortable edge.
Fabric behavior also matters. A soft viscose or satin front can stretch under its own weight, especially when a long diagonal neckline is handled repeatedly before sewing. A stretch jersey may look secure when new but loosen after wear if recovery is weak. When the first sample shows a problem, compare the pattern shape with the actual sewn edge before assuming the original paper pattern is wrong.
Movement and Wear Testing
Static fitting remains important because it shows balance clearly, but commercial garments are worn in motion. A sample that looks excellent on a dress form can behave very differently once someone sits in a restaurant, steps into a car, reaches for a bag, climbs stairs, or raises both arms. Those actions change tension across the bust, waist, armhole, and lower overlap simultaneously.
A useful fit session includes upper-body, torso, and lower-body movement. Ask the wearer to lift and extend the arms, rotate the torso to both sides, bend slightly forward, sit, stand again, walk normally, and take one or two longer steps. These movements do not need to become an athletic test; they simply reproduce ordinary situations that a customer will experience.
Watch the side seams while the garment is tied. If one side moves noticeably toward the front, the fastening system may be creating uneven tension. Watch the waistline at center front. If it rises as soon as the dress is closed, there may be insufficient front body length or bust allowance. If the entire dress rotates, the inner and outer closures may not be balanced.
The neckline deserves its own observation during reaching and bending. Some movement is normal in intentionally low-cut designs, but a secure pattern should return to position rather than remaining stretched or displaced. The skirt should also be checked from front and side during a full stride so the team can see how far the opening travels relative to the design expectation.
It is helpful to separate three approval questions during every fitting: does the sample measure correctly, does it look correct, and does it behave correctly? A dress can pass the measurement chart while failing movement. It can also photograph beautifully while becoming uncomfortable after several minutes of wear. Production approval becomes more reliable when all three conditions are considered together.
Which Fabrics Affect the Pattern?
Fabric changes wrap-dress fit because drape, stretch, recovery, thickness, friction, transparency, and bias stability all affect the neckline, crossover, waist, and skirt. A pattern that performs well in one material may behave differently in another. Final fitting should therefore use the intended bulk fabric whenever possible, or a substitute with genuinely comparable weight, stretch, recovery, surface behavior, and drape.
Drape and Weight
Cut the same wrap pattern in crisp cotton poplin and soft viscose and the two finished dresses can appear to have different silhouettes even when every pattern line is identical. Poplin tends to hold volume away from the body and creates clearer structural folds, while viscose collapses into softer vertical drape and follows body contours more closely.
That difference changes both appearance and fit. A fluid fabric can pull downward on a long neckline and may need careful stabilization. A crisp fabric may require slightly more functional ease because it cannot conform around the bust and hip as readily. A heavy fabric can make the overlapping waist feel bulky even when the circumference measurement is technically correct.
Fabric weight is useful as an early reference, but it should never be treated as the only indicator of suitability. Two materials at 180 gsm can have completely different stiffness, stretch, surface friction, and recovery. Still, broad ranges can help product teams think through likely pattern concerns before the first sample is made.
Fabric Characteristic | Practical Reference | Main Pattern Concern |
Lightweight woven | Roughly 80–150 gsm | Transparency, neckline stability, hem movement |
Midweight woven | Roughly 150–240 gsm | Waist bulk, drape, ease distribution |
Light jersey | Roughly 140–200 gsm | Stretch, recovery, neckline growth |
Ponte / structured knit | Roughly 250–350 gsm | Reduced drape, crossover thickness |
Stretch test | Measure 10 cm before stretching | Actual mechanical stretch |
Recovery check | Re-measure after release | Permanent growth |
Wash/steam check | Measure before and after treatment | Dimensional stability |
These categories are practical development references, not performance standards. Supplier finishing, yarn structure, weave or knit construction, fiber blend, and dyeing processes can change how materials behave even within similar weight ranges. The approved swatch or production fabric should always have the final word.
Stretch and Recovery
Stretch percentage matters because it determines how much a material can expand around the body, but recovery often matters more in a wrap dress because the neckline and waist remain under repeated tension. A fabric that stretches generously but does not return efficiently can look excellent during an initial fitting and become visibly looser after several hours.
A simple development check starts with a relaxed 10 cm section of fabric. Stretch it comfortably without forcing the yarn structure and measure the new length. If the sample reaches 12 cm, the observed extension is approximately 20%; if it reaches 14 cm, the extension is approximately 40%. Test both the width and length directions when the material may have meaningful two-way stretch.
Then release the sample and measure again. A section that returns very close to 10 cm has stronger recovery than one that remains at 10.5 or 11 cm. Repeated stretching is also informative because some materials recover well once but begin to grow after several cycles.
This information affects ease decisions. A fitted knit wrap may use zero or negative ease when stretch and recovery are sufficient, but the amount cannot safely be selected from fiber composition alone. “95% polyester, 5% elastane” does not describe gauge, yarn tension, knitting method, finishing, density, or recovery. Two fabrics with the same label can need different patterns.
Direction also matters. A jersey with 40% horizontal stretch and 10% vertical stretch behaves differently from a fabric that stretches substantially in both directions. The grainline should place the intended stretch where the body needs it, while the pattern should account for any vertical growth that could lower the neckline or lengthen the skirt during wear.
Facing, Binding, and Lining
Neckline finishing affects both appearance and stability. A facing can produce a clean woven edge and add structure, but it needs to be drafted from the final corrected neckline and controlled so it does not roll outward. Depending on the fabric, understitching, clipping, grading, light fusing, or careful pressing may be required to keep the facing hidden.
Binding creates a lighter finish and is common in both soft wovens and knits. With stretch materials, the binding may intentionally be slightly shorter than the garment edge so it provides gentle control, but the correct amount depends on the actual fabric. Applying a fixed percentage to every jersey can create either a stretched, wavy neckline or an edge so tight that it pulls the bodice out of shape.
Lining adds another layer of pattern engineering. It can improve opacity, comfort, internal appearance, and stability, particularly in chiffon, lace, mesh, light satin, or garments with strategic sheer areas. The lining still needs enough functional ease to follow the shell without restricting it. A lining that is slightly too short or narrow can lift the outer skirt, distort the bust, or change how the wrap falls.
Long diagonal necklines also require attention during handling because sections may sit close to the fabric bias. Cutting, sewing, pressing, steaming, and even hanging a sample overnight can lengthen an unstable edge. Stay stitching, lightweight tape, narrow fusible support, controlled binding, facing, or lining can help, depending on the material and design.
Seam allowances should match the intended sewing method rather than habit. In many dress applications, approximately 1.0–1.5 cm is a common starting range for standard seams, while hems can vary from narrow rolled finishes to approximately 2–4 cm turned allowances. A lightweight chiffon wrap maxi and a structured ponte mini should not automatically use identical internal construction simply because both garments belong to the wrap-dress category.
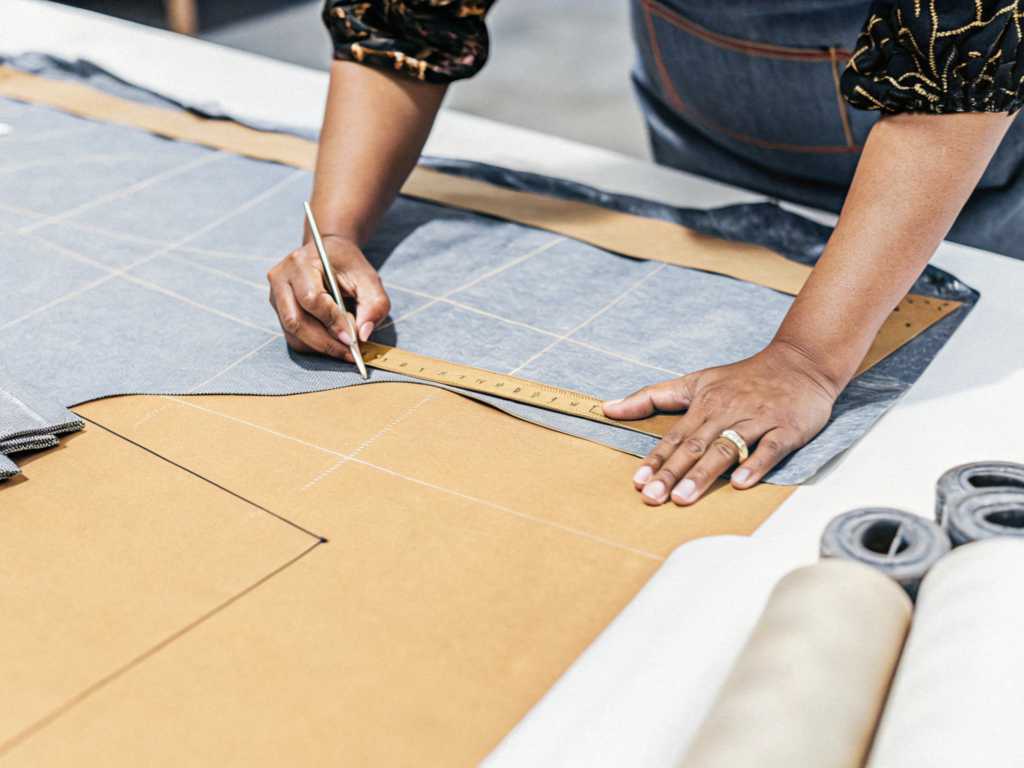
How Do You Make the Pattern Production-Ready?
A wrap dress becomes production-ready after the intended fabric has been sampled, the base size passes fit and movement checks, approved corrections are transferred into the master pattern, and the size range is graded and reviewed. Every production piece then needs accurate grainlines, notches, seam allowances, closure positions, piece identification, and version control so bulk production can reproduce the approved sample consistently.
First Sample and Pattern Correction
The first sample is best treated as a working test rather than proof that the development process is almost finished. It brings the flat pattern, real fabric, construction method, and three-dimensional body together for the first time, revealing interactions that cannot always be predicted accurately from paper or CAD alone.
Start fitting with overall balance before focusing on small details. Check shoulder position, side-seam direction, center back, waist level, and front-to-back length. If those larger relationships are wrong, correcting the neckline first can hide the symptom while leaving the original cause untouched. Once the body balance is stable, move into the wrap-specific areas: crossover position, neckline contact, bust shaping, inner fastening, tie placement, skirt overlap, and movement.
Record changes in a way that can be reproduced. “Neckline loose” describes a problem but does not tell the pattern maker what to change. A better record identifies the zone where the excess appears, the amount pinned during fitting, whether the correction tapers, and which related pieces need revision. If approximately 1 cm is removed near the upper neckline but the lower neckline remains correct, the pattern change should reflect that localized shape instead of shortening the entire edge.
Photographs from the front, side, and back are useful because they provide visual evidence between sample rounds. They can show whether a side seam became straighter, whether the waist returned to level, or whether a neckline correction unexpectedly affected the shoulder. Measurements, images, fitting notes, and pattern updates together create a clearer development record than relying on memory.
After the fitting, every approved correction must be transferred into the master pattern and relevant specification. Editing only the physical sample creates a dangerous mismatch because the garment in the room may look correct while the production file still contains the old geometry. The revised sample then confirms whether the pattern correction itself solved the issue.
For brands developing products with a manufacturing partner, Jinfeng Apparel’s documented pattern capability includes 7+ senior womenswear pattern makers, 2 sample rooms, and 20+ sample machinists, with development controls covering bust, waist, hip, length, neckline, lining, and other critical fit areas. The company’s sampling process also links pattern development with sample sewing, fit checking, revision tracking, PP sample approval, and Golden sample sealing before bulk production.
Grading the Size Range
Grading should start after the base size is stable. Trying to correct an inaccurate base pattern while building several additional sizes at the same time makes troubleshooting unnecessarily complicated. If a problem later appears in a larger size, the team may not know whether the issue came from the original pattern or from the grade rule.
Commercial grading increases and decreases dimensions according to the brand’s size specification. Bust, waist, hip, shoulder, armhole, length, and other locations do not necessarily grow by identical amounts. The grade system should reflect the intended body proportions and the brand’s established fit philosophy rather than applying the same horizontal expansion to every pattern point.
Wrap fronts need particular attention because the crossover is positional as well as dimensional. The neckline start, bust point, waist crossover, underlap, and tie position need to remain in a sensible relationship as sizes change. Simply making the front wider may preserve circumference while moving the crossover to a less flattering or less secure position.
Review the nested size range at several points:
- Bust point movement
- Shoulder neckline position
- Crossover location
- Front waist length
- Waist tie placement
- Side-seam balance
- Skirt overlap
- Hem length
- Armhole geometry
- Facing and lining compatibility
Larger sizes may require more thoughtful development if bust projection or body proportions change significantly through the range. Petite, tall, extended-size, and plus-size programs also deserve dedicated evaluation instead of being created by adding the same amount of length or width everywhere.
Physical size-set sampling practices vary by brand, order size, fit sensitivity, and product risk. Some programs sew selected key sizes rather than the complete range, while fitted or technically sensitive styles may justify broader size verification. Whatever system is chosen, the objective is the same: the graded garment should preserve the appearance, comfort, coverage, and movement behavior approved in the base size.
Production Pattern Control
Once fitting and grading are approved, the pattern needs to become understandable to people who were not present during development. Every piece should carry the information required by the production system, which may include style number, piece name, size, cut quantity, grainline, version, material identification, and matching references.
Notches should be used deliberately. Too few leave sewing operators guessing about alignment, while unnecessary notches make patterns harder to read. Useful positions include waist joins, sleeve balance points, skirt matching locations, tie attachments, lining references, and places where several panels need precise alignment.
A final production review can be organized around the following checks:
Production Check | Practical Requirement | Main Risk if Missed |
Base measurements | Match approved specification | Garment finishes outside tolerance |
Neckline | Matches approved sample | Gaping or unintended exposure |
Bodice overlap | Confirmed on body | Insufficient bust coverage |
Skirt overlap | Passed movement testing | Excess opening during wear |
Grainlines | Marked on every piece | Twisting or uneven drape |
Seam allowances | Match sewing method | Size or assembly errors |
Notches | Matching points verified | Misaligned construction |
Tie positions | Clearly controlled | Uneven closure tension |
Lining/facing | Matches corrected shell | Pulling or rolling |
Pattern version | Current approval only | Obsolete pattern reaches cutting |
Grade rules | Reviewed in key sizes | Fit changes across size range |
Reference sample | Approved status confirmed | Production interpretation varies |
Version control becomes more important as the number of revisions increases. Files named “new,” “new2,” “final,” or “final latest” may feel manageable during a single development session but become risky once merchandising, sampling, cutting, and production teams are accessing files independently. A controlled naming and approval system reduces the chance that an outdated neckline, tie position, or skirt overlap reaches the cutting table.
The production package should ultimately connect the approved pattern with the measurement specification, fabric, trims, construction information, and approved sample status. Jinfeng Apparel’s documented pattern team is structured to convert designs, size charts, reference garments, and image-based concepts into patterns that can be fitted, revised, graded, and prepared for bulk production. For brands that already have a tech pack, original sample, sketch, or reference image, using those materials as controlled development inputs can make the transition from creative concept to production pattern considerably clearer.
A good final test is surprisingly simple: if the production team receives the approved files without speaking to the original pattern maker, can they understand exactly what needs to be cut, assembled, measured, and checked? When the answer is yes, the pattern has moved beyond successful drafting and into genuine production readiness.
Developing a wrap dress pattern well is less about drawing a clever diagonal line and more about managing a chain of connected decisions. The block determines the starting balance; bust shaping affects the neckline; the crossover controls coverage; fabric changes how every edge behaves; the tie changes tension; and fitting reveals whether the flat pattern survives real movement. When those decisions are tested, documented, corrected, graded, and carried consistently into production, the apparent simplicity of a wrap dress becomes one of its strengths rather than a source of unpredictable fit problems. For a fashion brand, that careful development work also makes future colorways, fabric updates, repeat orders, and related silhouettes much easier to build from a reliable foundation.
Share This Article :

Jerry Lee
Categories

Latest blogs
Table of Contents
Here, developing your OEM/ODM private label clothing collection is no longer a challenge—it’s an excellent opportunity to bring your creative vision to life.