Skip to content

Satin can make a relatively simple dress look polished, fluid, and expensive, but the same surface that creates that effect also makes manufacturing mistakes harder to hide. A slightly wavy side seam, a zipper that stands away from the back, one panel cut in a different direction, or a faint pressing impression may barely register on a matte crepe dress yet become obvious when light moves across satin. The challenge is that these visible defects rarely have only one possible cause. A puckered seam may come from thread tension, fabric feeding, needle displacement, fabric density, or several factors acting together, while a zipper wave that looks like poor sewing may actually begin with center-back pattern balance. For brands developing satin slip dresses, cocktail dresses, wedding guest styles, party dresses, or eveningwear, the useful question is not simply whether a defect exists. The useful question is where it started, whether it will repeat, and whether the production system can remove the cause before the same problem spreads across a full order.
The most common satin dress defects include seam puckering, seam slippage, zipper rippling, snagging, needle marks, shade or luster variation, lining distortion, uneven hems, wrinkles, stains, and pressing marks. Their root causes usually trace back to fabric construction, cutting direction, pattern balance, needle and thread selection, machine feeding, zipper or lining compatibility, pressing conditions, handling, or insufficient production control.
That distinction becomes much more important once production moves beyond a sample. A technician can trim a loose thread in seconds, but a factory cannot inspect its way out of a systematic seam-slippage problem caused by an unstable fabric or a fit that loads the seam too heavily. Picture a satin sample that looks clean in the fitting room, followed by the first production cartons showing rippled center-back zippers under photography lights. The visible defect is only the final chapter. Reliable quality control starts by tracing the garment backward through fabric, cutting, construction, sewing, pressing, and packing until the process that created the problem becomes clear.
What Satin Dress Defects Are Most Common?
The most common satin dress defects fall into five practical groups: seam defects, structural failures, surface damage, fit or construction distortion, and finishing defects. Seam puckering and zipper waves are easy to see, while seam slippage can affect durability. Snags, needle marks, uneven luster, lining exposure, distorted hems, stains, creases, and pressing marks also matter because satin reflects light strongly and magnifies small inconsistencies.
Seam Appearance
Seam puckering is usually the first defect people notice because satin reflects light along every long seam. A side seam that is only slightly wavy under flat factory lighting can look far more obvious in photography, retail lighting, or on a moving body. The same problem can appear around darts, princess seams, waist joins, neckline edges, and invisible zippers. Puckering should not be treated as one single defect because excessive thread tension, differential feeding, dense fabric construction, inappropriate stitch density, needle displacement, and dimensional interaction between thread and fabric can all create similar-looking ripples. The location and timing of the pucker provide better clues than appearance alone.
Seam slippage deserves separate attention because it is a performance problem rather than just a visual one. The sewing thread may remain completely intact while warp or weft yarns move away from the stitch line and create an opening beside the seam. Fitted hips, busts, waists, armholes, and slit areas are particularly sensitive because the fabric is being loaded across the seam during wear. A satin dress can therefore look smooth on a hanger and still be vulnerable once it is put on, sat in, walked in, or pulled across a curved part of the body.
Surface Damage
Satin is especially unforgiving when it comes to surface damage. The longer floats that create its smooth luster can be pulled by rough table edges, damaged machine parts, jewelry, pins, zipper hardware, hooks, or neighboring garments with sequins and metal trims. Snagging can look random at first, but repeated defect positions often reveal the source. If several garments show pulls near the same area, the team should inspect every surface that touches that part of the dress rather than assuming the fabric supplier is responsible. Randomly distributed snags point more toward general handling sensitivity or a particularly delicate construction.
Needle marks and contamination can be just as visible. Fine filament-based satin may retain holes after stitches are removed, which makes repeated unpicking risky. On a matte woven fabric, an operator can sometimes resew a seam without leaving obvious evidence; on a glossy satin face, the first stitch line may remain visible even after the second line is technically correct. Pale shades also reveal machine oil, hand marks, steam contamination, dirty pressing equipment, and water spotting quickly, so prevention is usually safer than aggressive spot cleaning after the garment is finished.
Luster and Shade
Not every apparent color defect is a dye problem. Satin can look lighter or darker when two panels are cut in opposite directions because its surface reflects light directionally. This matters on multi-panel skirts, princess seams, corset cups, separate waistbands, sleeves, and styles that combine straight-grain and bias sections. Reversing one pattern piece to improve marker efficiency can create an apparent shade mismatch even when every panel comes from the same fabric roll. A simple directional test before bulk cutting can prevent a large amount of later confusion.
Jinfeng Apparel’s internal satin reference covers commonly handled polyester satin, acetate satin, polyester-spandex satin, and silk-like satin in an approximate 80-220 gsm range. The documented production risks include snagging, shade variation, wrinkles, stitch marks, luster-direction inconsistency, zipper bulging, and pressing marks. This range should not be treated as a universal definition of dress satin, but it illustrates how widely the material can vary in weight and behavior. The same design may require different sewing, pressing, lining, and handling decisions when the fabric changes from a light fluid satin to a denser, more structured one.
Lining and Hem Balance
Lining problems often appear late because the shell can look correct before the lining is fully attached, the garment is pressed, and the dress has been hanging long enough to reveal dimensional differences. Typical symptoms include lining hanging below the shell, lining pulling the satin upward, twisting between the two layers, visible lining around a slit, or a hem that no longer hangs evenly. Root causes include pattern mismatch, different shrinkage or recovery, incorrect lining length, insufficient attachment points, and incompatible stretch or drape between shell and lining.
Bias-cut satin adds another layer of complexity because panels can lengthen under their own weight after sewing. Long slip dresses, asymmetric skirts, and fluid maxi dresses may therefore change slightly between assembly and final hem leveling. The most useful working principle is to treat shell and lining as two connected garments rather than one main garment plus an afterthought. Their length, stretch, drape, shrinkage behavior, attachment points, and hem relationship all need to work together if the outer satin is expected to remain smooth during wear.
| Defect | Common Root-Cause Area | Useful Inspection Clue |
| Seam puckering | Tension, feeding, stitch density, fabric structure | Ripples follow the stitch line |
| Seam slippage | Yarn mobility, seam stress, insufficient holding | Fabric opens beside intact stitches |
| Zipper rippling | Fit, zipper stiffness, stretched shell | Waves concentrate along center back |
| Needle marks | Needle size, point damage, repeated rework | Holes remain after seam removal |
| Snagging | Long floats, rough handling, sharp surfaces | Pulled yarn or visible loop |
| Uneven luster | Cutting direction, panel orientation | Apparent shade changes with viewing angle |
| Lining exposure | Pattern balance, lining length, shrinkage difference | Lining appears below shell or slit |
| Press marks | Excess heat, pressure, internal thickness | Local shine or seam impression |
| Packing creases | Compression, fold placement, transport time | Fold line remains after unpacking |
What Causes Satin Seam Defects?
Satin seam defects usually result from an interaction between fabric structure and sewing conditions rather than one isolated mistake. Thread tension, needle size, thread size, stitch density, feeding, presser-foot pressure, seam direction, and operator handling all matter. Seam slippage is more closely related to yarn mobility and garment stress, while visible needle holes usually point toward excessive penetration, inappropriate needle selection, or repeated rework.
Puckering Mechanisms

The most common mistake when troubleshooting satin puckering is changing machine tension before identifying the type of pucker. If the thread is sewn under excessive tension, it may recover after stitch formation and compress the fabric along the seam. In another case, the upper and lower plies may travel through the machine at slightly different rates, leaving one layer longer than the other and producing feed puckering. Dense fabrics can create a third mechanism because the sewing thread and needle physically displace closely packed yarns, producing structural disturbance that remains even when tension is reduced.
A controlled trial is more useful than random adjustment. The team can compare upper and bobbin tension, needle size, thread size, stitch density, presser-foot pressure, and feed behavior while keeping the remaining variables unchanged. It is also worth sewing the same seam in warp, weft, and bias directions because the fabric may react differently depending on yarn orientation. For many dress satins, a practical sample-room starting point might be around 2.0-3.0 mm stitch length, but that range is only a trial reference. The final setting must be validated against the actual satin, seam construction, thread, garment stress, and desired visual standard.
Fabric or Sewing?
A puckered satin seam can be fabric-related, process-related, or a compatibility problem between the two. Calling every ripple poor sewing is technically weak, but calling every ripple the nature of satin is equally unhelpful. One useful diagnostic method is to unpick a representative test seam. If the fabric relaxes substantially when the thread is removed, sewing tension or structural interaction becomes more likely. If one ply is longer than the other after unpicking, feed imbalance deserves attention. If visible yarn displacement remains even after the seam is removed, fabric density and needle-thread interaction may be contributing.
Direction and repeatability provide additional evidence. A seam that behaves well along the warp but puckers strongly along the bias suggests that material behavior is part of the problem. A defect that appears mainly on one machine or with one operator points more strongly toward process conditions. The commercial question is whether the approved result can be repeated reliably across a production line. A sample-room technician may be able to achieve a beautiful seam by working unusually slowly and delicately, but a production method that only works under exceptional handling is still a production risk.
Seam Slippage
Seam slippage occurs when fabric yarns move away from the stitch line under load while the sewing thread itself remains intact. It is especially relevant in fitted satin dresses because the body creates transverse stress at the hip, bust, waist, back, armhole, and slit. A soft satin may look ideal in the first sample and still perform poorly if the design leaves too little ease or places a vulnerable seam in an area where the fabric is stretched every time the wearer sits or walks.
Increasing stitch density is not automatically the answer. More stitches create more needle penetrations, which can increase local disturbance without solving yarn mobility in the cloth. A better assessment considers fabric resistance to yarn movement, seam allowance, seam construction, local reinforcement, grain direction, and the amount of stress created by the fit. Where slippage is suspected, testing the fabric and seam before bulk approval is far more effective than relying on final inspection, because once thousands of stressed seams have already been assembled, the range of practical corrections becomes very limited.
Needle and Thread Effects
Fine satin generally benefits from the smallest needle that can sew the operation reliably without excessive deflection, skipped stitches, or breakage. The goal is to reduce yarn displacement while maintaining stable stitch formation. A lightweight dress satin may be trialed with approximately Nm 60-75 needles, while heavier or more structured satin may require approximately Nm 75-90 depending on fiber, density, seam thickness, thread size, and machine type. These are sample-room starting ranges rather than fixed production specifications, and every new satin should be checked before the line runs at speed.
Thread choice follows the same principle. A thread that is too heavy can increase visible seam definition and structural crowding, while a thread that is too fine may not provide enough durability in a stressed area. Rework is another major consideration because unpicking can leave a permanent penetration track on glossy fabric. Sensitive operations such as invisible zippers, neckline edges, long side seams, and narrow hems should therefore be validated through early sewing trials so the production line is not relying on repeated correction after the satin face has already been punctured.
| Sewing Variable | Practical Trial Range or Check | Main Risk if Poorly Matched |
| Stitch length | About 2.0-3.0 mm as a starting trial | Very dense stitching can increase distortion |
| Needle for light satin | About Nm 60-75 as a starting trial | Large needles can leave holes or displace yarns |
| Needle for heavier satin | About Nm 75-90 as a starting trial | Too-small needles may deflect or break |
| Thread size | Match seam strength with minimum visual bulk | Heavy thread can increase seam definition |
| Presser-foot pressure | Lowest stable pressure that feeds consistently | Excess pressure can drag or stretch the shell |
| Feed balance | Compare top and bottom ply lengths after sewing | Differential feed can create rippling |
| Rework | Minimize unpicking on visible seams | Old stitch holes may remain visible |
What Causes Zipper and Lining Problems?
Zipper and lining problems usually appear because those components do not behave exactly like the satin shell. A relatively rigid zipper can fight against soft fabric, while a lining with different stretch, shrinkage, weight, or drape can pull the shell out of shape. Pattern balance, waist-to-hip contour, seam allowance stability, and sewing stretch all influence whether the finished dress lies cleanly on the body.
Zipper Rippling
Invisible zipper rippling is one of the easiest satin defects to spot because the center-back seam creates a long vertical reference line. The first variable to investigate is component stiffness. A lightweight satin shell can be too soft to lie naturally against a firm zipper tape, so the zipper begins to dictate the shape of the fabric rather than following the garment. The second variable is sewing stretch. If the satin is pulled during insertion and then recovers after sewing, waves can form along the zipper even when the stitch line itself looks technically consistent.
Pattern shape is equally important. A fitted dress with a pronounced waist-to-hip transition needs a center-back line that follows the body accurately. Too much back length, an overly straight center-back contour, unstable seam allowance, or insufficient hip ease can all create bulging that looks like a sewing fault. Jinfeng Apparel’s documented production analysis lists soft fabric, overly rigid zippers, poor pattern fit, unstable seam allowance, an inaccurate center-back line, large waist-hip differences, and fabric stretching during sewing among common zipper-bulging causes in fitted dresses.
Fit and Center Back
A zipper often exposes fit problems that are much less obvious elsewhere. Excess length through the lower back can force the zipper away from the body, while insufficient hip room can pull the shell horizontally and make the zipper wave. Aggressive waist suppression without a compatible back contour can create a similar effect. This is why zipper diagnosis should not stop at the sewing table. The dress should be checked flat, on a dress form, and during actual fitting so the team can see whether the defect appears only when the body loads the garment.
Repeatability helps separate fit from sewing. If several garments sewn by different operators all develop a bubble at the same anatomical position, the pattern deserves immediate review. If the amount and position of waviness change dramatically by operator or machine, feeding, seam allowance control, and sewing technique become more suspicious. Useful fit checkpoints include center-back length, waist position, hip ease, back contour, zipper termination point, and lining interaction. Correcting the geometry during sampling is usually more effective than trying to press the zipper flat after bulk sewing.
Lining Compatibility
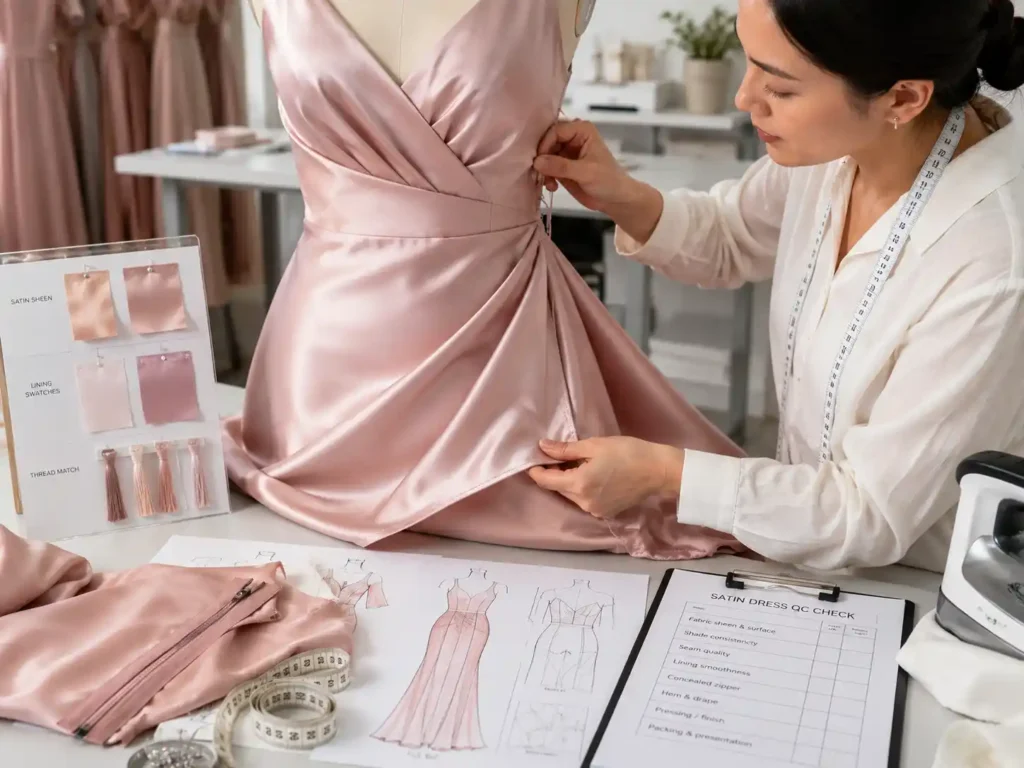
The lining must support the satin without controlling it too strongly. A fluid shell paired with a stiff lining can lose movement and form drag lines, while stretch satin paired with a non-stretch lining may fit tighter than expected and distort the outer layer. Different shrinkage or recovery after steaming can also change the relationship between the two fabrics after the garment has already been assembled. Length is another common source of trouble because the lining needs enough freedom to move without becoming visible below the shell or pulling the hem upward.
Useful approval checks include shell and lining length, stretch compatibility, opacity, color, shrinkage behavior, attachment points, slit construction, and movement during sitting and walking. Internal production records for lined satin styles emphasize lining pattern, lining length, lining fabric, lining color, attachment points, shrinkage differences, hem balance, and finished-garment review. These checks are most effective when the lining is selected during development rather than after the shell pattern and fabric have already been finalized.
Shell-Lining Distortion
When shell and lining fight each other, the satin usually shows the problem first. The face fabric may twist, pull upward, develop diagonal tension lines, or appear shorter on one side even though the shell was cut correctly. The underlying cause may simply be that the two materials relax at different rates or that attachment points are forcing one layer to follow the other. Bias satin complicates the situation further because the outer shell can lengthen under its own weight while a more stable lining changes much less.
Long or fluid dresses should therefore be evaluated after realistic hanging and fitting rather than judged only moments after sewing. There is no universal hanging time that suits every satin because weight, bias angle, panel length, seam construction, and lining choice all affect growth. The practical objective is to reach a stable relationship between shell and lining before final hem leveling. Designing that relationship at the pattern and sample stage is far more reliable than attempting to correct a distorted garment after finishing.
How Do Cutting and Fit Create Defects?
Cutting and fit defects often appear later as sewing or finishing problems. Satin panels cut in inconsistent directions can look like different colors, off-grain pieces can twist, and bias panels can lengthen after hanging. Incorrect bust, waist, hip, or back balance can create drag lines and zipper waves. Before changing machine settings, technical teams should confirm grain direction, panel orientation, pattern balance, and fit geometry.
Grain and Direction
Satin should often be treated as visually directional even when it is not sold as a traditional nap fabric. The smooth face can reflect light differently depending on yarn orientation and viewing angle, so two pieces from the same roll may appear to be different shades after one is rotated. This is especially noticeable in princess panels, corset cups, waistbands, sleeves, multi-panel skirts, ruffles, and styles that combine straight-grain and bias construction. Direction needs to be established before marker optimization, because reversing pieces to save fabric can create a more expensive appearance problem later.
A simple pre-production test can prevent this. Cut two representative pieces from the same roll, keep one in the original direction, rotate the second by 180 degrees, and compare them under both diffuse and directional light. If the apparent shade changes, the marker should keep visible panels in a consistent direction. This may reduce fabric utilization slightly because pattern pieces cannot be freely flipped, but the trade-off is usually worthwhile when the alternative is a finished dress that appears to contain mismatched color panels under retail or photography lighting.
Bias Growth
Bias cutting gives woven satin the fluid drape associated with slip dresses and softly fitted evening styles because the fabric can deform more easily along the diagonal. That advantage also creates dimensional instability. Large panels can lengthen under their own weight, side seams can twist, necklines can grow, and front and back lengths can change at different rates. The amount of movement depends on fabric weight, weave density, yarn type, panel length, seam construction, and the exact bias angle, which is why one satin cannot be assumed to behave like another.
The timing of final operations matters. A bias dress may look level immediately after sewing and become uneven after hanging. Long skirt panels usually reveal the effect more strongly than small bodice sections because gravity acts over a greater length. Final hem leveling should therefore occur after the garment has reached a stable hanging condition, with the intended lining and straps or shoulder support already in place. Cutting accuracy remains important, but the production team must also allow for controlled relaxation rather than treating every post-sewing dimensional change as a cutting error.
Fit Diagnosis
Drag lines are useful diagnostic evidence because they show the direction of tension. Horizontal lines across the hip may indicate insufficient circumference, diagonal wrinkles from the waist toward the side seam can suggest imbalance between length and width, and excess fabric at the lower back may create folds that also affect zipper flatness. A neckline that opens away from the body can involve excess pattern length, insufficient stabilization, or an incorrect contour. Satin makes these signals easier to see because reflected light exaggerates every ridge and hollow.
A productive fit review checks bust coverage, waist position, hip level, side seam balance, center-back length, strap length, neck drop, back height, slit height, hem level, and movement during sitting and walking. The same silhouette that looks acceptable in matte crepe can look significantly less refined in glossy satin because the surface creates stronger visual contrast around drag lines. Pattern correction during sampling is therefore one of the most economical forms of defect prevention. Pressing can soften a visual symptom for a moment, but it cannot correct the geometry that recreates the wrinkle every time the dress is worn.
Uneven Hems
An uneven satin hem can come from bias growth, off-grain cutting, pattern imbalance, lining mismatch, or relaxation during finishing, so the symptom needs to be tracked rather than simply trimmed away. If one side repeatedly drops lower, grain or bias behavior is likely to be involved. If front and back lengths differ across multiple garments, the waistline and body-length balance should be checked. If the shell remains level but lining appears below it, the problem belongs to the shell-lining relationship rather than the outer hem itself.
Long satin dresses deserve particularly careful evaluation because small vertical differences become easier to see over a larger distance. The final check should be made with the garment correctly fastened and hanging from the same support points it will use in wear. For bias or fluid styles, the team should compare the garment before and after a realistic hanging period and after pressing. Correcting only the final hem without understanding the cause can produce a short-term visual fix while leaving side seam twist, lining tension, or progressive growth unresolved.
How Do Finishing and Handling Damage Satin?
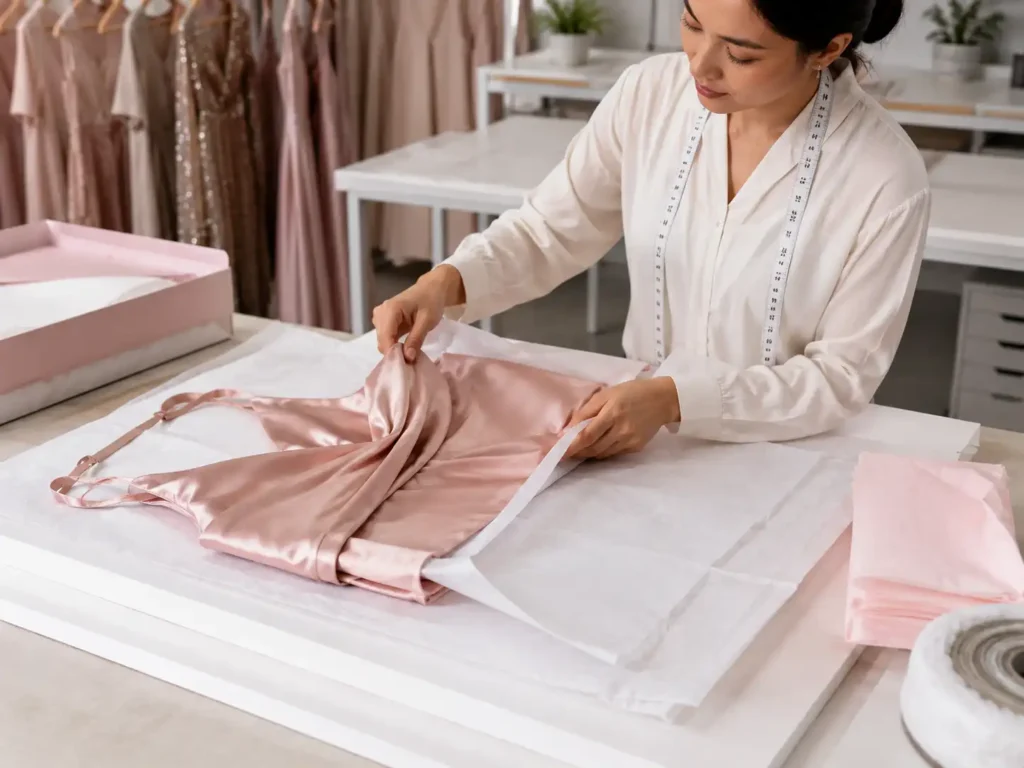
Satin can be damaged after sewing is complete. Excessive pressing heat or pressure can create shine and impressions, rough tables or metal parts can cause snags, and oil, moisture, or dirty equipment can leave visible marks. Prolonged folding and carton compression can also create stubborn creases. Finishing, inspection, packing, and transport therefore need the same product-specific discipline as cutting and sewing.
Pressing Marks
Pressing is one of the most underestimated sources of satin defects because operators sometimes use extra pressure to make a difficult seam look flatter. The result can be localized shine, visible seam-allowance impressions, flattened texture, or heat-related surface changes. The risk varies with fiber content and finish, so a polyester-rich satin and an acetate satin should not automatically share the same heat, steam, pressure, and contact-time settings. Pressing needs its own material trial just as sewing does.
The most sensitive areas are those with extra internal thickness, including darts, zipper tape, seam allowances, facings, boning channels, waist joins, and folded hems. These structures can print through to the face when pressure is too high. A useful pressing trial evaluates temperature, steam, pressure, contact time, pressing surface, and protective layers, then checks the garment again after cooling. Satin should also be viewed from several angles because a press mark that is almost invisible under flat fluorescent light can become obvious under side lighting or photography conditions.
Snagging Sources
Snagging prevention begins with the production environment rather than with repair. Common contact points include machine screws, damaged needle plates, burrs on guides, rough cutting-table edges, metal rulers, rings, jewelry, damaged hangers, hook-and-eye closures, zipper parts, and neighboring garments with sequins or rhinestones. When several dresses show pulled yarns at approximately the same position, the team should inspect the workstation that touches that area. A repeating pattern is evidence, not bad luck.
Simple operational controls can make a large difference. Work surfaces should remain smooth, sharp trims should be isolated from the satin face, delicate satin should not be stacked directly against sequined garments, damaged baskets and hangers should be removed, and machine surfaces should be checked regularly. These actions cost far less than trying to repair a displaced filament after the dress is finished. Even when a snag can be pulled back into place, the original light reflection may not fully return, leaving a visible line that is unacceptable on premium occasionwear.
Stains and Marks
Light-colored satin makes contamination particularly visible. Machine oil can migrate onto the fabric during sewing, pressing equipment can transfer dirt or mineral residue, steam can leave marks on sensitive finishes, and hand oils can be noticeable on white, ivory, champagne, blush, and pastel shades. The most effective approach is prevention because stain removal can create a second problem. Strong spot cleaning may change luster, leave a water ring, or alter the finish in the cleaned area even when the original stain disappears.
A practical investigation separates at least four sources: sewing-machine oil, pressing or steam contamination, dirty work surfaces, and packing or handling contamination. The location of the mark helps narrow the search. Repeated spots near the same seam suggest machinery, while broad or irregular marks appearing only after finishing point more toward pressing or handling. Garments should therefore be inspected at more than one stage so the team can identify when the contamination first appears instead of discovering it only at final inspection.
Packing Creases
Packing is one of the last operations, so defects created there are especially expensive. The garment has already consumed fabric, labor, finishing, inspection, labeling, and often client approval resources. Sharp fold lines, local compression, zipper impressions, hardware pressure, and abrasion can all appear after the dress enters the carton. The correct fold plan depends on garment structure. A simple satin mini may tolerate conventional folding, while a structured corset satin dress or long bias evening dress may need a different approach.
The receiving environment also matters. A retailer that will steam every garment before floor display can tolerate different packing conditions from an ecommerce warehouse that expects dresses to be unpacked, scanned, and shipped directly to consumers. Packing specifications should consider where the fold crosses the garment, whether it passes through the bust or waist structure, whether zipper hardware touches the satin face, how tightly garments are compressed, and how long cartons are expected to remain closed. Treating packing as part of product engineering helps protect the appearance already created during sewing and pressing.
How Are Satin Defects Controlled in Bulk?
Bulk satin defects are controlled by turning the approved sample into a repeatable production standard. Effective control starts with fabric, color, zipper, lining, pattern, and PP sample approval, then continues through cutting checks, sewing trials, in-line inspection, pressing review, final garment inspection, and packing control. The objective is not simply to find defective pieces at the end, but to stop repeating causes while production is still running.
Root-Cause Tracking
The most effective investigation follows the garment backward through production instead of beginning with blame. First define exactly what is visible, then record where it occurs, when it first appears, whether it repeats, and which variables are shared by affected garments. Grain direction, fabric roll, color, operator, machine, line, pattern size, zipper batch, pressing station, and packing method can all become useful comparison points. A controlled reproduction step is essential because a change that appears to improve the next few pieces does not prove that the actual cause has been removed.
Pattern recognition becomes more valuable as order size increases. Twenty dresses showing zipper rippling at the same waist position tell a different story from twenty randomly distributed snags. A defect that appears only after one pressing station should not send the technical team back to the cutting room. Root-cause tracking turns inspection records into process information. The purpose is not to create paperwork for its own sake; it is to stop the same defect from being reproduced across the next hundred pieces while the team is still discussing who might be responsible.
Fabric or Workmanship?
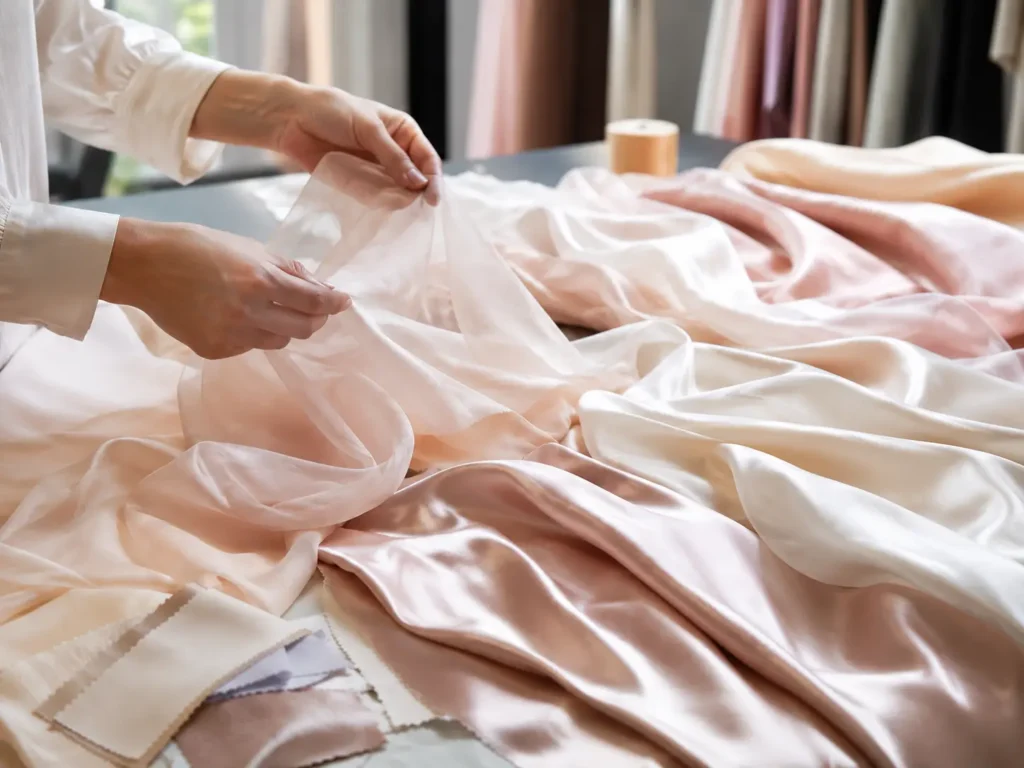
Assigning responsibility too early wastes time because many satin defects sit between material behavior and garment engineering. If the issue follows one fabric roll, fabric or finishing deserves attention. If it follows one machine, setup and machine condition become more likely. If it follows one operator, technique and handling should be checked. If the same defect appears at the same anatomical point across several operators and lines, pattern and fit deserve investigation. If the fabric opens beside intact stitches, seam slippage and yarn mobility should move to the top of the list.
Sometimes no single party is wrong. A fabric may have relatively low resistance to yarn movement, but the design may also place a highly stressed seam across the hip with very little wearing ease. The cloth is not automatically defective, and the sewing may not be poor. The combination may simply be unsuitable without changing seam construction, reinforcement, fabric choice, or fit. Strong technical teams therefore focus on compatibility and repeatability rather than forcing every problem into a simple fabric-versus-workmanship argument.
Sample to Bulk
A satin sample is most useful when it becomes a measurable bulk reference rather than a presentation piece. Before cutting production fabric, the team should know what has been approved for satin quality and weight, color and directional luster, lining fabric and color, zipper specification, main measurements, waist and hip shape, seam appearance, hem behavior, pressing result, labels, and packing. Those approved details need to be transferred into the production order, technical instructions, quality checkpoints, and reference garments used on the floor.
Jinfeng Apparel’s documented production workflow follows this sequence through PP sample approval, fabric and trim confirmation, size and packing confirmation, fabric inspection, relaxing, cutting, cut-panel checking, sewing, in-line inspection, pressing, finishing, final inspection, AQL inspection, and carton packing. Its recorded quality framework also covers incoming material QC, cutting QC, sewing QC, in-line inspection, garment inspection, pressing review, packing QC, and bulk consistency. The value of these checkpoints is timing: finding a repeating issue after the first few dozen garments creates options, while finding it after hundreds have been completed mainly creates rework.
Bulk Consistency
One good sample proves that a style can be made once. Bulk production proves whether it can be repeated across fabric rolls, sizes, colors, operators, lines, and production days. A documented Jinfeng Apparel satin program for an anonymous US occasionwear client involved 12 satin mini and midi styles totaling around 20,000 pieces. The recorded risks included color consistency, invisible-zipper flatness, lining comfort, and multi-color bulk stability, while the control process included satin-weight confirmation, lining-color matching, waist-hip pattern correction, zipper specification, PP sample approval, Golden Sample standards, and in-line QC.
The lesson is broader than one program. Final inspection asks which garments need repair, rejection, or rechecking. Production control asks what is making the defect repeat, how early the trend can be detected, and what must change before the next group is sewn. For brands developing satin collections, bringing a clear tech pack, intended satin specification, lining direction, zipper details, fit priorities, target quantity, and reference sample into the development conversation makes this process much more efficient because likely risks can be discussed before bulk fabric is cut.
| Production Stage | Core Satin Checks | Main Purpose |
| Fabric approval | Weight, color, luster direction, snagging sensitivity, shrinkage or relaxation | Confirm the material suits the design |
| Pre-production | PP sample, zipper, lining, measurements, seam appearance, packing plan | Lock the approved construction standard |
| Cutting | Roll identification, directional marker, grain, panel accuracy | Prevent shade and shape inconsistency |
| Sewing start-up | Seam trial, puckering, needle marks, zipper flatness | Catch process problems before volume rises |
| In-line QC | Measurements, seam appearance, slippage signs, snags, lining behavior | Stop repeating defects during production |
| Finishing | Press marks, stains, hem level, luster consistency | Protect final appearance |
| Final and packing | Overall appearance, zipper function, lining, creases, pack method | Confirm shipment-ready consistency |
Conclusion
Satin dress quality becomes much easier to manage once visible defects are treated as evidence rather than isolated imperfections. Puckering points toward tension, feeding, density, or seam interaction; slippage points toward yarn mobility and garment stress; zipper waves may begin in the pattern; uneven luster may begin at the cutting table; and a perfectly sewn dress can still be damaged during pressing or packing. The practical advantage of root-cause thinking is that it moves quality work earlier, when corrections are still inexpensive. For a fashion brand, that means fewer surprises between sample approval and bulk delivery, clearer technical conversations with the manufacturer, and a much better chance that the satin surface, fit, drape, and finishing remain consistent when the collection reaches photography, retail, or the final customer.