Skip to content

How to Develop a Slip Dress Pattern: From Measurements to Production-Ready Fit

Your trusted Women’s Apparel Manufacturer from China

A slip dress is one of those garments that looks almost effortless once it is hanging correctly on the body. The clean neckline, narrow straps, uninterrupted skirt and fluid surface create the impression that very little engineering is involved. In practice, the opposite is often true. When there are few seams, little internal structure and a smooth fabric such as satin, small pattern errors become easier to see. A neckline that is slightly too long can gape, insufficient hip room can make the dress climb upward, and poorly balanced bias panels can create twisting that becomes more obvious after the garment hangs.
A slip dress pattern is developed by translating approved body or garment measurements into balanced front and back pattern pieces, then controlling neckline depth, bust coverage, armholes, straps, waist and hip ease, grain direction, lining and finished length. The pattern must then be sampled, fitted, corrected, graded and documented before it can be considered reliable for production.
The most useful way to approach the process is therefore not to ask whether the pattern looks simple on paper. Ask whether the same pattern can remain attractive when the wearer sits, walks and turns, when the fabric is cut hundreds of times, and when the design is graded from the base size into an entire commercial size range. That is where a good slip dress stops being a sketch and becomes a workable garment.
What Defines a Slip Dress Pattern?
A slip dress pattern is defined by balanced bust coverage, narrow straps, a controlled neckline, clean armholes, appropriate waist-to-hip ease and a skirt that falls without twisting or pulling. The silhouette may be straight, fitted, A-line or bias cut, but the neckline, straps, side seams, grain direction, fabric behavior and lining must work together rather than being developed as separate details.
Core Shape and Balance
The basic slip dress usually contains fewer visible structural elements than a corset dress, tailored dress or paneled occasion gown. That does not make the pattern less technical. In fact, the absence of prominent seams means there are fewer places to distribute shaping. If too much bust volume is pushed into the side seam, the armhole may open. If too little shaping is provided, the neckline can stand away from the body. If the waist and hip relationship is incorrect, a fluid satin quickly reveals diagonal tension lines.
The front pattern normally manages bust room, front neckline, underarm coverage and the transition through the waist and hip. The back controls back-neck height, strap direction, side-seam balance and part of the overall stability of the upper garment. These two pieces should not be considered independent shapes. A narrow strap effectively connects them into one suspended system, so changing the front neckline, back depth or strap attachment point can change where the entire dress settles vertically.
The lower part of the pattern must also reflect the intended silhouette. A close midi may require carefully controlled hip ease and modest hem sweep, while a resort maxi can open more gradually from the hip. A straight column dress and a softly flared slip may share similar upper-body proportions but behave very differently when the wearer walks. Pattern development therefore begins with the complete silhouette rather than a generic outline labeled “slip dress.”
Essential Pattern Pieces
A relatively simple slip dress may use a front shell, back shell, two straps and either facings or a lining. More developed styles can add cowl extensions, separate bust sections, center-back shaping, side-slit components, lace inserts, cup support, adjustable strap pieces or a full-length lining. Each additional piece should solve a real construction, fit or design problem because unnecessary seam lines can disturb the smooth appearance expected from a slip silhouette.
The cutting outline alone is not enough for a production pattern. Grainlines, cut quantities, notches, balance marks, center-front or center-back references, strap attachment positions, slit locations, lining identification and seam allowances should be clear enough for another person to interpret without verbal instructions. That distinction matters once a garment moves beyond one sample sewer and enters a cutting and production environment where many people need to follow the same pattern information.
The pattern also needs to reflect the actual method of construction. A fully lined neckline, narrow facing, French-seamed side, overlocked seam or invisible zipper each influences seam allowance and assembly order. When construction decisions are left until after the pattern has been finalized, the production team often has to modify pieces informally, which makes consistency harder to maintain.
Base Block or New Draft?
An established brand block is often the most efficient starting point when a company already has a proven fit. It carries familiar relationships between bust, waist, hip, torso length and size grading into the new style. For a collection containing several dresses aimed at the same customer, this can prevent each new design from developing an entirely different fit identity.
A new draft becomes more useful when the desired silhouette is significantly different, when the target size chart changes, or when the project begins from an original sample that has proportions not represented in the existing block. Development may also begin from a tech pack, sketch, reference photograph or physical garment. Each source provides useful information, but none should be mistaken for a production pattern without technical interpretation.
A photograph may clearly communicate neckline shape, strap width and dress length while revealing almost nothing about internal bust shaping, side-seam positioning, lining, ease or grain direction. A physical sample gives more information because it can be measured and examined, yet the sample may still need correction before being translated into another brand’s size system. The practical objective is not to copy a source mechanically; it is to establish a reliable fit reference and rebuild the pattern around it.
Variations from One Base
A strong base pattern can support a family of commercial styles. A straight neckline may become a V-neck or cowl front, a midi can be extended to maxi length, standard straps can become adjustable straps, and a plain hem may evolve into a side-slit or asymmetrical design. Using a proven base can shorten development time because the core torso and hip relationships do not need to be reinvented for every variation.
The limitation is that visual changes often affect more than one pattern area. Lowering the back changes strap direction and upper-body stability. Deepening the front neckline affects bust coverage. Extending a bias midi into a maxi increases hanging weight and may increase vertical growth. Replacing medium-weight satin with a lighter fabric may cause the same hip circumference to appear much tighter because the fabric follows the body more closely.
This is why a base should be treated as a controlled reference rather than a universal template. Jinfeng Apparel’s documented womenswear pattern capability includes slip dresses among its core pattern categories, with bust coverage, strap length, drape, waist and hip ease, lining and garment length recorded as important development controls.
Which Measurements Control the Fit?
Slip dress fit depends on bust, waist and hip measurements together with neckline depth, strap length, armhole position, torso length, hip depth, dress length and lining length. These measurements must be evaluated as relationships rather than isolated numbers. Because a slip dress uses limited structure, an error in vertical position can create obvious gaping, exposure, pulling or uneven balance even when the main circumferences appear correct.
Critical Measurements
Bust, waist and hip establish the main horizontal dimensions, but a good slip dress cannot be developed from those three numbers alone. Vertical measurements determine where those circumferences occur on the body. Front length, back length, waist position, hip depth, neckline depth and strap length influence whether the garment actually reaches the correct levels when it is worn.
For the upper body, useful controls include full bust, upper bust where relevant, neckline depth, armhole position and the vertical relationship between the bust and waist. For the lower body, waist, hip, hip depth, total dress length, hem sweep and slit height become increasingly important. When lining is included, its finished length deserves its own measurement because the shell and lining do not always stretch or settle at the same rate.
A consistent target size chart should remain the reference throughout development. Combining dimensions from unrelated charts can create a technically impossible body proportion. For example, a hip measurement may look perfectly reasonable on its own but still create a poor pattern if the corresponding waist-to-hip depth came from another sizing standard. Reliable pattern work depends on the geometry between measurements, not simply the individual numbers.
Measurement | Primary Function | Typical Risk if Incorrect |
Full bust | Upper-body room | Compression or neckline gaping |
Neckline depth | Coverage and proportion | Excess exposure |
Strap length | Vertical garment position | Low neckline or high armhole |
Waist | Mid-body shaping | Boxy or overly fitted silhouette |
Hip | Movement and skirt fall | Cling, riding or drag lines |
Hip depth | Waist-to-hip transition | Distorted side seam |
Dress length | Overall proportion | Uneven or incorrect hem |
Lining length | Internal balance | Lining visible below shell |
Slit height | Mobility and coverage | Excess exposure in movement |
The pattern development records used by Jinfeng Apparel include bust, upper bust, underbust, waist, hip, neckline depth, strap length, armhole, slit height, lining length and garment length among the measurements commonly controlled during womenswear development.
Neckline and Straps
Neckline depth and strap length work together, but they should not be used to compensate blindly for each other. Shortening a strap raises the neckline, yet it also lifts the armhole, waist and potentially the entire dress. Lengthening the strap lowers the neckline and may improve one visual proportion while increasing underarm exposure somewhere else. When the basic bodice balance is wrong, strap adjustment can hide the problem rather than solve it.
Strap placement is equally important. Moving the front attachment closer to center front changes neckline angle and can expose more of the outer bust. Moving it too far outward can make the strap unstable on the shoulder. The back attachment controls another direction of tension, particularly on low-back styles where the amount of fabric supporting the upper body has been reduced.
On minimal garments, small corrections can create visible changes. During a fitting, movements of 5–10 mm at strap attachment points may noticeably alter the armhole or neckline, while a neckline correction of approximately 10–15 mm can substantially change front coverage. These are practical fitting examples rather than fixed specifications; the correct adjustment depends on the wearer, fabric and silhouette.
Adjustable hardware should also be tested on the sample rather than added later. Rings, sliders, folded strap ends and bartacks all consume part of the strap length. If the approved sample uses a simple temporary strap while bulk production uses adjustable hardware, the finished garment may not sit in the same place.
Bust and Hip Ease
There is no universal ease formula for a slip dress. The correct amount depends on fabric, grain direction, lining, closure, body shape and the visual fit the brand intends to sell. A relaxed straight-grain woven slip may need clearly positive ease, while a bias-cut style can appear closer because diagonal grain provides additional mechanical give around the body.
For early testing, a relaxed straight-grain woven slip might begin with approximately 4–8 cm of bust ease and 6–10 cm of hip ease, while some closer bias styles can be sampled with lower amounts. These figures are development ranges, not universal standards. They should be validated with the real fabric and target fit model before they become specifications.
Fabric weight can change the visible result even when the pattern measurements stay the same. A heavier satin may bridge across the hip and create a smoother surface, while a very lightweight satin can follow every curve and make the same measured ease look much smaller. The lining can also add friction or restriction, particularly if it has less give than the shell.
For that reason, ease should be tested as a fabric-and-pattern relationship. If a collection changes from lightweight satin to crepe satin, viscose or another material, the approved pattern should be reviewed instead of assuming the old ease will create the same silhouette.
Proportion Beyond Circumference
Two people can have identical bust and hip circumferences while requiring noticeably different patterns because their torso lengths, bust positions and hip depths differ. This is especially important in a garment with few seams because there are limited places where the pattern can absorb dimensional differences.
Suppose a pattern provides adequate hip width but places that width 30 mm above the wearer’s fullest hip. The garment can still produce diagonal drag lines even though a tape measure suggests there is enough total circumference. Adding more width may make the problem worse because the real issue is vertical placement rather than quantity.
The same logic applies at the bust. Correct circumference does not guarantee correct coverage if the neckline is too long, the bust point is positioned incorrectly or the front body length does not match the intended wearer. Successful fitting therefore requires observation of where the fabric is pulling, falling or standing away from the body rather than relying only on a finished measurement chart.
Commercial grading makes these relationships more important. Neckline width, strap spacing, torso length and hip depth do not necessarily increase at the same rate as bust and hip circumference. Grade rules should preserve both body accommodation and the visual identity of the design.
How Do You Draft a Slip Dress Pattern?
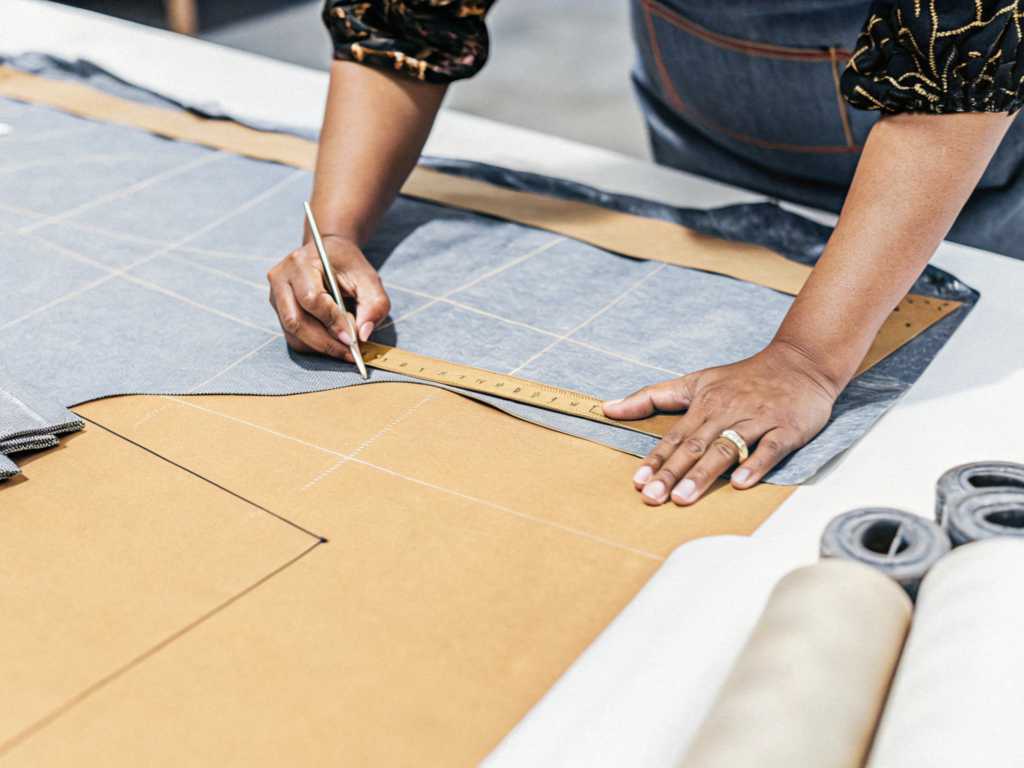
Drafting starts by establishing the approved base size, body or garment measurements, bust and hip balance, neckline, strap position, grain direction and finished length. The front and back are then shaped together before lining, slits, seam allowances and production marks are finalized. A successful draft must remain balanced after cutting, sewing and fitting rather than merely looking correct as a flat paper shape.
Drafting the Front
Begin with a clear center-front line and mark the bust, waist, hip and finished-length levels. These horizontal references create the framework for the front piece. Width is then distributed at each level according to the intended silhouette and ease rather than by drawing one continuous side curve without reference points.
Bust volume can be controlled through a dart, side-seam shaping, panel construction or, to some extent, bias behavior. A relaxed slip may require only subtle shaping, while a closer straight-grain satin style may need more deliberate volume management. Bias can help fabric mold over the bust, but it should not be expected to rescue a front draft that is fundamentally too flat.
The neckline and strap position should be established before the final armhole curve. These three features are connected. If the neckline is lowered significantly, less material remains to stabilize the upper front, and the armhole may need adjustment to maintain coverage. The front strap attachment should also be checked against both bust position and intended neckline angle.
Below the waist, the side seam should flow smoothly through the hip into the hem. A side slit should be placed according to finished length, mobility and desired coverage, not simply copied from a photograph without considering the new size and proportion. Before the front is considered complete, check the vertical relationship between neckline, bust, waist, hip and hem.
Drafting the Back
The back pattern should be developed alongside the front so that corresponding horizontal levels remain aligned. Waist and hip marks should match, and the side seams should be walked together after shaping to identify unexpected differences in length or curvature.
Back-neck depth affects much more than appearance. A very low back removes fabric that normally contributes to upper-body stability, placing greater responsibility on the straps and side seams. If the back is lowered aggressively while strap positions remain unchanged, the garment can begin to fall forward, making the front neckline feel lower even though its own pattern has not changed.
The back also needs enough width for natural movement without producing excess folds. Shaping may be placed at the side seam, center back or through dart manipulation depending on the design. Bias-cut construction can soften the need for visible shaping, but grain behavior should still be evaluated in the actual fabric.
Closure choice should be considered during drafting. A fitted straight-grain slip may need an invisible zipper to pass over the bust or hips, while certain bias designs can function without one because the diagonal grain provides additional give. Once front and back pieces are developed, compare side-seam length, waist position, hip position, strap locations, slit marks and hem balance before cutting the first sample.
Darts and Shape Control
Bust darts are tools for controlling three-dimensional volume rather than outdated details that should automatically disappear from a modern slip dress. The decision to keep, rotate, reduce or remove a dart depends on the bust volume, fabric, grain direction and visual design.
In a straight-grain woven slip, a small side bust dart can sometimes create a cleaner armhole and neckline than forcing all shaping into the side seam. In a bias-cut satin style, part of that shaping may be reduced or redistributed because the fabric molds more easily across curves. The amount that can safely disappear depends on the fabric and target body rather than a fixed drafting rule.
Larger bust sizes deserve particular attention. Scaling one small dart mechanically across an extended size range can move the dart point or angle into an unattractive position. Some commercial programs therefore use different shaping rules or fit adjustments as the size range increases.
During sample evaluation, diagonal tension from the bust toward the waist, armhole gaping, neckline lifting or fabric pulling toward the bust point can reveal more than the numerical bust circumference alone. Good pattern making is partly measurement and partly learning to read the direction in which the fabric is asking for additional or reduced volume.
Seam Allowance and Production Marks
Seam allowance should correspond to the construction method rather than being applied as one standard amount around the entire pattern. A French seam, overlocked side seam, narrow rolled hem, lined neckline and invisible zipper require different working allowances and handling methods.
Production patterns should clearly identify grain direction, cut quantity, size, important notches, strap positions, neckline balance points, slit marks, center references and lining pieces. When adjustable straps are used, the technical information should also specify finished width and the required adjustment range.
Bias pieces require especially clear grain instructions. Once a pattern has been developed and approved on a particular bias orientation, rotating it during marker planning can alter drape and stretch. Fabric utilization matters commercially, but improving marker efficiency should not come at the expense of changing the behavior that was approved during fitting.
Surface direction should also be considered with satin. Although satin does not necessarily have pile in the same way as velvet, cutting pieces in opposing directions can sometimes produce visible differences in reflected light. For sensitive fabrics, a one-way cutting direction can be safer even when it increases consumption.
How Do Bias Cut and Fabric Affect the Pattern?
Fabric and grain direction are part of the pattern rather than decisions made after drafting. Bias cutting gives many woven fabrics greater diagonal flexibility and a softer body-skimming drape, but it can also create length growth and distortion. Fabric weight, opacity, surface friction, recovery and lining behavior influence how much ease is needed and whether the approved pattern remains stable in production.
Bias Versus Straight Grain
True bias is approximately 45 degrees to the warp and weft of woven fabric. At that orientation, many woven materials gain noticeably more diagonal flexibility than they show in either straight-grain direction. This characteristic allows classic bias-cut slip dresses to follow the bust and hip with fewer visible shaping seams.
The same flexibility creates technical risk. Pattern pieces can lengthen after cutting, particularly when the fabric is light and the garment is long. Side seams may migrate, necklines can grow during handling, and the hem may become uneven after the dress has hung for several hours.
Straight-grain slip dresses are generally more predictable during cutting and sewing. They can be easier to grade and reproduce, although they normally depend more heavily on deliberate pattern shaping and positive ease because the fabric contributes less diagonal accommodation.
The choice also affects fabric consumption. Large bias pieces are more difficult to nest efficiently than straight-grain pieces, which can raise consumption even before any extra handling is considered. A premium fluid silhouette may justify that cost, while another commercial program may prefer a stable straight-grain construction. Neither method is inherently more professional; each should be selected according to the intended look, fabric and production priorities.
Fabric Weight and Drape
Calling a fabric “satin” does not tell a pattern maker enough. Satin describes a weave or surface characteristic, while real production behavior depends on weight, yarn, composition, density, stretch, drape and finishing. Two visually similar satins can react very differently at the hip, neckline and hem.
Jinfeng Apparel’s internal product knowledge identifies lightweight satin, crepe satin, chiffon, viscose and silk-like fabrics among common slip-dress directions. Its wider satin references cover approximately 80–220 gsm across different dress applications, with lighter constructions more suited to fluid slip and summer silhouettes and heavier options better suited to fuller or more structured garments.
Fabric Direction | Typical Behavior | Pattern Consideration | Common Risk |
Lightweight satin | Fluid and close to the body | Hip ease needs careful testing | Cling, transparency, snagging |
Crepe satin | Softer shine and controlled drape | Often visually more stable | Grain distortion |
Heavier satin | Fuller and less clingy | May need different ease | Seam bulk |
Viscose woven | Soft with natural movement | Check length stability | Shrinkage and growth |
Chiffon | Light and transparent | Usually requires lining | Slippage and distortion |
Stretch satin | Flexible with recovery | Reduce ease cautiously | Variation in stretch |
Silk-like polyester | Smooth and commercially repeatable | Test heat and drape | Snagging and shine marks |
Changing from one of these materials to another should trigger a pattern review. A lighter satin may make the hip appear tighter even at identical measurements, while a heavier material may stand away from the body and make the same pattern look looser.
Controlling Bias Growth
Bias pieces should be handled carefully from the moment they are cut because gravity and manipulation can start changing their dimensions before sewing begins. If one bundle is hung, pulled or transported differently from another, pieces cut from the same pattern can arrive at the sewing operation with slightly different lengths.
During development, allowing a bias-cut sample to settle before final hem evaluation is a useful practice. A period of roughly 12–24 hours is often a practical starting point for lightweight woven garments, although the appropriate time depends on the fabric, length and construction. The purpose is not to follow a rigid clock; it is to let the fabric reveal the amount and direction of growth before the hem is finalized.
After settling, measure center front, center back, side seams and hem level again. If one panel has changed noticeably more than another, check grain placement and cutting accuracy before assuming that trimming alone is the correct solution.
Necklines and armholes often need more stability than the main body. Stay stitching, narrow stabilizing tape, controlled understitching or another appropriate method can reduce unwanted edge growth while still allowing the body of the dress to drape naturally.
Lining and Shell Interaction
Lining does more than prevent transparency. It changes friction against the body, affects movement, influences drape and can either support or fight the outer fabric. A fluid shell paired with a stiff lining may lose the natural movement that made the fabric attractive in the first place.
If the lining is too tight through the hip, the wearer can feel restricted even when the outer dress appears to have enough room. If the shell and lining stretch at different rates, the lining may become visible below the hem or pull the outer layer upward.
The lining pattern therefore does not always need to be an exact copy of the shell. Ease, length and grain direction may need to be adjusted according to the fabric combination and whether the lining is full length, partial or attached at multiple points.
Opacity should also be tested under realistic lighting. Light-colored satin can appear sufficiently opaque on a table yet reveal more when stretched across the body or photographed with strong backlighting. Adding lining solves only part of the problem; the lining must still allow the shell to move naturally and should not create extra bulk or visible ridges underneath the dress.

How Do You Fit and Grade the Pattern?
A slip dress should be fitted in the intended fabric with the real straps, lining and major construction details in place. The base size must be corrected before grading because an unresolved fit problem becomes harder to diagnose once it is distributed across several sizes. Grading should increase body accommodation while protecting neckline proportion, strap placement, armhole coverage, slit height and the original silhouette.
First Sample Evaluation
The first sample is a diagnostic garment rather than a final presentation piece. Its purpose is to reveal how the proposed pattern, fabric and construction interact on a real body before the style is locked.
Allow the sample to settle naturally before making immediate corrections. Observe whether the neckline reaches the intended height, whether side seams remain vertical and whether front and back waist positions are level. If straps must be shortened dramatically just to make the neckline acceptable, the underlying front or back length may need correction.
Bust coverage should be checked from more than one angle. A neckline can appear secure when the wearer stands still and become too revealing when she bends slightly forward. Underarm coverage should be observed with the arms relaxed and raised. The wearer should also walk, sit and turn because a narrow skirt or slit can behave very differently in movement.
The finished sample should then be measured. If the planned hip measurement is 100 cm but the sewn garment measures 98.5 cm, the team should determine whether cutting, seam allowance, fabric behavior or sewing caused the difference before changing the paper pattern.
Fit comments work best when they are measurable. “Raise center-front neckline 10 mm” gives the pattern maker something precise to evaluate. “Make it less revealing” leaves room for several interpretations.
Common Fit Problems
Neckline gaping, insufficient bust coverage, loose straps, excessive underarm exposure, satin cling, twisted side seams, migrating lining and uneven hems are among the most common slip-dress problems. Several can appear at the same time, which makes careful diagnosis important.
A gaping neckline may be caused by too much edge length, poor bust shaping, strap placement or excessive front length. Shortening the strap can make the gap disappear temporarily while moving the waist and armhole to the wrong positions.
Hip cling can come from insufficient ease, very lightweight fabric, high friction between shell and lining or grain behavior. Adding width everywhere is not automatically the correct solution. A twisted side seam may come from an unbalanced front and back pattern, inaccurate bias cutting or pieces that stretched differently before sewing.
Jinfeng Apparel’s documented slip-dress development risks include insufficient bust coverage, straps that are too long, satin clinging through the hip, lining movement and uneven hems, with corresponding corrections focused on neckline height, strap length, hip ease, lining control and overall length balance.
The practical rule is to change a controlled variable and record what happened. Several unrecorded pins may make one sample look better while making the final pattern harder to reproduce.
Correcting the Cause
Fit correction becomes more reliable when the visible symptom is separated from the underlying cause. If the wearer has too much underarm exposure, check strap position, armhole depth, side-seam height and upper-bust balance before simply raising the side seam.
For hip drag lines, compare the pattern’s hip level with the actual fullest hip level. If the total circumference is sufficient but the width is placed too high, adding more width can create a loose garment without removing the drag. The side seam needs to be reshaped so the required volume occurs where the body actually needs it.
When the neckline sits too low, determine whether the neckline curve itself is too deep, whether the straps are too long, whether the front body is too long or whether a low back is allowing the entire dress to shift forward. These solutions are not interchangeable. Raising the neckline by 10 mm changes the upper edge directly, while shortening the straps by 10 mm moves several parts of the garment upward.
Every approved correction should be transferred to the pattern, lining or facing and measurement file immediately. A sample-room correction that exists only as pins or handwritten notes can disappear before the next round.
Grading Across Sizes
Grading should begin only after the base size has reached an acceptable fit. Scaling an unresolved base simply reproduces the same weakness across the size range.
Bust, waist and hip are obvious grade areas, but the neckline, armhole, strap spacing, strap length, waist level, hip depth, slit height, body length and hem sweep also need rules. These details do not necessarily grow at the same rate as circumference.
A neckline that looks balanced in size S should not automatically become dramatically wider in XL. Straps need to move enough to follow the body without drifting so far outward that they become unstable. Slit height should preserve both mobility and coverage rather than climbing proportionally with every increase in garment length.
Grade Area | Main Control | Frequent Mistake |
Bust | Fit and neckline relationship | Adding width only |
Neckline | Coverage and visual proportion | Becoming too wide |
Strap spacing | Shoulder and bust alignment | Moving too far outward |
Armhole | Coverage and mobility | Excessive depth |
Waist-to-hip | Intended silhouette | Losing brand fit |
Hip depth | Vertical proportion | Using one fixed increment |
Slit height | Coverage during movement | Becoming too high |
Length | Overall proportion | Ignoring vertical body change |
A brand’s own size chart should remain the controlling reference. Jinfeng Apparel’s documented pattern capability includes US, UK, EU and AU sizing, alpha sizing and customer-specific extended-size adjustments where required. For a broad commercial range, fitting more than one size can reveal grade problems that are impossible to see from the base sample alone.
How Do You Prepare the Pattern for Production?
A slip dress pattern is production-ready when the approved pattern, measurement chart, fabric, lining, grading, construction, sample comments and QC requirements describe the same garment. Before bulk cutting, grain direction, strap dimensions, neckline, hip ease, slit height, dress length and seam construction should be locked so that production does not depend on informal instructions or individual memory.
Production File Alignment
A pattern should not be considered finished if the corresponding tech pack or measurement file still contains old information. The approved sample, pattern, measurement chart, BOM and construction instructions need to agree with one another.
Finished measurements should be compared against the approved garment before bulk production. Bust, waist, hip, neckline, strap length, armhole, slit position, lining length and total length deserve particular attention. It should also be clear whether measurements are recorded as half measurements or full circumferences because inconsistent interpretation can create large production errors.
Fabric and lining codes must correspond to the materials used during approval. If the original satin is replaced after fitting, the team should decide whether the new material requires another sample. Strap hardware, zipper length, labels, care instructions and relevant finishing details should also be confirmed.
A reliable production file answers four practical questions without requiring the pattern maker to stand beside the sewing line: what should be cut, how should it be assembled, what should the finished garment measure, and what should the approved garment look like.
The company’s documented sampling process connects structure review, material confirmation, pattern development, sample making, fit checking, revisions, PP approval and Golden sample control before bulk production.
Revision Control
Every meaningful sample correction should result in an updated pattern record. Pins, chat messages and verbal instructions are useful during development, but they are poor long-term production documents.
A useful revision note states the location, original condition, required change and numerical amount where practical. It should also identify connected pieces. Raising the front neckline changes the lining or facing. Increasing hip circumference may require a corresponding lining change. Shortening the dress can alter the visual relationship between hem and slit.
Version numbers or dates help teams understand which file is active. Older versions should be archived rather than silently overwritten because they may be needed when investigating a later problem or comparing development rounds.
Good revision control becomes particularly valuable when a successful style is reordered months later. The production team should be able to retrieve the approved pattern, measurement chart, fabric reference, trim information, sewing notes and packing instructions without reconstructing decisions from old conversations.
The real commercial value of documentation is therefore not paperwork for its own sake. It reduces interpretation, makes repeat orders faster to restart and gives teams a traceable explanation for changes made between the first sample and the final production version.

Fabric Change Control
Using the same pattern in a different fabric is common in fashion collections, but it is one of the easiest ways to introduce an unexpected fit problem. A light satin, heavier satin and crepe satin may share a similar visual category while behaving very differently once they are cut and worn.
When fabric changes, review weight, diagonal give, mechanical stretch, recovery, drape, opacity, shrinkage, surface friction and dimensional stability. A small change may require only an ease or lining adjustment, while a large difference can justify another fit sample.
A lighter material may reveal undergarment lines and cling more closely through the hip. A heavier material can stand away from the body and make the silhouette appear looser. Viscose may change length after handling, while stretch satin introduces a recovery property that was not present in the original non-stretch pattern.
Internal development guidance used by Jinfeng Apparel similarly treats a fabric change as a reason to reassess stretch, weight, drape, transparency and dimensional behavior instead of assuming that an approved pattern can always be transferred unchanged.
This approach also makes commercial sense. Reusing a proven pattern can save substantial development time, but the saving disappears if a fabric substitution creates a poor sample, additional revision rounds or inconsistent bulk fit.
PP Sample and Bulk Consistency
The pre-production sample is the point where the approved design should meet the materials and construction conditions intended for bulk. It should therefore use the correct fabric, lining, major trims, strap construction and sewing methods wherever practical.
For a slip dress, final checks should include strap length, neckline height, bust coverage, side-seam balance, hip ease, lining position, slit height, finished length, pressing and fabric surface condition. Satin deserves additional attention for snagging, color variation, unwanted shine marks and handling damage.
Bias-cut styles should be rechecked for length and hem balance after the fabric has had enough time to settle. If the PP sample changes noticeably from the earlier fitting sample even though the pattern is supposedly identical, the cause should be investigated before cutting bulk fabric.
Once the PP sample is approved, uncontrolled pattern changes should stop. An approved reference or Golden sample then provides production, QC and finishing teams with a physical benchmark alongside the technical file.
Jinfeng Apparel, the standardized company name used in the project’s factual documentation, operates as a custom women’s fashion manufacturer, and its documented pattern-development resources include senior pattern makers, sample rooms and sample machinists supporting slip dress and other womenswear development. For a fashion brand working with an external development partner, sharing the real size chart, intended fabric, reference garment or technical design early usually produces a more useful development conversation than sending an image alone.
A successful slip dress pattern ultimately becomes almost invisible to the person wearing it. The neckline stays where it should, the straps carry the garment comfortably, the fabric moves over the hips without unwanted drag, and the hem appears balanced rather than technically corrected. Reaching that result requires more than drawing a clean outline. Measurements, fabric behavior, fit, grading, lining, construction and production control all have to agree.
The strongest commercial patterns are also repeatable. A beautiful first sample proves that a garment can be made once; a production-ready pattern proves that the same design can remain recognizable across sizes, fabric lots and repeat orders. When pattern development is treated as the connection between design and manufacturing rather than a separate technical step, the apparent simplicity of a slip dress becomes much easier to maintain at scale.
Share This Article :

Jerry Lee
Categories

Latest blogs

Table of Contents
Here, developing your OEM/ODM private label clothing collection is no longer a challenge—it’s an excellent opportunity to bring your creative vision to life.