
How to Develop a Ruched Dress Pattern

Your trusted Women’s Apparel Manufacturer from China
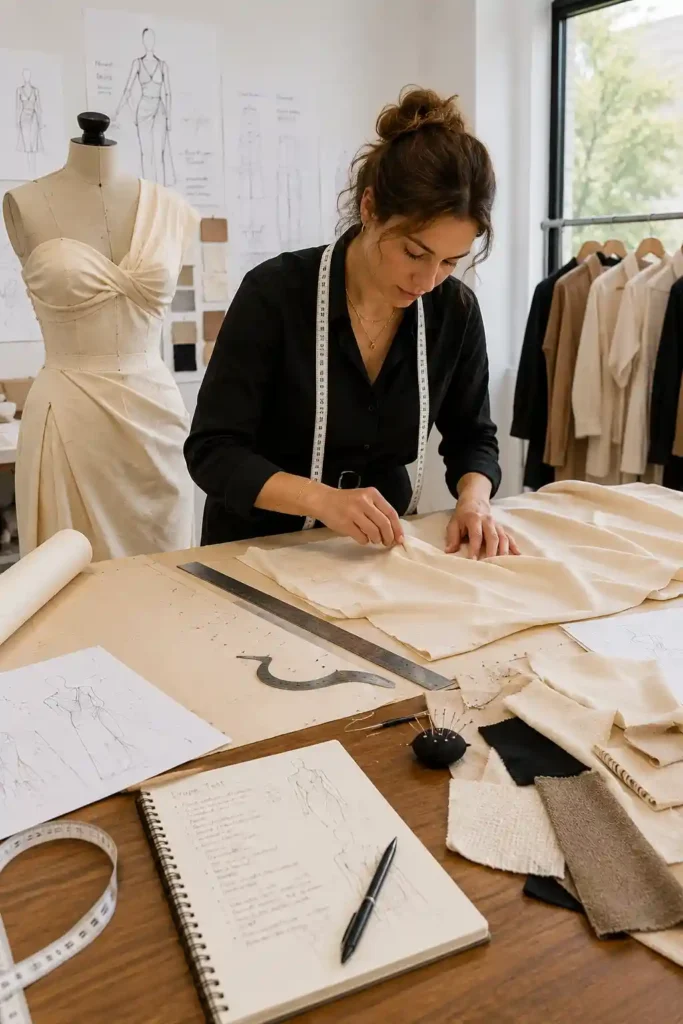
A ruched dress can look almost effortless in a campaign photograph. The fabric seems to fall into soft folds around the waist, hip, bust, or side seam, giving a fitted dress more texture and a more forgiving silhouette. Behind that apparently simple effect, however, is a series of pattern decisions that have to work together. The pattern maker must decide where the folds begin, where they finish, how much extra fabric should be introduced, how the material will be compressed, and what happens to the dress when the wearer moves.
A well-developed ruched dress pattern starts with a reliable base block, defines a precise ruching zone, adds controlled fullness through lengthening or slash-and-spread manipulation, and matches the construction method to the fabric. The finished pattern must then be tested for fit, stretch, recovery, symmetry, garment length, lining behavior, grading, and repeatability before it can be considered ready for production.
The difference between an attractive sample and a commercially reliable style often appears later. A sample maker can manually arrange folds until one dress looks beautiful, but a production line cannot depend on individual judgment for every garment. If the pattern does not contain measurable controls, one side may gather more tightly than the other, a mini dress may gradually become shorter, or the same style may look noticeably different between sizes. Good ruching therefore begins long before the sewing operator starts arranging folds.
What Is a Ruched Dress Pattern?
A ruched dress pattern is deliberately engineered with extra fabric in selected areas so that the excess material can be compressed into controlled folds. The pattern must define the direction, amount, placement, and finished length of the ruching while preserving the intended fit underneath. Fabric stretch, recovery, lining, seam position, and body proportions all influence whether the finished ruching looks soft, balanced, and repeatable.
Controlled Fullness Creates the Ruching
The easiest way to understand ruching is to compare the fabric length before it is gathered with the space it occupies after construction. If a section of side seam must finish at 30 cm but the corresponding pattern edge contains 45 cm of material, the additional 15 cm has to be compressed within that 30 cm zone. Those extra centimeters become the folds visible on the finished dress.
Pattern makers can describe this relationship with a simple development ratio: pre-gather length divided by finished ruched length. A 45 cm fabric edge gathered into 30 cm gives a ratio of 1.50, while 54 cm gathered into the same 30 cm zone gives a ratio of 1.80. The higher number generally produces more visible fullness, although fabric thickness and drape can make two identical ratios look completely different.
The ranges below are useful starting points when making development samples, rather than fixed production standards that apply to every dress.
Ruching Effect | Development Ratio* | Fabric Needed for a 30 cm Finished Zone |
Light | 1.25–1.40 | 37.5–42 cm |
Medium | 1.40–1.70 | 42–51 cm |
Full | 1.70–2.00 | 51–60 cm |
Dramatic | 2.00+ | 60 cm+ |
*These are practical sampling ranges. The final ratio should be confirmed in the actual fabric and intended garment fit.
A lightweight mesh can often accept substantial added length because each fold remains thin and soft. The same amount added to dense ponte can produce a heavy ridge at the seam. Stretch satin creates yet another result because light reflects across every fold, making irregular distribution more visible. This is why professional development starts with a measurable ratio but finishes with a real fabric sample on a body.
Ruching, Gathering, and Shirring Are Not Identical
Ruching, gathering, and shirring are often grouped together because all three create texture by contracting fabric, yet they describe different aspects of garment construction. Gathering is the general technique of bringing a longer fabric edge into a shorter finished distance. Ruching is the visible design effect produced when controlled fullness forms folds across a selected section of the garment. Shirring generally uses repeated rows of elasticized stitching to contract a broader surface.
This distinction becomes important when a style moves from sketch to pattern. A dress designed for fixed side gathers cannot automatically be converted to elastic ruching without checking finished length, tension, seam bulk, and recovery. A fixed ruched seam normally has one predetermined appearance, while an elasticized seam continues to stretch and contract when worn. A drawstring version may allow the customer to change both the density of the folds and the overall dress length.
The technical specification should therefore state more than “ruched side.” It should identify where the ruching starts and stops, how long that area is before gathering, what its finished length must be, how the fullness will be controlled, and whether elastic, gathering stitches, a channel, or another construction method is involved.
Placement Changes the Silhouette
Ruching can be placed at the side seam, center front, center back, bust, waist, hip, or across an angled panel. Each option changes how the eye reads the body. Side ruching is often used to soften the waist and hip area, while front ruching can add surface interest around the abdomen. Back ruching can emphasize the hip curve, and diagonal ruching creates a stronger directional line that can visually narrow part of the torso.
The placement itself needs to be treated as a pattern measurement. Moving a ruched zone only several centimeters upward or downward can change the apparent waist position and the way the folds sit over the hip. Excessive fullness at center front may create unwanted bulk, while folds placed too low on a side seam can make the waist look longer and reduce the shaping effect.
Jinfeng Apparel’s internal ruched-dress development criteria separate side, front, back, diagonal, bust, and waist ruching while controlling fold amount, stretch, symmetry, garment length, and the relationship between placement and body shape. Those controls reflect a useful principle for any commercial pattern: decide exactly where the folds belong before deciding how much fabric should be added.
Which Base Pattern Should You Start With?
Start with a base pattern that already reflects the intended silhouette, size chart, and fabric category. A fitted stretch dress normally begins from a stable knit block, while a woven ruched dress needs suitable wearing ease and structural shaping. Ruching should modify a pattern that already fits correctly rather than being used to hide unresolved problems around the bust, waist, hip, balance, or length.
A Reliable Block Comes Before Decorative Fullness
Most fitted ruched dresses are easier to develop from a well-balanced fitted block because the pattern maker already knows how the bust, waist, hip, side seam, and garment length relate to one another. Bodycon minis, fitted midis, party dresses, stretch mesh styles, and club dresses all depend on a predictable body shape beneath the visible folds, even when much of that structure is visually hidden.
Trying to use ruching to repair a poor block normally creates additional problems. A waist that is already too loose may become heavier once extra fullness is added. A hip that is too tight can pull the folds downward and encourage the dress to ride upward when the wearer walks. An unbalanced side seam can twist after gathering, giving the impression that the ruching is uneven even when both pattern pieces contain exactly the same additional length.
Before modifying the pattern, confirm the bust, waist, high hip, full hip, front length, back length, side-seam balance, dress length, neckline, and armhole. Where lining is involved, its main measurements should also be established before the outer shell is heavily manipulated. Once these basic relationships work, the ruched section can be treated as intentional design engineering rather than a way to disguise poor fit.
Knit and Woven Blocks Need Different Logic
A stretch-knit block and a woven dress block should not be treated as interchangeable because they manage body space in different ways. Fitted knit garments may use zero ease or negative ease, allowing the textile itself to expand around the wearer. Woven dresses generally require positive wearing ease and may use darts, seams, panels, or shaped construction to follow the body without relying on fabric stretch.
For stretch styles, the amount of negative ease should be based on real fabric behavior rather than a percentage copied from another design. A material with strong recovery can support a closer fit than a soft jersey that stretches easily but does not return well. One simple test is to measure a 10 cm sample, stretch it comfortably to 13 cm, and calculate the usable stretch as 30% using the formula: (13 − 10) ÷ 10 × 100.
Recovery should be checked immediately afterward. If the 10 cm sample returns close to its original length, it is likely to retain tension more effectively. If it settles at 10.8 or 11 cm, the garment can gradually grow during wear. In a ruched bodycon dress, weak recovery may flatten folds, allow the side seam to lengthen, or shift the concentration of fabric lower on the body.
The fabric and pattern therefore need to be considered as one system. A block developed for power mesh cannot automatically be transferred to lightweight viscose jersey, even if both fabrics have substantial stretch on paper.
Control Fit, Finished, and Construction Measurements
Ruched patterns become much easier to manage when the measurements are separated into three groups. The first group covers body fit, including bust, waist, hip, neckline, and total garment length. These measurements determine how the dress fits the wearer. The second group covers finished structure, such as final side-seam length, finished ruched-zone length, lining length, and hem position.
The third group covers construction measurements, including the pre-gather edge, elastic length, channel length, drawstring length, and any extra paper-pattern amount created during slash-and-spread development. These values can be significantly different from the measurements taken from the finished garment, yet both are needed to reproduce the style correctly.
For example, a ruched side edge may measure 52 cm on the paper pattern but be required to finish at 34 cm after construction. If the technical package records only 52 cm, an operator has no precise reference for how far the section should be contracted. Recording both measurements turns a visual styling detail into a controlled manufacturing instruction.
Jinfeng’s documented pattern-development system uses bust, upper bust, under bust, waist, hip, length, neckline, strap, lining, and other structural measurements as separate fit controls, which helps convert custom designs into production-ready patterns rather than judging them only by appearance.

How Do You Add Fullness for Ruching?
Fullness is added by extending the targeted pattern edge or opening the pattern through slash-and-spread manipulation. The amount should correspond to the desired fold density, fabric behavior, and finished ruched distance. The start point, stop point, intermediate balance notches, pre-gather length, and finished length should all be marked so the added volume can be distributed consistently during sampling and production.
Slash-and-Spread Controls the Direction of Fullness
Slash-and-spread is particularly useful when the folds travel through a shaped section of the body instead of simply gathering along a straight edge. The pattern maker draws several lines through the proposed ruched zone, cuts toward a pivot or opposite edge, and opens each section by a controlled amount. The added spaces create extra fabric without necessarily changing the surrounding fit points.
Suppose a waist-to-hip panel needs approximately 18 cm of additional fullness. If six slash lines are used, an initial trial could open each section by roughly 3 cm. The actual pattern does not have to distribute that amount evenly. More volume can be placed near the waist, high hip, bust, or a particular design line when the intended folds are concentrated in one part of the garment.
Diagonal ruching especially benefits from this approach. Simply adding length to one side seam tends to produce folds that run mostly across the body. By spreading the pattern through its interior, fullness can be directed toward an angled seam or anchor point, allowing the surface folds to follow the visual line of the design rather than behaving like ordinary side gathers.
Important landmarks should be protected during the manipulation. A previously approved neckline, armhole, waist seam, or hem should not move unless the design requires it. After spreading, the new pattern needs to be trued so curves are smooth, seams still match, grain or stretch direction remains workable, and the altered edge can be sewn without unwanted distortion.
Fullness Should Be Chosen in the Actual Fabric
There is no single percentage that produces attractive ruching on every dress. Lightweight fabrics generally tolerate more additional length because the folds stay thin, while heavier fabrics become bulky sooner. Surface finish also matters. Matte jersey can hide small inconsistencies that become immediately obvious on reflective stretch satin, where every ridge catches the light.
A useful development method is to make several fabric strips that all finish at the same distance but contain different starting lengths. If the target zone is 30 cm, the sample room might compare 42 cm, 48 cm, and 54 cm gathered back to that same 30 cm. Those simple tests correspond to ratios of 1.40, 1.60, and 1.80 and quickly show whether the planned fullness is too weak or too heavy.
The test should be performed with the production fabric or a genuinely comparable substitute. A lightweight sample jersey can give a completely misleading result if the approved order later switches to dense rib knit or ponte. Stretch direction, thickness, lining, and seam construction can all change how the same calculated ratio behaves.
Once a ratio has been approved, record the number instead of relying on visual memory. If another color, fabric lot, or repeat order is developed months later, the team can recreate the original density and then make deliberate adjustments if the material behaves differently.
Balance Notches Prevent Fullness From Drifting
A pattern can contain the correct total amount of fabric and still produce inconsistent dresses when the fullness is allowed to move freely along the seam. Internal balance notches divide a long ruched section into smaller controlled zones, making it much easier for the sewing operator to distribute the folds in approximately the same place on every garment.
Consider a finished ruched seam measuring 36 cm with a pre-gather edge of 54 cm. Instead of treating the entire section as one length, it can be divided into three control zones. Each 18 cm section of the pre-gather edge then matches a 12 cm section of the finished seam. The overall 1.50 ratio remains unchanged, but excess fabric cannot all accumulate near the waist or hem.
More complex designs can use four, five, or six matching sections when the ruching crosses different areas of the body. The pattern may also intentionally use different ratios within one seam, allowing strong folds at the waist to fade gradually toward the hip. In such cases, each section should have its own matching marks rather than leaving the distribution entirely to the operator.
Hem balance must be checked after the gathering is completed because shortening the side seam can raise the hem significantly. This is especially important on fitted mini dresses, where even a small increase in side lift can change coverage when the wearer walks or sits. A finished hem reference should therefore be evaluated on the sample rather than assumed from the ungathered paper pattern.
Which Ruching Method Should You Use?
Use fixed gathers when the dress needs a predetermined fold position, elastic when controlled contraction and stretch are important, and drawstrings when the wearer should adjust the fullness or garment length. The construction method should be chosen before the final pattern is approved because each option changes seam thickness, finished dimensions, tension, pattern allowances, production steps, and the behavior of the garment during wear.
Fixed, Elastic, and Drawstring Ruching Behave Differently
Fixed gathering gives the designer strong control over where the folds sit because the fabric is compressed to a predetermined measurement and then permanently attached to a seam, panel, or lining. This method works well when the appearance must remain largely the same from garment to garment and there is no need for the customer to change the length or density.
Elastic ruching adds controlled contraction while preserving some flexibility. A longer fabric section is attached to shorter elastic, which pulls the fabric into folds when released. The elastic then becomes an important engineering component rather than a minor trim. Its width, recovery, construction, and cut length can all change the finished garment, particularly on a short fitted side seam.
Drawstring ruching is more adjustable because the wearer can alter how much of the fabric is compressed. The pattern normally requires a channel, sufficient extra material to cover the intended adjustment range, secure exit points, and a drawstring long enough for the chosen styling. Changing a fixed-gather style to drawstring ruching after sampling can therefore affect fabric consumption, seam allowance, finished dress length, channel bulk, and labor.
Method | Main Benefit | Main Development Risk | Typical Application |
Fixed gathers | Consistent visual placement | Fullness may vary if poorly distributed | Front or waist ruching |
Elastic ruching | Controlled contraction with stretch | Elastic recovery changes fit | Fitted side ruching |
Drawstring ruching | Adjustable fullness and length | Channel adds bulk and complexity | Adjustable side or skirt ruching |
The construction choice should appear in the pattern and technical specifications rather than being left until the sewing stage. Two dresses can look almost identical in a photograph while requiring substantially different pattern pieces and production sequences.
Side Ruching Needs More Control Than It Appears
Side ruching is popular in fitted mini and midi dresses because it works naturally with the body and can visually soften the waist, abdomen, and hip area. The structure looks simple, but both sides of the garment need carefully matched start points, stop points, added fullness, finished lengths, and elastic or gathering specifications when the design is intended to be symmetrical.
Small differences become visible on a close-fitting dress. If one elastic section is even 1–2 cm shorter than the other, the hem may rise higher on one side and the waist folds may sit at different levels. When asymmetry is intentional, each side needs a separate specification rather than vague instructions such as “more ruching on the left.”
The interaction between side ruching and overall dress length is especially important. Contracting the side seam naturally lifts the side hem, and body tension can lift it further during movement. A mini that looks balanced on a mannequin may become noticeably shorter after the wearer walks, sits, or stretches over the hip.
Internal Jinfeng development records identify skirt-length riding, inconsistent placement, uneven fold quantity, stretch-recovery differences, left-right asymmetry, broken stitching, and lining mismatch as common ruched-dress risks that need to be checked in samples and bulk production. That practical list is a reminder that side ruching is part of the garment’s fit system, not merely surface decoration.
Front, Back, and Diagonal Ruching Need Different Treatment
Front ruching can create attractive softness around the waist and abdomen, but excessive fullness can make the same area appear heavier rather than more flattering. Instead of distributing the fabric uniformly over a large front panel, many successful patterns concentrate the strongest folds around a smaller zone and allow them to fade toward the upper or lower body.
Back ruching interacts strongly with the hip curve and often places more tension on the center-back construction when the wearer sits or walks. The pattern therefore needs enough body fit to create the intended shape without forcing the seam to carry excessive strain. Stitch elasticity, seam allowance, and reinforcement can become as important as the paper pattern itself.
Diagonal ruching is usually more demanding because the folds cross the torso or skirt at an angle. The slash lines, stretch direction, anchor point, and seam balance all influence the final appearance. Slight differences between left and right sides become noticeable because the eye follows the diagonal line across the body.
Samples should be reviewed while standing, walking, and sitting rather than only in a styled pose. A commercially usable dress still needs to behave like clothing. If movement causes the ruching to migrate dramatically, the pattern may need changes to negative ease, hip allowance, elastic tension, fold distribution, or the position of the anchor seam.

Which Fabrics Work Best for Ruched Dresses?
Stretch jersey, rib knit, mesh, power mesh, stretch satin, ponte, and other soft stretch fabrics are widely used for ruched dresses because they combine body fit with controlled folds. The best material depends on stretch percentage, recovery, weight, drape, transparency, surface finish, and lining needs. The intended fullness should always be tested in the real production fabric before the final pattern is approved.
Stretch and Recovery Must Be Evaluated Together
Stretch percentage tells the pattern maker how far a fabric can expand, while recovery shows how effectively it returns after that extension is released. Both properties matter in ruched dresses because the garment repeatedly expands over the bust, waist, and hip during dressing and movement. A material that stretches easily but recovers poorly can gradually lose its fitted shape.
Fabric should be tested in the directions that will actually run around and along the garment. Many jersey constructions have substantially more stretch across the width than along the length. Cutting the same pattern in the wrong orientation can therefore change both body fit and the way the ruching sits. A directional print, rib, mesh structure, or surface shine may further restrict the available cutting direction.
Weight and drape change the visual character of the folds even when stretch numbers are similar. Two textiles may both show 30% crosswise stretch, yet a 130 gsm jersey can produce soft, narrow folds while a much heavier knit creates large ridges at the same ratio. Thickness becomes especially important where multiple layers of fabric, lining, elastic, and seam allowances meet.
Jinfeng’s material-review process evaluates composition, weight, width, hand feel, drape, stretch, transparency, shrinkage, suitability for ruching, and bulk-production stability before confirming a material for a custom style. That wider review is more useful than choosing a fabric because its fiber content simply looks suitable on a specification sheet.
Jersey, Mesh, Satin, and Ponte Produce Different Folds
Jersey is one of the easiest fabrics to associate with ruched bodycon dresses because it is soft, flexible, and capable of forming natural folds. Its weakness is that some jersey constructions can twist along the side seam, grow during wear, or change after washing. Strong recovery and stable cutting direction are therefore important when the dress depends heavily on fitted proportions.
Stretch mesh produces finer folds with relatively little bulk and works particularly well in layered party and clubwear styles. Transparency, however, becomes greater when the mesh stretches over the body. A garment that looks sufficiently opaque while hanging can reveal much more around the bust or hip, making lining length and color part of the pattern-development decision.
Power mesh provides stronger recovery and body support than many soft meshes, but that support also increases tension. Stretch satin creates smoother, more reflective folds and can elevate the appearance of occasionwear, yet uneven gathering becomes easy to see under light. Ponte gives strong shape and stability but its thickness makes heavy ruching difficult to manage without bulk.
The Jinfeng ruched-dress material fact sheet lists jersey, rib knit, stretch satin, mesh, power mesh, spandex blends, ponte, and soft knit among the commonly suitable material directions. The important point is not that one fabric is universally best, but that the fullness, base block, lining, and construction method should be reconsidered whenever the fabric changes.
Lining Can Change the Entire Ruching System
A ruched dress may require lining for coverage, comfort, structure, opacity, or skin feel. Mesh and lace are obvious examples, but light satin, pale jersey, or close-fitting party dresses may also benefit from a lining. The pattern maker then has to decide whether the lining should share the visible ruching or remain relatively smooth beneath the shell.
A smooth lining usually keeps internal bulk lower and creates a cleaner surface against the body. The shell can carry the decorative folds while the lining provides coverage and stability. The finished dimensions of the two layers must still be compatible; otherwise, a short or tight lining can restrict the outer fabric and prevent the ruching from sitting naturally.
Ruching both layers can increase opacity and produce a richer effect, but it also doubles the amount of gathered material entering a seam. If both shell and lining use a 1.70 development ratio, the side seam contains two heavily compressed layers before elastic, seam allowance, or another component is added. This can create thickness that was not obvious when reviewing the pattern on paper.
During sampling, check shell stretch, lining stretch, total side-seam thickness, transparency under body tension, attachment points, hem relationship, and whether the lining migrates during movement. A recurring ruched-dress sample issue documented in Jinfeng’s internal product knowledge is mismatch between outer-fabric fullness and lining behavior. Treating the lining as its own engineered pattern piece prevents many of these problems.
How Do You Validate the Pattern for Production?
Validate a ruched dress through fit sampling, measurement, movement testing, material review, pattern revision, size grading, and an approved pre-production reference. The folds may look attractive in one prototype, but production readiness requires measurable control of finished length, ruching amount, placement, symmetry, stretch recovery, side seams, lining, stitching, and grading so the appearance can be repeated across multiple garments and sizes.
The First Sample Should Test More Than Appearance
The first sample is an opportunity to challenge the assumptions made during pattern development rather than simply confirm that the garment resembles the sketch. Start by checking the underlying fit around the bust, waist, hip, neckline, armhole, and total length. If these measurements are unstable, judging the ruching alone can lead the team in the wrong direction.
After the base fit is confirmed, evaluate the folds from the front, side, and back. Compare the actual start and stop positions with the pattern, observe whether the folds are concentrated in the intended area, and determine whether the amount feels too light or too bulky. The same dress should also be reviewed after several minutes of walking and sitting because fitted stretch garments can change significantly under movement.
Useful sample checks include left-right balance, side-seam stability, final dress length, lining exposure, elastic recovery, stitch integrity, and whether the folds return reasonably close to their intended position after the fabric has been stretched. Photos taken before and after the movement test can make subtle changes much easier to see.
Subjective feedback should then be converted into measurable corrections. “Move the ruching higher” becomes “raise the start notch 4 cm.” “Reduce the bulk” becomes a defined reduction in pre-gather length or development ratio. This makes the next sample a controlled revision rather than another visual experiment.
Jinfeng’s documented development process follows a comparable sequence of first sample, measurement, mannequin or fit review, modification, revised sample, PP sample, and, where required, a Golden Sample that becomes the reference for bulk production and quality control.
Ruching Must Be Graded as a Relationship
Grading a ruched pattern is more complicated than simply enlarging the base garment because the finished ruched zone and the amount of added material may both change through the size range. A useful starting point is to think in ratios while still reviewing the visual result on representative sizes.
If a medium size has a 30 cm finished ruched section at a 1.60 development ratio, the pattern edge measures 48 cm before gathering. If the large size increases the finished section to 32 cm and the same ratio remains visually appropriate, the pre-gather length becomes 51.2 cm. The additional fullness has therefore increased from 18 cm to 19.2 cm rather than remaining fixed.
Real commercial grading is more nuanced because the bust, waist, hip, length, and body proportions do not grow at identical rates. A larger garment may also stretch the fabric differently, changing how strongly the folds open when worn. The design team must decide whether maintaining the mathematical ratio also maintains the desired visual density.
Extended sizes deserve particular attention. They should not simply be generated by scaling every measurement proportionally. Bust support, armhole coverage, waist-to-hip balance, dress length, lining comfort, fabric recovery, and fold placement may all need separate adjustments based on the target size chart and fit feedback. Jinfeng’s documented extended-size approach similarly notes that grading requires more than proportional enlargement and should consider these structural relationships.
Whenever the size range is commercially important, fitting more than one representative size before bulk production is a much safer strategy than assuming the base-size ruching will automatically scale well.

Bulk Production Requires Measurable Instructions
A successful development sample can hide a dangerous weakness: an experienced sample maker may have arranged every fold manually until the dress looked right. That level of individual adjustment cannot be the only production method when hundreds or thousands of garments need to share the same appearance. The approved sample therefore needs to be converted into measurable instructions before the style reaches bulk sewing.
Useful records include the final pattern version, approved fabric code, stretch direction, pre-gather length, finished ruched length, elastic width and cut length where applicable, gathering start and stop notches, intermediate balance marks, shell-to-lining relationship, stitch construction, finished measurements, grading rules, and clear photographs of the approved appearance.
Ruching should also be inspected during sewing instead of waiting for final inspection. Once the side seam, lining, zipper, hem, and other construction have been closed, correcting uneven fullness becomes slower and more expensive. Early checks can identify a short elastic, incorrectly positioned notch, uneven gathering, or fabric-recovery difference before dozens of garments move through the same process.
Jinfeng Apparel’s internal ruched-dress QC points include placement, fold amount, left-right symmetry, stretch, recovery, waist and abdomen appearance, garment length, stitching, lining match, and side-seam stability. The company’s supporting development structure includes 7+ senior pattern makers, two sample rooms, and 20+ sample machinists working across pattern development, fit correction, sampling, and pre-production preparation.
Those controls become particularly valuable when a brand develops the same ruched silhouette in several colors or fabrications, or when a successful style returns for replenishment months later. Retaining approved pattern files, measurement records, material references, and construction details prevents the team from having to recreate a bestseller from photographs and memory.
A strong ruched dress pattern is ultimately a balance between creative intention and measurable garment engineering. The folds have to look natural, but the process that creates them should not depend on luck. A reliable base block, carefully positioned fullness, an appropriate fabric, a construction method suited to the design, and structured sampling all work together to turn a visually appealing idea into a wearable product.
When development reaches production, repeatability becomes just as important as the first sample. The pattern should maintain its silhouette when it moves between sizes, fabric lots, sewing operators, production lines, and repeat orders. When the extra fabric, finished length, stretch behavior, lining, and gathering positions are all documented clearly, ruching stops being an unpredictable styling effect and becomes a design feature that can support a consistent commercial dress collection.
Share This Article :

Jerry Lee
Categories

Latest blogs
Table of Contents
Here, developing your OEM/ODM private label clothing collection is no longer a challenge—it’s an excellent opportunity to bring your creative vision to life.