
What Are the Common Seam Types Used in Dresses?

Your trusted Women’s Apparel Manufacturer from China
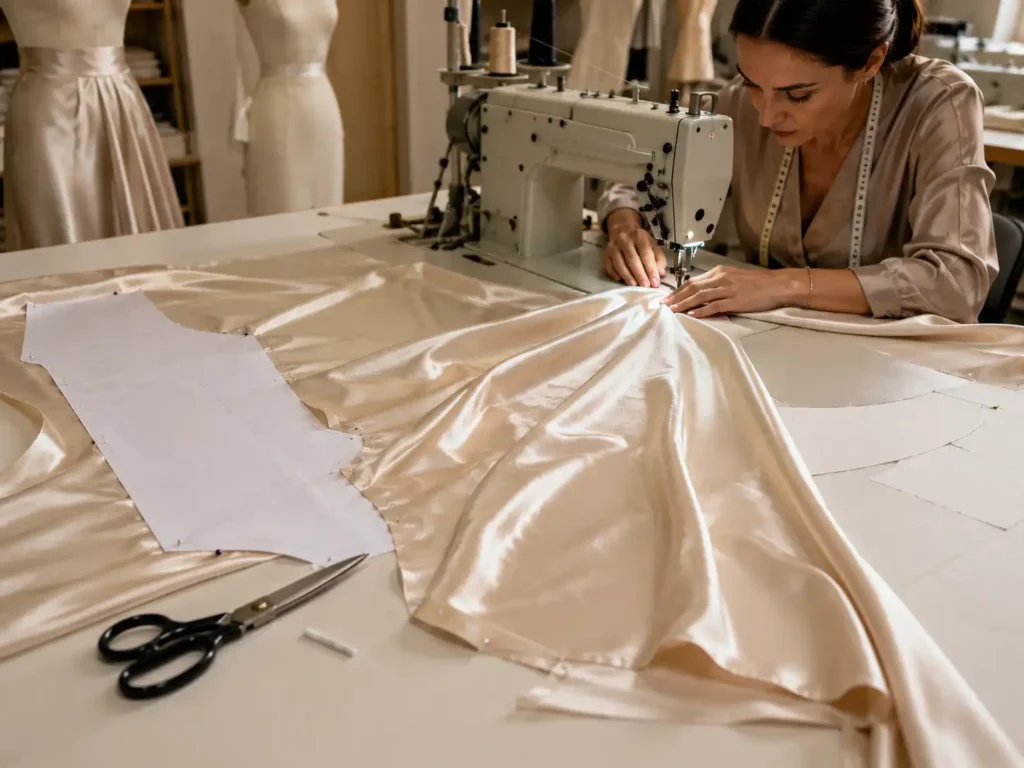
A dress can look effortless from the outside while depending on dozens of hidden construction decisions inside. The side seam influences how the skirt hangs, the shoulder seam carries the garment’s weight, and the waist seam may hold lining, gathers, boning, or several fabric layers at once. A seam that works beautifully in chiffon can become stiff in velvet, while a secure woven seam may break the first time a stretch dress is pulled over the hips.
The most common seams used in dresses are plain seams, overlocked seams, French seams, bound seams, lapped seams, and stretch-compatible constructions such as flatlock. The correct choice depends on fabric weight, elasticity, transparency, garment position, expected stress, comfort, appearance, lining, and the production method required to repeat the result in bulk.
Experienced dress developers therefore do not ask only whether a seam is strong. They ask whether it stays smooth after pressing, remains comfortable against the skin, survives dressing and movement, and looks consistent from the first approved sample to the final shipment. Many costly production problems begin with a seam that seemed harmless on a flat sketch. The following guide explains how to recognize those risks before they become visible in finished garments.
What Is a Seam in Dressmaking?
A seam is the constructed line that joins two or more fabric sections to create a garment. In a dress, seams also shape the bust, waist, hips, sleeves, and skirt while influencing strength, stretch, comfort, drape, and internal appearance. The most suitable seam must match the material, garment location, and movement expected during wear.
Seam, Stitch, and Finish
A seam, a stitch, and a seam finish are closely connected, but they describe different decisions. The seam explains how fabric sections are positioned and joined. The stitch explains how the sewing thread is formed by the machine. The finish explains how the cut fabric edges are controlled. A woven dress side seam, for example, may use a plain seam construction, a lockstitch joining line, and an overlocked finish on the raw allowances.
The distinction matters because an instruction such as “overlock the side seam” can be interpreted several ways. It might mean joining the panels directly with a four-thread overlock, sewing a lockstitch first and then overlocking both allowances together, or using a five-thread safety stitch that combines joining and edge finishing. Each method produces a different level of stretch, thickness, strength, visibility, and production time, so the construction sheet should state the actual requirement rather than relying on shorthand.
Seam Allowance and Fit
Seam allowance is the fabric between the sewing line and the cut edge. It provides working space for stitching, edge finishing, pressing, fitting changes, and accurate assembly. Many woven dress seams begin with allowances around 10-15 mm, while narrower values may be used for chiffon, mesh, enclosed seams, or tightly curved areas. Zipper seams and structured bodices often keep more allowance because fitting and construction adjustments may be needed during development.
These figures are useful starting ranges rather than universal standards. A fabric that frays heavily may need additional width, while a transparent material may show a wide allowance through the face of the dress. Sewing accuracy also affects finished measurements. On a fitted four-panel dress, a small deviation repeated at several seams can change the waist or hip enough to alter the intended fit, which is why allowance control belongs in both pattern development and production inspection.
Dress Area | Common Starting Allowance | Practical Reason |
Woven side seam | 10-15 mm | Provides stable sewing room and space for edge finishing. |
Center-back zipper seam | 15-20 mm | Allows zipper installation, stabilization, and fitting adjustment. |
French seam | 12-18 mm total | Provides enough width for the first seam, trimming, turning, and enclosure. |
Knit overlock seam | 6-10 mm | Keeps the join compact while maintaining adequate edge control. |
Neckline or armhole facing | 6-10 mm | Supports clipping, grading, turning, and reduced edge bulk. |
Structured bodice panel | 12-20 mm | Allows fitting control and internal support construction. |
Narrow lace or mesh join | 5-10 mm | Reduces visible shadow and thickness in transparent fabrics. |
Strength, Drape, and Comfort
Seam choice changes the behavior of a dress even when the pattern remains the same. A rigid seam can interrupt the flow of a soft fabric, a narrow join can weaken beside a heavily fraying edge, and a non-stretch stitch can snap when a fitted garment is pulled over the body. The required strength also varies by location. Shoulder seams carry suspended weight, waist seams support skirts and lining, and slit openings concentrate force at a single point.
Appearance and comfort are just as important as mechanical security. A dark allowance may show through pale chiffon, while several layers of binding can create a ridge under satin. Rough overlock thread, trimmed sequins, dense reinforcement, or hard internal edges may irritate the skin around the underarm, neckline, waist, or thigh. The best seam is therefore not the strongest or most expensive option in isolation; it is the construction that meets the required strength without damaging the intended drape, fit, appearance, or wearing comfort.
Planning Before Sampling
Seam planning should begin when the pattern, fabric, lining, closure, and silhouette are reviewed, rather than after the first sample is already complete. A fitted satin corset dress may need plain body seams, reinforced waist joins, enclosed boning channels, narrow lining seams, and wider center-back allowances. A loose chiffon maxi dress may rely more on French seams, narrow overlocking, fine hems, and carefully controlled gathering. Treating both dresses with one standard sewing method would ignore their very different risks.
The first sample is the point where the proposed construction meets real fabric. Bias-cut panels may grow after hanging, lightweight seams may pucker after pressing, and stretch joins may become wavy after wear. The garment should be checked on a body or fitting form, under normal light, and from the inside. Once the seam method works, the approved sample and technical file should record seam type, allowance, stitch formation, edge finish, thread, pressing direction, reinforcement, and any tolerances needed for bulk production.
Which Seam Types Are Common in Dresses?
Plain, overlocked, French, bound, lapped, and stretch-compatible seams are among the constructions most often used in dresses. Most garments combine several seam types because shoulders, side panels, waist joins, linings, zippers, and decorative sections have different needs for strength, flexibility, appearance, edge control, and bulk.
Plain and Overlocked Seams
The plain seam is the basic construction used in a large share of dress manufacturing. Two panels are placed with their face sides together and sewn along the specified line, after which the allowances are pressed open or to one side. This method works well at side seams, shoulders, sleeves, skirt panels, waist joins, and lining sections because it is adaptable, easy to inspect, and compatible with many woven fabrics.
The raw edges are often controlled with overlocking. On a woven dress, a lockstitch may provide the main join while a three-thread overlock finishes the allowance. A four-thread overlock can join and finish many knit seams, while a five-thread safety stitch adds a separate joining chain for more security. Overlocking supports efficient production, but the machine must be adjusted to prevent loose loops, excessive trimming, stretched edges, or visible ridges through lightweight fabric.
French and Bound Seams
A French seam encloses the raw edges inside a narrow folded construction. The first line is sewn with the wrong sides together, the allowance is trimmed, the panels are turned, and a second line encloses the cut edges. This method is especially useful in unlined chiffon, organza, voile, fine cotton, and selected lightweight rayon dresses because the interior remains clean without a visible overlock chain.
French seams are not suitable for every location. Thick fabrics, sharp curves, heavy gathers, and multi-layer intersections can become stiff or difficult to control. A bound seam offers another clean interior by wrapping the raw edge with tape or a fabric strip. Binding works well in premium unlined pieces, structured bodices, and visible internal areas, although it adds material, labor, and thickness. It should be used where the durability or interior presentation provides a real benefit rather than simply making the construction more complicated.

Lapped and Flatlock Seams
A lapped seam is made by overlapping one panel over another and securing the overlap with visible stitching. It appears in denim dresses, faux-leather styles, patchwork garments, structured panels, and decorative constructions where the seam becomes part of the design. Because the stitching remains visible, the overlap width, edge shape, stitch spacing, and panel alignment need tight visual control. Small deviations that would remain hidden inside a plain seam can become obvious along a lapped vertical panel.
Flatlock is more closely associated with knitwear, activewear, lingerie-inspired fashion, and low-bulk stretch garments. It can lie flatter against the body and provide comfortable extension in jersey, rib, or power-mesh dresses. It is not automatically the best choice for every knit style, however, because the appearance may feel too technical for a polished fashion garment. Many commercial knit dresses still use overlock, safety stitch, or coverstitch combinations because they provide familiar appearance, dependable stretch, and efficient production.
Choosing by Garment Area
A single dress may use several seam types because each area performs a different job. A lightweight unlined skirt panel may use a French seam, while its zipper opening uses a stabilized plain seam. A knit body may be joined with four-thread overlock, but the shoulder is reinforced with clear elastic. A structured bodice may have plain panel seams, bound internal edges, and lapped decorative sections. The correct question is not which seam is universally best, but which construction is most appropriate for the exact location and material.
Product level also affects the decision. A basic fully lined dress may not benefit from expensive binding that the wearer never sees, while a pale unlined chiffon dress can look unfinished if wide overlocked allowances remain visible through the body. Efficient manufacturing is not about removing every additional operation, and premium manufacturing is not about adding every possible operation. The goal is to place labor and construction value where they influence durability, appearance, comfort, and repeatability.
Seam Type | Common Dress Use | Typical Working Width | Main Benefit | Main Limitation |
Plain seam | Side, shoulder, waist, sleeve, and panel joins | 6-15 mm allowance | Versatile, inspectable, and easy to alter | Needs a suitable raw-edge finish |
Overlocked join | Knit side, sleeve, and lining seams | 4-7 mm finished | Stretch and efficient edge control | May look bulky in sheer materials |
French seam | Unlined lightweight woven dresses | 4-7 mm finished | Fully encloses the raw edges | Less suitable for thick or tight curves |
Bound seam | Premium unlined interiors and structured areas | 8-15 mm finished area | Clean, durable interior presentation | Adds labor, material, and thickness |
Lapped seam | Decorative and structured panels | 10-25 mm overlap | Creates a flat visible design feature | Alignment errors remain visible |
Flatlock seam | Close-fitting stretch and mesh panels | 4-8 mm finished | Low bulk and useful extension | Technical appearance may not suit every style |
Which Seams Suit Different Dress Fabrics?
Seams should follow the fabric’s weight, stretch, transparency, surface sensitivity, fraying tendency, and drape. Chiffon needs narrow controlled construction, satin needs smooth feeding, lace and mesh require visually discreet joins, jersey needs stretch-compatible stitching, and sequin or velvet fabrics need special preparation to prevent bulk, damage, and discomfort.
Chiffon and Satin
Chiffon is lightweight, mobile, transparent, and often prone to fraying. It can shift during cutting, stretch along curved edges, and be pulled into the needle plate if the machine setup is unsuitable. Narrow French seams often work well for straight or gently curved joins in unlined chiffon dresses. Narrow plain seams with fine overlocking may be more practical around gathered waists, armholes, zipper openings, and complicated curves where an enclosed construction would become difficult or bulky.
Satin presents another set of risks because the smooth surface can show needle holes, puckering, seam impressions, and changes in light reflection. Plain seams are common, but they depend on a fine suitable needle, balanced tension, controlled feeding, and careful pressing. Lightweight satin may accept a narrow enclosed seam in selected areas, while heavier or closely fitted satin usually performs better with low-bulk plain construction. Both fabrics should be reviewed under directional light because minor seam ridges can become far more visible when the garment moves.
Lace and Mesh
Lace should be assessed by structure rather than by name alone. Stable corded lace, stretch lace, embroidered tulle, eyelash lace, and open geometric lace behave differently during sewing. A fully lined lace dress may use narrow plain seams because the lining supports and hides the allowances. An unlined or partly transparent style may require motif-managed joins, appliqué work, or carefully positioned lapped sections so the seam does not interrupt the visual pattern more than necessary.
Mesh also varies widely. Stable tulle may tolerate narrow conventional seams, while power mesh and stretch mesh require stitches that extend with the material. Incorrect differential feed can create rippling, and an overly tight seam can restrict movement across the bust, waist, or hips. Because the construction remains visible through transparent fabric, thread color, allowance width, bra-cup attachment, lining placement, elastic insertion, and internal reinforcement must be judged from the outside of the dress as well as from the inside.
Jersey and Ponte
Jersey dresses need seams that stretch with the fabric and recover after the garment is worn. A join that looks secure on a hanger may break when the dress is pulled over the shoulders or hips. Four-thread overlock is common for bodycon dresses, rib styles, and casual jersey garments because it combines joining strength with flexibility. Safety stitching can add security, while flatlock may be used when low bulk or a deliberately visible stretch seam is part of the design.
Ponte and Roma fabrics are generally more stable than lightweight jersey, but their thickness can create bulk at waist joins, zipper ends, and intersecting panels. Stabilizing tape may be useful at shoulders and neckline sections that must resist growth, while zipper areas may need localized support so they stay flat. Fit testing should include dressing, sitting, walking, and reaching. Static measurements alone cannot show whether the seam extends comfortably or whether the fabric and stitch recover after movement.
Sequins, Velvet, and Textured Fabrics
Sequin fabric normally needs preparation before joining. Sequins inside the seam allowance can cause broken needles, skipped stitches, excessive thickness, and sharp edges that scratch the wearer. Removing decorations from the sewing path allows the machine to stitch through the base cloth, after which loose sequins can be restored near the seam when visual coverage is required. The inside should be checked by hand and during a fitting because a seam can appear attractive from the outside while remaining uncomfortable against the skin.
Velvet creates problems related to pile direction, layer creep, pressure, and permanent impressions. Two panels may shift against one another during sewing, leaving one side longer even when the cut pieces began at the same length. Reduced foot pressure, careful basting, appropriate feeding, and restrained pressing may be necessary. Coated, embossed, metallic, pleated, and bonded fabrics also need testing because needle holes or heat damage may be permanent, making repeated unpicking or aggressive pressing unsuitable.
Fabric | Practical Seam Option | Common Needle Starting Point | Typical Stitch Length | Main Risk |
Chiffon | French seam or narrow finished plain seam | 60/8-70/10 sharp or microtex | 1.8-2.2 mm | Puckering, fraying, shifting, and seam shadow |
Lightweight satin | Controlled plain seam; enclosed seam in selected areas | 60/8-75/11 sharp | 2.0-2.5 mm | Needle marks, shine change, and surface puckering |
Lace | Narrow plain, lapped, or motif-managed join | 70/10-80/12 | 2.0-2.5 mm | Broken motifs and visible interruption |
Stretch mesh | Four-thread overlock or tested flatlock | 70/10-80/12 stretch | Machine-dependent | Waving, transparency, and limited extension |
Jersey | Overlock or safety seam | 70/10-80/12 ballpoint | Machine-dependent | Broken stitches and stretched edges |
Ponte | Overlock or stabilized plain seam | 75/11-90/14 stretch | 2.5-3.0 mm | Bulk at intersections and reduced recovery |
Sequin fabric | Prepared plain seam after clearing the allowance | 80/12-90/14 | 2.5-3.0 mm | Needle breakage, roughness, and thick allowances |
Velvet | Carefully controlled plain seam | 70/10-80/12 | 2.5-3.0 mm | Layer creep, pile marks, and pressure damage |
Needle and stitch values in the table are initial testing ranges, not fixed production rules. Fiber content, fabric density, coating, stretch, thread size, machine system, and seam construction can all change the correct setup. A small seam test made from the actual production fabric is usually more reliable than choosing settings from the fabric name alone, especially when the material is pale, delicate, heavily decorated, or expected to stretch during dressing.

How Are Seams Used in Dress Construction?
Dress seams assemble panels, create body shaping, connect skirts and linings, support closures, and control concentrated stress. Side and shoulder seams form the main structure, princess seams develop three-dimensional fit, waist seams connect major garment sections, and specialized construction is required around zippers, slits, armholes, straps, and layered intersections.
Side, Shoulder, and Waist Seams
Side seams join the front and back of a dress and often carry considerable tension around the bust, waist, and hips. A loose woven style may use a conventional plain seam, while a close-fitting stretch dress needs a join that extends and recovers. Side seams also affect balance. If the front and back panels are fed differently, the seam can rotate toward the front or back, a problem that becomes especially visible in jersey, bias-cut satin, and asymmetrical silhouettes.
Shoulder seams carry the hanging weight of the garment and may need stabilization in knits, embellished dresses, or styles with heavy skirts. Waist seams can be even more complex because they may connect outer fabric, lining, gathers, boning, zipper tape, and several internal layers at the same level. Bulk should be graded, trimmed, or pressed in controlled directions so the waist remains comfortable and visually level. A correctly sewn seam can still tilt if the bodice length, skirt weight, or side balance is wrong.
Princess Seams and Shaping
Princess seams run vertically through the bodice and sometimes continue into the skirt. They create shape through curved panels rather than relying entirely on separate bust and waist darts. The operator must join curves of different shapes without creating points, hollows, or unwanted gathers around the bust. Accurate notches help align the bust point, waist, hip, and other reference positions, while clipping or grading allows the curved allowance to open or fold smoothly after pressing.
These seams also provide useful fitting control during development because volume can be added or removed along the panel line to refine the bust, waist, or torso. Once the fit is approved, the corrected line must be transferred accurately to every size. Princess seams are visually prominent, particularly in satin, mesh, or bodycon fabrics, so small puckers can distort the entire front view. On transparent material, even the shape of the allowance and clipping marks may need adjustment to prevent an untidy shadow through the dress.
Zippers, Linings, and Intersections
Zipper seams need enough allowance for accurate positioning and may require stabilization to remain flat. Invisible zippers are often installed in center-back or side seams with working allowances around 15-20 mm, depending on the style and fabric. Lightweight materials may need narrow support strips, while stretch fabrics require stabilization that controls the zipper area without making the back of the garment noticeably stiff. Waist seams and decorative panels should align closely on both sides of the closure because even a small mismatch can be obvious.
Lining must cover internal construction without pulling the outer dress, twisting, or dropping below the hem. It may be attached at the neckline, armholes, waist, zipper tape, or hem according to the garment structure. Intersections deserve special review because several layers can become too thick for stable sewing. A side seam containing outer fabric, lining, pocket bags, elastic, and a waist join may create skipped stitches or a visible lump. Reducing bulk in the pattern and operation plan is more dependable than expecting operators to correct it during final assembly.
Slits and Stress Points
Slit openings, pocket corners, narrow straps, waist cutouts, zipper ends, and the base of deep necklines experience concentrated force. A slit that looks perfect on a standing sample may pull sharply when the wearer walks or sits. Reinforcement can include controlled backstitching, bar tacks, internal patches, stay tape, or a change in facing construction. The reinforcement should spread the load without producing a stiff lump or a visible mark on the outside of the garment.
Shoulder straps should be tested under realistic tension, particularly when they support a fitted or embellished dress. Cutout areas need similar attention because corners and curves can stretch out of shape even when the surrounding fabric appears stable. Development testing can begin with a careful wear test that includes sitting, reaching, walking, and pulling in the expected direction. Higher-risk fabrics or fitted styles may also require laboratory seam-strength or slippage testing when the potential cost of failure is significant.
How Do Manufacturers Check Seam Quality?
Manufacturers check seam quality by reviewing strength, stitch security, puckering, slippage, stretch, recovery, comfort, appearance, and consistency. Inspection should start with fabric and sample testing, continue during sewing, and finish with measurement and visual review. A seam can look acceptable while failing during wear, so both appearance and performance must be assessed.
Strength and Seam Slippage
Seam strength describes how much force a joined area can withstand before the thread breaks, the fabric tears, or the seam opens. The required level depends on fabric, fit, and garment location. A loose chiffon sleeve carries less stress than a fitted waist, narrow strap, bodycon hip seam, or slit opening. Development teams should therefore test the areas that experience the greatest movement rather than assuming one general seam specification will suit the entire dress.
Seam slippage occurs when woven yarns move away from the stitch line, creating an opening even though the sewing thread remains intact. Smooth, loosely woven, or low-density materials can be vulnerable. Increasing stitch density is not always the solution because too many needle penetrations may damage delicate cloth. A wider allowance, different stitch formation, finer needle, suitable thread, reinforcement, or a better fabric choice can provide a more dependable result. Small test seams made with production materials often reveal the risk before complete samples are sewn.
Puckering and Appearance
Seam puckering creates unwanted ripples beside the stitching line and is especially visible on satin, smooth polyester, lightweight woven fabric, and fitted panels. Common causes include excessive thread tension, unsuitable thread size, dense stitching, feeding imbalance, fabric shrinkage, and poor pressing. The first task is to identify whether the defect comes from the machine setup, the pattern relationship, or the material itself. Pressing can temporarily hide a ripple without correcting the reason it formed.
Appearance should be checked before and after pressing, on the table and on the body. Side lighting reveals ridges that disappear under flat overhead light, while satin should be viewed from several angles because changes in gloss can exaggerate small defects. Symmetry is also important. Princess seams, neckline joins, waist seams, and topstitching should follow the approved shape on both sides. A seam can be technically secure yet still fail the quality review if it pulls the dress off balance or looks visibly inconsistent.

Stretch, Recovery, and Comfort
Stretch seams need both extension and recovery. Extension allows the seam to expand without breaking, while recovery allows it to return close to its original length instead of remaining loose or wavy. A bodycon dress may need to pass over the shoulders or hips even if the final wearing fit is close. If the stitch cannot extend as far as the fabric, the seam becomes the weakest point despite looking secure while the dress hangs on a rail.
A practical development check is to mark a measured section, stretch it in the expected wear direction, release it, and compare the final length with the starting mark. Broken stitches, cracking sounds, thread strain, or permanent waviness indicate that the construction needs adjustment. Comfort should be reviewed at the same time because thick overlock chains, exposed binding, hard thread ends, and trimmed sequins can irritate the skin. Testing after pressing, hanging, and washing may be necessary when heat or relaxation can change recovery.
Sample-to-Bulk Consistency
A well-made sample does not guarantee consistent bulk production unless the approved construction is translated into clear instructions. The sealed sample should show the seam allowance, stitch type, edge finish, thread, topstitching distance, reinforcement, and pressing direction. Written specifications are especially valuable for details hidden inside the garment. Operators and inspectors need the same reference so quality does not depend on personal interpretation from one line or production batch to another.
Inline inspection is more effective than waiting for final inspection because many seam defects are difficult or expensive to repair after the garment is complete. Uneven allowances, stretched panels, missed overlocking, mismatched waist joins, and poorly secured stitch ends should be identified while the relevant operation is still active. Measurement trends can also separate pattern problems from sewing variation. When every garment is consistently small, the pattern or specification may be wrong; when results vary widely, seam allowance control and handling are more likely causes.
Quality Check | Practical Method | What to Review | Typical Working Guidance |
Seam allowance | Measure inside selected garments | Width and consistency | Critical joins are often controlled within about +/-2 mm, subject to the approved standard. |
Cross-seam alignment | Compare both sides at a zipper or waist | Visual matching and balance | A 3-5 mm mismatch can already be visible on fitted or contrast styles. |
Stitch security | Inspect starts, ends, and stress points | Loose thread, skipped stitches, and unravelling | Backtack or approved reinforcement must hold without creating bulk. |
Seam puckering | View flat, on-body, and under side light | Ripples, ridges, and surface distortion | Compare with the approved sample before and after pressing. |
Seam extension | Stretch in the expected wear direction | Broken stitches and movement restriction | The join must support dressing and normal body movement. |
Recovery | Measure before and after stretching | Permanent growth or waviness | The seam should return close to its starting form for the intended product. |
Raw-edge coverage | Inspect the full seam length | Fraying and missed overlocking | The cut edge should remain controlled without excessive trimming. |
Interior comfort | Wear-test and hand-check the seam | Roughness, sharp edges, and concentrated bulk | The seam should not scratch or create a hard pressure point. |
Zipper seam | Open and close repeatedly | Rippling, trapping, and alignment | The zipper should move smoothly without pulling the dress out of shape. |
Final symmetry | Compare left and right garment sections | Position, curve, and visual balance | The construction should follow the approved pattern and sealed sample. |
The figures in this table are practical development references rather than universal acceptance standards. Final tolerances must reflect the fabric, garment structure, measurement specification, brand quality level, and sealed sample. Reliable quality comes from repeating small controls: suitable machine settings, trained handling, clear construction documents, inline inspection, and realistic wear testing. Final inspection remains important, but it should confirm a controlled process rather than discover problems that have already been sewn into an entire production run.
For custom dress development, seam decisions should be confirmed together with the fabric, pattern, lining, closure, fit, and target quality level. Jinfeng Apparel has focused on custom women’s fashion manufacturing since 2008 and supports dress projects through pattern development, material sourcing, sample making, bulk production, inline control, final inspection, private-label packaging, and export coordination. Its production network includes six owned women’s fashion factories, more than ten long-term satellite production partners, and dedicated resources for woven, knit, satin, lace, mesh, sequin, and occasionwear styles.
Brands preparing a new dress collection can send a tech pack, reference sample, sketch, size chart, fabric direction, quantity plan, and target market for an initial manufacturing review. The team can assess seam construction, fit risks, material compatibility, sampling requirements, and production feasibility before quotation. Contact Kelly at info@jinfengapparel.com or WhatsApp +86 18929465598 to discuss custom dresses, skirts, jumpsuits, matching sets, and private-label womenswear for bulk production.
Share This Article :

Jerry Lee
Categories

Latest blogs


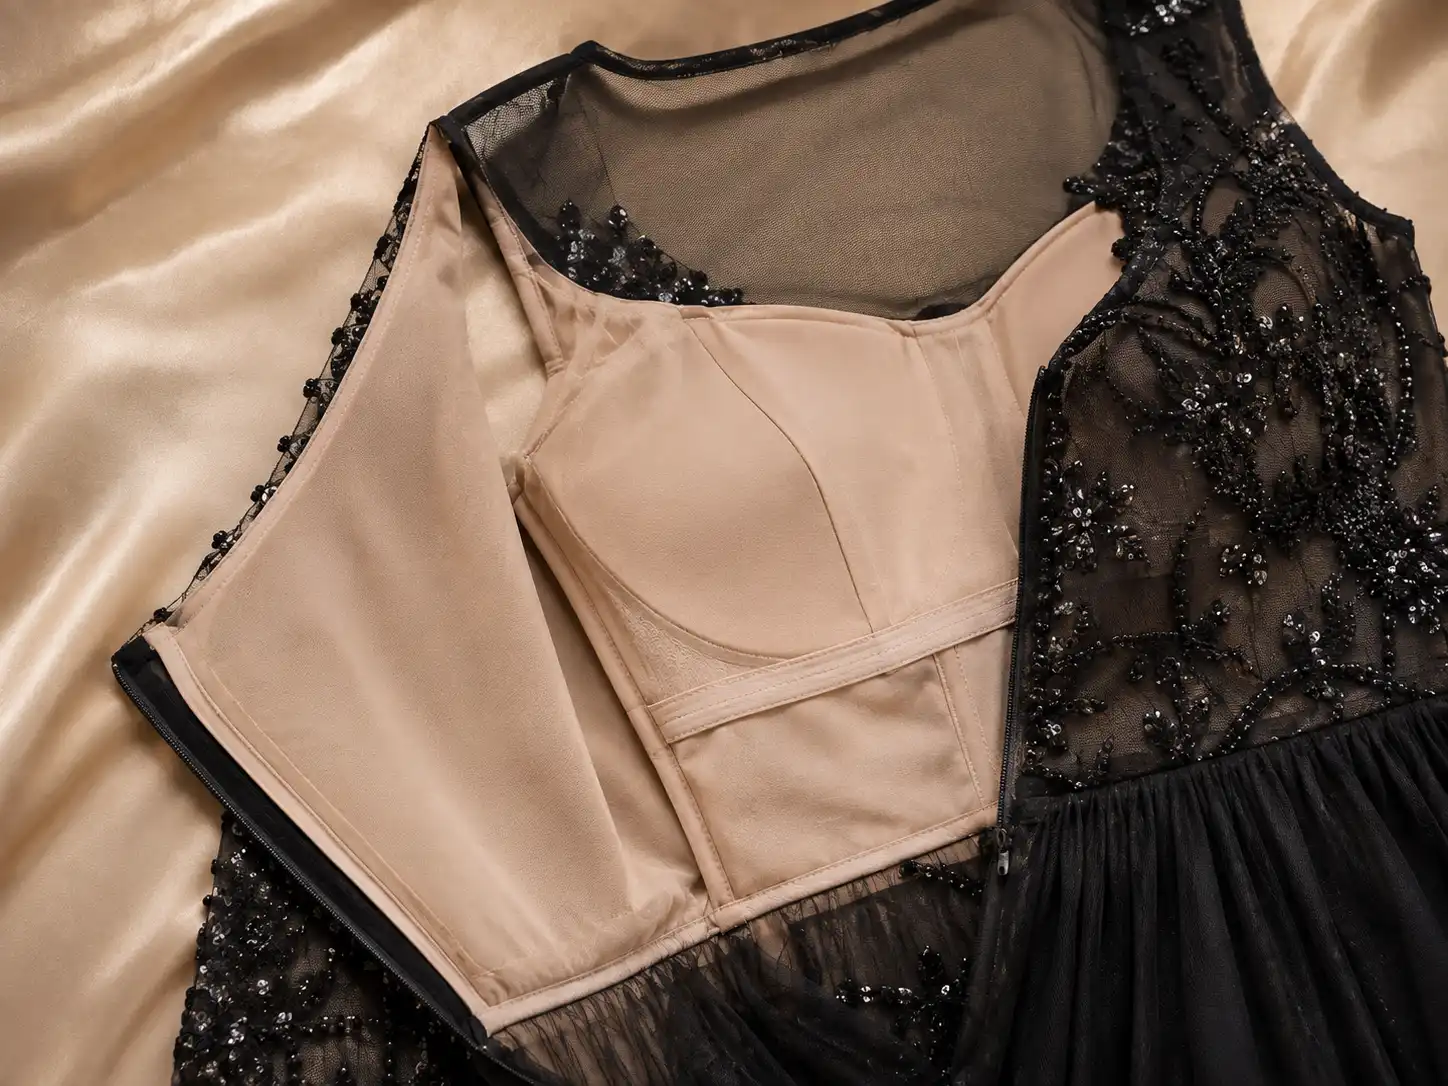
Table of Contents
Here, developing your OEM/ODM private label clothing collection is no longer a challenge—it’s an excellent opportunity to bring your creative vision to life.

