 Skip to content
Velvet Dress Quality Control Checklist: What Should You Inspect Before Shipment?

Your trusted Women’s Apparel Manufacturer from China
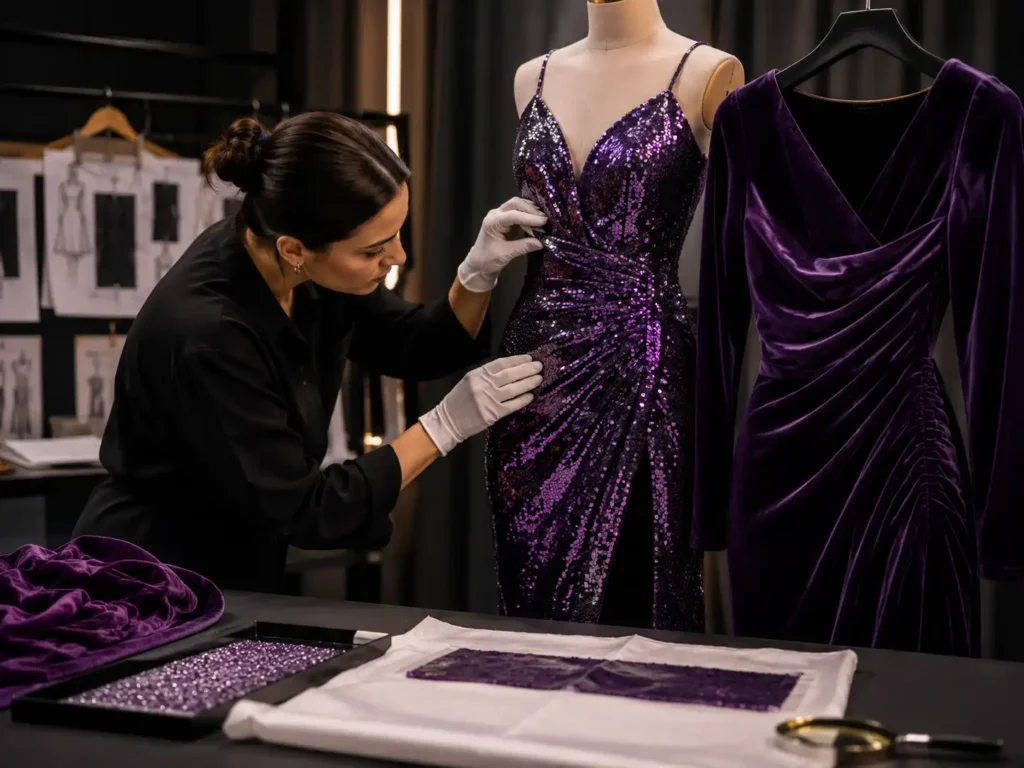
Velvet has a way of making a dress look expensive before anyone checks the label, but that visual richness comes from a surface that is unusually sensitive to direction, pressure, handling, and light. A velvet panel can be cut from the correct roll and still appear to be another shade when its nap runs the opposite way. A seam can be perfectly secure yet look poor because the pile beside it has been flattened. A garment can pass the sewing line and still develop visible pressure marks during pressing or carton packing. For brands producing eveningwear, holiday dresses, party styles, fitted minis, or winter occasion collections, quality control therefore has to start long before the final inspection table. The useful question is not simply whether the finished dress has loose threads or correct measurements; it is whether every stage has preserved the approved velvet appearance and garment shape.
A velvet dress quality control checklist should cover fabric shade and pile, nap direction, cut-panel orientation, stitching, seam appearance, measurements, lining and zipper construction, pressing damage, surface cleanliness, packing pressure, labels, cartons, and final shipment quality. The safest approach is stage-based: inspect incoming velvet, control directional cutting, monitor sewing, review finishing, verify the finished garment, and protect the pile during packing.
The costly mistakes are often the quiet ones. Imagine a run of black velvet evening dresses in which several skirt panels were rotated in the cutting marker to improve fabric utilization. On the table, those panels still look black. Under boutique lighting, they reflect light differently enough to read as a visible shade mismatch. By the time the problem is obvious, the panels may already be sewn, lined, pressed, labeled, and packed. That is why experienced production teams treat velvet QC as a chain of connected decisions rather than a last-minute defect hunt. The following checklist focuses on where defects actually begin, how they show up in bulk production, and what should be verified before the garments are released for shipment.
What Are the Most Common Velvet Dress Defects?
The most common velvet dress defects are inconsistent nap direction, visual shade variation, crushed or flattened pile, pressure marks, sewing impressions, seam puckering, zipper distortion, inaccurate measurements, lining problems, stains, lint, poor pressing, and packing damage. The practical challenge is identifying where each defect begins, because fabric, cutting, sewing, finishing, and packing problems require different corrective actions.
Fabric Surface Defects
Velvet is not inspected like a flat woven fabric because the face of the material is created by a raised pile. That pile changes the way light is reflected, which means two pieces from the same roll can look lighter or darker when their directions are different. Incoming inspection should therefore check pile consistency, approved nap direction, true shade, pressure marks, crushed areas, streaks, stains, snags, holes, surface contamination, lint, and sections that look bald or unusually glossy. In the velvet specifications used across our custom womenswear programs, dress-weight velvet commonly falls around 180–350 gsm, while stretch can range from low to medium depending on whether the construction is woven, knit, or blended with elastane. Those numbers are useful for production planning, but they are not pass/fail limits by themselves. The approved fabric specification, client standard, and confirmed sample remain the real acceptance references.
A useful inspection habit is to separate genuine material defects from handling damage. If two rolls remain visibly different after they are placed in the same orientation and viewed under the same light, the issue may be an actual shade or finishing difference. If the mismatch disappears when one piece is rotated, nap direction is the more likely cause. If the surface looks lighter only where it has been stacked under pressure, the problem may be pile compression rather than dyeing. This distinction matters because the corrective action changes completely. Material shade issues require roll or lot control; directional issues require cutting discipline; compression issues require better handling. Calling all three problems “color variation” produces weak root-cause analysis and makes repeat defects more likely.
Cutting and Sewing Defects
Cutting errors are especially expensive in velvet because the garment may not reveal the mistake until several components have been assembled. Front and back bodices, sleeves, skirt panels, yokes, pockets, waist pieces, and other visible parts normally need to follow the same approved direction unless the design intentionally creates contrast. Rotating pieces to improve marker efficiency can reduce fabric consumption while creating a visually unacceptable garment. Once sewing begins, another group of defects becomes important: seam puckering, creeping between layers, distorted side seams, uneven waist seams, zipper waviness, mismatched panel lengths, and visible machine impressions around the stitch line. Velvet layers can shift more readily than stable flat fabrics, so a technically strong seam is not automatically a good seam. The inspector has to judge the fabric surface immediately beside the stitching as well as the security of the stitching itself.
This is also where inline inspection earns its value. A recurring seam mark found after five garments can usually be traced to machine pressure, feeding, tension, handling, or operator technique and corrected before the problem spreads. The same issue found after five hundred garments becomes a repair and sorting exercise. A practical QC system therefore records not only the defect but also the operation that created it. “Center-back zipper waviness” is more useful than “poor workmanship,” and “right sleeve reversed against nap direction” is more useful than “shade issue.” Precise descriptions allow the cutting or sewing team to change a method rather than simply repair isolated pieces. They also create better references for repeat orders, where the goal is not only to pass today’s shipment but to avoid rediscovering the same production problem next season.
Pressing and Packing Defects
Some of the most frustrating velvet defects appear after sewing is already complete. Pressing can leave glossy patches, hard seam impressions, flattened pile, zipper outlines, or unwanted creases when temperature, steam, contact, or pressure is not appropriate for the approved material. A finishing operator may be trying to make the garment look cleaner while unintentionally making the surface look cheaper. This is why velvet pressing should be treated as a fabric-specific finishing process rather than as a standard end-of-line routine. The team needs to know whether direct contact is allowed, how much steam and pressure are acceptable, which areas are most sensitive, and how long the garment should cool before it is folded. A successful finish should remove unwanted construction creases while preserving the pile, drape, and directional appearance that were approved during sampling.
Packing can then create a second pressure environment. A dress that looks excellent on a hanger can arrive at a warehouse with deep fold marks if the fold line crosses a highly visible area, if structured components press into the velvet face, or if the carton is packed too tightly. The solution is not to abandon efficient packing, but to test the real packing method on the actual style. A soft velvet mini dress, a corseted party dress, and a floor-length formal gown may need different folding logic because the areas that carry pressure are different. For sensitive styles, a packed-condition check before bulk packing is more useful than assuming that a garment will recover automatically after unpacking.
| Defect | Likely Stage | QC Check | Typical Action |
| Nap mismatch | Cutting | Compare all visible panel directions | Correct marker direction or recut affected panels |
| Apparent shade mismatch | Fabric/Cutting | Align nap before judging color | Segregate lots or correct orientation |
| Crushed pile | Handling/Pressing/Packing | View under angled light | Reduce pressure and revise handling |
| Sewing impressions | Sewing | Inspect pile beside seams | Adjust machine pressure, feed or method |
| Zipper waviness | Sewing | Hang garment and inspect center back | Correct zipper application and tension |
| Press shine | Finishing | Inspect after cooling from several angles | Revise heat, steam and contact method |
| Deep fold marks | Packing | Run packed-condition trial | Change fold placement or carton pressure |
Root Cause Before Rework
Repairing a defective garment without identifying the source can make a quality team look busy while the production line keeps creating the same problem. If twenty dresses show a lighter-looking sleeve, replacing those sleeves may save twenty pieces, but it does nothing if the marker has been set with one sleeve in the wrong direction for the entire run. The same logic applies to seam impressions, twisted side seams, or press marks. The useful question is not only whether the garment can be repaired; it is which earlier control failed and whether more units are still exposed to that risk. Experienced QC teams therefore connect final defects back to fabric receipt, cutting, sewing, finishing, or packing. That approach reduces repeated repair, improves communication between departments, and gives brands more confidence that corrective action addresses the process rather than the symptom.
How Do You Inspect Velvet Fabric?
Velvet fabric inspection should verify the approved material before cutting and examine lot identity, color, weight, usable width, hand feel, stretch where applicable, nap direction, pile consistency, stains, pressure marks, visible defects, and roll-to-roll variation. The acceptance standard should come from the approved fabric, client specification, and required testing rather than from a generic idea of what “good velvet” should look like.
Nap Direction
The first practical control is to establish the approved nap direction before marker planning begins. It should not live only in an experienced cutter’s memory. The direction needs to appear in cutting instructions, pattern orientation, bundle identification, and the production reference used by QC. To check it, place fabric sections in the same orientation, smooth or brush the pile consistently, and view them under stable light from more than one angle. If they change appearance together, the direction is likely aligned. If one section continues to read differently, the inspector can then investigate actual shade or surface variation. This simple sequence prevents one of the most common diagnostic mistakes in velvet production: assuming that every visible color difference is a dyeing problem when the real cause is directional reflection from the pile.
Repeat orders make documentation even more important. A style produced six months later may be handled by a different cutting team, use a new fabric lot, or move to another production line. If the approved nap direction is retained as part of the style record, the next team has a physical and written reference instead of having to infer direction from photographs. That is particularly useful for black, burgundy, navy, emerald, chocolate, and other saturated colors where the pile creates pronounced visual depth. The goal is not to create paperwork for its own sake. It is to convert a subjective-looking characteristic into a repeatable production instruction that can be checked before fabric is committed to bulk cutting.
Shade Variation
Shade inspection should separate three causes that can look similar at first glance: true dye or finishing variation, nap orientation, and pressure-related surface change. Rolls should remain identifiable by lot where that information is available, and comparisons should be made with the fabric oriented in the same direction under the same light. Comparing one roll beside a window and another under a different lamp can create confusion rather than evidence. For commercially sensitive colors, a practical check uses samples from relevant sections of the roll or lot according to the agreed inspection procedure, then compares them with the approved standard. If an apparent difference disappears when the nap is aligned, the root cause is directional. If it remains, the material lot deserves closer review before it enters cutting.
The same discipline should continue after cutting. When a finished garment shows a lighter-looking panel, the investigation should trace the panel back to its orientation and material identity instead of recording a vague “shade defect.” This is particularly valuable when several rolls are being used in one production run. Shade grouping may add a little handling time, but it can prevent an expensive situation in which front and back panels from visibly incompatible groups are sewn into the same dress. A QC record that identifies lot, panel, direction, and the observed difference is far more useful for corrective action than a simple pass/fail mark. It also helps the sourcing and production teams decide whether the issue belongs with the fabric supplier or with internal cutting control.
Surface Quality
Surface inspection should be performed in lighting that reveals pile behavior rather than hides it. Velvet often looks acceptable from directly above but shows flattened tracks, streaks, pressure marks, or uneven pile when viewed from a shallow angle. Inspectors should therefore examine the material from more than one direction and pay attention to recurring patterns rather than only isolated spots. Practical checks include pile uniformity, stains, oil marks, lint, foreign fibers, holes, snags, crushed areas, permanent creases, irregular shine, rough patches, and obvious changes in hand feel. If defects are localized, the team can determine whether approved marker placement can avoid them; if defects repeat through the roll, the issue belongs at material acceptance. That distinction prevents the cutting department from becoming a last resort for fabric that should never have been released to production.
One caution is that not every temporary pile disturbance is a permanent defect. Velvet can change appearance after rolling, stacking, or transport, and some marks may relax when the material is handled according to the approved process. The inspector should therefore understand the specific fabric rather than reject or accept it based on a single quick view. At the same time, “it will recover later” should not become an excuse for ignoring persistent damage. A controlled evaluation looks at whether the surface returns to the approved appearance under normal treatment and whether the mark remains visible in the garment’s intended presentation. The more visible the area will be in the finished dress, the less room there is for subjective acceptance.
Fabric Specifications
Velvet is a surface family, not one fixed technical specification. Polyester velvet, spandex velvet, knit velvet, and crushed velvet can behave differently in stretch, recovery, drape, shrinkage, sewing, and finishing. For the dress programs documented in our fabric system, velvet commonly falls around 180–350 gsm, with low-to-medium stretch and generally low transparency, but the exact specification has to be confirmed for the selected article. A fitted stretch-velvet bodycon style may need closer attention to recovery and dimensional stability, while a non-stretch formal gown may place more emphasis on drape, pile appearance, seam handling, and press sensitivity. The relevant tests can include composition, weight, width, dimensional stability, rubbing or colorfastness, stretch and recovery, and any market- or client-specific requirement. No universal table should override the approved material standard for the order.
| Fabric Check | Typical Reference | What It Controls |
| Fabric weight | Approved spec; common dress range about 180–350 gsm | Drape, structure, sewing behavior |
| Stretch | Approved construction; low–medium is common | Fit, pattern allowance, recovery |
| Usable width | Purchase/specification record | Marker efficiency and yield |
| Nap direction | Approved sample and cutting instruction | Panel appearance consistency |
| Shade | Approved color standard and lot control | Roll and garment consistency |
| Pressure marks | Angled-light visual inspection | Pile preservation before cutting |
| Dimensional stability | Client/test requirement | Finished measurement stability |
| Surface defects | Roll inspection standard | Prevents defective panels entering sewing |
How Do You Control Velvet Cutting?
Velvet cutting should control nap orientation, shade grouping, marker direction, panel accuracy, size identification, and surface protection. Visible garment pieces should follow the approved directional plan unless the design intentionally specifies otherwise. Cut bundles must remain traceable so correctly oriented panels are not mixed during sewing, and the handling method should avoid unnecessary compression before those panels reach the sewing line.

How Do You Control Velvet Cutting?
Velvet cutting should control nap orientation, shade grouping, marker direction, panel accuracy, size identification, and surface protection. Visible garment pieces should follow the approved directional plan unless the design intentionally specifies otherwise. Cut bundles must remain traceable so correctly oriented panels are not mixed during sewing, and the handling method should avoid unnecessary compression before those panels reach the sewing line.
Pattern Direction
Marker planning for velvet begins with a directional decision that is less flexible than it is for many ordinary fabrics. Fronts, backs, sleeves, skirt panels, cuffs, pockets, yokes, waist sections, and any other visible velvet components should be considered in relation to the approved pile direction. Rotating a piece by 180 degrees may improve marker efficiency, but the fabric saved on paper can be more than offset by visually mismatched garments later. The direction should be marked on the pattern or digital marker so the cutting team can verify it before the first lay is cut. For complex styles, it is worth reviewing the marker against the approved sample rather than assuming every secondary piece is hidden. A facing, flap, or trim that becomes visible in wear can create an obvious contrast if its pile runs differently.
A practical pre-cut meeting does not need to be lengthy. The marker, fabric approval, nap direction, size ratio, shade grouping method, and any special panel-matching requirement can be reviewed together before bulk cutting begins. This is one of the cheapest points in the production cycle to catch a high-cost velvet mistake. Once a panel is cut incorrectly, the options narrow to recutting, accepting the visual difference, or repairing the garment after sewing. For repeat styles, the approved directional layout should be retained so another team does not unknowingly change the appearance in the next season. What looks like a small technical note at the pattern stage can determine whether the finished dress reads as one consistent surface under retail lighting.
Shade Grouping
Shade grouping starts with roll and lot identification. If more than one lot is used, the material should remain traceable through cutting and bundling according to the project’s quality plan. The purpose is simple: avoid assembling a garment from panels that look noticeably different when they are next to each other. Velvet can exaggerate small variation because the pile already creates directional light effects, so actual lot differences and orientation differences can combine into a stronger visual mismatch. Major panels can be compared in their intended finished orientation before the bundle leaves cutting. When a problem is found later, the ability to trace a panel back to its roll and cutting group makes the investigation faster and more objective. Without traceability, production teams may spend hours debating whether the fabric, direction, or sewing process caused the visual difference.
The appropriate degree of grouping depends on the order, color, fabric consistency, and client standard. Overcomplicating a stable lot can waste time, but ignoring visible variation can create costly sorting at the end of production. The useful principle is evidence-based control: inspect enough material to understand whether the bulk behaves consistently, then set the grouping method accordingly. Dark or saturated velvet often deserves closer visual attention because optical differences are easy to see across large uninterrupted panels. If the dress has multiple small pieces, the production team also needs to make sure the grouping method survives bundling. A perfect shade plan is useless if components are mixed on the way to sewing.
Cut Panel Accuracy
Velvet still requires all the normal cutting checks: correct pattern version, size, notches, seam allowance, panel count, symmetry, and clean cut edges. The surface sensitivity does not make dimensional accuracy less important. In fitted dresses, small cutting differences around the bust, waist, hip, side seam, or zipper area can create tension that later shows as distortion in the velvet face. Long evening styles add another risk: panel length and hem balance. If several skirt panels are slightly inconsistent, the finished hem can become uneven, particularly when the design includes shaped seams, godets, or bias-influenced sections. Early cut-panel checks should therefore compare actual pieces with the approved pattern and measurement logic before large quantities move into sewing. Catching a systematic cutting error at this stage protects both fit and appearance.
Stretch velvet needs one more layer of attention because grain or stretch direction interacts with garment fit. A knit or elastane-blend velvet may be selected specifically because it can support a bodycon silhouette, but inconsistent orientation can change how panels stretch and recover. The cutting instruction should clarify the direction that controls both the pile and the stretch behavior. This is also where the approved sample becomes useful: if the fabric feels or behaves differently from the sample, the team should not assume the pattern will compensate automatically. Pattern, fabric, and cutting are connected. A stable pattern cut in the wrong direction can create a garment that technically matches the paper pieces but does not match the approved fit.
Panel Handling
After cutting, velvet pieces should be bundled in a way that protects orientation, size identity, shade grouping, and surface condition. Excessive stacking pressure, rough clamps, dirty work surfaces, and unnecessary face abrasion can damage panels before sewing begins. The goal is not to make production impractical; it is to avoid creating a defect in work-in-progress handling that did not exist in the original roll. Smaller controlled bundles may be preferable to very heavy stacks for sensitive fabrics, and the bundle ticket should retain enough information for the sewing line and QC team to understand style, color, size, and any shade group. If components are separated for different operations, that identity needs to travel with them. Good cut-panel handling is one of the quiet controls that rarely appears in marketing material but often separates stable bulk production from repeated sorting and recutting.
Which Sewing Defects Should You Check?
Velvet sewing inspection should cover stitch quality, seam shape, puckering, panel movement, surface impressions, seam allowance, symmetry, zipper installation, lining attachment, hem construction, and style-specific details. Inspectors should evaluate both seam strength and the pile around the seam, because a structurally sound seam can still be commercially unacceptable when the velvet surface is flattened, distorted, or visibly marked.
Seam Quality
Start with the approved sewing instruction and garment sample. Inspect stitch consistency, skipped stitches, broken threads, loose stitching, seam allowance, puckering, crooked seams, twisting, and symmetry. Then look directly at the velvet beside the stitch line. If machine pressure or handling has compressed the pile, an otherwise clean seam can create a visible stripe or hard impression. Long seams deserve special attention because layer movement can accumulate over distance. Side seams, princess seams, waist seams, and long skirt seams can show creeping when the upper and lower layers do not feed evenly. The result may be a twisted garment or uneven panel length even though individual stitches look acceptable. Inspectors should therefore evaluate seams both flat and in the hanging garment so they can see how construction affects the overall silhouette.
Inline inspection is useful because many sewing defects are process-driven. If several early pieces show the same pressure track, the cause may be machine setup, presser-foot pressure, feeding, tension, or handling technique. Correcting the method while the order is still in production prevents the defect from multiplying. In Jinfeng Apparel’s documented manufacturing system, 15+ QC inspectors cover fabric, inline, final, and packing inspection, which reflects the need to catch issues before they reach the last inspection table. The number itself is less important than the structure: quality control is positioned at several production stages rather than concentrated only at shipment. For velvet, where the fabric surface can record what happened during sewing, that structure is especially valuable.
Zippers and Linings
A zipper check should go beyond opening and closing the slider. The tape, seam, and surrounding velvet should lie cleanly without waves, twisting, bulges, trapped pile, or an obvious raised ridge. Center-back zippers are particularly visible on fitted dresses because the line is under tension when worn, and even a small distortion can make the silhouette look poor. Inspect the top alignment, bottom stop, seam symmetry, zipper security, and the appearance of the velvet around the opening. If the pile has been caught or compressed, the defect may look more obvious under angled light than it does when the garment is flat on the table.
Linings need the same functional and visual review. Check attachment, length, width, comfort, twisting, seam quality, exposure, and whether the lining pulls against the outer shell. A lining that is too short or too narrow can lift the velvet, distort the hem, or restrict movement. A lining that is too long can show below the dress or through a slit. In structured evening styles, the lining may also interact with cups, boning, waist stays, or other internal support. That is why lining inspection cannot be reduced to “present or missing.” It should confirm that the internal layer supports the approved silhouette without changing how the velvet shell hangs or moves.
Pile Marks
High-risk areas for pile marks include seam intersections, darts, waist seams, zipper areas, shoulders, armholes, hems, neckline edges, and any point that has been repeatedly handled or held under pressure. The garment should be viewed under changing angles of light because a pressure mark may disappear from one viewpoint and become obvious from another. Inspectors should distinguish between a temporary disturbance that returns to the approved appearance under normal finishing and permanent pile damage that remains visible. Aggressive pressing is not a reliable solution; too much pressure can replace a sewing impression with a glossy or flattened patch. When several garments show the same mark, the production team should stop treating the issue as isolated rework and investigate the relevant sewing operation.
It is also important to judge the visibility of the mark in the finished garment rather than only at close range. A slight disturbance hidden inside a seam allowance is not equivalent to a long flattened line across the center front of an evening dress. Quality teams need agreed criteria for location, size, persistence, and visual impact. When those criteria are clear, inspectors make more consistent decisions and production receives better feedback. Without them, one person may pass a mark another person rejects, creating unnecessary arguments near shipment. Velvet magnifies subjective inspection unless the team uses a repeatable viewing method and compares questionable areas with the approved sample.
Garment Distortion
A finished seam can be secure and still distort the dress. Hang the garment or place it on the appropriate form and check whether side seams fall naturally, the waistline remains level, shoulders are balanced, the neckline sits correctly, the zipper is centered, the slit is positioned as approved, and the hem is even. Fitted velvet styles deserve close attention to bust, waist, and hip proportions because tension can change both fit and surface appearance. Distortion may come from several stages: inaccurate cutting, unequal feeding, stretched seams, lining tension, or pressing. The inspection should therefore connect the visible symptom back to the production history instead of assuming that the sewing operator is always the cause. The best QC result is not the longest defect list; it is a clear diagnosis that helps production prevent more defective garments from being made.
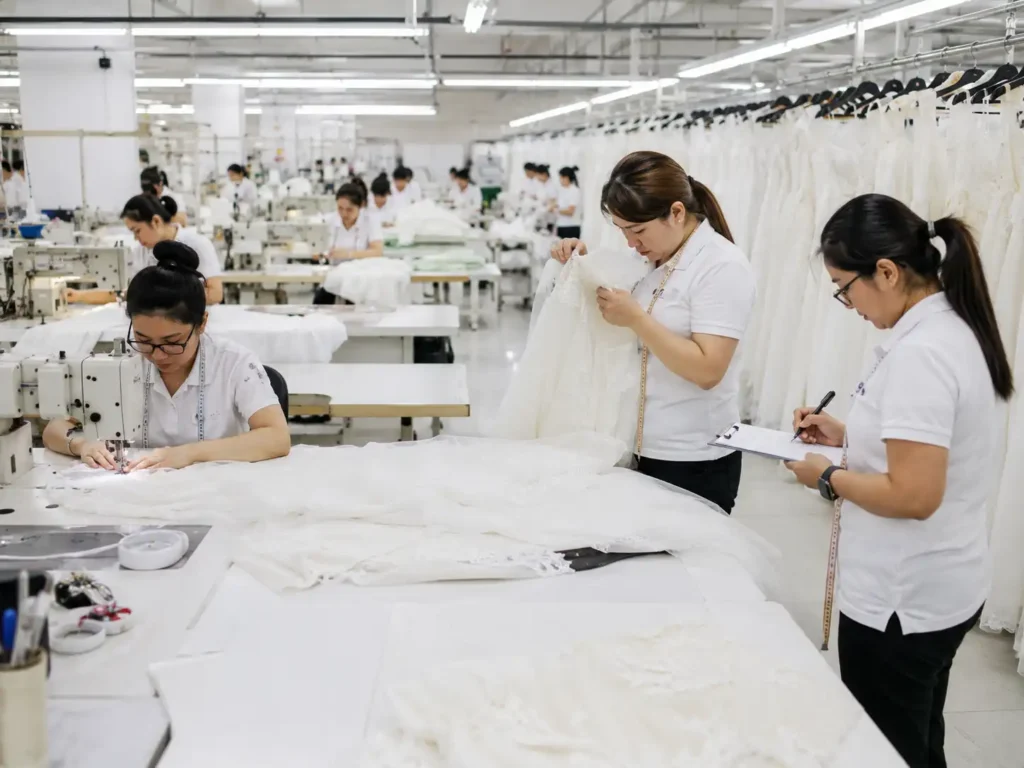
How Do You Check the Finished Dress?
Finished velvet dress inspection should compare the bulk garment with the approved sample and technical specification for measurements, proportions, workmanship, surface appearance, nap consistency, shade, pressing, cleanliness, zipper function, lining, hem balance, labels, and trims. The inspection is most useful after finishing but before bulk packing, while the garment can still be viewed in the condition it is intended to reach before shipment.
Measurements and Fit
Measurement inspection begins with the approved size chart, grade rules, measurement method, and agreed tolerance. A factory should not substitute a generic internal tolerance when the client has already defined another requirement. The same point of measure also needs to be used consistently; otherwise two inspectors can create different results simply by placing the tape differently or applying different tension. Depending on the style, relevant points may include bust, waist, hip, total length, shoulder, sleeve, strap length, armhole, neckline, slit height, and hem width. The numbers should then be connected to the silhouette. A stretch-velvet bodycon dress can behave very differently from a non-stretch formal gown even when their flat measurements look similar, so fit review must consider fabric behavior as well as the tape measure.
The approved PP sample is particularly useful at this stage because it ties measurements to a real garment. Before bulk production, the final sample, fabric, trims, color, size chart, labels, packing details, BOM, workmanship, and quality expectations should already have been confirmed. Final inspection should therefore be verification, not product development. If a measurement falls outside tolerance, the team should determine whether the deviation is random or systematic across a size or operation. A repeated length issue may point to cutting or hemming; a repeated waist issue may involve pattern, seam allowance, or stretch handling. Recording that pattern matters more than simply counting failures, because it determines whether the remaining stock is likely to contain the same problem.
Pressing Quality
Pressing quality is unusually important for velvet because finishing can improve or permanently damage the surface. Hang the garment under stable light and inspect the bodice, waist, skirt, sleeves, zipper area, neckline, armholes, hem, and structured sections from several angles. Look for glossy areas, flattened pile, hard seam impressions, unwanted creases, uneven surface direction, and places where the pile no longer matches surrounding panels. The garment should be allowed to cool and settle after finishing before final judgment. Packing a piece while it is still warm or heavily steamed can combine residual heat with compression and make a fold or pressure mark more persistent. The aim is not to press velvet until it looks flat; it is to present a clean garment while preserving the approved pile, drape, and depth.
The safest finishing method depends on the exact velvet construction, so operators should work from the approved fabric rather than from a single setting used for every style. Heat, steam, contact, pressure, protective cloth or equipment, and the treatment of zippers, hems, seams, and structured details all need to be considered. A crushed velvet may intentionally have a different face from a smooth velvet, while a stretch velvet may respond differently to heat from a rigid woven velvet. Final QC should therefore compare the garment with the approved sample instead of applying a generic rule that all pile must look perfectly uniform. The standard is the intended commercial appearance of the selected fabric, not an abstract idea of smoothness.
Final Appearance
Final appearance inspection should begin from a normal viewing distance. Hang the dress and look at the front, back, and sides before focusing on small details. This often reveals panel shade differences, asymmetric lines, uneven hems, distorted waist seams, and obvious surface marks more quickly than close inspection. Then move closer to check nap consistency, pile crushing, stains, lint, holes, snags, loose threads, zipper shape, lining exposure, seam alignment, trim position, label placement, and the quality of the hem and finishing. Velvet benefits from this two-distance method because its visual effect is created across a broad reflective surface. A panel mismatch may be subtle at twenty centimeters and immediately obvious from one or two meters away.
Lighting should be controlled enough to make comparisons meaningful. The purpose is not to create a theatrical inspection environment, but to avoid judging one garment in bright daylight and another under a warm lamp. When a questionable area is found, compare it with the approved sample and another accepted unit under the same conditions. If the visual difference changes dramatically when the garment is turned, nap or pressure may be involved. If it remains consistent, investigate actual shade, construction, or finishing. This method turns a vague “looks wrong” reaction into a more useful technical diagnosis. It also gives brands and factories a common language for discussing surface quality when photographs alone do not show the effect accurately.
Approved Sample
The approved PP or golden sample is one of the strongest controls available because it translates technical instructions into a physical reference. Bulk garments should be compared with it for silhouette, fabric appearance, direction, shade, construction, lining, zipper installation, trim placement, labels, hem balance, and finishing. If the written specification and approved sample conflict, the team should not silently choose whichever is easier to produce. The discrepancy should be clarified and recorded before shipment. That discipline is particularly important in velvet, where subjective words such as “rich,” “smooth,” or “luxury” are not precise enough to control bulk production. A physical sample gives the team something concrete to compare when deciding whether pile appearance, drape, seam behavior, or finishing matches what the brand approved.
The sample also becomes more valuable on repeat orders. A future run may use a different fabric lot, a new operator, or a changed production schedule, but the approved reference preserves the intended result. Retaining pattern, measurement, fabric, color, trim, workmanship, and packing information reduces the chance that small production decisions drift over time. This is one reason mature brands often care as much about record discipline as about the first sample itself. They are not only buying today’s garments; they are building a repeatable product. For velvet, repeatability depends on keeping the directional and finishing decisions together with the pattern and size information rather than treating them as informal workshop knowledge.

How Do You Approve Velvet Dresses for Shipment?
Velvet dresses should be released only after production corrections are complete and the finished lot meets the agreed quality, measurement, appearance, labeling, packing, and carton requirements. AQL, client inspection, or third-party inspection can form part of shipment approval, but final sampling does not replace the incoming fabric, cutting, sewing, inline, pressing, and packing controls that should already have protected the order.
Defect Classification
A useful defect record describes exactly what is wrong and where it appears. “Appearance issue” provides little information; “front skirt right panel reversed against approved nap direction” tells the cutting team what to investigate. The same applies to sewing and finishing: center-back zipper waviness, pile flattened beside the waist seam, permanent press mark at the left hip, lining visible below the hem, neckline asymmetry, or incorrect care-label placement are all actionable descriptions. Defect categories and acceptance criteria should follow the agreed quality manual or inspection procedure, because the commercial impact of a defect depends on severity and location. A small hidden mark inside a facing is not equivalent to the same mark across the center front of a formal dress. Clear classification improves both final decisions and corrective action.
Good classification also helps the next order. If a previous run recorded repeated pressure marks beside the zipper, the team can review zipper installation and finishing before the next production begins. If the record only says “minor appearance defects,” that learning is lost. The strongest quality systems therefore use defect data as production memory rather than as a scorecard. This is particularly relevant for fashion collections with repeat colors, seasonal replenishment, or the same pattern developed in new fabrics. Velvet styles can change visibly when the material changes, but the history of previous defects still helps the team identify where to look first. A concise, specific record is more valuable than a long generic checklist that does not point to the manufacturing cause.
AQL and Final Inspection
AQL sampling is best understood as a final lot-acceptance tool, not as another name for 100% inspection. The exact inspection level, sample size, defect classification, and acceptance criteria should be agreed according to the client’s quality standard and order requirements. The important practical point is that a statistically accepted lot can still contain individual defects, which is why systematic risks such as reversed nap direction, repeated zipper distortion, incorrect labeling, or pressure damage should be controlled earlier in production. Waiting for a random final sample to discover a process-wide error is poor risk management. Final inspection should confirm that earlier controls have worked, not become the first time anyone seriously evaluates the product.
For larger retail, ecommerce, or multi-batch programs, it is better to establish the shipment standard before bulk production starts. That includes measurement tolerances, critical workmanship points, packing requirements, defect categories, and whether client or third-party inspection will be used. Changing those rules after the goods are finished creates avoidable disputes. The documented manufacturing system used for Jinfeng Apparel supports internal inspection, AQL inspection, client inspection, and third-party pre-shipment inspection according to project requirements. That flexibility matters because brands do not all use the same acceptance process. What should remain consistent is the principle that final release is based on an agreed standard, documented findings, and traceable corrective action rather than on an informal visual judgment at the loading date.
Packing Protection
Packing QC has two jobs: verify commercial information and preserve the garment that final QC has approved. Commercial checks include main labels, size labels, care labels, hangtags, barcodes, size stickers, polybags, carton quantities, size and color ratios, carton marks, carton dimensions, and weight. Velvet then adds another question: will the chosen packing method protect the pile during storage and transport? Review where folds land, whether zippers or trims can press into another panel, whether structured bodices create high-pressure points, and whether the carton is compressed more tightly than the garment can tolerate. A practical packed-condition trial can be useful for sensitive styles. Pack a finished garment exactly as planned, leave it under realistic handling conditions, reopen it, and check whether pile or fold marks recover to the approved presentation.
The finishing and packing stage is often underestimated because it happens after the garment looks “finished.” In reality, it can create the last quality problem before the customer sees the product. Jinfeng Apparel’s documented production structure includes 30+ finishing and packing workers responsible for activities such as pressing, trimming, labeling, barcode application, folding, private-label packing, carton marking, and final packing checks. The important lesson is broader than the staffing number: packing is part of product quality, not only logistics. A velvet dress that leaves the factory technically correct but arrives crushed or mislabeled has still failed the customer. Shipment approval should therefore consider the condition in which the garment is likely to be opened, not only the condition in which it looked on the inspection table.
Shipment Records
Shipment release should leave a record that allows both production and the client to understand what was checked and which standard was used. Useful records include the approved PP or golden sample reference, fabric and lot information, nap-direction instruction, size specifications and tolerances, inline defect and correction records, final appearance findings, packing specification, label and barcode approvals, carton details, and client or third-party inspection reports where applicable. Photographs of important defects and corrections can also improve future communication when they are managed within the client’s confidentiality rules. These records are especially valuable for repeat production because they turn today’s inspection decisions into a reference for the next run.
For a recurring velvet style, quality consistency depends on more than keeping the paper pattern. The next production team also needs to know the approved fabric appearance, pile direction, shade-control method, construction details, pressing approach, and packing decisions. Retaining that information reduces communication time and helps prevent the same defect from returning in another color or season. Mature manufacturing relationships benefit from this kind of production memory because both sides spend less time rediscovering old decisions. The purpose is not to create an oversized archive. It is to keep the small number of technical references that actually determine whether the next bulk order looks and fits like the product that was originally approved.
| Release Stage | What Must Be Confirmed | Primary Reference |
| Material | Correct velvet, color, lot, surface and required test status | Fabric approval / purchase specification |
| Cutting | Nap direction, shade grouping, correct pattern and size | Marker and cutting instruction |
| Sewing | Stable workmanship, seams, zipper, lining and structure | Approved sample / sewing spec |
| Measurement | Required points within agreed tolerances | Size chart / measurement method |
| Appearance | Shade, pile, cleanliness, finishing and hem balance | PP or golden sample |
| Packing | Labels, barcode, fold method and surface protection | Packing specification |
| Cartons | Quantity, size/color ratio, carton marks and weight | Packing list / order data |
| Final release | Inspection result meets agreed acceptance criteria | Internal, client or third-party report |
Final Thoughts
A reliable velvet dress quality control checklist follows one practical rule: quality has to be built into the production sequence rather than inspected into the garment at the end. Velvet makes small inconsistencies unusually visible, so incoming material approval, one-way cutting, shade control, careful sewing, controlled pressing, objective final inspection, and protective packing have to work together. When those stages share the same approved sample and technical references, defects are easier to diagnose and bulk consistency is easier to maintain. For brands developing velvet evening dresses, winter party styles, holiday collections, or fitted velvet programs, it is worth discussing fabric construction, color standard, nap direction, size chart, finishing expectations, packing method, and inspection requirements before bulk production begins. That early technical conversation usually costs far less than sorting, recutting, re-pressing, or explaining inconsistent garments after the shipment is complete.
Share This Article :

Jerry Lee
Categories

Latest blogs


Table of Contents
Here, developing your OEM/ODM private label clothing collection is no longer a challenge—it’s an excellent opportunity to bring your creative vision to life.

