Skip to content

How to Improve Jumpsuit Torso Fit: Measurements, Pattern Adjustments, and Fit Testing

Your trusted Women’s Apparel Manufacturer from China

A jumpsuit can look almost perfect on a hanger and still feel completely wrong once someone sits down. The reason is structural: unlike a blouse worn with separate trousers, a jumpsuit connects the shoulders, bust, waist, hip, rise, seat, and crotch in one continuous garment. A shortage of only a few centimeters in the wrong area can pull the crotch upward, move the waistline, load the shoulders, or make the wearer feel restricted even when the bust, waist, and hip measurements appear correct.
Improving jumpsuit torso fit starts with measuring the complete vertical body relationship rather than simply increasing the garment size. Full girth, front and back waist length, crotch length, crotch depth, waist position, hip level, and movement ease need to be evaluated together. The pattern should then be corrected where the imbalance actually occurs—above the waist, below the waist, through the rise, or around the crotch—before being tested again in sitting and movement.
A fitting room often tells the story better than a size chart. A sample may look sleek during a front-view photo, yet the wearer sits down and immediately reaches for the waist to pull the garment back into place. That small reaction is useful technical information. Learning to read those reactions, drag lines, shifting seams, and changes in posture is what turns an acceptable jumpsuit into a genuinely well-balanced one.
What Defines Good Jumpsuit Torso Fit?
Good jumpsuit torso fit keeps the shoulder, bust, waist, hip, rise, and crotch close to their intended positions while leaving enough vertical room for normal movement. The wearer should be able to sit, bend, walk, and reach without strong crotch pressure, shoulder drag, waistline displacement, or excessive fabric collapse. A clean standing silhouette alone is not enough to confirm correct fit.
What Is Jumpsuit Torso Girth?
Torso girth is one of the measurements that makes jumpsuit fitting different from fitting a dress or pair of trousers separately. The garment must travel continuously from the upper body, through the front torso and crotch, and back up the body. Even when bust, waist, and hip circumferences look correct on paper, inadequate vertical girth can make the jumpsuit feel noticeably too short.
Full girth should therefore be considered alongside front waist length, back waist length, and the section running from the waist through the crotch. The finished garment also requires additional room beyond the static body measurement because the body changes shape during sitting, walking, bending, and reaching. The required amount depends heavily on silhouette, textile behavior, lining, and how close the style is intended to fit.
For a relatively fitted woven jumpsuit, several centimeters of usable vertical ease are normally needed. A working range around 4–6 cm can be a useful development reference for some fitted styles, but it should never be treated as a universal specification. A relaxed jumpsuit may need more, while a high-stretch style can sometimes work with less if the textile also provides useful lengthwise stretch and strong recovery.
The objective is not simply to lower the crotch until the wearer feels comfortable. Functional vertical ease should be distributed through the pattern so the jumpsuit remains visually controlled. A noticeably dropped crotch may solve immediate pressure while creating poor proportions, excess fabric at the seat, and an unnecessarily long-looking lower torso.
Which Fit Zones Work Together?
A jumpsuit behaves as one connected fit system. Shoulder position affects where the bodice hangs. Bust projection changes the amount of front length needed to reach the waist. Waist position controls the transition between the upper and lower body. Hip and seat volume influence how the garment moves around the pelvis, while rise and crotch geometry control space between the waist and legs.
Because these zones interact, the most visible problem may not be where the original pattern error began. A crotch that rides upward can result from an insufficient rise, but it can also begin with a bodice that is too short. A high-looking waist may be caused by missing upper-body length rather than insufficient waist circumference. A sagging seat may come from an overly long back rise rather than an oversized hip measurement.
A disciplined fitting sequence usually works from broader balance toward local corrections. Check upper-body position and torso length first, then the waistline, hip and seat, lower torso, and finally the detailed crotch curve. Altering the crotch too early can temporarily hide the symptom while leaving the waist or bodice balance unchanged.
Fit Zone | Primary Control | Too Little Can Cause | Too Much Can Cause |
Full torso girth | Overall vertical body room | Shoulder pull, rising crotch | Dropped torso, low crotch |
Front torso | Front waist length, bust projection | Front waist pulled upward | Folding below bust |
Back torso | Back waist length, posture | Back tension, waist lift | Pooling at back waist |
Waist | Position and circumference | Compression, seam riding | Shifting, weak definition |
Hip and seat | Circumference and depth | Drag lines, restricted sitting | Sagging seat |
Rise | Waist-to-crotch distance | Wedging, crotch pressure | Low crotch, excess folds |
Crotch curve | Front/back projection | Localized tension | Loose crotch shaping |
Correcting one zone should always be followed by a review of the neighboring areas. When a pattern adjustment improves three related symptoms at once, the correction is more likely to be addressing the real structural problem rather than merely hiding one wrinkle.
How Does Movement Change Torso Fit?
A standing body is only one version of the body a jumpsuit must fit. When someone sits, the pelvis rotates, the seat spreads, the back body becomes longer, and the thighs move toward the torso. Reaching forward expands the upper back, while raising the arms can pull fabric upward through the bodice and transfer tension directly toward the waist and crotch.
That movement explains why some highly fitted jumpsuits look excellent in photographs yet feel restrictive during real wear. Product teams naturally want a smooth waist, clean hip, and relatively high-looking crotch, particularly in partywear and evening styles. If too much functional room is removed in pursuit of a perfectly smooth standing silhouette, the garment may have no remaining capacity for ordinary sitting or bending.
A useful fit session should reproduce realistic movement rather than extreme poses. Ask the wearer to walk several steps, sit with the hips close to a 90-degree angle, lean slightly forward, stand again, reach forward, and raise both arms. The waistline can move slightly, but it should normally settle back toward its intended position without the wearer needing to pull the jumpsuit down manually.
Pay particular attention to when discomfort begins. If sitting alone produces crotch pressure, the lower torso deserves attention. If arm movement is the trigger while sitting remains comfortable, upper-body mobility may be the larger issue. Movement is not merely a final comfort check; it is one of the most useful diagnostic tools available during jumpsuit development.
How Much Ease Is Needed?
Ease should be determined by the silhouette, material, construction, and expected use rather than one fixed industry number. A tailored office jumpsuit, a stretch going-out style, and a relaxed utility jumpsuit can share the same nominal body size while requiring very different finished measurements. What matters is where the additional room is placed and how the textile behaves when the wearer moves.
Fitted woven styles generally need positive vertical ease because the material contributes relatively little mechanical stretch. Stretch jumpsuits can sometimes use less horizontal ease, but vertical fit still deserves careful attention because many knit fabrics stretch far more across the width than along the length. A fabric described casually as “stretchy” may offer excellent hip flexibility while providing almost no help between the shoulder and crotch.
Ease must also be distributed with proportion in mind. Adding 5 cm entirely below the waist may create a low, loose crotch. Adding the same amount only above the waist may move the waist seam too far downward. The appropriate solution may involve smaller additions at two different locations so the total girth increases without damaging the intended silhouette.
Two questions are useful during every fitting: does the jumpsuit look controlled while the wearer is standing, and does it remain comfortable when she moves? A sample that passes only one of those tests is not fully resolved, regardless of how accurate its static measurements appear.

How Do You Diagnose Torso Fit Problems?
Diagnose jumpsuit torso problems by reading drag-line direction, waist placement, crotch position, and movement behavior together. First determine whether the garment is vertically too short, too long, or simply distributing its existing length incorrectly. Only after that distinction is clear should the pattern be changed through the bodice, rise, crotch, hip, or front-to-back balance.
What Shows the Torso Is Too Short?
A jumpsuit with insufficient vertical length often feels as if the garment is being pulled upward from both ends. The wearer may experience crotch pressure at the same time as tension around the shoulder, neckline, or armhole. The designed waistline may sit higher than expected, and a sample that seems acceptable while standing can become noticeably uncomfortable within seconds of sitting.
Look at the direction of tension rather than simply looking at the amount of wrinkling. Strong vertical or near-vertical pull between the shoulder, waist, and crotch suggests that the garment may be short somewhere in the continuous torso path. If bust, waist, and hip circumferences are already close to specification, increasing the complete garment size can add unwanted width without supplying enough useful vertical length.
The next task is locating the shortage. When the jumpsuit waist sits above the wearer’s natural or intended design position, check front and back bodice lengths before altering the crotch. If the waist remains correctly placed but the crotch is pulled upward, the lower torso and rise become more likely areas for investigation.
Small experimental changes are often more informative than a dramatic alteration. A temporary 1–2 cm correction through a suspected pattern zone can show whether the waist, crotch, and shoulder improve together. Adding all missing length directly to the crotch may reduce pressure but still leave the waist high, distort the leg balance, and create an obviously dropped crotch.
What Shows the Torso Is Too Long?
An overlong torso usually creates collapse rather than tension. Common signs include a crotch sitting lower than intended, fabric folding at the lower waist, a loose back waist, or a seat that appears to hang even though the hip circumference is not excessive. The overall appearance often feels less controlled because the garment is hanging from the shoulders rather than following the intended body landmarks.
Waist position is one of the best clues. If both the waist and crotch sit below their intended locations, excess length may exist above the waist as well as through the rise. When the waist sits correctly but the crotch remains low, the lower torso deserves more attention than the bodice.
Temporary horizontal pinning is extremely useful before paper or digital pattern changes are made. Pin approximately 1–2 cm above the waist, reassess the garment, then release it and test a similar reduction below the waist. The location that improves both proportions and movement provides a clearer indication of where the excess length is concentrated.
Avoid treating every visible fold as a defect. Some extra fabric is functional and becomes useful as soon as the wearer sits. A jumpsuit made perfectly wrinkle-free in a rigid standing pose can become restrictive when the same fabric is needed to travel around the pelvis and back body during normal movement.
Is the Problem Torso Length or Crotch Curve?
Torso-length and crotch-curve problems are commonly confused because both may create discomfort in the same area. The distinction becomes clearer when the entire garment is observed. Insufficient vertical length generally influences larger parts of the jumpsuit, while a poorly shaped or insufficiently extended crotch curve tends to create more localized pulling around the front or back body.
When shoulder tension, a high waist, and an upward-pulling crotch appear together, investigate full girth and vertical distribution before aggressively reshaping the crotch. If the shoulders and waist remain stable but pressure is concentrated around the front or back crotch, curve extension, body projection, thigh shape, or seat volume become more relevant.
Front and back corrections should also be considered separately. A fuller seat may require more back extension without a matching front change. A prominent abdomen can change the required front rise and front-body length without requiring additional fabric behind the body. Treating the complete crotch as one symmetrical curve often adds unnecessary material where no problem existed.
Fit Symptom | Check First | Secondary Check | Avoid Assuming |
Crotch rides upward | Full girth, rise | Front/back balance | Crotch curve is always wrong |
Waist sits high | Bodice length | Bust projection, girth | Waist circumference is too small |
Crotch hangs low | Rise length | Upper torso length | Hip is too large |
Front wedging | Front rise, front extension | Abdomen, torso length | More overall width will solve it |
Back wedging | Back extension | Seat projection, back rise | Front and back need equal changes |
Sagging seat | Back rise, seat volume | Hip position | Whole garment is oversized |
Shoulder and crotch pull together | Full vertical girth | Armhole and sleeve | Shoulder width is the only cause |
A strong fitting diagnosis changes one variable at a time and observes how several symptoms respond. If a single adjustment improves the waist position, shoulder comfort, and crotch pressure together, the fitting team has probably found a more fundamental balance issue rather than simply smoothing one local wrinkle.
Are Shoulder Pulling and Crotch Drag Connected?
Shoulder pulling and crotch drag can be directly connected because a jumpsuit forms a continuous garment from the upper body to the legs. Unlike a blouse, it cannot freely shift independently at the waist. When the bodice is pulled upward by arm movement or insufficient torso length, part of that force can travel through the waist and increase pressure at the crotch.
The connection is particularly noticeable in jumpsuits with sleeves, halter necklines, narrow armholes, structured shoulders, or close-fitting upper bodies. If both arms are raised and the waist climbs sharply while the crotch becomes uncomfortable, investigate full torso balance as well as upper-body mobility instead of treating the lower section in isolation.
Not every shoulder problem comes from insufficient torso length. An armhole that is too low, restricted sleeve geometry, inadequate upper-back width, or incorrect shoulder slope can produce similar tension while the vertical girth remains adequate. Adding rise length in such a case may simply create a lower crotch while leaving arm movement almost unchanged.
Separate movement tests help locate the source. Ask the wearer to sit without lifting her arms, then stand and raise one arm, both arms, and finally reach forward. Note exactly when the waist and crotch begin to shift. A sequence like this often reveals more than a long list of static measurements.
Which Measurements Control Torso Fit?
The most useful measurements for jumpsuit torso fit include full girth, front waist length, back waist length, waist-to-crotch length, crotch depth, front and back crotch length, bust, waist, hip, and hip depth. Together, these measurements reveal not only whether enough total room exists, but also whether that room is distributed correctly above and below the waist.
Which Measurements Matter Most?
Bust, waist, and hip remain essential measurements, but they cannot explain a jumpsuit’s vertical balance on their own. Two wearers can have very similar circumferences yet need very different patterns because one has a longer torso, deeper rise, fuller seat, stronger bust projection, or a different front-to-back relationship.
Full girth helps determine whether the complete body path from the upper torso through the crotch has enough room. Front and back waist lengths divide the upper-body requirement into two meaningful sections. Crotch length and crotch depth describe the lower torso in different ways, while hip depth identifies where the garment should place its maximum lower-body volume.
These measurements become much more useful when interpreted as a group. If full girth is short while both front and back bodice lengths are also short, the missing length likely belongs above the waist. If the bodice lengths match but total girth remains insufficient, the rise deserves more investigation.
Correct total girth does not automatically mean correct balance. A pattern may contain too much length above the waist and too little below it, or the reverse. The overall number can look perfect while the wearer still experiences a low waist and an uncomfortable crotch because the available length is sitting in the wrong location.
How Do You Measure Full Girth?
Use a flexible measuring tape over close-fitting clothing so bulky garments do not add artificial volume. Start from the upper reference point used by the chosen pattern system, guide the tape down the front of the body, through the crotch, and back toward the matching upper reference point. The tape should follow the body’s contour without compressing the bust, abdomen, or seat.
Consistency between body and pattern is more important than choosing one universal starting landmark. If the body is measured from a neck reference while the paper pattern is measured from a shoulder seam, the resulting comparison will be misleading. Pattern measurements should also be taken along stitching lines rather than raw cutting edges because seam allowances are not part of the finished internal dimension.
For development records, it is helpful to keep the body full girth, pattern full girth, intended vertical ease, actual sample girth, and approved production girth as separate values. Combining them into one informal note makes later corrections difficult to trace, especially after several sampling rounds.
Measurement precision should remain practical. Recording body and garment dimensions to the nearest 0.5 cm is often sufficiently detailed for fit evaluation, although each brand may apply its own specification system. Repeatability matters more than claiming a degree of precision that cannot be reproduced consistently during sampling and production.
How Do Front and Back Lengths Differ?
Front and back torso lengths should not be assumed to be identical because the human body is not symmetrical in profile. Bust projection increases the path required over the front torso, while shoulder-blade prominence, posture, spinal curve, and seat shape influence how much length is needed through the back.
A fuller bust may require additional front length while the back bodice remains correct. Adding the same amount to both sides could improve full girth numerically while creating folds behind the body. The reverse can occur for a wearer with a rounded upper back or posture that requires additional back-body length.
Side seams provide useful visual evidence. A side seam that repeatedly swings toward the front or back can indicate an imbalance in the way the garment is consuming length or circumference. A waist seam that tilts instead of remaining at its intended angle can reveal the same problem from another perspective.
Suppose a fit sample requires 3 cm more total girth. The correct response is not automatically 1.5 cm added to the front and 1.5 cm to the back. The wearer may need 2 cm at the front and 1 cm at the back, or the complete correction may belong below the waist. The body determines the distribution, not mathematical symmetry.
How Much Ease Is Needed for Sitting?
Sitting is one of the most revealing tests of jumpsuit ease because the body changes considerably while the static size-chart measurements remain unchanged. The pelvis rotates, the seat spreads, the upper back lengthens, and the distance fabric must travel around the lower torso increases. A pattern approved only from standing measurements can therefore feel much shorter once the wearer sits.
There is no universal sitting-ease figure that suits every silhouette. Fabric stretch, seat shape, neckline construction, sleeve mobility, waist stabilization, and the desired closeness of the garment all influence the amount required. The fit sample remains the final authority because the same numerical girth can behave differently in two fabrics.
Seat the wearer fully in a chair with the hips and knees close to 90 degrees. Check whether the shoulders are being pulled downward, whether the waistline rises excessively, and whether pressure develops at the front or back crotch. Ask her to lean forward slightly and then return upright without adjusting the garment by hand.
Measurement | How It Is Taken | Main Fit Decision |
Full girth | Upper front reference through crotch to upper back | Overall vertical room |
Front waist length | Front upper reference to waist | Front bodice balance |
Back waist length | Back upper reference to waist | Back bodice balance |
Crotch length | Front waist through crotch to back waist | Lower torso length |
Crotch depth | Waist to seated surface | Vertical rise requirement |
Bust | Fullest bust point | Upper-body circumference |
Waist | Natural or design waist level | Waist shaping |
Hip | Fullest hip/seat area | Lower-body volume |
Hip depth | Waist to fullest hip level | Vertical hip placement |
Inseam | Crotch to finished hem | Leg length after rise is correct |
No single measurement should be used as the final diagnosis. A technically useful size chart is a network of related dimensions, and jumpsuit fitting becomes far more reliable when the pattern maker can see how those dimensions interact.
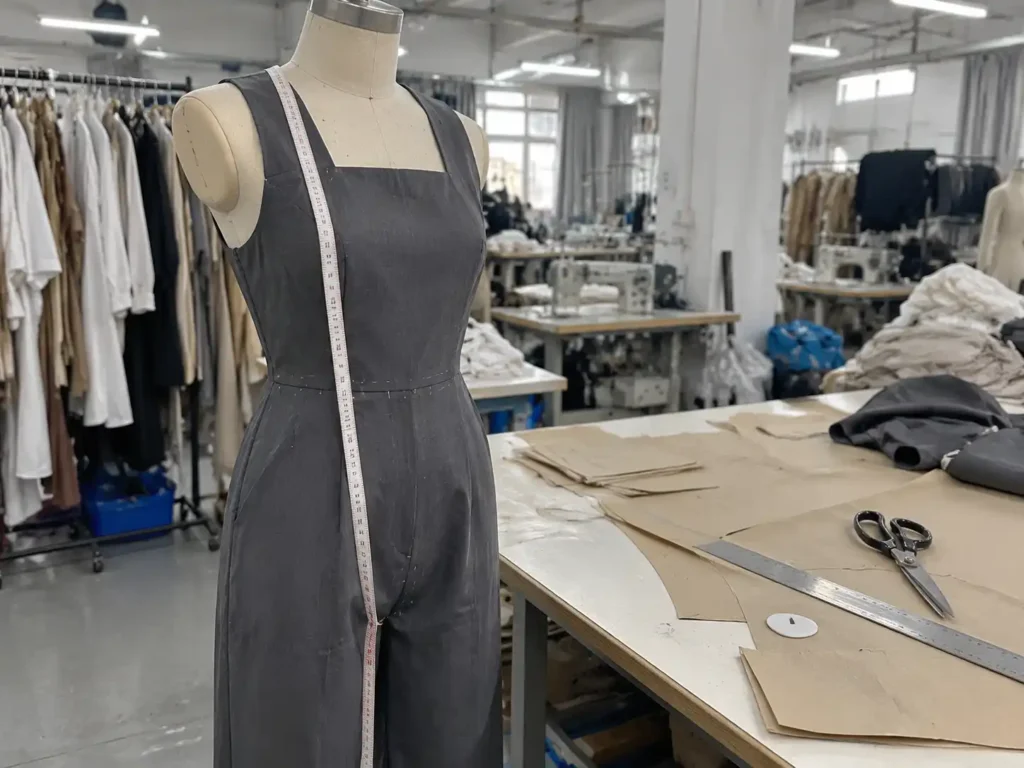
How Do You Adjust Jumpsuit Torso Length?
Adjust jumpsuit torso length at the location where the mismatch actually occurs. Length can be added or removed through the bodice, lower torso, or rise while keeping the grainline, waist placement, crotch geometry, and connecting seams balanced. When total girth is already adequate, redistribute existing length instead of automatically making the whole jumpsuit longer or shorter.
How Do You Lengthen a Short Torso?
Begin by identifying whether the shortage is above or below the waist. When the designed waist is visibly high and the front or back waist length is short, adding length to the bodice is normally more logical than lowering the crotch. If the waist sits correctly but the crotch remains tight, the rise becomes the stronger candidate.
On the pattern, length should be added through controlled horizontal adjustment lines rather than at random seam edges. Divide the affected area perpendicular to the grainline, spread it by the required amount, and redraw the side seams and internal shaping smoothly. The goal is to increase vertical travel without unintentionally increasing circumference.
Working in increments of approximately 1–2 cm during early fitting can make the effect easier to judge. A seemingly small change may significantly improve a fitted jumpsuit, particularly when the original shortage is concentrated in only one area. Front and back adjustments do not have to match if the wearer’s body shape requires different amounts.
Every connected component must be checked afterward. Waist seams still need to match, while zipper lengths, pockets, darts, facings, linings, belt loops, and internal support pieces may need to move with the revised pattern. A torso correction is not complete until all construction pieces reflect the same new geometry.
How Do You Shorten a Long Torso?
Shortening requires caution because some fabric that appears excessive while standing becomes functional during sitting. Removing every fold can create a cleaner static silhouette while leaving the finished jumpsuit uncomfortable in normal use. Temporary changes to the sample are therefore extremely useful before the production pattern is altered.
Start with a small horizontal tuck, often around 1 cm, in the suspected area. Reassess waist placement, crotch position, and movement. Increase the reduction only when the first change clearly improves the fit. If the crotch rises into a better position but the waist becomes obviously too high, the reduction is probably being made in the wrong area.
When shortening a paper or digital pattern, maintain the grainline and overlap the selected adjustment line evenly. Redraw side seams, darts, princess seams, and other shaping so they remain smooth. Large reductions may need to be divided between the upper and lower torso rather than concentrated at one line.
Always repeat movement testing after the alteration. If a 3 cm reduction produces a beautiful standing result but introduces pressure when the wearer sits, some of the removed material was not excess at all. It was movement allowance. Good fitting removes unnecessary fabric without removing the space the body needs to function.
How Do You Adjust Rise and Crotch Depth?
Rise, crotch depth, crotch length, and crotch extension describe related but different parts of lower-torso fit. Crotch depth is largely a vertical relationship from the waist toward the seated level. Crotch length follows the body from front waist through the legs to back waist, while front and back extensions provide space for body projection.
When the waist is correctly positioned but the crotch sits too high, additional vertical rise may be needed. Add that length above the crotch curve rather than automatically extending the curve outward. If the vertical depth is adequate but fabric cuts into the front or back body, extension or curve shape deserves closer evaluation.
The front and back should again be treated independently. A fuller seat may require more back extension and perhaps additional back length without changing the front. A prominent abdomen may influence the front rise differently. Equal adjustments made simply for visual symmetry can create excess fabric on the unaffected side.
Before altering the area, mark the waist, hip line, crotch level, grainline, and inseam. Recheck those landmarks afterward because careless crotch changes can rotate the inseam or distort upper-thigh balance. Jinfeng Apparel’s internal jumpsuit development records likewise identify crotch length, waistline, bust, hip, and movement allowance as linked pattern controls rather than isolated dimensions.
How Do You Reposition the Waistline?
Waist placement can often be corrected without changing total girth. That is important when a jumpsuit has enough overall shoulder-to-crotch length but distributes the length incorrectly between the upper body and rise. The garment may feel long in one area and short in another even though the complete measurement appears correct.
Imagine that the intended waist needs to move 2 cm lower while total girth already feels comfortable. Simply adding 2 cm above the waist would increase total length unnecessarily. A better correction may be to add 2 cm to the bodice and remove approximately the same amount from the lower torso, preserving full girth while changing the location of the waist division.
The reverse principle applies when the design waist needs to move higher. Some bodice length may be removed while corresponding room is returned through the lower torso if movement requires it. The exact values depend on the sample rather than a universal formula.
Design intent must remain part of the decision. A fashion jumpsuit may deliberately use a raised or lowered waist to change visual proportions. Fit correction does not mean moving every waist seam to the anatomical waist. It means placing the seam where the design intends while ensuring that the connected torso remains balanced and comfortable.
How Do Fabric and Construction Affect Fit?
Fabric and construction can change the fit of a jumpsuit even when the paper pattern remains identical. Stretch percentage, stretch direction, recovery, fabric weight, drape, lining, closures, waist stabilization, and internal support all influence usable ease. Fit should therefore be approved in a material that behaves closely enough to the intended bulk fabric to reproduce realistic movement and recovery.
How Does Stretch Affect Torso Ease?
Stretch can make a marginally short pattern appear wearable because the textile extends when the wearer sits or reaches. That can be useful when it is intentionally engineered, but it becomes risky when the pattern depends on uncontrolled fabric extension to compensate for incorrect torso length. The garment may gradually pull at seams, distort the crotch, or lose shape during wear.
Stretch percentage can be tested using a measured fabric section. For example, if a 10 cm section extends comfortably to 12 cm without excessive force, the measured stretch is about 20%. If it reaches 14 cm, the result is approximately 40%. The same test should be performed across both relevant fabric directions because many knits behave very differently lengthwise and crosswise.
A fabric with 40% crosswise stretch but only 5–10% lengthwise stretch may accommodate bust and hip circumference effectively while providing little help with shoulder-to-crotch length. Calling such a material simply “stretch fabric” hides an important fit limitation.
Recovery deserves equal attention. Extend the same measured sample several times, release it, and compare it with the original dimension. Poor recovery can create bagging at the seat, knees, waist, or elbows even when the first fitting looks excellent. Usable stretch, direction, and recovery should therefore be recorded together during development.
How Do Wovens and Knits Fit Differently?
Woven jumpsuits usually rely more heavily on pattern ease because the fabric contributes relatively little mechanical extension. Sitting comfort needs to be engineered through full girth, rise, hip, seat, and crotch dimensions. Close woven silhouettes therefore require particularly careful balance because the pattern must supply freedom without looking loose.
Knits can create a closer silhouette because the material expands around the body. However, horizontal stretch should not be confused with vertical torso capacity. A knit that stretches generously around the hips but very little along the grain can remain surprisingly restrictive between the shoulder and crotch.
Fabric substitution is one of the most common reasons an established fit suddenly changes. A jumpsuit developed successfully in ponte should not automatically move into rigid crepe using exactly the same finished measurements. The woven version may need additional girth, different hip ease, modified rise, a new closure system, or another fit sample.
The reverse problem also occurs. A woven block copied into high-stretch jersey can create excessive fabric and weak waist definition. When one design is offered across several textile families, each fabric group should be treated as a fit program of its own rather than assuming the silhouette alone determines the pattern.
How Do Linings and Zippers Affect Fit?
The outer fabric is not always the layer that controls movement. A stretch shell paired with a rigid lining can behave much more like a non-stretch garment because the lining reaches its limit first. The wearer may report unexpected restriction even though the shell looks smooth and appears to contain enough ease.
Lining length through the torso and crotch should therefore be checked independently. A lining attached tightly at the waist, neckline, or zipper can prevent the outer fabric from redistributing during sitting. Similar restrictions may come from power mesh, bra cups, boning, waist stay tape, facings, internal panels, or other structural components.
Zippers also create relatively stable lines in a garment. A long center-back zipper does not stretch like the surrounding jersey or stretch woven. When the pattern relies too heavily on textile extension, tension can accumulate along the zipper and produce rippling, pulling, or discomfort during movement.
Fit approval should always take place with every intended closure fastened and the major internal components installed. A sample that feels comfortable only when the zipper is partially open has not passed a realistic fit test. Construction is part of the fit system rather than a separate finishing issue.
Do Fitted Jumpsuits Need Different Ease?
Fitted jumpsuits need more controlled ease, not an absence of ease. A close silhouette can use small or negative horizontal ease in selected stretch areas, but the garment still requires sufficient vertical room for sitting and bending. Removing ease uniformly from bust, waist, hip, and torso can produce a garment that works only while the wearer stands very still.
Pattern shaping helps reconcile the conflict between appearance and movement. Darts, princess seams, curved side seams, waist seams, stretch panels, and internal shaping can keep the silhouette visually close while retaining useful room in less noticeable areas. The aim is to hide functional ease within good shaping rather than eliminate it.
Highly fitted evening and party jumpsuits are particularly demanding because the design may call for a secure bust, narrow waist, smooth hip, and high crotch simultaneously. Those requirements compete with the body’s need to lengthen and spread during sitting. Reliable stretch can help, but it cannot permanently rescue incorrect torso proportions.
A strong fitted jumpsuit usually combines accurate vertical body relationships with controlled circumference, appropriate fabric recovery, and sufficient movement room. The garment should feel secure rather than restrictive. That difference is small on a technical drawing but very obvious to the person wearing the finished product.
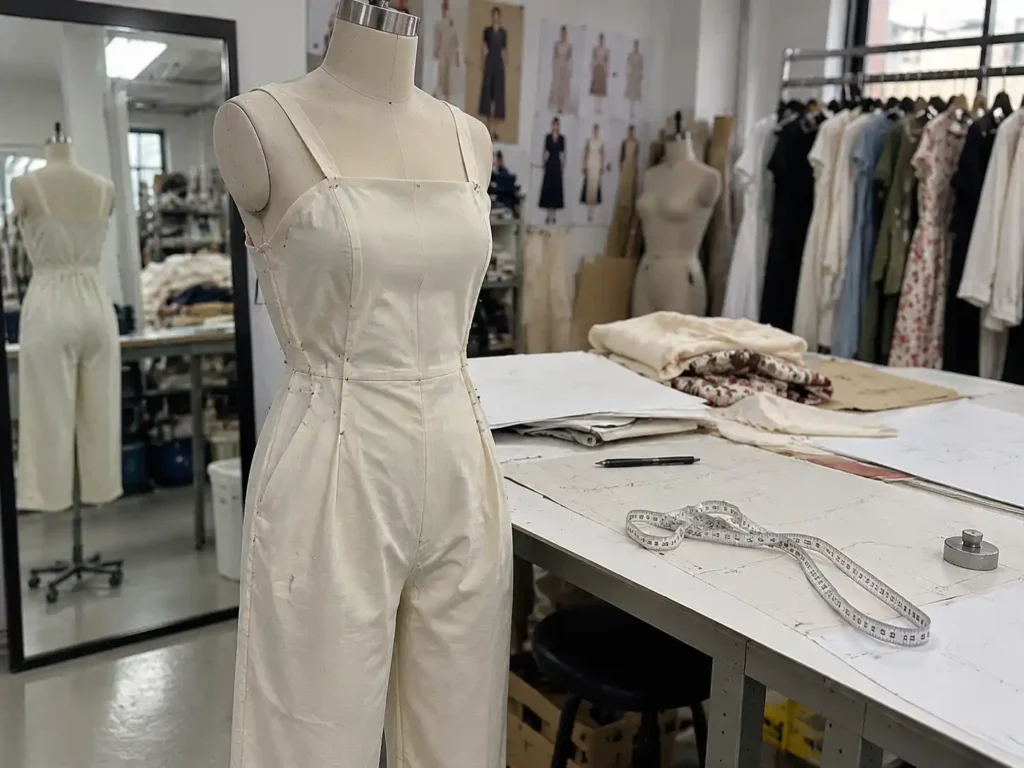
How Do You Validate Fit Before Production?
Validate jumpsuit fit with a measured fit sample, front-side-back evaluation, repeatable movement tests, and a review of the intended size range. Every approved correction should be transferred into the final pattern, measurement specification, lining files, construction details, grading rules, and QC checkpoints before bulk cutting. One attractive base-size sample is not enough evidence of production-ready fit.
What Should a Fit Sample Confirm?
A fit sample should confirm four things at the same time: the silhouette matches the intended design, the wearer can move comfortably, the critical measurements can be recorded, and the construction can be reproduced consistently. Fitting therefore needs to move beyond a simple visual judgment of whether the sample “looks good.”
Begin with stable landmarks such as shoulder position, neckline level, bust placement, design waist, hip level, crotch position, side seam, inseam, and leg length. Compare the garment with the specification and note where a correct numerical measurement produces an incorrect visual result. That difference often reveals a balance issue rather than a circumference issue.
Photograph the sample from the front, back, and both sides under consistent conditions. Side views are especially useful for detecting waist tilt, front-back imbalance, seat shape, and side seams that swing away from their intended position. Repeat selected photographs after movement if a problem appears only after sitting.
Fit comments should translate directly into pattern actions. “The torso feels strange” provides little technical value. “Add 1 cm to front bodice length below the bust” or “increase back rise while maintaining waist position” gives the pattern maker a measurable task that can be checked in the next sample.
How Do You Test Sitting, Bending, and Walking?
Movement testing should be consistent enough that one sample can be compared fairly with another. The goal is not to make every fashion jumpsuit suitable for athletic activity. The goal is to reproduce the movements a customer is likely to make during ordinary wear and see whether the garment remains balanced.
A practical sequence can include walking 8–10 normal steps, taking one longer stride, sitting fully in a chair, leaning slightly forward, returning to standing, reaching both arms forward, raising both arms, bending gently at the waist, and performing a shallow squat when appropriate for the style.
During each movement, observe the shoulders, waist, seat, and crotch rather than focusing only on comfort comments. If the waist rises slightly and then returns naturally, the garment may have adequate movement capacity. If it rises and stays displaced, some part of the torso may be too short or restricted.
Jinfeng Apparel’s documented fit-review process uses front, back, side, walking, and sitting observations when needed and connects those observations with adjustments to waist position, hip ease, straps, armholes, and crotch length. The value of such a process is consistency: movement becomes something that can be reviewed and recorded rather than a vague final impression.
How Do You Grade Torso Corrections?
A good fit in one sample size does not guarantee a good size range. Jumpsuit grading has to consider vertical proportion as well as circumference because the relationship among bodice length, waist level, rise, hip depth, and crotch extension changes as bodies become smaller or larger.
After a base pattern is corrected, determine whether the alteration represents a general block problem or an individual fit-model characteristic. A systematically short rise in the base pattern should usually influence the grade system. A highly specific posture correction made for one person should not automatically be applied identically to every size.
Important vertical grading points include front waist length, back waist length, crotch depth, front and back rise, hip depth, total torso length, and finished garment length. Front and back crotch extensions also deserve separate attention because body projection does not grow in exactly the same way as circumference.
Extended, petite, and tall ranges require particular care. A tall customer may need substantially more torso length without the same increase in inseam, while a petite customer may require a shorter rise despite having average bust or hip measurements. Size-set fitting remains one of the most reliable ways to confirm that good base-size balance survives the grading process.
What Fit Data Should Be Locked for Bulk?
Before bulk cutting begins, every accepted fitting decision should exist in a controlled technical record. The final pattern revision, measurement specification, approved sample, lining pattern, construction file, and grading rules need to describe the same garment. If one document still reflects an earlier sample, the original fit problem can easily reappear during production.
Critical records normally include full girth or another vertical control measurement, front and back waist length, waist and hip circumference, front and back rise, crotch depth, crotch extension when specified, shoulder and armhole measurements, inseam, fabric stretch information, lining construction, zipper placement, internal support details, fit-model size, and approved grading rules.
Movement observations should also be retained when they influenced a correction. A note such as “back rise increased after seated fit test” explains the reason behind a pattern change far better than an unexplained numerical revision. Such records become especially useful during repeat orders or when a similar silhouette is developed in another material.
Jinfeng Apparel’s pattern and sampling resources include 7+ senior womenswear pattern makers, two sample rooms, and 20+ sample machinists, with documented jumpsuit controls covering areas such as crotch length and fit balance. For brands developing custom jumpsuits, the practical value of a structured sampling system is not simply producing one good sample; it is converting approved fit into a pattern and specification that can be repeated consistently in bulk.
Improving jumpsuit torso fit is ultimately about distribution, not simply adding or removing fabric. Full girth has to provide enough room for movement without creating a visibly low crotch. The waist has to sit where the design intends without stealing necessary length from the rise. The crotch has to accommodate the body without becoming the place where every unrelated fitting problem is corrected.
The most reliable development process is therefore straightforward in principle: measure the body carefully, compare those measurements with the actual pattern, identify where the imbalance occurs, make one controlled correction at a time, and test the revised garment in motion. When those steps are documented properly, fit becomes less dependent on guesswork and more repeatable across fabrics, sizes, sampling rounds, and production orders.
For fashion brands developing fitted or fashion-led jumpsuits, early technical attention can prevent small pattern problems from turning into larger commercial ones. A torso that is consistently short across a size run may contribute to discomfort and returns, while unnecessary excess can weaken the intended silhouette. Working through pattern development, fit samples, textile behavior, grading, and bulk controls as one connected process gives the product a much stronger foundation before production begins.
Frequently Asked Questions
How Should a Jumpsuit Fit in the Torso?
A well-fitted jumpsuit should follow the intended shoulder, bust, waist, hip, and crotch positions without producing strong vertical pulling or excessive fabric collapse. The wearer should be able to sit, walk, bend, and reach normally without the crotch cutting upward or the shoulders being pulled downward. Some functional ease is necessary even in close-fitting styles, so a perfectly wrinkle-free standing fit is not always the most comfortable or technically correct result.
Why Does My Jumpsuit Ride Up at the Crotch?
A jumpsuit can ride up because the full torso girth is too short, the rise lacks vertical length, the front or back crotch extension is insufficient, or the length is distributed incorrectly between the bodice and lower torso. Check the waistline first. If the waist is also pulled upward, overall torso length deserves attention. If the waist stays correctly positioned while pressure remains localized at the crotch, the rise or crotch shape is more likely to require adjustment.
How Do You Lengthen a Jumpsuit Torso?
Lengthen a jumpsuit at the area where the shortage actually occurs rather than simply lowering the entire crotch. If the waist sits too high, additional length may belong in the bodice. If the waist is correct but the crotch pulls upward, the rise may need more room. Pattern alterations are usually made through controlled horizontal adjustment lines so grainlines and seam balance remain stable, followed by a new fit sample and movement test.
How Much Torso Ease Should a Jumpsuit Have?
There is no universal torso-ease number because the correct amount depends on fabric stretch, silhouette, lining, sleeve construction, waist treatment, and intended use. Fitted woven jumpsuits generally need positive vertical ease, while stretch styles may work with less if the textile provides useful lengthwise stretch and recovery. Several centimeters of functional full-girth ease can be a practical development starting point, but the final amount should always be approved through sitting and movement rather than a number alone.
Can Jumpsuits Be Adjusted for a Long Torso?
Yes. A long-torso fit can be developed by adding length to the bodice, rise, or both according to the wearer’s proportions. The important step is determining where the additional length is needed. Adding all of it at the crotch can create a low, baggy appearance, while adding everything above the waist can move the waist seam too low. A balanced long-torso adjustment preserves the intended waist placement while supplying enough shoulder-to-crotch room for movement.
Should a Jumpsuit Fit Be Tested While Sitting?
Yes. Sitting is one of the most important jumpsuit fit tests because the pelvis rotates, the back body lengthens, the seat spreads, and the garment needs more functional space than it does while the wearer stands upright. A sample that looks correct in a static pose can become tight through the crotch or shoulders when seated. Fit approval should therefore include sitting, standing, walking, and basic reaching before the final production pattern is released.
Share This Article :

Jerry Lee
Categories

Latest blogs


Table of Contents
Here, developing your OEM/ODM private label clothing collection is no longer a challenge—it’s an excellent opportunity to bring your creative vision to life.