Skip to content

How to Develop a Halter Dress Pattern: From Bodice Block to Production-Ready Fit

Your trusted Women’s Apparel Manufacturer from China

A halter dress often looks surprisingly simple on a sketch. Remove the conventional shoulder, sweep the neckline toward the neck, expose part of the back, and the silhouette seems almost finished. Once the first sample goes onto a body, however, the pattern starts telling a different story. The neck may carry too much weight, the armhole can expose the side bust, the front neckline may gape, or a low back may remove more support than expected. These are not unusual mistakes; they happen because a halter changes the basic load path of the bodice.
Developing a halter dress pattern means reshaping a reliable bodice block so the neckline, bust, armhole, neck strap, side body, and back work together. A commercial pattern also has to match the intended fabric, survive fitting and movement, grade logically across the size range, and provide clear measurements and construction references for repeatable production.
The most revealing moment usually comes after the first toile or sample is tied at the neck. A paper pattern may look perfectly balanced on a table, yet satin can pull the front downward, jersey can relax around the neckline, and an open back can make the bust less stable than the designer expected. Good halter development therefore happens through an ongoing conversation between pattern, fabric, body, and sample rather than through a single drafting formula.
What Makes a Halter Dress Pattern Different?
A halter dress redirects upper-body support away from a conventional shoulder seam toward the neck, upper bust, side body, underbust, and back. Because those areas share the garment load, neckline contour, armhole shape, bust volume, strap length, and back tension must be developed together. A halter can look correct in a flat pattern yet become unstable once worn if any of these relationships are poorly balanced.
Support Paths and Balance
A standard sleeveless bodice normally distributes garment weight through several relatively stable areas: the shoulders, upper back, armholes, side seams, waist, and sometimes internal structure. When the shoulder is cut away for a halter neckline, one of those major support zones disappears. The pattern then has to redistribute the load through the neck connection, upper chest, side bust, underbust, back edge, and whatever internal support remains inside the garment.
That redistribution explains why simply drawing a new line from the armhole to the neck rarely creates a reliable halter. The original block was balanced around a shoulder seam and a conventional armhole. Removing those areas changes the direction of tension across the front. Fabric can begin to pull toward the neck, excess length may appear above the bust, and a previously stable side seam can move because the garment is now hanging from different points.
The effect becomes stronger when the dress has a low or fully open back. A higher back naturally provides more horizontal support around the torso, while a very low back removes that support and asks more from the side body, underbust shaping, neck strap, lining, elastic, or internal mesh. If the only way to make a sample feel secure is to tie the neck very tightly, the pattern is probably relying on the neck to solve a problem that should be shared elsewhere.
A well-balanced halter should remain stable without excessive tension. The neckline should stay close to the body, the bust should remain covered during movement, the armhole should not flare outward, and the back should not collapse when the wearer reaches forward or sits down. Those relationships are more important than how tidy the pattern looks when it is lying flat on a cutting table.
Neckline and Armhole Geometry
The long diagonal edge between the neck and underarm is one of the most sensitive parts of the pattern. Depending on the design, portions of this edge may fall close to the bias direction, making them more vulnerable to stretching, sewing distortion, and gaping. Even a small amount of excess edge length can become highly visible once the neckline is sewn, turned, pressed, and placed around a three-dimensional bust.
For fitted woven halters, some neckline contouring is often necessary. The pattern maker may remove a small wedge of excess near the upper bust and transfer that volume into an existing dart, underbust seam, princess seam, or another shaping area. The correction may only be a few millimeters, but those few millimeters can determine whether the neckline hugs the body or stands away from it.
Armhole geometry needs the same level of attention. Fashion sketches often show a dramatically low side line because it lengthens the body visually and creates a more open, sensual silhouette. On an actual body, the pattern still has to protect the side bust. Raising the underarm by approximately 5–10 mm can make a visible difference in some fitted styles, although the correct adjustment depends on bust shape, neckline depth, fabric stretch, and the intended amount of exposure.
Not every armhole problem should be solved by raising the side seam. If the lowest point is already correct but the edge opens away from the body higher up, localized contouring is more appropriate. Raising the entire armhole may restrict movement while leaving the original excess volume almost untouched.
Different Halters Need Different Structures
The term “halter dress” covers a wide family of designs rather than one universal pattern. A high-neck woven halter, a plunging satin cocktail dress, a gathered chiffon resort style, and a fitted stretch-mesh mini can all sit in the same retail category while requiring very different approaches to shaping, support, ease, lining, and closure.
A high-neck halter generally retains more fabric across the upper chest, which allows tension to be distributed over a broader area. A plunge halter removes more center-front coverage, so side support and neckline stabilization become more important. A gathered halter intentionally adds volume at the neck, while a close-fitting halter removes unwanted fullness through darts, seams, stretch reduction, or carefully placed contouring.
The back changes the strategy again. A halter with a regular center-back zipper has far more horizontal support than a fully backless design. A tie-back style gives the wearer some adjustment, while a fixed back requires tighter control over circumference and elastic behavior. A bra-friendly halter must preserve different areas of coverage from a party style designed to be worn with built-in cups.
Before drafting, describe the design in structural terms rather than only visual ones. Decide whether the bodice is fitted or relaxed, woven or stretch, high or plunging, fixed or adjustable at the neck, high-backed or backless, lined or unlined, and whether conventional underwear needs to remain hidden. These choices determine where the pattern can safely remove fabric and where support needs to be added back.
Which Measurements and Blocks Do You Need?
Start from a bodice block that already represents the target fit rather than drafting the halter directly from a fashion sketch. Bust, upper bust, underbust, front length, side height, armhole position, back height, neckline depth, and neck-strap length are especially important. Stretch styles should normally begin from a stretch-appropriate block because fabric extension changes ease, neckline tension, and overall balance.
Start With a Reliable Block
The base block is the foundation of every later correction, so it should already sit well around the bust, waist, armhole, and torso before the shoulder is converted into a halter. If the original block has the wrong bust-point location, poor front-to-back balance, or an unstable armhole, converting it into a halter usually makes the weakness more visible rather than disguising it.
For a fitted cocktail or party dress, a close-fitting bodice block is normally a better starting point than a loose dress block. For a relaxed resort style, extra ease may be intentionally built into the silhouette, so a softer block can make more sense. A fitted jersey or stretch-mesh halter should ideally begin from a block created for fabrics with comparable extension and recovery instead of simply reducing the width of a woven block.
The base size also matters. Commercial development works best when the starting size reflects the brand’s established fit model or central selling size rather than a convenient mannequin measurement. Every grading decision later radiates outward from the base pattern. A small fitting error in the base size can therefore become a repeating problem across an entire size range.
The block should also reflect the final wearing position of the waist and bust. Halter styles often expose more of the shoulders and back, so changes in front length become easy to see. If the bodice is short over the bust, the waistline can rise at the front and the wearer may tighten the neck strap to compensate, creating discomfort that appears to be a strap problem but actually starts much lower on the pattern.
Measure the Upper Body Carefully
Bust circumference alone does not describe enough of the body for a reliable halter. Upper-bust and underbust measurements help describe how quickly the torso changes around the chest, while front bodice length tells the pattern maker where the bust and waist need to sit vertically. Side height controls underarm coverage, and back height determines how much structural support remains once the back is opened.
Neck and strap measurements should be treated as functional measurements rather than decorative details. A fixed neckband needs an accurate finished neck circumference plus closure allowance, while an adjustable tie must be long enough to accommodate tying without allowing the front bodice to drop too low. The strap should be measured along its intended wearing path rather than as a simple straight line between two pattern points.
The following measurements are especially useful when developing a fitted halter style:
Measurement | Main Purpose | Main Risk if Incorrect |
Bust | Controls overall chest fit | Compression or loose front |
Upper bust | Controls upper neckline fit | Gaping above bust |
Underbust | Supports fitted construction | Poor stability |
Front bodice length | Sets bust-to-waist balance | Front waist riding upward |
Side seam height | Controls underarm coverage | Side-bust exposure |
Back height | Controls rear stability | Loose or unstable back |
Neck circumference | Controls fixed-neck comfort | Choking or looseness |
Halter strap length | Sets front hanging position | Neck pressure or low neckline |
Neckline depth | Sets coverage | Excess exposure |
Waist | Anchors the bodice | Riding or twisting |
Measurements should be written with clear points of measure because different people can measure the same curved area differently. A neckline measured along the finished seam is not the same as one measured straight across the garment, and even a small inconsistency becomes important when the style relies on a close, controlled upper edge.
Choose Ease From Fabric Behavior
Ease should come from the intended silhouette and the actual material rather than from a universal formula. A fitted woven halter still needs enough positive ease for breathing and movement, while a stretch style may use zero or negative ease. The amount of reduction should reflect measured extension and recovery rather than a supplier description such as “high stretch” or “soft stretch.”
As a practical development reference, some fitted woven bodices may begin with roughly 1–4 cm of total bust ease and around 0.5–3 cm at the waist. These figures should not be treated as fixed standards because structured eveningwear, relaxed resortwear, fuller-bust blocks, and individual brand fits can sit well outside those ranges.
Stretch garments are better evaluated by percentage. A fabric with dependable extension and strong recovery may work with several percent of negative ease, while weak-recovery jersey may need much less reduction even if it initially stretches easily. An approximate 2–8% negative-ease range can be useful for early testing in some close-fitting styles, but the final number should always be validated in the actual fabric.
A simple 10 cm strip test makes the decision more measurable. If a 10 cm sample comfortably reaches 12 cm, its working extension is approximately 20%. If it reaches 14 cm, the figure is approximately 40%. Release the fabric and measure it again immediately and after a short rest. A material that remains noticeably longer after release may continue relaxing during wear, allowing the neckline or bust area to drop after the garment has been worn for a while.

How Do You Draft the Halter Bodice?
Draft the halter by establishing the new neckline and armhole on a proven base block, controlling excess edge length, redistributing bust-dart volume, and developing the back and neck closure at the same time. The pattern should then be checked for seam matching, grain direction, side coverage, facings or lining, strap placement, construction marks, and seam allowances before the first sample is cut.
Shape the Neckline and Armhole
Begin by marking the intended neck connection and the final underarm level on the base block. Draw the halter line between those points while preserving the side coverage required by the design. At this stage, treat the line as a working line rather than a finished edge because its shape will probably change after the first contour and fitting review.
Once the conventional shoulder is removed, inspect the new neckline for excess length. On a dress form or toile, a small wedge of fabric may open above the bust. Pinning out that wedge shows where the pattern needs to lose length. The removed amount can then be transferred into the bust dart, waist dart, underbust seam, princess seam, or another shaping area rather than simply disappearing.
Contour corrections can be surprisingly small. Removing only 3–6 mm at a strategic location may bring a fitted neckline noticeably closer to the body. Deep plunges, fuller busts, and very open sides can require larger changes, but aggressive corrections should be avoided before a real fitting because too much reduction can pull the neckline and create pressure elsewhere.
The armhole should flow smoothly into the side seam without producing a sharp break. If the side coverage is too low, the underarm can be raised and the curve redrawn. If the height is already acceptable but the edge stands away from the body, localized contouring is usually more effective than raising the entire armhole.
After all manipulations, redraw the neckline with a smooth curve. A production neckline should look intentional rather than like a series of straight corrections connected together. This is especially important in satin, mesh, and other fabrics where even a small irregularity becomes visible once the edge is turned and pressed.
Move the Bust Dart With Purpose
Dart manipulation is central to halter development because the new neckline removes an area that previously helped control bust volume. Dart volume represents three-dimensional shaping, so closing a dart at one location normally means opening equivalent volume somewhere else unless the fabric itself provides enough stretch to absorb the difference.
For a fitted halter, the original side dart may be rotated toward the neckline, waist, center front, underbust, or a style seam. For a gathered halter, part of the volume can move toward the neck so the shaping becomes visible fullness. In a princess-line bodice, dart volume can be absorbed into vertical seams, allowing smoother control over the bust and making it easier to integrate cups or structured lining.
Moving too much volume directly into the neckline can create an unnecessarily bulky or gathered look. Splitting a large dart between two positions often creates a cleaner surface, particularly in satin or structured woven fabrics. The final approach depends on the design language of the dress rather than on one preferred drafting method.
The new dart point should normally finish short of the actual bust apex. A development reference of roughly 20–35 mm from the apex can work for many conventional bodices, although fuller busts, softer fabrics, and different dart positions may require another distance. The goal is to create volume without making the finished garment appear pointed.
After every major manipulation, walk the adjoining seams and true the pattern. Confirm side-seam length, waist continuity, neckline length, and balance marks. A technically correct dart rotation can still create a poor garment if the new edges are not smoothed or if the front and back seams no longer match.
Build the Back and Neck Closure
The front and back should be developed as one system because back height directly affects how much support the neck and side body must provide. A relatively high back with a zipper can anchor the side seams effectively, while a fully open back removes that support and asks more from the underbust, side coverage, neck connection, elastic, and internal structure.
For an adjustable neck tie, decide whether the strap grows from the front bodice or is attached as a separate piece. Separate straps often give more control over grain direction, width, interfacing, and turning. Integrated straps can create a clean visual line but may become difficult to turn when they are narrow or when the fabric is thick.
A fixed neckband requires more precise measurement because the wearer cannot compensate by tying the garment differently. Finished neck circumference, closure overlap, button or hook position, and any internal interfacing need to be included in the calculation. A band that is slightly too short can feel restrictive, while one that is too long may allow the entire front bodice to drop.
Strap width should also be treated as a comfort issue. A narrow tie may work well on a light chiffon dress, while the same width can become uncomfortable on a heavier satin maxi or embellished evening style. Wider bands spread pressure across a larger area of the neck and can sometimes improve comfort without changing the visible silhouette dramatically.
Finish the Working Pattern
Once the structural balance is working, add the construction information needed for sampling. Facings or lining should follow the final neckline accurately, and seam allowances should suit both the fabric and the chosen finishing method. Curved necklines generally turn more cleanly with manageable allowances rather than very wide ones that create bulk inside the edge.
For many light- to medium-weight dresses, approximately 6–10 mm around a curved neckline can be a useful development reference, while side seams often sit around 10–15 mm. Center-back zipper seams may use approximately 15–20 mm when extra room is needed for zipper installation or controlled fitting. Hem allowances vary much more widely and may range from narrow rolled finishes to 20–40 mm turned hems.
Those dimensions are workshop references rather than universal rules. A baby hem, bound edge, bonded finish, heavily embellished fabric, bias-cut satin, or layered mesh can require completely different construction allowances. The finishing method should be chosen before the pattern is considered complete.
Mark grainlines, center front, center back, bust point, waistline, neck attachment, strap placement, zipper position, gathering limits, matching notches, lining boundaries, and stretch direction where relevant. A first sample should be cut from a clean working pattern rather than a draft covered with outdated lines, because an unclear pattern makes it impossible to know whether a fitting problem came from the design or from someone following the wrong mark.
How Do Fabric and Support Change the Pattern?
Fabric can change the performance of a halter as much as the original pattern. Drape, stretch, recovery, thickness, transparency, weight, and surface friction affect neckline tension, bust support, vertical growth, ease, lining, and strap dimensions. Pattern and material should therefore be developed together. Internal support such as cups, elastic, power mesh, or shaped lining should solve a specific structural need rather than being added automatically.
Match Pattern to Fabric
The same paper pattern can produce completely different results when cut in different fabrics. Satin can expose every pulling line around the bust and neckline because its surface reflects light strongly. Chiffon may drape beautifully but offer very little structural support. Rayon and viscose can grow vertically when suspended, while jersey can relax around a neckline if the recovery is weaker than expected.
Stretch satin is especially variable because the term can describe fabrics with very different amounts of elastane, base constructions, and recovery. A stretch satin that comfortably extends 15% behaves differently from one that extends 35%, even when both look similar in a product photograph. The pattern reduction, neckline stabilization, and lining choice need to reflect the actual fabric rather than its commercial name.
Mesh creates another set of decisions. Lightweight stretch mesh can provide considerable mobility while offering very little support on its own. Power mesh can add internal control without changing the outer appearance much, while double-layer mesh can improve coverage and reduce edge distortion. The direction of strongest stretch should be established before pattern placement.
The following table provides practical comparisons for common halter fabrics:
Fabric | Typical Halter Use | Main Pattern Concern | Useful Development Check |
Satin | Cocktail, evening, party | Pull lines and bias growth | Hang and seam test |
Stretch satin | Fitted partywear | Recovery variation | Stretch/recovery test |
Chiffon | Resort and gathered styles | Low support and transparency | Lining and edge test |
Jersey | Fitted or casual halter | Neckline growth | Repeated recovery test |
Rib knit | Bodycon halter | High extension | Width after wear |
Mesh | Party and cut-out styles | Transparency and distortion | Layer and stretch test |
Power mesh | Internal support | Strong tension | Outer-layer compatibility |
Rayon/viscose | Resort and vacation | Vertical growth | 12–24 hour hang test |
Woven crepe | Occasion and cocktail | Limited stretch | Bust and armhole fitting |
For long dresses or fabrics that are prone to growth, hanging the sample for approximately 12–24 hours before final hem correction can reveal changes that would otherwise appear only after production or customer wear.

Treat Stretch as a Measured Variable
Avoid treating “stretch” as a yes-or-no material property. Measure it in both the crosswise and lengthwise directions because halter patterns respond differently to horizontal and vertical elongation. Horizontal stretch mainly changes circumference and bust fit, while excessive vertical stretch can allow the entire front to drop under garment weight.
A simple test begins with a 10 cm section of fabric. Stretch it comfortably rather than forcing it to its maximum mechanical limit. If the sample reaches 13 cm, the practical extension is approximately 30%. Repeat the process lengthwise, then release the fabric and record how closely it returns to its original dimension.
Recovery matters just as much as extension. A material that stretches to 13 cm and returns almost immediately to 10 cm behaves very differently from one that remains at 10.5 or 11 cm. Weak recovery can cause a neckline that initially looks secure to become lower and looser after an hour of wear.
Repeat the test several times rather than stretching the sample only once. Real garments are subjected to repeated body movement, particularly at the neck, armhole, and back. A fabric that performs well during a single pull may relax after several cycles.
If the fabric changes after fitting approval, the pattern should be reconsidered. Replacing a 25% stretch jersey with a 40% stretch jersey while keeping the same pattern can change neckline depth, side coverage, and bust position enough to produce a noticeably different garment.
Use Lining as Part of the Structure
Lining does more than reduce transparency. In a halter dress it can stabilize the neckline, reduce outer-fabric stretching, provide a surface for cups or support components, cover internal construction, and help distribute tension around the bust and back. The lining should therefore be included in the fitting process rather than added at the end.
The outer fabric and lining need compatible behavior unless the contrast is intentional. A highly elastic jersey combined with a rigid woven lining will dramatically reduce the garment’s effective stretch. That may be useful when the goal is to stabilize a fitted bodice, but the reduction needs to be accounted for in the pattern and sample.
Power mesh can provide a lightweight internal support layer, particularly in fitted party or low-back dresses. It can support the underbust or side body while remaining relatively thin, although its strongest stretch direction needs to be controlled. If positioned incorrectly, it can pull the bodice sideways or distort the outer fabric.
Cups are useful in some non-bra-friendly designs, but their position needs to follow the actual bust point. A cup placed even 10–15 mm too high or low can create discomfort or an unnatural shape. Cup position also needs to grade rather than simply moving outward as garment circumference increases.
Build Support Where the Garment Needs It
Internal support should solve a clear problem. A softly gathered chiffon resort halter may need little more than a lined bodice and an adjustable tie. A fitted low-back party dress may require cups, an underbust elastic, power mesh, side reinforcement, or a shaped internal layer because there is far less fabric available to stabilize the body.
Elastic can be useful along the underbust, back edge, or other strategic areas, but stronger tension is not automatically better. Excessive elastic can pull side seams backward, create puckering, or make the wearer feel compressed. The correct length and recovery need to be tested in combination with the actual outer material.
When a sample feels unstable, ask where the garment is currently carrying its weight. If the answer is almost entirely at the neck, simply tightening the tie will usually make the garment less comfortable without solving the underlying balance problem. Better support may come from the underbust, a fitted back, a more stable side panel, a wider neckband, power mesh, cups, or a lining structure.
Halter development benefits from treating comfort and stability as connected problems rather than separate ones. A secure garment that hurts the neck is not a successful fit, and a comfortable garment that moves away from the body when the wearer bends forward is equally unfinished.
How Do You Test and Correct the Fit?
Test the first halter sample on a body using the intended fabric or one with closely comparable stretch, drape, and weight. Evaluate the dress while standing, sitting, walking, bending, reaching, and lifting the arms. Corrections should be measurable and address the source of the problem rather than hiding symptoms by tightening the neck tie or trimming the hem.
Fit the First Sample in Motion
Begin the fitting by positioning the garment correctly at the bust and waist before adjusting the neck strap. If the strap is pulled tight immediately, it can lift the entire front bodice and temporarily hide incorrect front length, bust placement, or upper-body looseness. The first assessment should therefore happen with the garment sitting as naturally as possible.
Check the front, side, back, and three-quarter views. The waistline should remain level unless the design intentionally changes it, and side seams should stay reasonably vertical. Look at the position of the bust point, the relationship between the neckline and upper bust, underarm coverage, back height, and the way the strap approaches the neck.
Movement testing is essential. Ask the wearer to raise both arms, reach forward, sit down, turn the torso, and lean slightly. A halter that photographs perfectly while standing can expose the side bust when the arms lift or open at the neckline when the wearer bends forward.
Soft or stretch fabrics should be worn for a short period before the fitting is considered complete. Ten to twenty minutes of normal movement can reveal whether the neckline relaxes, the back becomes loose, or the neck strap starts feeling uncomfortable. Some fabrics settle quickly enough that these changes are visible during the fitting itself.
Record corrections numerically. “Fix armhole” is difficult to repeat accurately, while “raise underarm 7 mm and remove 4 mm of excess at upper armhole” gives the pattern maker a clear action and makes the next sample easier to compare objectively.
Correct Gaping and Side Exposure
A gaping neckline is usually an edge-length problem before it is a strap-length problem. Pin the exact excess while the sample is on the body. If the pin creates a wedge pointing toward the bust, transfer that wedge into the paper pattern through neckline contouring or dart manipulation rather than removing equal length from the entire neckline.
Shortening the full neckline can create unwanted tightness close to the neck while leaving the original gape above the bust almost unchanged. Localized corrections are usually cleaner because they target the area where the flat pattern is failing to follow the body.
Underarm exposure requires similar diagnosis. If the whole lower armhole is too low, raise the side seam. If the bottom position is correct but the upper edge stands away from the body, remove localized fullness instead. If movement becomes restricted after correction, check whether the armhole was raised farther than necessary.
Evaluate coverage during sitting and bending as well as standing. Low-cut fashion styles often appear acceptable in front-facing photography but can open significantly during normal movement. For dresses intended for weddings, parties, dinners, or resort use, real-wear coverage should be checked before the visual line is finalized.
Back openness also influences front stability. The more support removed from the upper back, the more carefully the side body, bust, and underbust need to be balanced. Treating the front and back as independent fitting areas usually leads to repeated corrections.
Reduce Neck Pressure
Excessive neck pressure is one of the clearest signals that the garment is not sharing load effectively. Strap length should be checked first, but it should not be treated as the only possible cause. The wearer may have tightened the strap simply because the bust or back felt unstable, meaning the tight tie is actually a reaction to another problem.
Check the front length over the bust. If the waistline is lifting at the front when the halter is tied, the bodice may be too short and the strap may be pulling the garment upward. Adding the missing vertical length can sometimes reduce pressure without changing the visual neckline much at all.
Strap width also affects comfort. A narrow 10 mm tie places pressure over a much smaller surface than a 25–40 mm shaped neckband. Very narrow straps can work on lightweight garments, while heavier satin, layered lining, beads, or a long skirt can make the same width uncomfortable.
Garment weight should never be ignored. A floor-length skirt or dense embellishment can pull strongly downward. If the design relies on the neck as its only vertical support, discomfort is predictable. A better solution may involve a fitted underbust, supportive lining, cups, power mesh, a more stable back, or another internal anchor.
The product-development system documented by Jinfeng Apparel includes halter pattern development within a broader pattern and sampling workflow, supported by 7+ senior pattern makers, two sample rooms, and 20+ sample machinists who work on areas including neckline depth, armhole adjustment, strap length, sample revision, and production-pattern confirmation.
Recheck the Whole Garment
After correcting one problem, look again at the entire dress because fit changes rarely stay isolated. Raising the neckline can change armhole shape. Tightening the back can move the side seam. Lengthening the neck strap can alter bust position and neckline depth. Adding an underbust elastic can affect how the waist and side body sit.
Hem balance can reveal issues that originate much higher in the garment. If the front of a midi or maxi dress becomes noticeably shorter after the neck is tied, the bodice may be lifting. Trimming the hem would hide the symptom rather than solve the balance problem.
Transfer every approved correction to the pattern before cutting the next sample. Avoid building a development process around verbal instructions, pins, and chalk marks that never reach the master file. Once several rounds of undocumented changes accumulate, it becomes difficult to know which version actually produced the approved result.
If the first sample requires multiple structural changes, cutting another sample is usually more reliable than forcing the original garment into approval. A second round may appear to add time, but it is often far less costly than discovering the same instability after hundreds or thousands of garments have already entered production.
How Is the Pattern Prepared for Production?
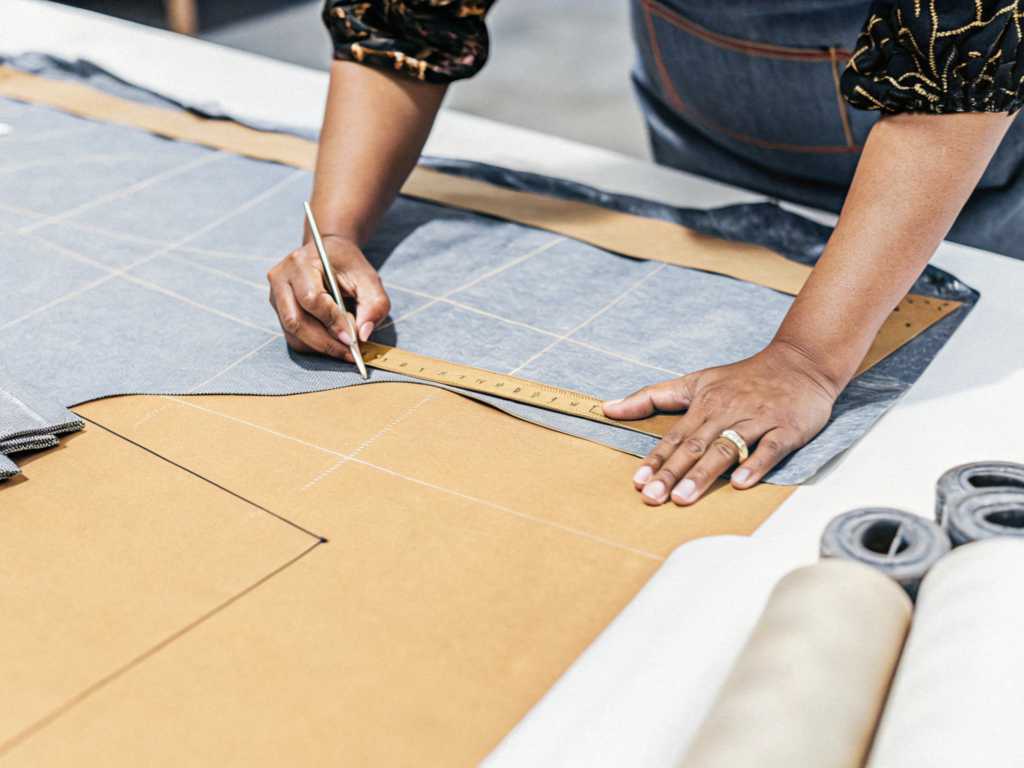
A production-ready halter pattern must reproduce the approved fit across sizes, materials, operators, and repeat orders. Final preparation includes cleaning the master pattern, creating thoughtful grading rules, confirming matching seams and construction marks, defining critical finished measurements, setting realistic tolerances, and validating the complete construction through a pre-production sample made as closely as possible to bulk conditions.
Clean the Master Pattern
Once the fit is approved, create a clean master pattern instead of continuing to use a development draft covered with alternative lines and previous corrections. Redraw curves smoothly, confirm center front and center back, verify the bust and waist references, and walk every joining seam after all fit changes have been transferred.
Outer fabric, lining, facings, elastic, and straps need to match one another accurately. A small mismatch around a long curved neckline can cause rolling or puckering once the garment is sewn. Neckband length, zipper placement, strap attachment, lining boundaries, and any internal support pieces should therefore be checked before the pattern is released.
Use notches only where they communicate useful information. Neckline balance points, underarm joins, waist references, gathering limits, strap attachment, zipper stops, and lining joins are practical examples. Too many marks can become just as confusing as too few.
Every piece should carry the style reference, piece name, size, cut quantity, fabric or lining designation, grainline, and version information. Version control matters because a halter may pass through several neckline or armhole corrections before approval. A good final pattern has little value if the cutting room receives an earlier revision.
Grade the Fit, Not Only the Width
Halter grading should preserve the visual and functional relationship between neckline, bust, armhole, strap, side body, and back. Simply adding standard increments around the bust and waist can cause the largest sizes to become more open or less stable than the approved base size.
Bust position changes both horizontally and vertically through a size range. Darts, cups, underbust seams, and neckline shaping therefore need to follow those changes rather than only moving outward. Larger sizes may require additional shaping or altered grade rules rather than a proportional enlargement of every feature.
Strap length needs controlled grading as well. Increasing it too quickly can lower the neckline substantially in larger sizes, while leaving it unchanged can increase neck pressure. The appropriate change should follow the brand’s body measurements and the actual construction of the halter.
Nested patterns are useful for visual checking. Compare the smallest, base, and largest sizes and look at the silhouette as a group. The neckline should retain the same character, side coverage should remain intentional, and the back should not gradually become too low or too high.
For highly fitted, plunging, or backless designs, sampling another size beyond the base is particularly valuable. One approved base-size sample proves the original pattern concept, but it does not automatically prove that the grading logic maintains equivalent bust coverage and support across the full range.
Lock Measurements and Tolerances
Finished-garment specifications convert the approved sample into measurable production standards. Without them, several sewing lines can work from the same pattern and still produce garments that feel different because strap length, neckline depth, back height, or elastic tension have drifted during cutting and sewing.
The most sensitive halter dimensions usually deserve tighter control than low-risk measurements because relatively small changes can alter fit significantly. The following figures are useful as development references rather than universal apparel standards:
Point of Measure | Example Development Tolerance* | Main Risk |
Halter strap length | ±5 mm | Alters neck pressure and neckline depth |
Neckline depth | ±5 mm | Alters bust coverage |
Underarm height | ±5 mm | Alters side exposure |
Back height | ±5 mm | Alters stability |
Bust circumference | ±10 mm | Alters overall fit |
Waist circumference | ±10 mm | Alters anchoring |
Left/right neckline symmetry | Within 5 mm | Creates visible imbalance |
Dress length | ±10 mm | Creates uneven finished appearance |
Elastic length | Project-specific | Alters back or underbust tension |
*Final tolerances should reflect fabric behavior, garment construction, size range, brand specification, measuring method, and the approved production standard.
Stretch garments require especially clear measuring instructions. A dimension can change depending on whether the garment is completely relaxed, lightly smoothed, or stretched during measurement. Elastic areas should also specify whether the measurement is taken relaxed or extended.
Tolerance should never become a way to excuse poor fit. A garment can technically fall inside several individual tolerances and still feel wrong if the strap, neckline, back, and bust all drift in the same direction.
Validate the PP Sample
The pre-production sample is where development becomes a manufacturing standard. It should use the confirmed outer fabric, lining, cups, elastic, zipper, neck closure, construction method, and other critical components whenever possible. If the production fabric differs materially from the approved fit sample, the relevant fit checks should be repeated instead of assuming the pattern will behave identically.
Before approval, check neckline depth and symmetry, finished strap or neckband length, bust and underbust fit, underarm coverage, back height and tension, lining position, closure behavior, elastic recovery, side-seam balance, dress length, and the relationship between the garment and the approved measurements.
Wear testing still has value at this stage. The completed sample should remain on the body long enough to reveal whether straps lengthen, jersey relaxes, elastic becomes uncomfortable, or the neckline shifts after repeated movement. A garment that looks correct for two minutes may behave differently during an evening of actual wear.
Once approved, the PP sample, final pattern, measurement specification, construction details, and material approvals form the production reference. Jinfeng Apparel’s documented process connects pattern development, sample revision, PP samples, golden samples, bulk control, and quality inspection rather than treating the approved sample as separate from production execution.
Production control should protect fit-sensitive relationships during sewing rather than waiting until final inspection. Strap length, neckline depth, back tension, elastic length, and underarm coverage are much easier to correct when a limited number of garments have been assembled than after an entire order has reached finishing.
A good halter pattern is therefore not finished when one sample looks attractive on a model. It is finished when the neckline remains close to the body, the bust feels secure without excessive neck pressure, the armhole gives the intended coverage during movement, the back contributes the correct amount of support, the fabric behaves predictably, and those relationships remain stable after grading and bulk production.
For fashion brands developing a new halter dress, the most reliable workflow is to begin with a proven block, define the support structure before chasing the visual line, test the actual fabric early, record measurable fitting changes, verify more than one size when the design is fit-sensitive, and lock the approved result into a clear production specification. When a project needs outside pattern, sampling, or manufacturing support, Jinfeng Apparel can work from design references, samples, or technical information to help move a style through pattern development, sample correction, PP confirmation, and production preparation without turning the process into a hard sales exercise.
Share This Article :

Jerry Lee
Categories

Latest blogs
Table of Contents
Here, developing your OEM/ODM private label clothing collection is no longer a challenge—it’s an excellent opportunity to bring your creative vision to life.