 Skip to content
Fabric-Covered Buttons for Occasionwear: Which Fabrics, Styles, and Closures Work Best?

Your trusted Women’s Apparel Manufacturer from China

A fabric-covered button is one of those details that seems almost invisible until it goes wrong. On a satin evening dress, a slightly twisted button can catch the light differently from the rest. On velvet, inconsistent nap direction can make two buttons cut from the same roll appear to be different shades. On a fitted back opening, a button that looks perfect on a trim card may still create gaping, difficult fastening, or an uneven visual line once the garment is worn.
Fabric-covered buttons work best in occasionwear when the cover fabric, button profile, diameter, backing, loop construction, spacing, and closure function are developed as one system. Satin, crepe, lace, organza, velvet, and other formalwear fabrics can all work, but each behaves differently when wrapped around a small form. The most reliable approach is to test the complete button-and-closure assembly on the actual garment fabric before bulk production.
That sounds straightforward, yet it is exactly where many expensive-looking dresses lose polish. Imagine twenty small buttons running down the back of a fitted satin midi dress: one millimeter of extra loop length, a few degrees of fabric rotation, or a small spacing drift repeated across the row becomes visible from several feet away. The button is small, but the repetition magnifies every decision, which is why experienced development teams treat covered buttons as part of garment engineering rather than as a last-minute trim choice.
What Are Fabric-Covered Buttons in Occasionwear?
Fabric-covered buttons are rigid or semi-rigid button forms wrapped with the same fabric as the garment or with a deliberately coordinated textile. In occasionwear, they can act as working fasteners, decorative details, or a visual layer over another closure such as an invisible zipper. Their value comes from integrating the closure into the dress rather than interrupting the garment with exposed hardware.
Covered Button Construction
A covered button is a small assembly rather than a single material. The visible textile is stretched or formed around a button shell, while the reverse side provides the structure required for sewing, looping, or fastening. Depending on the system, the back may use a metal shank, a covered back, a canvas-style base, or another attachment construction. The visible face may be shallow, domed, or strongly rounded, and that profile changes how the button catches light and projects from the garment.
The cover fabric has to do something it was not originally designed to do: move from a mostly flat garment surface onto a tight three-dimensional curve. Smooth satin may show every small radial fold, thick crepe may gather heavily at the back, lace can reveal the shell through open motifs, and stretch fabric can distort if it is pulled inconsistently. For that reason, the button shell, cover fabric, finished diameter, fabric direction, and backing should be selected together instead of being approved as separate trim decisions.
Occasionwear Applications
Covered buttons are especially useful when a designer wants the closure to feel visually continuous with the garment. They are common on center-back openings, keyhole necklines, high collars, sleeve cuffs, corset-inspired bodices, decorative back seams, fitted waist details, detachable trains, bridesmaid dresses, cocktail dresses, wedding-guest styles, evening gowns, and other formal garments where exposed plastic or metal would interrupt the intended surface.
Quantity changes the design language. One self-covered button at a neckline is a finishing detail, while a row of ten to twelve buttons becomes part of the garment architecture. Twenty or more small buttons can create a strong vertical line even when each individual button is visually quiet. The final effect depends on the relationship between button size, opening length, garment silhouette, and spacing, so it should be reviewed on the fitted sample rather than only on a flat sketch or trim board.
Decorative vs Functional Use
Covered buttons can be fully functional, purely decorative, or part of a hybrid closure in which another component carries most of the tension. A decorative button mainly needs secure attachment, consistent appearance, and correct placement. A functional button has to do more: it must pass through a loop or buttonhole repeatedly, remain secure during movement, and withstand the load created by the garment fit without loosening or damaging the surrounding fabric.
Hybrid systems are common in fitted occasionwear because they allow the designer to preserve a refined buttoned appearance while using an invisible zipper for more predictable entry and load control. This can be particularly useful when a long row of small buttons would be inconvenient for the wearer to fasten individually. The design team should decide the role of the buttons early, because a functional closure needs different reinforcement, spacing, loop development, and fit allowance from a purely decorative row.
Design Proportion
Covered buttons are repeated visual units, so scale becomes more important than it is with a single trim. A button that appears only slightly large when held in the hand can become dominant when repeated twenty times down a narrow back opening. Likewise, very small buttons may look refined in photographs but become difficult to operate if the corresponding loops are narrow, firm, or positioned in a high-tension area.
A practical review should happen at three distances: close range for surface quality, normal fitting distance for spacing and alignment, and full-garment distance for overall proportion. The same button can look appropriate at one distance and distracting at another. Clean slip dresses often benefit from a quieter scale, while structured velvet or corset-inspired styles can carry a stronger button profile. The goal is not to make the button look expensive by itself, but to make the entire closure feel intentional.
Which Fabrics Work Best for Covered Buttons?
Satin, crepe, lace, organza, velvet, and many stable woven fabrics can all work well for covered buttons, but they behave differently under tension and around tight curves. Smooth fabrics expose wrinkles and directional shine, thick fabrics add bulk, and transparent fabrics may need backing. The best fabric is one that wraps cleanly around the selected shell and stays visually consistent across repeated buttons.
Satin and Crepe
Satin is one of the most attractive materials for fabric-covered buttons because a self-fabric button can almost disappear into the dress until light moves across the curved surface. That same quality makes satin unforgiving. Uneven pulling can create radial wrinkles, pressure can leave visible marks, and pieces cut in different directions may reflect light differently enough to look like a shade mismatch even when they came from the same roll.
Crepe is usually more forgiving because its pebbled or matte surface breaks up minor tension differences. Weight still matters, however. Lightweight crepe may fray or collapse around a deep button form, while heavier crepe can build too much material at the back of a small shell. Stretch versions introduce another variable because inconsistent stretching during covering can change both the surface appearance and the finished diameter. For both fabrics, the safest approval is a finished button made from the actual bulk fabric direction, not from a similar substitute.
Lace and Organza
Lace-covered buttons often need an opaque underlayer because open motifs can expose the shell and create a hard circular shape beneath an otherwise delicate surface. A coordinated satin, crepe, or lining fabric can provide color and coverage, while the lace overlay carries the visible pattern. Once two layers are involved, button size and back closure become more important because the added thickness has to be accommodated without creating bulky gathers.
Motif placement also needs a conscious decision. If the lace repeat is large, randomly cutting small circles can produce visibly different buttons: one may contain a dense floral motif while the next is mostly open net. Random variation can be acceptable on a relaxed design, but a close vertical row on formalwear often looks better when the visual density is more controlled. Organza creates a different challenge because it is transparent and crisp, so the base color strongly influences the result and fine edge folds can become visible on very small forms.
Velvet and Heavy Fabrics
Velvet can produce a deep, luxurious covered button, but pile direction should be controlled because reversing the nap can change the apparent shade. When the buttons sit in a row, inconsistent nap orientation is especially obvious under directional lighting. Velvet also adds physical bulk, so a button size that closes cleanly in satin may be too small once the pile and base cloth are gathered around the back.
Heavy jacquards, brocades, dense embroidery, and sequin fabrics create similar practical limits. These materials are not automatically unsuitable, but the visual idea should not force a poor technical result. A matching plain satin, crepe, or velvet button may look cleaner than trying to wrap a heavily embellished surface around a small shell. On sequin fabrics, hard edges, stacked sequins, or broken embellishments can also interfere with the closing mechanism, so alternative cover materials should be sampled before production is committed.
Fabric Selection Guide
The following ranges and notes are practical development references rather than fixed industry standards. Actual suitability depends on the button shell, fabric construction, layering, and finished design, so the real production fabric should always be sampled before final approval. A combination that closes neatly in one satin or velvet can behave differently in another fabric with a different backing, finish, weight, or surface treatment.
Fabric | Visual Strength | Main Production Risk | Practical Sample Focus |
Satin | Smooth, integrated formal finish | Wrinkling, shine direction, pressure marks | Grain direction, surface smoothness, uniform reflection |
Crepe | Forgiving matte texture | Fraying or bulk depending on weight | Edge wrap, shell closure, finished thickness |
Lace | Strong design continuity | Transparency and motif inconsistency | Underlayer, motif density, layered thickness |
Organza | Light, refined appearance | Sheerness and fine edge folds | Base color, gathered bulk, shell visibility |
Velvet | Rich depth and soft volume | Nap direction and thickness | Pile orientation, larger shell trial, clean back |
Stretch woven | Useful for fitted styles | Uneven tension and distortion | Recovery, equal stretch, finished diameter |
Sequin fabric | High visual impact | Hard edges, excess bulk, broken embellishment | Test a matching plain cover fabric |
Heavy jacquard | Structured appearance | Too much fabric at the button back | Larger shell or lighter coordinated substitute |
For manufacturers developing occasionwear across several fabrics, this is where a connected trim and fabric workflow matters. The fabric cannot be approved only for drape, stretch, and hand feel while the button is approved only from a supplier card. The two decisions meet at the sample stage. A button that looks clean in a loose swatch should still be checked on the finished dress under pressing, handling, lighting, and normal fit tension.

Which Button Style and Size Should You Choose?
Choose covered-button style and size according to fabric thickness, garment scale, closure function, and the number of buttons used. Small domed buttons create a fine repeated line, while larger profiles become stronger design elements. The backing must provide the right clearance for the loop or attachment, and spacing should be developed together with button diameter rather than added after the pattern is complete.
Button Profile
Profile determines how much the button projects from the dress and how strongly it catches light. A shallow dome gives a quieter, modern finish and sits closer to the garment. A deeper dome creates a more obvious three-dimensional effect, while a high rounded profile can feel more formal, vintage-inspired, or bridal. The same satin can look understated on a shallow form and much more decorative on a strongly curved shell.
Usability changes with profile as well. Functional loops need to pass over the widest part of the button and settle behind it securely. A very flat button may provide little natural holding point, while an extremely prominent button can snag or sit awkwardly on a close-fitting back. Decorative rows have more freedom because they do not need the same working clearance. The correct profile should therefore be judged in the context of the loop, the fabric thickness, and the expected movement of the garment rather than from appearance alone.
Button Diameter
There is no universal correct diameter for occasionwear, but several ranges are useful as sampling starting points. These are practical development references, not mandatory specifications, and thicker fabrics may require moving to a larger form simply to achieve a clean back closure. The apparent scale also changes with button count, garment length, and whether the row is meant to disappear into the dress or become a visible design feature.
Finished Diameter | Typical Visual Effect | Practical Development Use | First Spacing Trial* |
9-11 mm | Very fine and delicate | Dense rows, neckline details, lightweight fabrics | 13-18 mm centers |
12-14 mm | Balanced and versatile | Satin, crepe, lace-over-base formalwear | 16-24 mm centers |
15-17 mm | More visible | Structured occasionwear and stronger closures | 20-29 mm centers |
18-20 mm | Prominent | Decorative accents and heavier fabrics | 24-34 mm centers |
Above 20 mm | Statement scale | Selected fashion details, not dense rows | Develop visually on sample |
The spacing column uses roughly 1.3-1.7 times button diameter as a first comparison range, not as an industry standard. Final spacing should be adjusted for garment tension, loop size, visual density, the curve of the opening, and the wearer’s ability to fasten the closure comfortably. A fitted sample remains the final decision point because flat measurements cannot fully predict how the row will behave on the body.
Quantity changes the perception of size. A 14 mm button may look moderate on its own but strong when repeated thirty times. That is why development teams should review an actual row or at least a representative mock-up rather than approving one loose component beside a swatch. The full sequence reveals rhythm, density, opening length, and whether the trim starts to dominate the silhouette instead of supporting it.
Back and Shank
The reverse construction determines how the button sits, how securely it can be sewn, and whether a loop has enough room to move behind the visible face. Functional closures usually need a shank or attachment point that gives some working clearance. If the button sits too tightly against the garment, a rouleau loop may be difficult to place behind it, especially when the loop fabric is firm or slightly bulky.
Too much clearance creates a different problem because the button can lean away from the surface and move under tension. Decorative buttons often look cleaner when they sit closer to the fabric, while working buttons need a balance between security and usability. The surrounding garment structure also matters. A strong button sewn onto a weak piece of satin does not create a strong closure. Reinforcement behind the attachment point may be more important than selecting a heavier button base.
Button Spacing
Spacing determines whether a covered-button row reads as a continuous design line or a sequence of unrelated points. Too much space can make a functional opening gape, while very tight spacing can crowd the row and slow dressing. The first sample should usually compare several center-to-center options rather than committing to one number from a flat technical drawing.
A useful starting exercise is to compare spacing at approximately 1.3, 1.5, and 1.7 times the finished button diameter, then judge the result on the actual garment. This is a workshop comparison method, not a fixed standard. On a 12 mm button, for example, the difference between roughly 16 mm, 18 mm, and 20 mm centers is easy to see once ten or more buttons are placed in sequence.
Body shape complicates the calculation. Equal spacing on a flat pattern may look less equal once the center back curves over the body or the garment is under tension. Final approval should therefore be made on a fitted sample, with the row viewed from normal standing distance as well as measured closely. Sitting, twisting, and normal movement can also reveal gaping or visual compression that is not obvious when the dress is hanging flat.
How Do Covered Buttons Work as Dress Closures?
Covered buttons usually work with fabric loops, buttonholes, or a concealed secondary closure. In refined occasionwear, rouleau loops are especially useful because they can match the garment fabric and keep the opening visually clean. Reliable performance depends on button diameter, profile, loop size, spacing, seam reinforcement, and the amount of tension the closure is expected to carry during wear.
Rouleau Loops
Rouleau loops are narrow fabric tubes formed into small loops along the edge of an opening. They work particularly well with fabric-covered buttons because both elements can be made from the same or coordinated material, creating a continuous finish that is difficult to achieve with conventional stitched buttonholes on delicate satin, crepe, or lightweight formalwear fabrics.
The challenge is repeatability. A loop that is slightly too short can make fastening frustrating, while one that is too long may slip off the button or leave the opening visibly loose. The fabric also affects behavior. Satin can be elegant but slippery during turning and sewing; crepe offers more friction but may appear bulkier; stretch fabrics can make loops easy to fasten but unstable if recovery is not controlled. A short prototype strip with several repeated closures is usually more informative than a single working loop because it reveals whether size and spacing remain consistent across a row.
Hidden Zipper Support
A visible row of covered buttons does not have to carry the whole garment opening. On fitted occasionwear, an invisible zipper can provide fast entry and reliable structural closure while covered buttons create the exterior appearance. This hybrid approach is useful when the design calls for many small buttons but the wearer would otherwise have to fasten them individually behind the body.
The decision should be made early because adding or removing a zipper changes seam bulk, reinforcement, lining treatment, and sometimes the position of the decorative row. If the buttons are genuinely functional, the opening has to be engineered around their load. If the zipper carries the tension, the button row can be optimized primarily for visual balance. Neither solution is automatically more premium; the better choice is the one that matches the silhouette, dressing experience, and intended customer use without creating unnecessary construction risk.
Loop Fit
Loop fit depends on more than button diameter. The widest part of the button profile, shank position, cover-fabric thickness, loop width, and flexibility all affect the opening required. For that reason, the most dependable method is to build several physical loop lengths around the finished button rather than relying only on a calculated circumference. The best trial is the version that fastens without strain, sits close to the shank, and remains secure after repeated handling.
A small dimensional difference can change fastening effort noticeably. On delicate occasionwear, the loop should not need to be forced aggressively over the button because repeated pulling can distort the loop attachment point, pull the opening edge outward, or abrade the surface. The opposite condition is equally problematic: an oversized loop may release too easily during movement. During sample review, the same loop should be fastened and released repeatedly while checking twisting, seam exposure, abrasion, and whether the opening remains flat under normal garment tension.
Load and Reinforcement
Functional buttons on a loose neckline experience far less force than buttons crossing a fitted waist, bust, or hip. When the garment is close to the body, the closure system should be supported by the surrounding seam structure rather than relying only on the surface fabric and a few button stitches. Interfacing, lining, seam allowance construction, or other reinforcement may be necessary to distribute load and maintain the opening shape.
Movement should be part of the fitting check. A closure that appears flat while the wearer stands still can begin to gap when sitting, twisting, or raising the arms. If that happens, the button itself may not be the real problem. Excessive garment tension, insufficient ease, wide spacing, weak reinforcement, or loop length may be responsible. A stronger button will not correct a pattern issue, so experienced development teams separate component strength, attachment security, and garment fit when diagnosing closure problems.

How Are Fabric-Covered Buttons Developed for Production?
Fabric-covered buttons should be developed during sampling, with the cover fabric, shell size, profile, back construction, button count, spacing, loop specification, and closure function clearly defined. The approved garment sample then becomes the physical reference for bulk production. Early specification reduces late changes caused by unsuitable fabric thickness, trim availability, inconsistent button orientation, or loop dimensions that do not work on the finished dress.
Fabric Selection
The first decision is whether the button should use self-fabric, a layered version of the garment fabric, or a coordinated substitute. Self-fabric usually gives the strongest visual continuity, but it is not automatically the best technical solution. A heavily sequined dress may look cleaner with a matching satin-covered button, while lace may need a solid base beneath the decorative layer and velvet may require a larger shell than the original sketch suggests.
Directional materials need written control. Satin, velvet, prints, and patterned lace should not be cut randomly if orientation changes the finished appearance. Production planning should also reserve enough approved fabric for the planned button count, normal covering loss, rejected components, replacement during final inspection, and any spare-button requirement in the brand specification. The fabric consumption is small per piece, yet running short can become difficult if the replacement cloth comes from another lot or has a different finish.
Sample Testing
A useful button sample is not simply a loose button that looks smooth. It should be attached to the garment in the intended position and, if functional, paired with the actual loop or buttonhole. The dress should then be fitted, fastened, handled, and pressed in the same way the production garment will be treated. Surface smoothness, attachment stability, loop fit, spacing, opening flatness, and visual consistency all need to survive that process.
Long rows deserve special attention because repetition magnifies variation. If a style uses twenty or more buttons, a single working component does not prove that the design is ready. A representative strip or full row should be reviewed so the team can see whether small differences in button tension, loop projection, or spacing accumulate visually. Labor should also be considered during sampling. A small increase in handling time per button becomes meaningful when multiplied across many buttons and many garments.
Tech Pack Details
“Self-covered button” is not a complete production instruction. A reproducible specification should identify the finished diameter, button profile, base or shell reference, back type, cover fabric code, color, grain or nap direction, quantity per garment, exact placement, center-to-center spacing, loop construction, attachment method, and whether the button is functional, decorative, or part of a hybrid closure.
The approved sample should remain the physical benchmark because numbers cannot fully communicate how a loop should sit behind a rounded button or how much projection looks right on a fitted back. Where multiple styles use the same base system, a standardized internal trim reference can reduce repeated development. The fabric and color can change while the shell, size, attachment method, and approved loop relationship remain consistent, which makes repeat orders and seasonal extensions easier to manage.
A practical specification normally records:
- Finished button diameter and profile.
- Button base, shank, or back construction.
- Cover fabric code, color, grain, nap, or motif direction.
- Quantity per garment and spare-button requirement, if any.
- Exact position and center-to-center spacing.
- Loop fabric, finished width, and loop projection.
- Functional, decorative, or hybrid closure status.
- Attachment and reinforcement requirements.
- Approved sample or sealed trim reference.
Cost and Lead Time
Covered buttons affect more than the price of the base component. The garment cost may include fabric preparation, button covering, directional cutting, lace layering, rouleau-loop preparation, attachment, alignment, and inspection. Adding five buttons to a design can also mean five extra loops, five more sewing positions, and five more points that must be checked for spacing and security.
Lead time can also be linked to fabric availability. When buttons must use the exact bulk satin or velvet, final covering may have to wait until the production fabric is approved and available. That is different from ordering a standard stock button before cutting begins. Brands can reduce delays by confirming the proposed button diameter, approximate count, cover-fabric construction, and functional role early in development. A manufacturer that manages fabric, trims, pattern, sampling, and bulk QC within one workflow can identify these dependencies before they become late-stage production changes.
How Do You Control Covered-Button Quality in Bulk Production?
Bulk quality control should examine the button form, cover fabric, orientation, attachment, spacing, loop construction, and closure performance. The biggest risks are often repeated small defects: wrinkles, shade differences, loose attachment, or spacing drift that becomes obvious across a long row. Reliable control starts with an approved reference and continues through incoming checks, in-line inspection, and final garment review.
Common Defects
Covered-button defects can be separated into component defects and garment-assembly defects. Component problems include exposed shell edges, radial wrinkles, uneven fabric tension, incorrect size, distorted shape, loose shanks, stains, inconsistent nap direction, or poor lace motif placement. Assembly problems appear after the button is sewn to the dress and include incorrect position, loose stitching, uneven spacing, tilted buttons, twisted loops, and opening distortion.
Separating these categories helps the team fix the real cause. A perfectly formed button sewn 3 mm off the intended line is an assembly problem, while a straight row of satin buttons with wrinkled faces points back to the covering process. Group inspection is also important because repetition makes small variation more visible. Ten buttons laid together will reveal directional shine, shape, and diameter differences much faster than inspecting isolated components one at a time.
Inspection Stage | Key Check | Typical Failure | Practical Control |
Button base receipt | Size, profile, shank | Wrong shell or weak base | Compare with approved trim reference |
Fabric cutting | Grain, nap, motif | Shade or pattern variation | Use directional cutting instruction |
Covering operation | Surface, edge, symmetry | Wrinkles, exposed shell, distortion | Inspect pieces in groups before sewing |
Attachment | Position and stitch security | Loose, tilted, off-line button | Mark placement and verify first bulk pieces |
Loop sewing | Size, projection, twist | Too tight, loose, or rotated loop | Use approved loop template or gauge |
Row inspection | Spacing and center line | Uneven visual rhythm | Measure and review from normal viewing distance |
Functional check | Fasten, release, tension | Gaping or accidental opening | Test representative garments on-body or form |
The inspection frequency and defect classification should follow the order’s agreed quality plan rather than an arbitrary universal percentage. If the project uses an AQL-based final inspection, covered-button defects should be classified according to the approved garment specification and the practical effect on function, appearance, and saleability. A loose functional button, for example, carries a different risk from a minor visual variation on a purely decorative button.

Color and Direction
Directional fabrics need explicit bulk controls. Satin and velvet can show apparent shade variation even when every cover piece comes from one roll because reflected light changes with grain or nap direction. The simplest control is to establish direction during sample approval and preserve it through cutting, covering, and sewing. The finished buttons should then be viewed together under consistent lighting so orientation errors are caught before they are attached to garments.
Printed fabric and lace create another type of variation. The team should decide in advance whether motif placement is random, semi-controlled, or specifically centered. Without that decision, different operators may produce different but individually reasonable results, and the inconsistency will only become obvious when the finished dresses are compared side by side. Finished buttons should therefore be viewed in groups and then checked again on the completed garment, because the surrounding dress fabric changes how color, texture, and gloss are perceived.
Alignment and Spacing
Long vertical rows make alignment errors easy to see. A single button positioned only a few millimeters away from the intended center line can interrupt the rhythm of otherwise consistent spacing. Small interval changes can also accumulate, causing the bottom of the row to look compressed or stretched even when no individual gap seems dramatically wrong.
Placement marks, templates, or operation guides are valuable on repeat styles because they reduce dependence on visual estimation. The first bulk pieces should be compared directly with the approved sample before the operation continues across the full order. Inspection should combine measurement with normal-distance viewing. Measurement confirms the agreed spacing, while visual review shows whether fabric distortion, pressing, or body curvature makes the row look uneven despite technically correct marks. Functional rows also need a gaping check under normal wear tension.
Bulk Consistency
Bulk consistency comes from preserving the approved sample decision across every production stage. The reference should establish the button size, profile, cover fabric, direction, surface smoothness, quantity, spacing, loop size, attachment appearance, and opening behavior. In-line checking is especially useful because errors in a long row become expensive to correct once the garment has been fully assembled, pressed, and packed.
Different occasionwear fabrics also need different priorities. Satin requires close attention to surface marking and shine direction. Velvet needs nap control and careful pressing. Lace needs overlay and motif checks. Fitted corset or formal styles place more load on closure points than loose silhouettes, so attachment and reinforcement deserve more attention. The final inspection should judge the whole garment, not only the individual buttons. A technically acceptable component still fails visually if the row wanders, the opening twists, or the spacing fights the dress proportion.
Conclusion
Fabric-covered buttons work best when they are treated as a small system inside a much larger garment rather than as decoration chosen at the end of development. Fabric behavior, shell size, profile, backing, loop construction, spacing, reinforcement, and fit all influence the result, and repetition makes small mistakes easier to see. The strongest occasionwear programs resolve those relationships on the sample before bulk production begins.
For a brand developing satin, lace, velvet, crepe, corset, or other event-focused dresses, the practical goal is not to specify the most elaborate button possible. It is to create a closure detail that looks consistent, feels easy to use, survives normal wear, and can be reproduced across colors, sizes, repeat orders, and future collections. When those decisions are recorded clearly in the tech pack and preserved through sampling and QC, a tiny component becomes one of the details that quietly makes the whole dress feel better made.
Share This Article :

Jerry Lee
Categories

Latest blogs
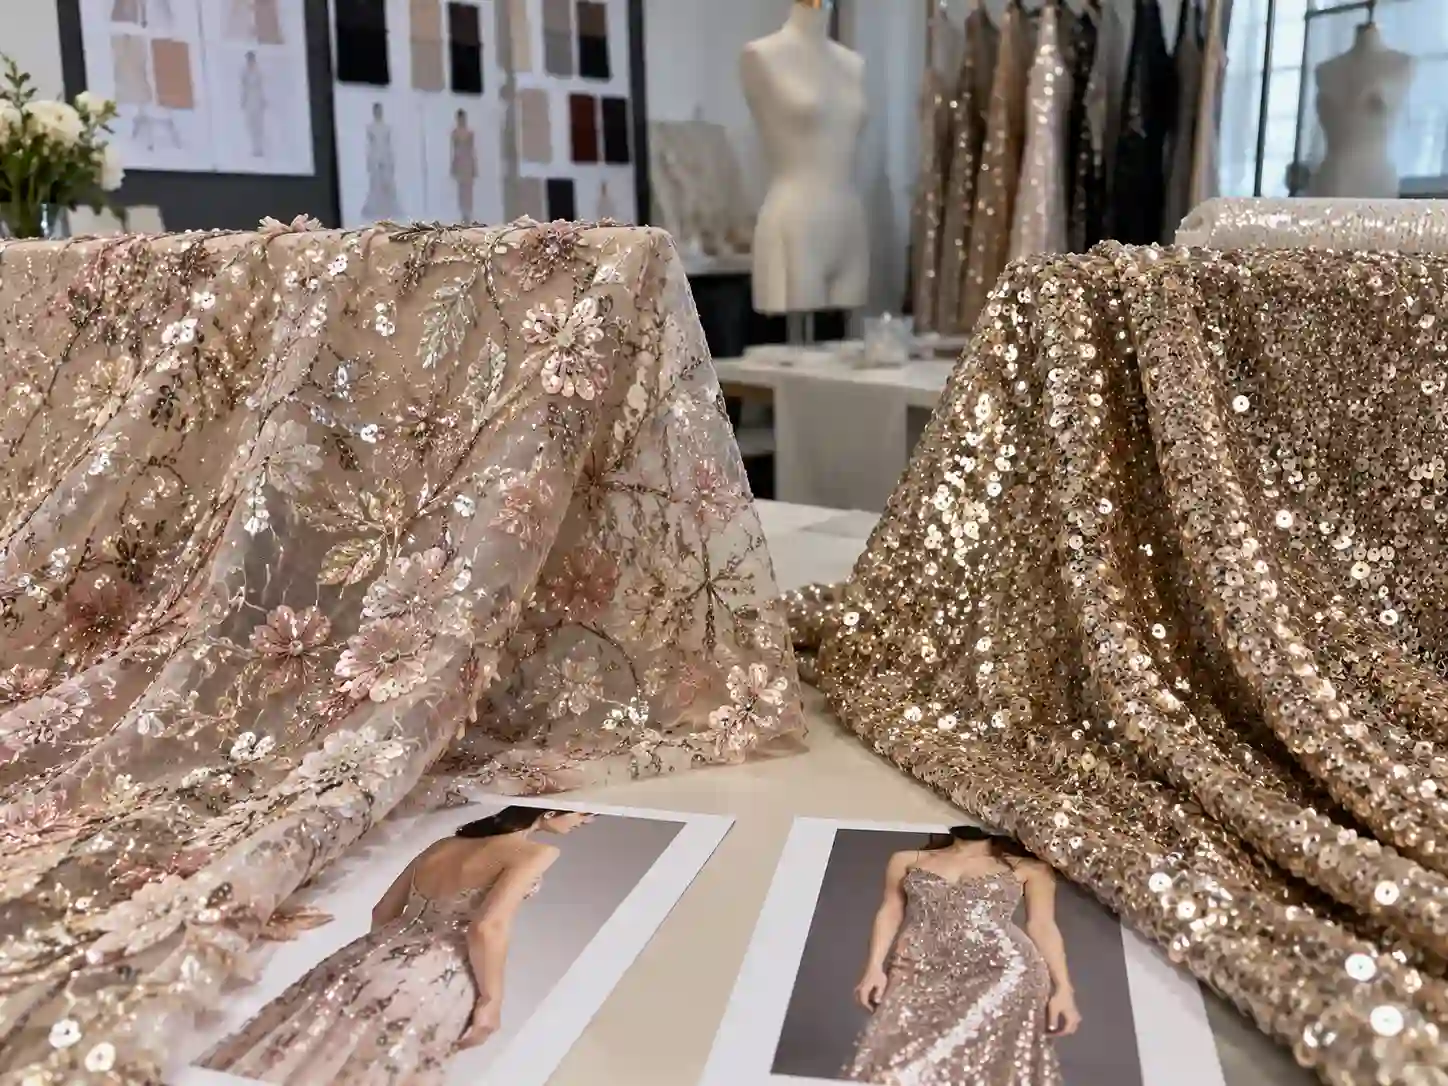


Table of Contents
Here, developing your OEM/ODM private label clothing collection is no longer a challenge—it’s an excellent opportunity to bring your creative vision to life.

