 Skip to content
Corset Dress Quality Control Checklist: How Do You Inspect Fit, Boning, Cups, Zippers, and Bulk Quality?

Your trusted Women’s Apparel Manufacturer from China

A corset dress can look excellent on a hanger and still fail the moment it is worn. One cup may sit slightly higher, the neckline may pull away from the body, a bone may become visible through satin, or the center-back zipper may ripple once the waist is under tension. These are not isolated cosmetic flaws. They usually show that pattern shape, internal support, sewing tension, material behavior, and fit are not working together. That is the reason corset dress quality control needs a more structured inspection process than the quick appearance check used for many simple dresses.
A reliable corset dress quality control checklist should verify the approved sample, measurements, shell fabric, lining, cups, boning, neckline stability, closure performance, sewing, fit, movement, size grading, finishing, labels, packing, and final defect acceptance. The strongest inspection systems begin before bulk cutting, continue through sewing and in-line checks, and finish with garment and shipment inspection, because structural defects become more expensive to correct as production advances.
The most difficult corset problems are often the quiet ones. A bodice can pass a flat measurement check and still twist on a body. A zipper can run smoothly on the inspection table and become difficult after the dress is closed at the waist. A cup can be sewn to the correct marking and still look wrong because the surrounding panel is pulling it off position. For brands developing structured dresses, the useful question is not simply whether the garment looks clean; it is whether the whole structure can be repeated consistently across sizes, colors, and bulk quantities.
What Should a Corset Dress QC Checklist Cover?
A complete corset dress QC checklist should connect the approved product specification with physical inspection. It should cover materials, measurements, cups, boning, bodice balance, neckline stability, closures, lining, sewing, fit, movement, grading, finishing, labels, packing, and defect acceptance. It should also identify the approved reference and inspection stage so that every decision is based on a controlled standard rather than personal preference.
Approved References
Quality control becomes unreliable when an inspector is asked to judge a dress without a fixed reference. Before bulk pieces are evaluated, the production and QC teams should have the latest tech pack, measurement chart, approved sample or PP sample, fabric and trim specifications, pattern version, construction notes, label artwork, and packing instructions. For corset dresses, ordinary garment specifications are rarely enough. The documentation should also identify cup type and placement, boning material and position, neckline reinforcement, lining attachment, waist-seam location, zipper or lace-up construction, and any stabilizing component required by the design. Every feature that can change fit or appearance between sample and bulk needs a controlled reference. If a molded cup is replaced with a denser version, the zipper tape becomes stiffer, or boning is shortened during production, the outer pattern may stay unchanged while the final silhouette changes noticeably. A strong checklist therefore compares bulk garments against both written specifications and an approved physical reference rather than relying on a single sample photograph.
QC Reference | What It Controls | Typical Risk if Missing |
Approved sample / PP sample | Overall appearance, fit and construction | Bulk may follow an outdated sample version |
Measurement chart | Points of measurement and agreed tolerances | Size inconsistency or false measurement disputes |
Pattern version | Panel shape, cup opening and waist geometry | Twisting, imbalance or fit drift |
Fabric and lining spec | Material identity, stretch, weight and hand feel | Different drape, support or transparency |
Trim specification | Cups, boning, zipper, hooks, eyelets and elastic | Closure or support performance changes |
Sewing instructions | Seam allowance, reinforcement and attachment methods | Operator-to-operator construction variation |
Packing standard | Labels, barcode, folding, polybag and carton details | Retail or warehouse receiving errors |
Inspection Zones
The easiest way to miss corset defects is to inspect the dress as one undivided garment. A better method separates it into functional zones because different areas fail for different reasons. The upper bodice includes the neckline, cups, underbust area, center front, side panels, and upper side seams, all of which affect support and bust shape. The waist region controls the transition between bodice and skirt and often carries substantial tension. The back closure zone includes the zipper, hooks, lacing, eyelets, modesty panel, and reinforcement. Inside the garment, boning channels, cups, interlining, seam allowances, lining, binding, and reinforcement need their own review. The skirt should then be checked for attachment balance, drape, lining length, slit construction, hem level, and decorative work. This zone-based method also improves defect reporting because “bodice uneven” is difficult to act on, while “left cup apex higher than right” or “center-back zipper ripples below waist seam” gives the technical team a clear starting point.
Flat and On-Body Checks
Flat inspection and fit inspection answer different questions, and a professional corset QC routine needs both. A flat garment can be measured accurately and checked for seam position, panel symmetry, zipper alignment, stains, skipped stitches, lining exposure, and general construction. Several important corset defects, however, only appear when the garment is placed under body tension. A neckline can measure correctly and still gape. A zipper can lie perfectly straight on the table and develop waves after the waist is closed. Both cups can be sewn to matching marks yet appear uneven because one side panel is pulling more strongly. Boning can sit neatly inside a channel but become uncomfortable when the wearer bends or sits. For highly structured styles, mannequin review, fit photographs, or a controlled fitting are not decorative extras; they are ways to confirm that flat dimensions produce the intended three-dimensional result. The closer the dress fits to the body, the less reliable a flat-only quality decision becomes.
Product-Specific Priorities
Not every corset dress carries the same quality risk, so the checklist needs a permanent structural core and a project-specific layer. A satin strapless corset mini dress may reveal seam puckering, zipper waves, boning ridges, pressing marks, and tiny tension changes that would be less visible on a textured fabric. Mesh can distort around cups and seams and may expose internal construction that opaque materials hide. Lace requires placement, matching, edge control, and careful attachment around curved structural areas. Sequin fabrics introduce abrasion, broken sequin, needle, lining, and packaging concerns, while stretch fabrics add recovery and tension balance to the inspection. The permanent checklist should always protect fit, cups, boning, closure, measurements, and workmanship. The project-specific portion should then address the selected shell fabric, lining, embellishment, silhouette, and target wearing situation. This prevents the QC document from becoming a generic form that inspectors complete mechanically without considering the actual garment in front of them.
How Do You Inspect Corset Structure and Support?
Corset structure should be inspected by checking whether the cups, boning, panels, neckline, lining, waist shaping, and closure work together without twisting, collapsing, poking, or creating abnormal pressure. Boning should reinforce an accurate pattern rather than compensate for poor fit. A structurally sound dress should maintain its intended silhouette while standing, moving, sitting, and using the closure normally.
Boning Placement
Boning inspection begins with location and symmetry rather than stiffness. Compare the production garment with the approved construction reference and confirm that each bone follows the intended seam or panel position, because a small positional change can redirect tension, alter cup shape, expose a ridge through the shell, or interfere with the zipper. Paired bones should be reasonably balanced left to right, and the top and bottom termination points should match the approved construction. A bone that finishes too high may push into the upper bust or neckline; one that extends too low can become uncomfortable at the waist or hip when the wearer sits. The channels should hold the selected bone securely without enough looseness for frequent twisting, while the stitching and channel ends should remain stable under handling. Inspectors should also feel the garment from the inside and outside for hard edges, protruding ends, or abrupt thickness changes. The relevant question is not whether boning exists, but whether it is positioned, contained, and finished so that it supports the intended shape without creating a new defect.
Cup Position and Shape
Cup inspection should treat the two sides as a pair and evaluate their relationship with the rest of the bodice. Start with cup height, apex position, spacing, projection, lower-cup support, top-edge shape, and left-right symmetry. Then look at how each cup meets the center front, underbust seam, side panel, boning, lining, and neckline. Common problems include one cup sitting higher, uneven projection, a pointed bust shape, a visible cup edge, upper-cup emptiness, lower-cup collapse, or a cup positioned too far toward the center or side. These defects are not always caused by the cup component itself. The opening may have been cut inaccurately, one bodice panel may be longer, boning may redirect tension, lining may be tighter than the shell, or the cup specification may have changed between sample and bulk. A useful diagnosis is to compare the cup while the dress is open and again after the closure is fastened. If the cup becomes distorted only under closure tension, the source may lie in bodice balance rather than cup sewing alone.
Neckline Stability
The neckline is one of the clearest visual indicators of whether a corset support system is working. In a strapless or low-cut style, the top edge should remain close to the body without rolling outward, collapsing between support points, digging excessively into the skin, or forming an unintended left-to-right height difference. Inspect the neckline from the front, side, and three-quarter angle because a line that looks level from the front may project away from the chest when seen from the side. The causes of instability can include upper-bust pattern shape, cup projection, boning position, fabric stretch, insufficient reinforcement, seam tension, or lining behavior. Anti-slip tape or elastic can help when it is part of the approved construction, but it should not be used as a shortcut for poor pattern balance. Increasing grip on an inaccurate neckline can simply create more compression without solving the gap. The most stable results come from a coordinated relationship among pattern shape, cup support, boning, fabric behavior, and correctly controlled internal layers.
Internal Support Balance
A corset bodice is a system, and the inside of the dress often explains what the outside is showing. Cups, boning, interlining, lining, seam allowances, waist shaping, shell fabric, and closures all influence one another. A lightweight satin shell may reveal every internal ridge, while a heavier woven shell can hide the same structure. A lining that is too tight can pull the outer fabric inward, while a lining with too much ease can bunch and shift. A soft cup combined with very rigid boning can create an abrupt shape transition, and a strong zipper cannot correct an incorrectly balanced back bodice. During inspection, turn the garment inside out where construction allows and look for twisted lining, unsecured layers, exposed rigid edges, uneven seam allowances, bulky junctions, and inconsistent reinforcement. Internal construction does not need to be decorative, but it should look deliberate, repeatable, and comfortable enough for the intended wearing time. That internal consistency is especially important when the same corset design will be reordered in several colors or produced across multiple size groups.

How Do You Check Fit, Measurements, and Grading?
Corset fit should be checked by combining approved measurements with three-dimensional evaluation. Bust, underbust, waist, bodice length, cup position, neckline, side seams, and closure must work together. A dress can fall within measurement tolerance and still fail because the proportions create twisting, gaping, excessive compression, or instability when worn, particularly after the pattern is graded across several sizes.
Key Measurements
The exact points of measurement should come from the approved product specification because there is no single universal tolerance that suits every corset dress. A structured mini dress, evening gown, stretch party dress, and lace-up corset style may use different measuring methods and acceptable variation. High-impact measurements commonly include bust circumference, underbust, waist, center-front bodice length, center-back bodice length, side length, cup spacing, cup position, neckline width or opening, waist-seam position, strap length where used, and total garment length. Measurement method is as important as the target number. Inspectors should know whether the garment is measured relaxed or extended, whether curved seams are followed with the tape, and exactly where each measurement starts and ends. Stretching the waist while measuring can hide a genuine shortage, while measuring center-back length from different reference points can create false variation between two identical garments. A robust measurement sheet therefore defines both the target dimension and the method, especially when quality work is shared among different inspectors, lines, or production partners.
On-Body Fit
Start fit inspection with overall balance before focusing on individual wrinkles. The center front should sit where intended, side seams should not rotate strongly toward the front or back, and the waistline should remain level unless the design intentionally uses an angled or dropped waist. Cups should sit at the intended bust position, while the center back and closure should remain visually balanced. After that, look for diagonal pull lines, horizontal compression, cup collapse, neckline gaping, upper-bust excess, underbust wrinkles, center-front twisting, side-panel distortion, or excessive tightness around the zipper. Wrinkles should be treated as diagnostic clues rather than automatic pressing defects. A diagonal line may indicate insufficient width, incorrect length, or misplaced support, while a horizontal fold under the bust can come from cup depth, underbust shape, or torso length. Experienced fit teams follow the direction of tension and ask where it starts and ends. That approach usually identifies the real source faster than simply adding circumference or pressing the garment harder.
Movement Tests
A corset dress should not be approved only from a standing front photograph because normal movement changes the tension across the entire bodice. A useful fit check asks the wearer to sit, walk, turn the torso, raise the arms naturally, and operate the zipper or lacing. These simple actions can expose problems that remain hidden during a static fitting: boning may dig into the waist when sitting, a strapless neckline may shift during arm movement, the zipper may become difficult to operate under real tension, or the cups may move away from the bust when the torso turns. The skirt-to-bodice seam can also rise or pull during walking if the lower portion of the dress restricts movement. The intensity of movement testing should match the product. A formal corset gown does not need to behave like activewear, while a fitted club dress is expected to tolerate more repeated movement. In both cases, the garment should remain functional and visually controlled in the environment for which it was designed.
Size Grading
Structured garments are more sensitive to grading than simple loose dresses because increasing bust and waist measurements proportionally does not automatically preserve cup position, neckline coverage, boning location, torso length, or closure tension. A size-set review should therefore compare relationships rather than circumference alone. If the cup becomes wider but not deeper, the larger size may compress the bust; if the waist expands while boning remains in the same relative place, the support line may move away from the body position it was meant to control. Torso length also needs attention because the waist seam can rise or drop after grading, changing both comfort and silhouette. For larger production programs, reviewing representative sizes before full cutting is far less costly than discovering a structural grading issue after several size groups have already been sewn. Where a brand uses a broad size range, fit approval should confirm that the design intent remains recognizable across sizes rather than assuming that a mathematically graded pattern automatically produces equivalent wearing performance.
Grading Area | What to Compare Across Sizes | Common Failure to Watch |
Bust and cup | Projection, spacing and coverage | Cup becomes too shallow or too widely spaced |
Boning | Position relative to body landmarks | Bone moves away from intended support line |
Waist | Circumference and vertical position | Waist seam rises, drops or twists |
Neckline | Coverage and stability | Gaping or excessive compression |
Closure | Stress, alignment and finished length | Zipper or lacing becomes overloaded |
Bodice length | Front, back and side balance | Bodice pushes upward or collapses |
Which Corset Dress Defects Should You Reject?
Corset dress defects should be rejected or reworked according to their effect on safety, function, fit, approved appearance, and saleability. High-priority problems include exposed or damaged boning, failed closures, severe cup asymmetry, open seams, major measurement deviation, strong bodice distortion, wrong materials, or defects that prevent normal wear. Minor cosmetic issues should be separated from functional structural failures rather than treated as equivalent problems.
Structural Defects
Structural defects deserve more attention than isolated finishing issues because one error can affect several areas of the garment at once. Typical examples include boning pushing toward or through the shell or lining, bent or incorrectly positioned bones, twisted channels, severe left-right cup asymmetry, cup collapse, incorrect bust-point position, neckline gaping, neckline rolling, center-front twisting, uneven waist shaping, strong rippling across structural panels, and unsecured internal reinforcement. The most useful distinction is whether the defect is isolated or systematic. A single bone inserted incorrectly may be a repairable operator error. Repeated twisting in the same channel across many garments suggests that channel width, bone length, material choice, insertion method, or sewing sequence needs to be reviewed. The same logic applies to cups: one poorly attached cup can be repaired, while repeated imbalance indicates a marking, pattern, cutting, component, or operation problem. Final QC should therefore record defect location and repetition, not only a total number, because frequency often tells the technical team more than severity alone.
Zipper and Closure Defects
Closures are high-risk components on corset dresses because they often work under greater tension than the same zipper would experience on a loose garment. Inspect the zipper both open and closed, checking slider movement, tooth alignment, tape attachment, top and bottom stops, seam balance, and whether surrounding fabric becomes trapped or distorted. The garment should then be checked on the correct form or wearer because zipper waviness and bulging often appear only after the waist is under tension. Difficult closing, seam spreading, uneven top edges, center-back misalignment, or strain concentrated at the waist can indicate a closure problem, a pattern-balance problem, or both. Lace-up styles require a similar review of eyelet reinforcement, spacing, symmetry, lacing quality, modesty-panel placement, and the shape of the back opening under realistic tension. A closure defect should never be judged only as a trim problem. Zipper rippling can originate from installation, seam feeding, lining tension, pattern length, waist pressure, or a zipper tape that behaves differently from the approved sample.
Sewing and Lining Defects
Sewing inspection should focus closely on panel junctions and stress points because corset seams help create the garment’s three-dimensional shape. An apparently small seam-position error can change fit even when the stitch formation itself looks clean. Inspect for open seams, skipped stitches, broken stitches, puckering, inconsistent seam allowance, poor reinforcement, mismatched panel junctions, thread loops, and unsecured ends, with extra attention around cups, center front, side seams, waist, zipper, and straps. Lining should be reviewed for bunching, twisting, excessive tightness, exposure at the neckline or zipper, poor cup attachment, and uncomfortable internal edges. A lining that is shorter or tighter than the shell can pull the outside of the bodice out of balance, while excessive lining ease can twist, show at the hem, or interfere with dressing. Outer appearance and internal cause should always be reviewed together. If a structured panel keeps rippling, stronger pressing may hide the symptom temporarily while the underlying tension imbalance remains unchanged.
Appearance Signals
Many visible defects are useful because they point toward deeper construction problems. Zipper waves may come from waist tension, zipper feeding, seam length, or lining behavior rather than the zipper itself. A neckline gap can be related to upper-bust shape, cup projection, boning position, or stretch. Uneven cups may result from cup placement, panel sewing, pattern symmetry, or uneven support. Visible boning ridges can reflect channel position, bone profile, shell-fabric thickness, or pressing. The inspection team should therefore use appearance as evidence, not merely as a list of faults to hide. When the same visual symptom repeats through production, root-cause correction is usually more effective than repeated cosmetic repair. This is also where experienced dress factories create measurable value: they do not only remove defective finished pieces; they change the pattern, operation, component, or QC checkpoint that is generating the defect before the problem becomes part of the whole lot.
Visible Symptom | Areas to Investigate | Typical Corrective Direction |
Zipper waves | Waist tension, zipper feeding, seam length, lining | Rebalance seam or installation method before rework |
Neckline gap | Upper-bust pattern, cup shape, boning, stretch | Review fit and structural support rather than adding tension blindly |
Uneven cups | Cup placement, panel sewing, pattern symmetry | Check markings, cup openings and left-right construction |
Waist rippling | Shaping, seam tension, lining tension | Compare pattern, seam allowance and layer balance |
Visible boning | Channel location, bone profile, shell fabric | Review internal placement and material compatibility |
Twisted center front | Cutting grain, panel symmetry, sewing sequence | Verify cut panels and operation alignment |
Exposed lining | Lining length, attachment, pressing | Correct internal pattern or attachment method |

How Should Corset Dress QC Run from Sample to Bulk?
Corset dress QC should begin during development and continue through material inspection, cutting, first-piece approval, in-line sewing checks, measurement review, fit evaluation, finished-garment inspection, pressing, packing, and final release. Structural defects become more expensive to correct as assembly progresses, so the objective is to prevent and contain errors early rather than depend on a final inspection to discover them.
Before Cutting
Bulk fabric and trims should be checked against approved references before cutting begins because structured dresses are sensitive to substitutions that appear minor on paper. The shell fabric, lining, cups, boning, zipper, hooks, eyelets, elastic, labels, and decorative components should match the confirmed construction. Material inspection may include shade, hand feel, width, surface condition, stretch and recovery where relevant, shrinkage risk, colorfastness requirements, transparency, snagging risk, and fabric-specific damage. Testing depth should match the material, target market, and project risk rather than applying every laboratory test to every order. After material approval, cutting inspection should focus on grain direction, paired-piece symmetry, pattern version, cup openings, corset panels, waist shaping, notches, center-front and center-back pieces, and placement marks for boning or decoration. Complex panels should be checked early in the lay or first bundles so that a cutting error does not spread through hundreds of pieces. Once inaccurate structured panels have been cut in bulk, later sewing corrections often create new fit or appearance problems instead of truly restoring the approved shape.
In-Line Inspection
In-line QC is most valuable when it targets operations that are expensive or difficult to repair after the bodice has been closed. High-value checkpoints include cup placement, boning channel position, panel symmetry, neckline construction, waist-seam alignment, zipper preparation, reinforcement, lining attachment, and critical measurements. The first pieces after a new operation begins deserve close attention because they reveal whether the machine setup, operator method, seam allowance, and component placement are producing the expected result. If the same neckline imbalance appears on five consecutive units, removing those five dresses does not solve the production risk; the line needs to identify whether the problem comes from fabric feeding, operator handling, pattern alignment, cup position, or the construction sequence. For high-risk structured styles, many factories also use 100% functional checks on closures during finished-garment QC because zipper or lacing failure immediately affects usability. In-line reporting becomes more useful when repeated problems are tracked by operation, size, color, or line, allowing the team to distinguish an isolated sewing mistake from a systematic technical issue.
PP and Golden Samples
The PP sample should represent the intended bulk standard closely enough that production and QC teams can use it as a physical benchmark, while a sealed Golden Sample provides a stable reference after multiple revisions have been completed. A practical development path may move from development sample to fit review, revised sample, PP sample, Golden Sample, first bulk piece, in-line QC, and final garment inspection. The important point is that every approved correction must move into production documentation. If the sample was accepted only after changing boning length, lowering the neckline, moving the bust point, adjusting the waist, or changing zipper construction, those decisions need to appear in the correct pattern version, measurement chart, trim record, sewing instructions, and QC checkpoints. Otherwise, a line can unintentionally return to an earlier construction even while believing it is following the approved style. This disciplined transfer from sample to bulk is particularly valuable for repeat orders, multi-color programs, and production split across more than one manufacturing unit, where informal memory is not a reliable quality-control system.
Final Garment and Packing QC
Finished-garment inspection should verify that the completed production still matches the approved standard after sewing, trimming, pressing, and handling. Inspectors should confirm critical measurements, cup and boning structure, neckline and bodice balance, zipper or lace-up function, seam quality, lining stability, stains or damage, pressing, labels, size identification, and any barcode or SKU information required by the order. Packing review should then confirm folding, protective materials, polybag method, assortment, carton quantity, and carton marks where specified. A well-made dress packed under the wrong size or barcode can still create warehouse receiving errors, stock mismatches, or customer claims, so packing accuracy belongs inside quality control rather than being treated as a separate administrative detail. Final inspection should confirm that earlier controls have worked; it should not be the first moment when major cup, boning, fit, or closure problems are discovered. For brands producing custom corset collections, this sample-to-bulk discipline is also the most useful foundation for repeat orders because approved patterns, component records, and QC checkpoints can be carried forward instead of rebuilt from memory each season.
How Do You Set AQL and Final Acceptance?
AQL and final acceptance should be based on the agreed inspection plan, lot size, inspection level, defect classification, product risk, and client quality requirements. Critical, major, and minor defects need to be defined before inspection begins. AQL is an acceptance-sampling framework for deciding whether a sampled lot meets agreed criteria; it is not a production target or permission to manufacture a fixed percentage of defects.
Defect Classification
Consistent defect classification prevents inspectors from making different decisions about the same problem. Critical defects generally involve serious safety, legal, or severe usability concerns under the agreed quality standard; for a corset dress, an exposed sharp structural component that could injure the wearer requires very different treatment from a loose thread. Major defects materially affect function, fit, appearance, specification compliance, or saleability and can include failed closures, broken or exposed boning, severe cup asymmetry, open seams, significant measurement deviation, incorrect size identification, substantial stains, wrong materials, or major structural distortion, depending on the brand’s approved manual. Minor defects normally have limited impact on function or overall appearance, such as an isolated loose thread or a small pressing inconsistency. The same physical issue can be classified differently by different brands because product price level, retail positioning, intended use, and contractual standards vary. For that reason, the customer’s approved defect manual should take priority over examples copied from a generic internet checklist.
AQL Sampling
AQL inspection uses a sampling plan rather than inspecting an arbitrary number of garments and making a subjective release decision. The practical process begins by defining the inspection lot, selecting the agreed inspection level, determining the applicable sample size, applying the agreed limits for defect categories, inspecting the selected pieces, recording findings, and comparing the results with the acceptance and rejection criteria in the chosen plan. Brands should avoid treating one AQL value as a universal rule for every corset dress because the required limits can change with retailer requirements, product risk, order value, historical supplier performance, and contractual quality standards. AQL also does not mean that every uninspected garment is automatically defect-free. It is a statistical acceptance method, which is why strong manufacturing programs combine material controls, in-line inspection, functional checks, and final sampling rather than placing all responsibility on a single pre-shipment inspection. Where a customer uses its own sampling standard or appointed third-party inspection agency, those agreed requirements should be incorporated before production rather than discussed only after the shipment is ready.
Acceptance Decisions
Final acceptance should consider both defect count and defect pattern because two inspection samples with similar totals can represent very different production risks. Several unrelated minor issues scattered randomly across different pieces may indicate ordinary workmanship variation, while the same number of findings concentrated around one right cup, one zipper operation, or one size can reveal a repeatable process problem that may exist beyond the inspected sample. A professional release decision therefore considers statistical results, defect severity, repeat frequency, concentration by size or color, effect on safety or function, reliability of repair, and whether the root cause has been understood. For larger programs, a rejected lot may need sorting, repair, reinspection, or a wider investigation depending on the pattern of findings. Brands that appoint third-party inspectors should also ensure that the inspector receives the correct approved sample, measurement chart, defect definitions, packing specification, and any special product risks. An external inspection is only as useful as the standard against which the garments are actually judged.

Corrective Closure
A failed inspection is not properly closed when defective garments are simply moved to a repair table. A disciplined corrective process identifies what failed, isolates the affected goods, investigates the root cause, defines an appropriate repair or rework method, checks repaired pieces, reviews the remaining inventory, updates production or QC controls where necessary, and then performs reinspection before release. If zipper rippling appears repeatedly, the team should determine whether the cause is installation, seam feeding, pattern length, lining tension, waist pressure, or zipper specification. If cup asymmetry repeats, the investigation should include pattern symmetry, cup markings, cutting accuracy, cup components, operator method, boning position, and sewing sequence. The greatest value comes when corrective action changes future production records. Pattern revisions, measurement corrections, trim specifications, sewing instructions, and QC checkpoints should be updated so that the defect does not return on the next color, size run, or repeat order. That is the difference between repairing a shipment and improving a manufacturing system.
Conclusion
Corset dress quality control works best when the garment is treated as a structured system rather than a simple dress with a few extra components. Cups, boning, panels, neckline, lining, measurements, closures, sewing, and fit all influence one another, so inspection needs to begin during development and remain active through cutting, in-line production, finished garments, and shipment release. For brands developing corset dresses in multiple sizes, colors, or seasonal collections, the most valuable supplier is not the one that promises zero defects; it is the one that can define the approved standard, identify structural risk early, document corrections, and reproduce the accepted result consistently in bulk. Jinfeng Apparel supports custom womenswear development from structure review and sampling through bulk production, quality control, private-label packing, and repeat-order records, allowing technical requirements to remain connected as a style moves from sample approval into production.
Share This Article :

Jerry Lee
Categories

Latest blogs
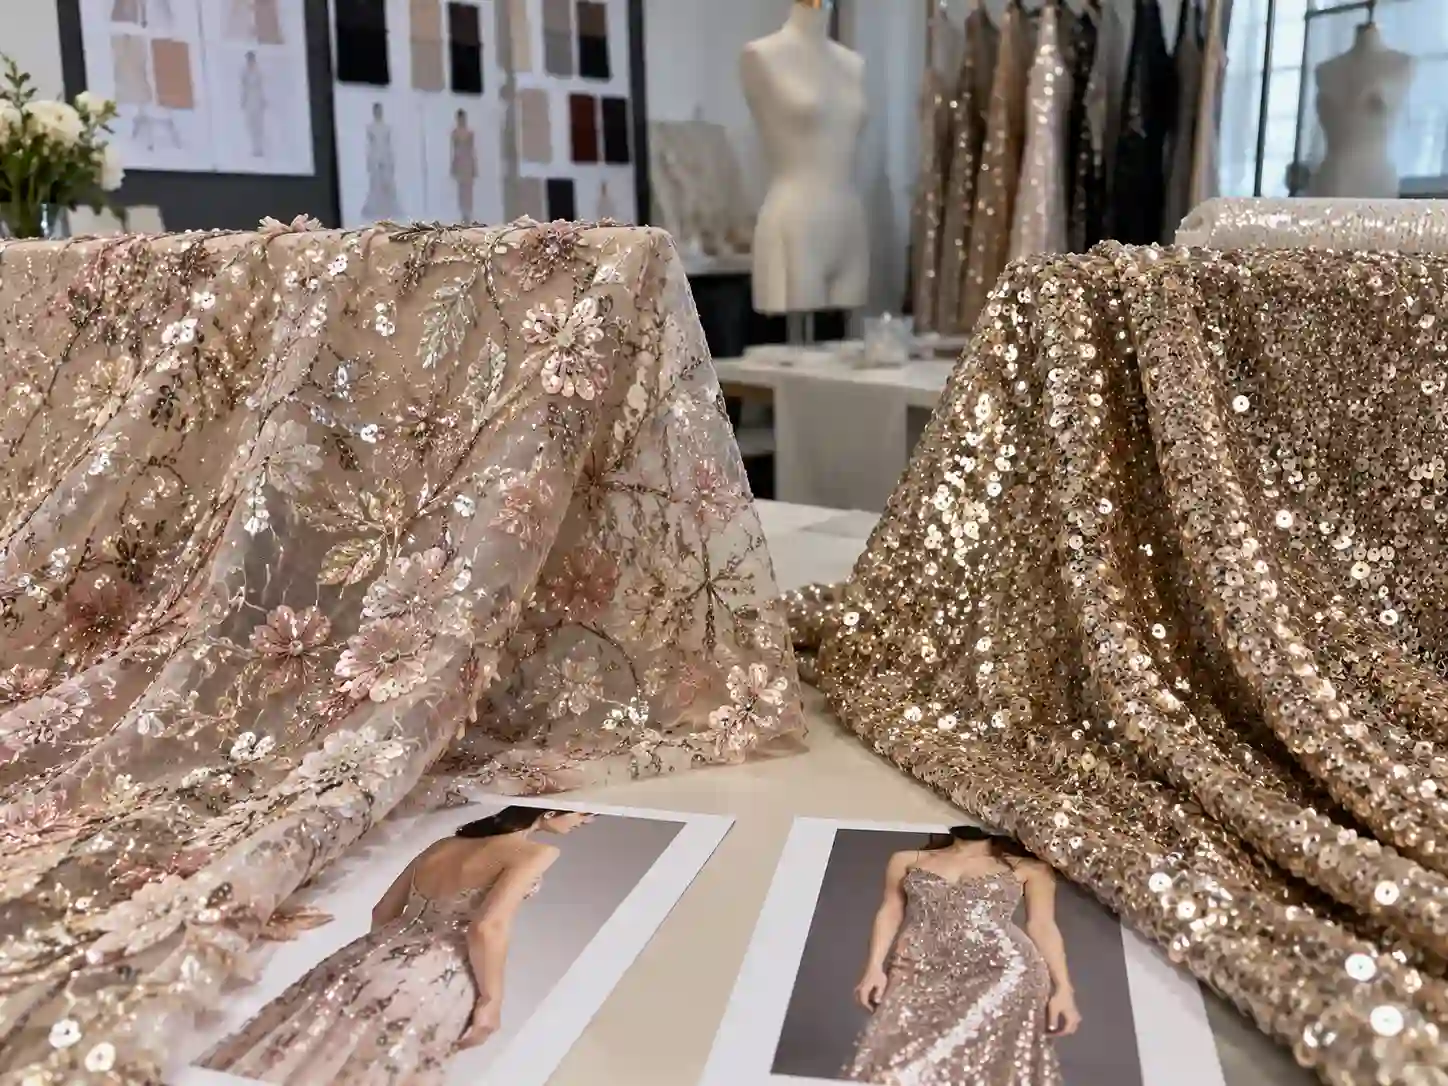


Table of Contents
Here, developing your OEM/ODM private label clothing collection is no longer a challenge—it’s an excellent opportunity to bring your creative vision to life.

