Skip to content
Do you have a beautiful dress hanging unused because it doesn’t fit right? Wearing an ill-fitting dress can ruin your confidence and comfort. Fortunately, with some basic tailoring skills, you can transform that dress into your new favorite outfit.
Tailoring a dress1 involves identifying fit issues, measuring carefully, marking adjustments, removing excess fabric, and sewing new seams. With patience, basic sewing skills, and the right tools, you can significantly improve the fit and appearance of your dress without needing professional help.
Let me guide you step-by-step, so you can turn your frustrating clothing dilemmas into rewarding fashion solutions.
Why might you need to tailor a dress?
Sometimes a dress you love isn’t quite right. It could be a little loose, too long, or just unflattering. Tailoring can quickly fix these issues.
Common reasons to tailor a dress include improving fit issues like looseness or unflattering shapes, revitalizing outdated garments, or saving money by making minor adjustments instead of buying new clothes. Tailoring helps your wardrobe become personalized, practical, and stylish without overspending.
 Tailoring essentials
Common Fit Issues: Too Loose, Too Long, Unflattering Shape
Fit issues are common. Dresses that are loose at the waist or hips can look sloppy. Excess length can feel awkward or uncomfortable. Tailoring quickly resolves these issues, making your clothing flattering and comfortable.
Breathing New Life Into Old Favorites
Do you have an older dress you can’t bear to discard? Tailoring helps you modernize outdated styles or restore your favorite pieces to their former glory, giving them new life.
Saving Money vs. Buying New Clothes
Tailoring saves money. Instead of buying a new dress, minor adjustments can dramatically improve the garments you already own, stretching your clothing budget and reducing unnecessary waste.
What essential tools do you need for dress tailoring?
Tailoring a dress successfully requires the right tools. Gathering basic supplies ensures your project goes smoothly.
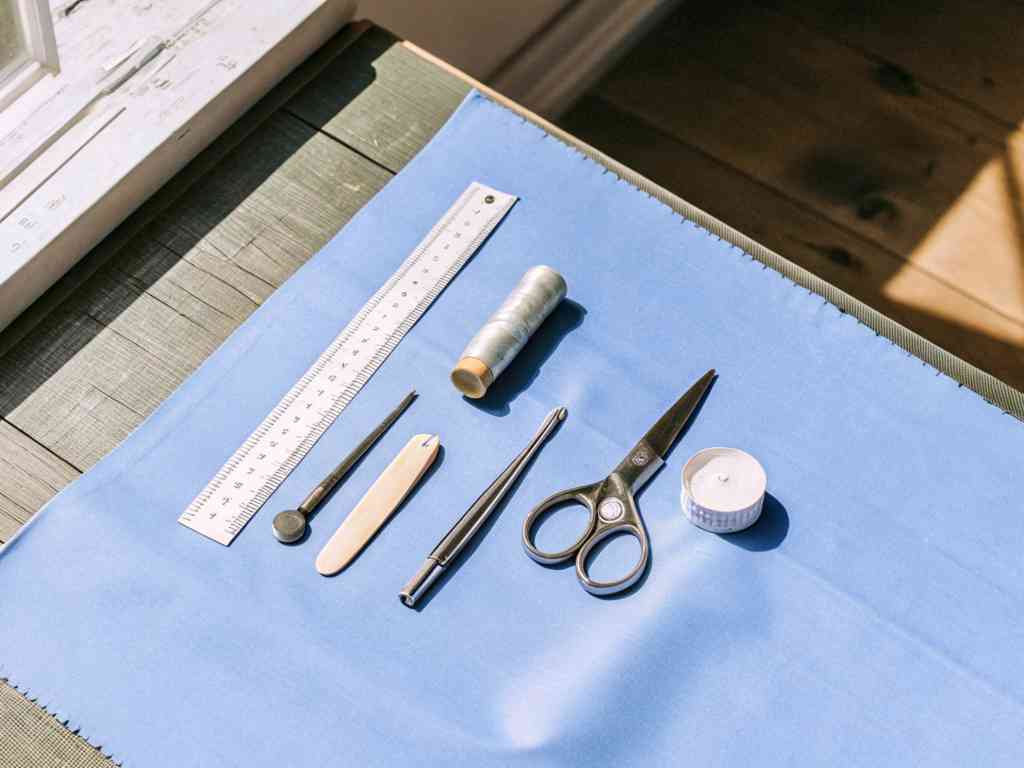
Essential tailoring tools include measuring tape, fabric marking tools, sharp fabric scissors, seam rippers, pins, tailor’s chalk, and a reliable sewing machine. Optional but useful tools include dress forms or mannequins for better fitting visualization.
Measuring Tape and Fabric Marking Tools
Measuring tape helps you record accurate body measurements. Fabric markers ensure precision when marking adjustments on your garment.
Seam Ripper and Sharp Fabric Scissors
A seam ripper helps you carefully undo stitches without damaging fabric. Sharp fabric scissors cleanly cut fabric edges, minimizing fraying.
Pins, Tailor’s Chalk, and a Good Sewing Machine
Pins hold fabric securely in place. Tailor’s chalk lets you make easily removable marks. A good sewing machine ensures reliable stitching, saving you effort and frustration.
Optional But Helpful: Dress Form or Mannequin
A dress form or mannequin allows visualizing adjustments realistically, making it easier to judge proportions and symmetry.
Step-by-step process to tailor a dress
Follow these clear steps for confidently tailoring any dress at home.
To tailor a dress, first evaluate fit issues by pinning the dress inside out. Next, measure carefully, mark adjustments clearly, remove excess fabric cautiously, baste and sew new seams, and finish with pressing seams and trimming threads to ensure a polished final look.
1. Evaluate the Fit and Identify Problem Areas
Try the dress inside out, pinning loose areas. Focus on shoulders, bust, waist, hips, and length. This helps visualize changes needed.
2. Take Accurate Measurements
Measure bust, waist, hips, and length. Accurate measurements prevent mistakes, ensuring alterations fit your body precisely.
3. Mark the Adjustments
Use tailor’s chalk or fabric markers to clearly indicate where you’ll cut or sew. Clear markings reduce errors during alterations.
4. Remove Excess Fabric
Carefully use a seam ripper to open necessary seams or darts. Trim cautiously, leaving extra fabric initially to avoid mistakes.
5. Sew New Seams and Test Fit
Initially baste new seams (temporary stitches) to test fit. Once satisfied, sew permanent seams. Frequent fittings help ensure accuracy.
6. Final Touches
Finally, trim excess threads, press seams for a smooth finish, and double-check symmetry for professional-looking results.
Specific tailoring projects for dresses
Gain confidence by mastering these common dress alterations.
Common dress tailoring projects include taking in waistlines, shortening hemlines, adjusting shoulder straps, and adding darts for bust shaping. These straightforward adjustments dramatically improve fit, comfort, and overall appearance, making your dresses look custom-made.
How to Take in a Dress at the Waist
Pin excess fabric at side seams or darts. Mark adjustments clearly, remove excess fabric, then sew carefully for a tailored waistline.
How to Shorten a Dress Hem
Measure desired length, mark the hemline clearly, trim fabric evenly, and sew a neat hemline, ensuring a flattering final length.
How to Adjust Shoulder Straps for a Better Fit
Pin straps for ideal placement, mark adjustments clearly, remove stitching, trim fabric if needed, and resew straps securely.
How to Add Darts for Bust Shaping
Pin fabric vertically or horizontally at the bust, mark dart placements, remove fabric carefully, and sew darts neatly for better shaping.
Tips for tailoring different dress fabrics
Fabric choice impacts how you approach tailoring. Here’s how to handle common dress fabrics carefully.
Different fabrics require specific techniques. Stretch fabrics need specialized stitches, woven fabrics are easier to tailor, and delicate materials like silk and chiffon need gentle handling. Knowing how to manage each fabric type ensures successful tailoring outcomes.
Working with Stretchy Fabrics vs. Woven Fabrics
Stretchy fabrics need elastic stitches and careful handling to prevent puckering. Woven fabrics are stable and easier to control during tailoring.
Dealing with Delicate Materials Like Silk and Chiffon
Delicate fabrics need sharp needles, careful cutting, and slow sewing to avoid tearing or fraying. Use tissue paper underneath to stabilize seams.
Common mistakes to avoid when tailoring a dress2
Avoid these common pitfalls to ensure your tailoring project succeeds smoothly.
Avoid common tailoring mistakes like overfitting, cutting too much fabric too soon, and skipping test fittings. Taking these precautions ensures your dress fits comfortably, looks polished, and avoids costly or frustrating errors.
Overfitting: Leaving No Room for Movement
Always leave some ease in your measurements. Tight dresses can look good standing but become uncomfortable when sitting or moving.
Cutting Too Much Fabric Too Soon
Start conservatively when trimming fabric. It’s easy to trim more later, but difficult or impossible to add fabric back.
Skipping Test Fittings
Frequent fittings catch mistakes early. Skipping this step increases chances of irreversible errors.
Conclusion
Tailoring your own dresses saves money, revitalizes your wardrobe, and gives you customized comfort. With patience, careful measurements, and proper tools, you’ll quickly master basic alterations, transforming your clothing and boosting your confidence.