Skip to content

How to Improve Bodycon Dress Fit: Pattern, Fabric, Testing, and Production Control

Your trusted Women’s Apparel Manufacturer from China
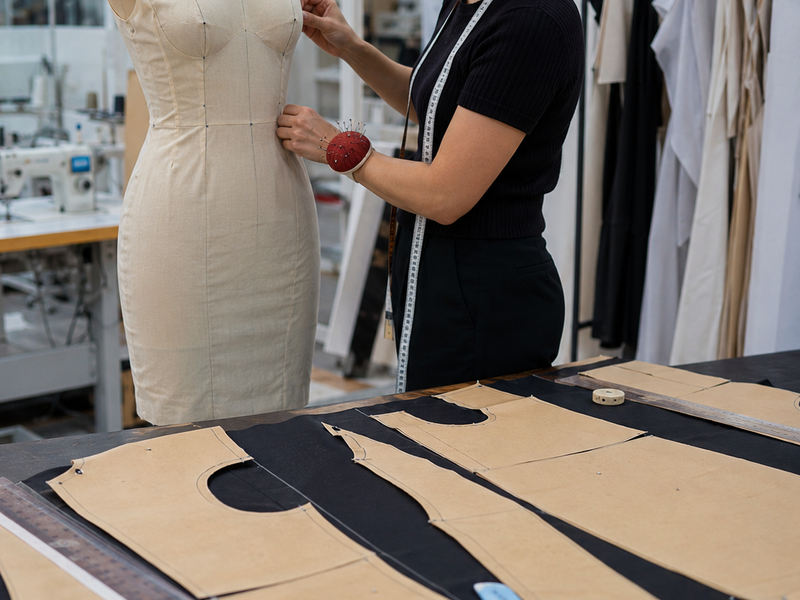
A bodycon dress can match an approved measurement chart and still look wrong once someone puts it on. The waist may measure correctly while the side seam twists toward the front. The hip may fall within tolerance while the hem gradually climbs after walking. A neckline may lie flat on a mannequin but open after the wearer sits, turns, or raises her arms. These problems are reminders that bodycon fit is not simply a matter of making a garment smaller or tighter.
To improve bodycon dress fit, treat fit as a relationship between body proportions, pattern balance, negative ease, fabric stretch, recovery, vertical length, construction, and movement. A successful bodycon dress should contour the bust, waist, hip, and thigh smoothly while keeping seams stable, maintaining coverage, allowing normal movement, and returning close to its intended position after walking or sitting.
The difficult part is identifying which element is causing the problem. A technician might remove one centimeter from the waist, add volume at the hip, and redraw the side seam, yet the sample still rides upward because the real issue is weak fabric recovery or insufficient back-body length. Once the cause is diagnosed correctly, fit corrections become far more controlled. The following sections look at bodycon fit the same way experienced pattern makers and garment developers do: by reading the garment, testing its behavior, and changing only what the evidence supports.
What Does a Good Bodycon Dress Fit Look Like?
A well-fitted bodycon dress follows the bust, waist, hip, and thigh closely without looking overstretched or feeling unnecessarily restrictive. Side seams remain balanced, the neckline stays secure, and the hem returns near its intended position after movement. Good fit combines controlled negative ease, suitable fabric recovery, balanced front and back length, comfortable mobility, and a clean silhouette rather than maximum compression.
How Tight Should It Be?
One of the most common mistakes in bodycon development is assuming that tighter automatically means more flattering. Once the fabric is stretched beyond the range the pattern and construction can support, the opposite usually happens. Horizontal strain lines appear around the bust or hip, lighter colors become more transparent, seam allowances begin to show through the surface, and the skirt starts moving upward with every step.
The correct level of tightness depends on both design intention and material behavior. A firm ponte midi may need relatively modest negative ease because the fabric already provides structure. A lightweight stretch jersey mini may tolerate more reduction because it extends more easily. Rib knits can stretch substantially, but if their recovery is weak, a tightly fitted waist may become noticeably looser after sitting or wearing the dress for an hour.
For that reason, fit should be judged by behavior rather than by one measurement or percentage. A successful garment should allow a normal walking stride, maintain reasonable coverage, recover after sitting, and avoid persistent pulling at the hip, neckline, armhole, or hem. When someone repeatedly needs to pull the skirt down or adjust the neckline, the dress is giving a clear technical signal even if the specification sheet looks correct.
How to Read a Balanced Fit
Bust, waist, and hip measurements matter, but their relationship matters more. Two people can share the same full-hip circumference while distributing body volume very differently. One may have greater side-hip width, while another has stronger seat projection. A pattern based only on total circumference can therefore measure correctly and still create different tension paths when worn.
Vertical balance is equally important. A fuller bust uses more front-body length, while greater seat projection uses more back-body length. If the pattern does not account for this, the garment may borrow length from another area. The front waist can rise, the back hem can lift, or a horizontal design line can tilt even though bust, waist, and hip measurements technically remain within tolerance.
A good fitting session watches the garment’s landmarks. The waistline should sit approximately where the design intends. Side seams should remain reasonably vertical. Ruching, panel seams, cut-outs, slit positions, and waist details should not be dragged toward areas of greater tension. When several of these landmarks shift in the same direction, the pattern is usually revealing a balance problem rather than a simple sizing issue.
Does Fit Hold During Movement?
A bodycon dress should never be approved only because it looks clean in a front-facing photograph. Walking, sitting, bending, raising the arms, and rotating the torso redistribute tension through the fabric. A sample that appears excellent while someone stands still can become uncomfortable, unstable, or visually distorted after less than a minute of normal movement.
A practical fitting can include 10–20 normal walking steps, several longer strides, sitting for 30–60 seconds, standing without manually pulling the dress back into place, raising both arms, and turning the torso left and right. These figures are not universal industry standards; their value comes from repeating the same actions consistently across sample rounds so the team can compare performance instead of relying on memory.
After movement, observe the hem, waist, neckline, side seam, and fabric surface. Some temporary movement is completely normal. A fitted mini will rise slightly when someone sits, and stretch fabric will extend around the hip during a long stride. The more useful question is what happens afterward. If the garment returns close to its original position without manual adjustment, the fabric-pattern relationship is working. If it stays several centimeters higher, twists, or bags, more development is needed.
Jinfeng Apparel’s documented fit-development system also treats stretch recovery, hip fit, hem length, side seams, coverage, and sitting or walking comfort as connected factors rather than separate cosmetic details.
What Causes Common Bodycon Fit Problems?
Most bodycon fit problems come from an interaction between pattern proportion, vertical balance, negative ease, fabric behavior, cutting accuracy, and construction. Wrinkles, twisting, ride-up, gaping, and bagging are symptoms rather than causes. Reliable troubleshooting starts by locating where tension originates before measurements are changed, because correcting the wrong area can easily create a new problem somewhere else in the garment.
What Wrinkles and Twisting Reveal
Persistent wrinkles are valuable diagnostic clues because they show where the garment is trying to move. Horizontal lines across the hip often indicate tension, but the cause may be insufficient circumference, insufficient back length, low available stretch, or poor recovery. Diagonal lines frequently lead toward an area where the pattern is being pulled out of balance, while vertical folds can indicate local excess or weak fabric support.
The important point is that wrinkles should be interpreted, not automatically removed. A technician who sees horizontal lines and immediately takes fabric away may increase the very tension creating those lines. During a fitting, photograph the garment from the front, side, and back, then repeat the photographs after walking and sitting. Compare where each wrinkle begins, where it points, and whether it disappears after the garment has had time to recover.
Side seams offer another strong clue. When a seam consistently rotates forward or backward, the garment may be redistributing volume between the front and back. However, pattern balance is not the only possible cause. Fabric torque, off-grain cutting, uneven sewing feed, and residual tension in the knit can produce similar symptoms. The seam should therefore be checked both flat and on the body before the paper pattern is altered.
Fit Symptom | Likely Causes to Check | First Technical Checks |
Horizontal lines at hip | Excessive negative ease, short back length, low stretch | Hip measurement, back length, fabric extension |
Side seam twists forward | Back requires more volume or length, fabric torque | Front-back balance, grain direction |
Side seam twists backward | Front requires more volume or length | Bust or abdomen balance, front length |
Lower-back bagging | Excess back length, weak shaping, poor recovery | Back waist length, seam shaping, recovery |
Neckline gaping | Excess edge length, bust imbalance, stretched edge | Upper bust, neckline length, stabilization |
Hem rides up | Hip tension, friction, short back length, narrow hem | Hip ease, hem width, back length, lining |
Waist loosens after wear | Weak recovery, excessive stretch, poor shaping | Recovery test, waist pattern, construction |
What Causes Ride-Up and Gaping?
Ride-up is one of the most common complaints in fitted dresses, yet making the garment longer does not necessarily solve it. The skirt rises because movement creates upward force that the garment cannot comfortably absorb. Excessive hip or thigh tension is an obvious cause, but front-to-back length balance, surface friction, lower-skirt width, lining, and fabric recovery can all contribute.
Seat projection is particularly important. A fuller seat requires additional vertical fabric across the back. If the pattern is too short in this area, the dress may pull fabric upward from the skirt. Adding more hip width can reduce pressure but will not always replace the missing vertical length. This is why a garment can still ride up even after the hip circumference has been increased.
Gaping requires the same diagnostic approach. A neckline that is loose from the moment the dress is put on may have excessive edge length or poor upper-body shaping. A neckline that looks correct initially but opens after twenty minutes of wear may point more strongly to weak recovery or inadequate stabilization. Lower-back bagging can follow a similar pattern: immediate looseness often suggests pattern excess, while looseness that appears after sitting suggests fabric growth.
Construction can amplify each problem. A highly elastic neckline may need clear elastic, binding, stabilization tape, lining, or carefully controlled seam tension. A smooth shell paired with a high-friction lining may create more ride-up than expected. Fit and construction are therefore difficult to separate in a bodycon garment because the sewing method determines how faithfully the pattern survives real wear.
Is It Size, Pattern, or Fabric?
This distinction is one of the most useful skills in fitted-garment development because size, pattern, and fabric problems can produce similar visual symptoms. A size problem usually affects much of the garment in the same direction. If bust, waist, and hip are all clearly smaller than specification, the sample itself may simply be undersized rather than incorrectly patterned.
Pattern problems tend to be more localized. A tight bust combined with a loose waist, a level front hem with a high back hem, or a side seam that rotates only through the hip suggests proportion or balance rather than a general sizing error. In these cases, moving to the next size can fix one region while creating looseness in several others.
Fabric problems become more likely when the same pattern behaves well in one material and poorly in another. Two fabrics can share the same fiber composition while differing in knit construction, stretch percentage, recovery, friction, shrinkage, weight, or finishing. Those differences directly change how much tension the pattern experiences on the body.
A sensible diagnostic sequence is to measure the garment, confirm the fit model against the intended body standard, test fabric stretch and recovery, inspect grain direction, observe movement, and only then change the pattern. This prevents a development team from repeatedly adjusting paper patterns to compensate for a material or production problem that will simply return during bulk manufacturing.
How Do Stretch and Recovery Affect Fit?
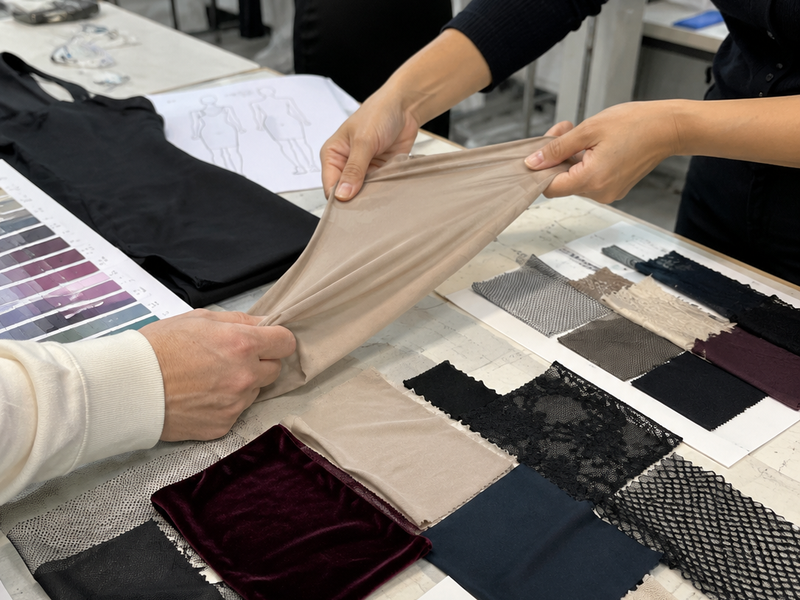
Stretch describes how far a fabric can extend, while recovery describes how closely it returns toward its original dimensions after the force is removed. Bodycon dresses need both. High stretch with poor recovery encourages bagging and migration, while strong recovery with insufficient stretch can create excessive compression. Negative ease should therefore be developed around the approved fabric instead of copied unchanged between different materials.
How Negative Ease Works
Negative ease means that the finished garment circumference is smaller than the corresponding body circumference, requiring the fabric to extend when worn. It is fundamental to most bodycon garments, but there is no single percentage that works across every jersey, rib knit, ponte, mesh, or spandex-blend fabric.
If a fit model has a 100 cm hip and the garment measures 94 cm at the corresponding level, nominal negative ease is approximately 6%. That figure sounds precise, but it says very little about comfort until fabric behavior is considered. Six percent can feel gentle in one soft, high-stretch jersey and noticeably firm in a dense ponte with limited extension.
The ranges below are best used as development starting points rather than universal production specifications. Actual values should be validated with the approved fabric, garment structure, intended wearer, lining, and product category.
Intended Fit | Illustrative Negative Ease | Typical Material Requirement |
Light contour | 0–5% | Firm knit with stable recovery |
Standard bodycon | 5–10% | Balanced stretch and recovery |
Strong sculpted fit | 10–15% | High stretch with strong recovery |
Higher compression | Above 15% | Requires product-specific validation |
Different parts of the garment can also require different tension relationships. The waist may visually benefit from more reduction, while the hip needs enough extension for sitting and walking. The bust may need coverage and vertical length rather than stronger compression. Applying one negative-ease percentage uniformly around the entire body oversimplifies how a fitted dress actually functions.
How to Judge Stretch and Recovery
A useful development test records extension in both width and length directions. Width stretch usually carries most of the demand around bust, waist, hip, and thigh, while length stretch becomes especially important in long bodycon styles, ruched dresses, cut-outs, and garments where vertical recovery affects hem position.
A simple stretch calculation can be expressed as:
Stretch % = (Extended Length − Original Length) ÷ Original Length × 100
For example, if a marked 10 cm section extends to 15 cm under controlled tension, its extension is 50%. However, maximum extension alone does not tell the whole story. After release, the fabric should be measured again to determine whether it returns close to 10 cm or remains permanently longer.
A fabric that stretches to 50% and quickly returns near its original measurement can behave more predictably in a fitted waist than a fabric that stretches to 70% but retains noticeable growth. Repeated cycling is also useful because the first extension can behave differently from later ones. For commercial programs, brands may specify laboratory procedures for stretch, growth, shrinkage, pilling, colorfastness, or dimensional stability.
Jinfeng Apparel’s documented fabric system evaluates characteristics including stretch, transparency, lining requirements, shrinkage, hand feel, drape, and bulk-production risk rather than selecting fitted-dress fabrics on composition alone. This approach is important because two polyester-spandex fabrics with similar percentages on the label can perform very differently once they are knitted, finished, cut, and worn.
How Weight, Opacity, and Lining Change Fit
Fabric weight changes both the appearance and the mechanics of a bodycon dress. Lightweight jersey can follow small body contours closely and create a softer look, but it may reveal underwear lines, seam allowances, or changes in opacity when stretched. Pale colors usually require especially careful review because the spacing between knitted loops becomes more visible under tension.
Heavier ponte or Roma fabrics can create a smoother and more structured silhouette, yet they introduce their own compromises. Dense material can feel warmer, create stronger compression, produce bulkier seams, and resist soft ruching. In a long fitted dress, the additional weight can also influence neckline tension and vertical length.
Opacity should be evaluated under expected extension, not only while the fabric lies relaxed on a table. One practical method is to place the material over contrasting light and dark surfaces and stretch it approximately to the level expected around the wearer’s bust or hip. If transparency becomes unacceptable only under high tension, reducing negative ease or selecting a denser material may be more effective than adding a full lining.
Lining can completely change effective fit. A shell that stretches 40–50% paired with a lining that stretches only 15–20% will behave according to the more restrictive component. Recovery mismatch can also create internal drag, bubbling, twisting, or hem migration. For this reason, shell fabric, lining, elastic, binding, zipper construction, seam type, and pressing should be evaluated as one garment system rather than as unrelated material decisions.
How Do You Correct a Bodycon Dress Pattern?
Bodycon pattern correction should address the source of imbalance instead of simply adding or removing circumference. Begin with bust-waist-hip relationships, then review front and back vertical length, side-seam position, neckline, armhole, and lower-skirt behavior. Every major correction should be evaluated again in the approved fabric because stretch and recovery directly influence how strongly a paper-pattern change affects the finished garment.
Balance Bust, Waist, Hip, and Length
Many difficult fit problems persist because development teams focus almost entirely on circumference. A bodycon dress is three-dimensional, so vertical length is just as important as width. A fuller bust consumes additional front-body length, while greater seat projection consumes additional back-body length. When the pattern does not supply that length, another area is forced to compensate.
During fitting, horizontal landmarks at the waist, high hip, and full hip can make this imbalance easier to see. If the waistline tilts upward at the front, additional bust or front-body length may be required. If the back hem rises while the front remains level, the pattern may need more length over the seat rather than more width around the entire hip.
Localized circumference changes should be approached in the same way. A sample that is tight at the bust but loose at the waist does not need to be graded up everywhere. The bust requires more room while the waist still needs controlled shaping. Depending on design, that adjustment may be distributed through side seams, princess panels, center-back seams, darts, curved panels, or stretch.
Jinfeng Apparel’s documented pattern-development capability covers bodycon patterns and specific control points including bust, upper bust, underbust, waist, high and low waist, hip, front length, back length, neckline, armhole, slit, and lining. Its internal fact sheet records 7+ senior pattern makers working with two sample rooms and 20+ sample machinists.
Correct Side-Seam Twist and Ride-Up
A twisted side seam should be investigated before it is redrawn. Lay the garment flat first. If the seam is already distorted without a wearer inside, grain direction, cutting accuracy, fabric torque, or uneven sewing feed becomes a stronger suspect. If the seam is straight when flat but consistently rotates on the body, front-to-back pattern balance deserves closer attention.
Mark the intended side-seam position on the fit model and observe it at the underarm, waist, high hip, full hip, thigh, and hem. A seam can remain perfectly balanced at the waist while shifting 1–2 cm around the hip. Moving the entire seam would therefore be too crude; the correction may need to redistribute volume only around the seat or front hip.
Ride-up should also be diagnosed locally. If an entire mini climbs upward, hip and upper-thigh compression may be too strong. If only the back rises, back-body length may be insufficient. If a midi moves upward only during walking, the lower skirt or slit may be restricting stride. When the hem rises and remains high after the wearer stops moving, weak fabric recovery or friction can be contributing.
A useful fitting record measures the hem position before and after a repeatable walking test. Comments such as “better” or “still moves” are difficult to compare across sample rounds. A note stating that hem migration dropped from approximately 4 cm to 1 cm under the same test gives the pattern maker a much clearer indication of whether the correction worked.
Refine Neckline and Armhole Fit
Neckline and armhole fit problems should be reviewed only after neighboring body areas have been checked. A neckline may gape because its edge is too long, but it can also be pulled open by an overly tight bust or incorrect strap angle. Cutting away the visible excess without correcting the underlying tension can create a smaller opening that still behaves poorly during movement.
Pinning out excess during the fitting helps reveal where the problem originates. If a small localized pinch immediately cleans the neckline without disturbing the bust, a direct edge correction may be appropriate. If tension runs through the entire upper body, more structural changes to bust, upper bust, shoulder, or strap position may be required.
Construction should then be reviewed. Highly elastic neckline edges can grow during handling and sewing. Clear elastic, stabilization tape, binding, lining, facing, or carefully controlled seam tension may be appropriate depending on the design. The correct method is the one that preserves the intended edge while allowing comfortable movement.
Armholes need the same discipline. Removing fabric from an armhole without checking upper-bust width and bust projection can create cutting or restriction. Once corrected, the sample should be tested with arms down and raised. A neckline or armhole that works only when the wearer stands still has not been fully resolved, no matter how clean it looks in the first photograph.

How Is Bodycon Fit Tested Before Production?
Bodycon fit should be tested through a repeatable process that includes measurement review, on-body fitting, movement testing, fabric evaluation, documented pattern correction, and pre-production confirmation. The PP sample should represent the approved fabric, measurements, construction, and fit closely enough to become a reliable production reference before bulk cutting starts, rather than being treated as another visual sample.
Review the Fit Sample
A professional fit review begins before the dress goes onto the model. Measure the sample against the latest specification first. If the finished hip is already 2 cm smaller than the approved measurement, that information changes how the technical team should interpret horizontal strain lines. Pattern alterations should not be used to compensate for a sample-making deviation that already explains the problem.
Once the garment is worn, review it systematically from top to bottom: neckline, straps or shoulders, bust, underbust where relevant, waist, high hip, full hip, thigh, hem, and side seams. Front, side, and back views should all be considered because side photographs frequently reveal bust projection, seat projection, front-back length balance, and hem angle more clearly than a front view.
Keep the wearer in a neutral posture for the initial review. Strong posing can hide genuine problems by changing the relationship between the pelvis, rib cage, shoulder, and garment. Photographs should ideally be taken from approximately the same angle and distance during each sample round so differences are easier to compare.
Comments are most useful when classified by cause. A discrepancy may come from sample measurements, pattern balance, fabric behavior, construction, workmanship, or styling preference. Separating these categories prevents the pattern team from being asked to correct a sewing problem, or the sewing team from trying to compensate for an incorrect paper pattern.
Use Repeatable Movement Tests
Movement testing becomes valuable when the same routine is used repeatedly. The intention is not to create a universal performance standard for dresses; it is to remove some of the subjectivity from comparing the first fit sample, revised sample, PP sample, and production reference.
A straightforward test may involve walking 10–20 normal steps, taking several longer strides, sitting for 30–60 seconds, standing without pulling the garment down, raising both arms once or twice, rotating the torso, and making a shallow forward bend. These actions expose different weaknesses in the garment while still resembling normal everyday movement.
Walking tests hem migration, lower-skirt restriction, thigh tension, and side-seam stability. Sitting exposes hip, seat, waist, and back-length issues. Arm raising tests neckline security, armhole behavior, bust stability, and waist movement. Bending can reveal neckline exposure and back coverage.
Measurements can be added when they genuinely help. Hem position before and after walking, side-seam rotation at the full hip, or visible neckline opening can all be recorded in centimeters. When the first sample rises approximately 4 cm and the next rises only 1 cm under the same movement sequence, the team has objective evidence that the change moved in the right direction.
Record Revisions and Approve the PP Sample
Fit comments need to be specific enough that a pattern maker who was not present can understand exactly what should change. “Waist too loose” is weak technical communication. “Reduce back waist by 2 cm total while keeping front waist and high hip unchanged” gives the pattern team a much clearer instruction.
A reliable fit record can identify the body area, visible problem, dimensional change, pattern action, material impact, construction impact, and whether another sample is required. Annotated photographs are especially useful for neckline gaping, side-seam movement, hem imbalance, localized wrinkles, ruching position, and areas where two-dimensional measurements do not fully describe the issue.
Once the correction works, the revised measurements and pattern should replace the earlier version throughout the development system. Pattern V2, specification V3, and an old sewing instruction should never remain active at the same time. Version control sounds administrative, but it directly affects whether fit survives the transition from sample room to production line.
The PP sample is the point where fit development becomes production control. It should confirm approved shell fabric, lining, stretch direction, trims, zipper or elastic where relevant, seam construction, pattern version, finished measurements, and overall fit. Once approved, the final pattern, grade rules, material references, construction instructions, and QC measurement points should all refer to the same production standard.
A documented Jinfeng Apparel bodycon project illustrates how these factors connect. An anonymous European premium bodycon brand developed 10 jersey, rib-knit, and ponte styles totaling approximately 16,000 pieces. Recorded challenges included stretch recovery, bust-waist-hip proportion, side-seam twisting, hem ride-up, and post-wash dimensional stability. Development involved material-recovery review, fabric relaxation, cutting-direction control, pattern adjustment, and garment-measurement QC.
How Do You Keep Bodycon Fit Consistent in Bulk?
Bulk bodycon fit depends on preserving the conditions that created the approved sample. Pattern version, grade rules, fabric stretch, recovery, cutting direction, sewing method, pressing, and measurement control must remain stable. Manufacturers should compare new fabric lots with approved references, check critical dimensions by size, review early production against the PP or Golden sample, and verify post-wash stability when relevant.
Grade Across Sizes
Grading is often described as making a pattern larger or smaller, but body proportions do not increase uniformly across a size range. Bust, waist, hip, shoulder, armhole, front length, and back length follow different growth relationships, so applying one proportional increase across every pattern point can gradually distort the intended silhouette.
Negative ease also needs attention across sizes. Keeping exactly the same percentage reduction from an XS base size through much larger circumferences can increase total compression more than expected. A fit that feels balanced in the base size may become restrictive at the hip, bust, or armhole when the same mathematical relationship is extended without additional fitting.
Extended sizes deserve real fit evaluation rather than automatic enlargement. Bust support, waist-hip balance, back coverage, strap position, armhole comfort, lining behavior, slit height, skirt length, sitting room, and fabric recovery may all need different treatment as sizes increase.
A strong grading file normally includes the approved base size, body measurement standard, finished garment measurements, grade rules, tolerances, fabric stretch reference, target market, and fit preference. When the commercial size range is broad, fitting at least one additional size away from the base can identify proportion problems before every graded pattern is released.
Control Fabric, Cutting, and Measurements
A repeat order can use the same supplier description and fiber composition yet produce a noticeably different fit if the new lot has changed in knitting tension, finishing, stretch, recovery, shrinkage, usable width, or surface friction. For fitted products, incoming material should therefore be compared with the approved reference instead of being accepted solely because the purchase specification appears unchanged.
Fabric relaxation is particularly important for knits. Material can arrive under tension created during knitting, finishing, rolling, and transportation. If it is spread and cut before that stored tension has stabilized, garment panels can change dimensions afterward. The result may be seam twisting, shorter lengths, inconsistent widths, or size variation that appears only after sewing or washing.
Cutting direction matters for the same reason. Rotating pieces to improve marker utilization may not be acceptable when the material has directional stretch, visible rib structure, nap, shine, print direction, or natural torque. Excessive stack height and poor spreading can also distort elastic fabrics more easily than stable woven cloth.
Measurement technique must remain consistent as well. Stretch garments measured immediately after pressing can differ from the same garment after relaxation. Operators can also create several millimeters of false variation by pulling the garment while measuring. The method should therefore define garment position, relaxation condition, reference points, and whether curved dimensions are measured straight or along the seam.
Control Area | What to Record | Main Fit Risk |
Bust / Waist / Hip | Finished garment measurement | Compression or looseness |
Front / Back Length | Vertical balance | Waist shift and hem rise |
Side Seam | Position and symmetry | Twisting |
Hem / Slit | Width and height | Restricted walking |
Neckline / Armhole | Width, depth, symmetry | Gaping or cutting |
Fabric Stretch | Width and length extension | Inconsistent negative ease |
Fabric Recovery | Residual growth | Bagging after wear |
Shrinkage | Width and length change | Post-wash fit change |
Grain Direction | Cutting alignment | Torque and asymmetry |
Lining | Stretch, length, recovery | Internal drag and distortion |

Prevent Fit Drift and Check Post-Wash Stability
Sample-to-bulk fit drift usually develops through a series of small changes rather than one obvious mistake. A different fabric lot is used, a zipper is substituted, seam allowance shifts by several millimeters, pressing stretches the neckline, or an outdated pattern remains active on one production line. Each difference may seem minor on its own, but their combined effect can noticeably change the garment.
Version control is the first defense. Patterns, measurement specifications, BOMs, fit comments, construction instructions, and QC documents should all point to the same approved revision. Early production pieces should then be compared with the PP or Golden sample before large quantities move through sewing. Discovering a problem after 20 garments is far less damaging than discovering the same defect after 2,000.
Post-wash dimensional stability also deserves attention because bodycon garments already contain negative ease. If a finished 94 cm hip circumference shrinks by 2%, the change is approximately 1.9 cm. On a loose silhouette, that amount may have little practical effect. On a dress already stretching around a 100 cm body, it can noticeably increase compression.
Testing should follow the intended care method as closely as practical. Measure critical dimensions before treatment, wash and dry according to the proposed care instruction, allow the garment to relax, and measure again. Width and length should be assessed separately because fabric can change differently in each direction. Seam twisting, puckering, lining distortion, surface changes, and recovery loss should also be reviewed.
Final QC should combine measurements with visual comparison. A dress may technically fall within tolerance but still show asymmetric seams, uneven ruching, stretched neckline edges, zipper waviness, lining migration, or visible fabric distortion. The goal is not simply to produce garments that pass a measurement table; it is to reproduce the fit logic of the approved sample across sizes, colors, fabric lots, production lines, and repeat orders.
Conclusion
Improving bodycon dress fit is less about finding one perfect measurement and more about understanding how the entire garment behaves as a system. Bust-waist-hip proportions, front and back length, negative ease, stretch, recovery, lining, cutting direction, seam construction, grading, and post-wash stability all influence the final result. When one of these elements changes, the wearer can feel the difference even if the style looks unchanged on paper.
For brands developing fitted dresses, the most useful habit is to stop treating every complaint as a request to make the garment larger or smaller. Read the wrinkles, watch the side seams, measure hem migration, compare movement before and after revisions, and verify that the approved fabric behaves consistently in bulk. When repeated problems such as ride-up, waist bagging, neckline gaping, or side-seam twisting continue across samples, reviewing the pattern, fabric, fit photographs, grade rules, and production measurements together usually provides a clearer path than changing the size chart alone.
The best bodycon dress often looks uncomplicated to the person wearing it. It follows the body, stays reasonably secure through movement, recovers after sitting, and feels consistent from one size to another. Achieving that apparently simple result requires disciplined product development, which is also why experienced pattern development and sampling become especially valuable before a fitted style moves into commercial production.
Share This Article :

Jerry Lee
Categories

Latest blogs
Table of Contents
Here, developing your OEM/ODM private label clothing collection is no longer a challenge—it’s an excellent opportunity to bring your creative vision to life.