Skip to content

How to Improve Backless Dress Fit: A Technical Guide to Fit, Support, and Bulk Consistency

Your trusted Women’s Apparel Manufacturer from China

A backless dress can look flawless on a hanger and still become difficult to wear within minutes. The lower back may stand away from the body, the neckline may drift downward, the side of the bust may become exposed, or narrow straps may need constant adjustment. What makes these problems frustrating is that the area where the problem appears is not always where it started. Tightening the back can sometimes make the front fit worse rather than better.
Improving backless dress fit means balancing back length, bust shaping, strap tension, side coverage, waist support, fabric behavior, lining, and internal structure. The goal is not simply to make the garment tighter. A well-developed backless dress should keep its intended neckline, bust coverage, side coverage, waist position, and back opening while the wearer stands, walks, sits, turns, and raises her arms.
Imagine approving a beautiful sample after a five-minute fitting, only to discover later that the neckline drops after twenty minutes of wear or that larger sizes expose significantly more of the side body. These are not unusual problems. They show why successful backless fit comes from treating the dress as a connected support system rather than correcting one visible gap at a time.
What Causes a Backless Dress to Fit Poorly?
A backless dress usually fits poorly because the bodice has lost balance between vertical length, bust shaping, strap tension, side coverage, waist anchoring, and fabric behavior. Back gaping is only one visible symptom. The real source can sit at the shoulder, chest, side seam, waist, back curve, or fabric itself, so the first step should be diagnosis rather than simply removing fabric from the opening.
Read the Fit Symptoms
Removing a large part of the back also removes part of the structure that normally stabilizes a dress. A conventional bodice can distribute tension through the shoulders, center back, side seams, waist, zipper, and neckline. A low-back design has fewer structural points available, so each remaining area becomes more important. A small error that would barely be noticed in a closed-back dress can become obvious once the back is exposed.
Lower-back gaping, for example, does not automatically mean the back is too wide. Excess vertical torso length can create the same appearance. Straps that are too long may allow the entire bodice to settle lower, producing space along the open edge. A side seam rotating backward can move fabric away from the front body and make the back appear larger even when its actual pattern width is reasonable.
The most useful fitting habit is to look at several symptoms together. Check the neckline, bust, armhole, side seam, waistline, strap angle, and back opening before making a correction. When two or three areas move in the same direction, they usually reveal more about the true source of the imbalance than the gap itself.
Visible Problem | Likely Causes to Check | Practical Fit Check |
Lower-back gaping | Excess back length, weak waist support, incorrect back curve | Check back length and waist position before reducing width |
Neckline dropping | Long straps, weak underbust support, loose bodice | Temporarily shorten straps and observe the entire upper body |
Side-bust exposure | Low armhole, narrow side panel, side-seam rotation | Turn and reach forward during fitting |
Straps slipping | Incorrect strap angle, attachment position, excessive length | Check shoulder position and back attachment point |
Bodice sliding down | Weak waist anchor, insufficient bust structure | Hold waist at intended position and reassess |
Wavy back edge | Fabric growth, unstable finish, lining mismatch | Compare fit before and after extended wear |
Check Bust and Torso Balance
Bust fit has a direct effect on the open back even though the two areas appear separated visually. When the front bodice does not have enough room for the bust, it can pull length and width away from the side and back. When the bust area is too loose, the neckline may float away from the chest and leave the straps doing more structural work than they were designed to handle.
Full bust is therefore only one part of the fitting picture. Upper bust helps determine whether the neckline and upper side body follow the wearer closely, while underbust measurement influences how securely the bodice can anchor below the fullest point of the chest. If the underbust is noticeably looser than intended, the front can move downward even when full-bust circumference appears correct on the measurement sheet.
Vertical proportions matter just as much. A fuller bust normally uses more front-body length, while a shorter back torso may need less vertical length behind. If front and back lengths are treated as identical adjustments, excess material may collect around the lower back or the waistline may tilt. The best correction keeps the bust point, side seam, waist, neckline, and back opening in their designed positions at the same time instead of solving one area by disturbing another.
Watch Fabric During Movement
A correct paper pattern can still perform poorly when the production fabric behaves differently from the sample material. Stretch satin, jersey, mesh, chiffon, viscose, and lightweight woven fabrics all react differently to body heat, gravity, seam tension, lining, and repeated movement. Two fabrics may even show similar initial stretch but recover very differently after they have been worn for twenty or thirty minutes.
This is especially important around an open back because a long unsupported edge can gradually grow. Stretch mesh may feel secure at the first fitting but relax if its recovery is weak. Satin cut partly on the bias can lengthen under its own weight. Lightweight chiffon provides almost no structural resistance, meaning the lining and strap system must do much more of the work.
Fit should therefore be checked after movement rather than only when the wearer first puts on the sample. Walking, sitting, turning, reaching, and raising the arms help reveal whether the dress recovers toward its intended position. If the wearer repeatedly has to lift the neckline or reposition the back, the problem is not simply personal preference. It is a sign that the pattern, fabric, or internal support system is not controlling movement effectively.
Which Measurements Control Backless Dress Fit?
Backless fit depends on a network of measurements rather than a single bust or waist number. Upper bust, full bust, underbust, front length, back length, waist position, armhole depth, side coverage, strap length, and back-opening depth all influence how the garment sits. Recording these points consistently makes it much easier to distinguish a width problem from a vertical balance or support problem.
Bust, Underbust, and Waist
Full bust circumference tells you how much total volume the bodice must accommodate, but it does not tell you whether the top of the dress will stay close to the body. Two wearers with the same full bust can have noticeably different upper-bust and underbust measurements, which is one reason the same backless design can feel secure on one person and unstable on another.
Upper bust helps control contact around the neckline and upper chest, while the underbust helps establish a stable circumference beneath the bust. In many low-back styles, the underbust or waist has to take on more structural responsibility because there is less material behind the torso. If both areas are loose, the garment may gradually slide down regardless of how carefully the straps were adjusted.
Vertical distance between these points should also be considered. Bust point to waist, underbust to waist, and neckline to waist determine where shaping sits on the body. A bodice that is too short in front can ride upward, while excess front length may collapse or make the neckline appear loose. Measurements are most useful when they describe the body in three dimensions rather than treating bust and waist as two isolated circumferences.
Back Length and Side Coverage
Back length determines where the open edge sits vertically and how smoothly the lower back follows the body. If the pattern contains more length than the wearer needs between the upper bodice and waist, that extra length often appears as a soft bubble near the lower back. If there is too little length, the back opening can be pulled upward and create tension through the waist or front bodice.
The depth of the opening should also be measured from a fixed reference point. Terms such as “low back” or “very open back” are useful for design conversations, but they are too vague for pattern development and production. The lowest point of the opening needs a repeatable measurement so that different samples, sizes, colors, and production batches can be compared against the same standard.
Side coverage is equally important. A dress can have a dramatic open back without exposing the side of the bust if the side seam, underarm height, and side-panel width are balanced correctly. In low-back styles that cannot be worn with a conventional bra, this becomes especially important because the garment itself has to provide the intended coverage.
Measurement Point | How It Affects Fit | Common Risk When Incorrect |
Upper bust | Controls upper bodice contact | Neckline or armhole gaping |
Full bust | Controls bust volume | Compression or loose shaping |
Underbust | Creates support below bust | Bodice slides downward |
Front body length | Positions bust and waist | Front lifts or collapses |
Back body length | Controls lower-back smoothness | Back gaping or pulling |
Back-opening depth | Defines exposure | Opening becomes too high or low |
Side coverage | Protects side bust | Accidental exposure |
Strap length | Controls upper-bodice height | Neckline drops or shoulder pressure |
Waist position | Stabilizes vertical balance | Entire bodice shifts |
Strap and Opening Measurements
Strap length is one of the most sensitive measurements on a backless dress because one small change can affect several areas simultaneously. Shortening a strap can raise the neckline, increase side coverage, raise the armhole, and lift the back opening. Lengthening it can make the dress feel more relaxed, but it can also allow the bust and neckline to move below their intended position.
For accurate development, strap length should be measured between clearly defined attachment points. If adjustable sliders are used, the finished strap length and realistic adjustment range should both be recorded. The existence of an adjustable strap does not remove the need for a correct base pattern; it simply gives the wearer a limited amount of personal adjustment within the intended fit.
Back ties deserve the same attention when they contribute to support. A pair of ties with noticeably different finished lengths may create asymmetric tension even when the dress measures correctly elsewhere. Small fitting experiments are often useful during sampling. Teams may test a 5–10 mm strap correction or remove only a few millimeters at a seam before making a larger pattern change. These are diagnostic increments rather than universal tolerances, but they help reveal how sensitive the design is to each adjustment.

How Do Straps, Side Seams, and Waist Support Work Together?
Straps, side seams, and the waist form a shared support system in many backless dresses. Straps manage vertical position, side seams control front-to-back balance and side coverage, while the waist provides an anchor against downward movement. When one area becomes weak, another carries too much tension. Stable fit comes from distributing the load across several controlled points instead of asking one narrow strap to hold the entire garment.
Straps as Load Paths
A strap does more than connect the front and back of a dress. It creates a path through which garment weight and body tension are transferred. In an open-back style, this path can become one of the main structural elements because there is no broad back panel helping to stabilize the upper body.
Length matters, but attachment angle is just as important. A strap positioned too far toward the outside may slip from the shoulder. Moving it inward may improve security, yet an overly central position can pull the neckline toward the middle and distort the armhole. Cross-back straps create another tension pattern, while halter straps transfer more of the garment’s weight toward the neck.
Material choice changes the result as well. A narrow satin strap may stretch slightly under the weight of a long skirt, while a reinforced strap of similar width may remain stable. Heavy embellishment can increase the load even further. Strap development therefore needs to consider garment weight, attachment reinforcement, comfort, length, and direction of pull rather than treating straps as a purely decorative detail.
Side Seams as Balance Lines
The side seam is one of the easiest places to see whether a dress is balanced correctly. On a well-fitted sample, it should remain relatively calm and follow the intended line down the side of the body. When it begins rotating toward the front or back, the garment is often showing that one section of the pattern is borrowing width or length from another.
If the front bodice is too small, the side seam may be pulled forward. If the back or waist is too tight, it may move in the opposite direction. With a low-back design, even a modest rotation can have a large visual effect because there is less fabric behind the seam to absorb the imbalance. Side-bust coverage may decrease and the back opening may no longer sit symmetrically.
Armhole shape should be reviewed at the same time. An underarm line that looks elegant in a static photograph may become too revealing when the wearer reaches forward or turns. The goal is not to maximize coverage at the expense of style. The goal is to keep exposure intentional, so the same areas remain covered during ordinary movement instead of changing unpredictably with every change in posture.
Waist Anchoring and Closures
A stable waist reduces the amount of work required from straps. When the dress has a reliable anchor around the waist or underbust, gravity is less likely to pull the entire bodice downward. This can be particularly important in long dresses, embellished styles, and satin designs where the skirt itself contributes noticeable weight.
Waist stability can come from several different constructions. A fitted waist seam, structured lining, internal waist stay, shaped underbust seam, localized elastic, or corset-inspired interior can all provide support. The right choice depends on the silhouette and target wearing experience. A soft resort dress should not feel like a corset simply because it has an open back.
Closures can add another controlled support point. Cross straps distribute tension in several directions, lace-up backs provide adjustable compression, and drawstring channels can shape a softer opening. Hooks, zippers, and small elastic sections can stabilize specific areas without changing the visible design dramatically. The most effective solution is not automatically the most adjustable one; it is the one that keeps the intended shape stable without creating uncomfortable pressure elsewhere.
Which Fabrics and Support Details Improve Fit?
Fabrics with suitable recovery, drape, and edge stability make backless fit easier to control, but no single fabric type is automatically best. Stable woven materials require accurate shaping, while stretch fabrics offer flexibility but can relax during wear. Lining, cups, boning, elastic, stay tape, reinforced straps, and edge stabilization work best when they support an already-correct pattern rather than trying to rescue a fundamentally poor fit.
Stretch and Recovery
Calling a fabric “stretchy” does not describe enough about how it will behave in a backless garment. Stretch tells you how far a material can extend, while recovery tells you how well it returns to its original dimension afterward. A fabric that stretches comfortably but remains slightly elongated after repeated movement can gradually change neckline height, strap position, and back-edge tension during wear.
A simple development test can reveal a lot. Mark a measured section of fabric, such as 10 cm, stretch it in the direction that will carry body tension, release it, and observe how closely it returns to the original mark. Repeat the test several times rather than once. The same fabric should also be checked in crosswise, lengthwise, and bias directions when those orientations appear in the garment.
Different materials create different risks. Mesh can offer excellent flexibility but may require stabilization around long exposed edges. Jersey is comfortable but can relax at necklines. Stretch satin combines flexibility with a smooth surface that makes tension lines visible. Woven satin can hold shape well, yet bias-cut sections may grow. Chiffon offers beautiful movement but very little inherent support, which makes lining and strap construction more important.
Fabric Type | Useful Fit Quality | Main Backless Risk | Practical Development Check |
Woven satin | Clean shape and polished surface | Bias growth and visible rippling | Hang and wear-test before approval |
Stretch satin | Flexibility with smooth appearance | Relaxation and uneven tension | Repeat stretch-and-recovery test |
Mesh | Lightweight and adaptable | Edge growth and transparency | Check recovery and edge stabilization |
Jersey | Comfortable body fit | Neckline relaxation | Recheck after repeated movement |
Chiffon | Soft drape | Little structural support | Evaluate lining and strap load |
Lace | Decorative structure | Uneven stretch and fragile edges | Check motif, lining, and seam stability |
Lining and Edge Control
Lining is not just a finishing layer in a backless dress. In many styles it becomes part of the structural system. A carefully selected lining can help stabilize the bust, prevent transparency, support the open edge, and reduce distortion. A poorly matched lining can do the opposite by pulling the outer fabric, creating wrinkles, or appearing above the finished edge.
The outer fabric and lining should be compatible in stretch, weight, and directional behavior. If a soft stretch shell is attached to a rigid lining without enough allowance, the outer fabric may ripple. If the lining stretches significantly more than the shell, it may fail to provide the intended support. Lightweight fabrics can also require different lining coverage than heavier materials to avoid visible lines from the outside.
Edge construction deserves similar attention. Binding, facing, narrow elastic, clean-finished lining, stay tape, or a turned edge all affect how much the opening can stretch. The objective is to stop unwanted elongation without creating a rigid line that stands away from the body. The best back edges look simple because the stabilization is doing its job quietly beneath the surface.
Built-In Support
A bra-friendly and a non-bra-friendly backless dress should be treated as two different structural directions rather than minor variations of the same pattern. A bra-friendly design needs enough back height, side coverage, and strap placement to conceal the intended underwear while preserving the visual impression of an open back.
A lower non-bra-friendly design removes those restrictions but creates another responsibility: the dress itself may need to provide some of the support normally provided by lingerie. Built-in cups, shaped lining, underbust control, localized boning, stable side panels, reinforced straps, or adjustable back ties can all be used depending on the silhouette.
Cup placement matters as much as the presence of the cup itself. If the cup sits too high, too low, or too far apart, it may create an unnatural bust shape and reduce security. Boning should support the garment without pressing uncomfortably into the body. Side panels should provide enough coverage without visually closing the back.
This decision is best made before the first production pattern is finalized. Lowering an approved back later without redesigning the internal support can turn a visually attractive style into a garment that looks good only when the wearer is standing perfectly still.

How Do You Correct Backless Fit During Sampling?
Backless fit should be corrected through a controlled sample process: identify the symptom, confirm whether the source is pattern shape, fabric behavior, or construction, change the smallest relevant area, refit the garment, and record the result. Avoid tightening several areas simultaneously. A reliable sample process checks both static appearance and movement, then transfers every approved correction into the updated pattern and technical specifications.
Diagnose Before Altering
The first fitting should answer where the imbalance begins rather than where it is most visible. Start with overall garment position. Check whether the waist is sitting at the intended level, whether the bust point is correctly placed, and whether both side seams are balanced. These reference points make it easier to judge the back accurately.
Temporary adjustments are particularly useful during diagnosis. Hold the waist at its intended position and see whether the back gap disappears. Shorten one strap temporarily and observe what happens to the neckline and armhole. Pin a small amount from the lower back and check whether the front starts pulling. Each controlled adjustment reveals which part of the garment is actually influencing the visible symptom.
Changing four areas at once may produce a better-looking sample, but it removes valuable information. Nobody knows which change solved the original problem or which one created a new issue. Experienced fitting teams therefore work in logical groups and re-evaluate the whole bodice after each meaningful adjustment.
Small changes can produce surprisingly large results on exposed styles. Before removing substantial fabric, testing a few millimeters at a seam or a modest strap adjustment often helps determine whether the pattern is moving in the correct direction.
Fit Under Movement
A backless dress should never be approved solely from front, side, and back photographs taken while the wearer stands still. Real customers walk, sit, bend, turn, reach, raise their arms, and remain in the garment for hours. A fit that works only during a static photograph is not a stable fit.
A repeatable movement test makes sample comparisons more useful. Begin by observing the dress in a natural standing position. Walk for thirty to sixty seconds, sit and stand several times, raise both arms above shoulder level, rotate the torso left and right, and reach forward. After each movement, note whether the dress returns toward its original position without the wearer pulling or adjusting it.
Pay close attention to recovery. A neckline that gradually drops indicates a different problem from a neckline that moves temporarily and immediately returns. Side-bust exposure while reaching can reveal insufficient coverage that was invisible during a static fitting. Lower-back gaping that appears only while sitting may indicate excess vertical length or insufficient shaping rather than excessive width.
The aim is not to freeze the garment against the body. Good fit allows natural movement while keeping exposure, support, and overall balance predictable.
Record Every Correction
Fit comments need enough detail for someone who did not attend the fitting to understand what happened. “Back too loose” is subjective and difficult to reproduce. A stronger comment explains the location, approximate amount, intended result, and any dimensions that must remain unchanged during correction.
Photographs should show front, side, and back views, with close-ups where necessary. Marking the image can help identify the exact location of gaping, side exposure, strap movement, cup position, or lining problems. If a correction changes a measurable point, the updated value should be transferred to the specification rather than left only in an email or chat message.
Pattern changes and construction changes should also be separated. Reshaping the back curve, shortening a strap, moving a cup, adding stay tape, changing lining stretch, and reinforcing a seam can all improve the same visible problem, but they affect production in different ways. Recording them separately makes future troubleshooting much easier.
For brands developing several related dresses, these records become valuable product knowledge. A successful backless fit from one collection can inform future strap placement, back depth, side coverage, material selection, and grading rather than requiring the development team to rediscover the same lessons every season.
How Do You Keep Backless Fit Consistent Across Sizes and Bulk Production?
Consistent backless fit requires more than approving one attractive sample. The pattern must be graded so back exposure, side coverage, bust support, and strap position remain visually consistent across sizes. Critical measurements need defined tolerances, while PP and approved reference samples establish the target for production. Bulk quality control must verify both measurement and construction so the approved fit survives cutting, sewing, finishing, and repeat orders.
Grade the Design, Not Just the Circumference
Backless dresses should not be graded by simply increasing every pattern line at the same proportional rate. Bust, waist, and hip circumferences need to grow across sizes, but an open-back shape is partly a design feature. If its width and depth increase mechanically, larger sizes may expose much more skin than the original sample.
Side coverage may require the opposite treatment. As bust volume increases, the distance needed to protect the side of the bust may also change. If the side panel grows too slowly, a larger size can become more revealing even though the garment technically follows the size chart. Strap attachment points can also behave differently as shoulder and bust proportions change.
The strongest grading plans separate functional dimensions from design-controlled dimensions. Bust, waist, hip, and some vertical body measurements follow the intended size progression. Back depth, exposure, tie placement, and certain strap positions are reviewed separately to maintain comparable visual results.
Extended sizing deserves particular care because support needs may change along with circumference. More bust volume may require different cup placement, stronger side coverage, or revised strap geometry. The objective is not to make every size geometrically identical on paper. It is to make every size deliver comparable appearance, security, comfort, and design intent on the body.
Set Fit-Critical Tolerances
Not every garment measurement deserves the same production tolerance. A small difference in the sweep of a full skirt may have little visible effect, while the same difference in strap length or back-opening depth can noticeably change the upper body. Backless dresses therefore benefit from identifying a smaller set of fit-critical points that receive closer measurement control.
Exact tolerances should depend on the fabric, construction method, brand standard, and measurement technique. A stretch jersey dress cannot automatically use the same tolerance logic as a structured satin style. What matters is that the most sensitive points are recognized before bulk production starts.
Strap length, upper bust, back depth, side coverage, waist position, cup location, tie length, lining height, and side-seam balance are common examples. Measurements also need clear methods. Two inspectors should be able to place the garment on a table and measure the same point in approximately the same way.
When tolerance problems appear repeatedly in production, the answer is not always stricter inspection. It may indicate that the construction method, operator process, fabric stability, or pattern itself is too difficult to reproduce consistently. Quality control is most useful when it helps identify the source of variation rather than simply rejecting garments after they are finished.
Fit-Critical Point | What Must Stay Consistent | Risk if It Drifts |
Strap length | Finished length and attachment | Neckline drops or pressure increases |
Back-opening depth | Lowest point of opening | Exposure varies between garments |
Upper bust | Top-bodice circumference | Gaping or compression |
Side coverage | Width and underarm height | Side-bust exposure |
Cup position | Height and left-right balance | Poor support and visual asymmetry |
Waist position | Vertical seam placement | Bodice balance shifts |
Tie length | Pair length and placement | Uneven adjustment |
Lining height | Relationship to shell | Lining becomes visible |
Side seam | Position and finished length | Front-to-back balance changes |
Protect the Approved Fit in Bulk
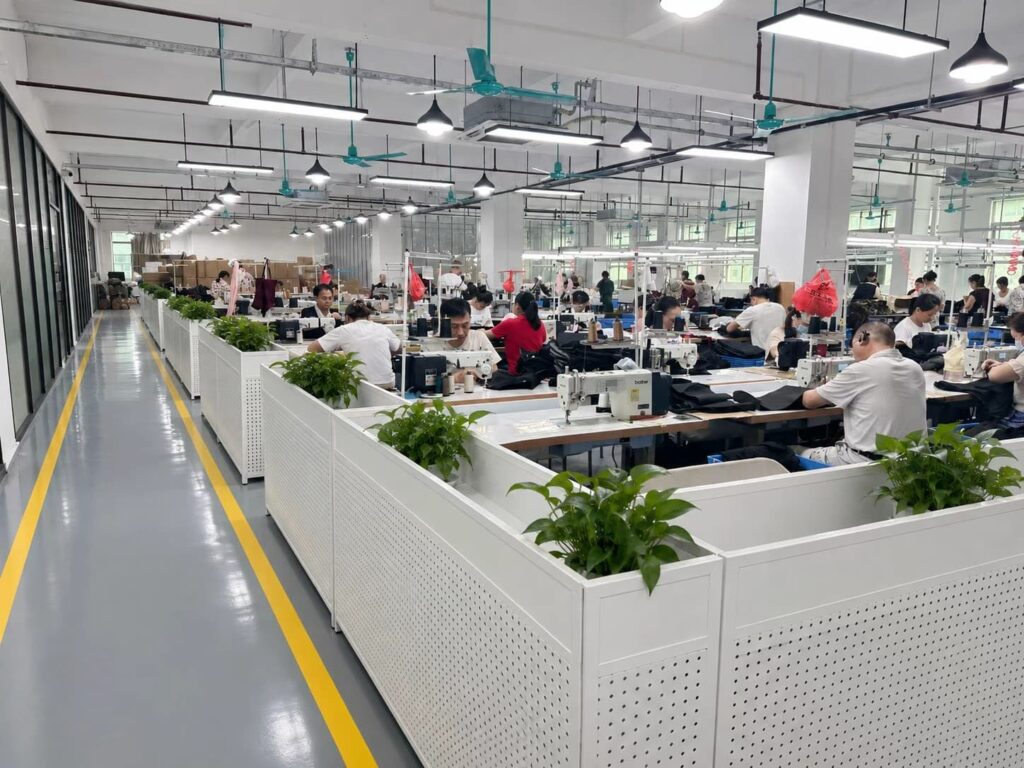
The final pattern is only one reference once bulk production begins. An approved physical sample communicates details that numbers cannot fully describe, including strap angle, back-edge shape, cup positioning, side exposure, lining behavior, pressing quality, and the overall way the garment sits on the body.
A pre-production sample should confirm that the intended production fabric, trims, pattern, stitching method, support structure, and finishing work together before large-scale sewing begins. Once the approved reference is established, production teams can compare workmanship and appearance against something tangible rather than interpreting written comments differently from one line to another.
Material variation should also be considered. Two colors of the same nominal fabric can sometimes behave differently because of dyeing, finishing, coating, or batch variation. Stretch recovery, surface appearance, transparency, and pressing response may change enough to influence an exposed style. Checking the first production pieces in each important material execution can prevent an approved fit from drifting.
Backless fit is truly solved only when the same balance can be reproduced across sizes and production quantities. The neckline should stay where it was designed, the straps should remain secure, the side body should stay intentionally covered, and the back opening should preserve its shape without constant adjustment. When pattern development, fabric selection, sampling, grading, and QC are treated as one connected process, a visually simple open-back dress becomes much more reliable to wear and much easier to reproduce.
For brands developing backless party dresses, occasionwear, resort styles, satin slips, date-night dresses, or low-back evening collections, solving these issues before bulk production is far more efficient than correcting them after garments reach the warehouse. A specialist development partner such as Jinfeng Apparel can use reference designs, samples, fit comments, and technical specifications to discuss pattern balance, material behavior, support construction, sampling, and production risks before a style is scaled into a larger order.
Share This Article :

Jerry Lee
Categories

Latest blogs
Table of Contents
Here, developing your OEM/ODM private label clothing collection is no longer a challenge—it’s an excellent opportunity to bring your creative vision to life.