 Skip to content
Zipper Quality Control Checklist: How Do You Inspect Zippers for Dresses?

Your trusted Women’s Apparel Manufacturer from China

A zipper may be one of the smallest components in a dress, but it can decide whether the finished garment looks clean, fits correctly, survives normal wear, or fails inspection after the most expensive production work has already been completed. This is especially true for satin, bodycon, corset, strapless, lace, mesh, cocktail, and evening dresses, where the closure sits close to the body and even a small wave, color mismatch, or stiff slider can become obvious. Experienced production teams therefore treat zipper control as part of garment engineering, not as a last-minute trim check.
A reliable zipper quality control checklist verifies the approved zipper specification, slider and puller condition, teeth or coil alignment, tape and stops, color, length, opening-and-closing performance, installation, zipper flatness, lining clearance, and finished-garment appearance. Inspection should begin when zippers arrive at the factory and continue through sewing, in-line QC, final garment inspection, pre-shipment sampling, and repeat-order record keeping.
The difficult problems are rarely the dramatic ones. A broken zipper is easy to reject. The expensive problems are the zippers that look acceptable in a carton, sew normally for the first hundred pieces, and then begin to bulge at the waist, catch a lining, create puckering on satin, or differ slightly in shade between production lots. A good checklist is designed to catch those quiet problems while they are still cheap to correct.
What Should a Zipper Quality Control Checklist Include?
A zipper quality control checklist should cover five connected areas: approved specification, component condition, functional performance, garment installation, and production consistency. It should also record the reference used for approval, the exact defect found, where it occurred, and what action followed. That turns the checklist into a repeatable production standard rather than a collection of subjective pass-or-fail opinions.
Approved Specifications
The first question is not whether the zipper looks attractive; it is whether the factory received the correct zipper for the approved garment. Before production starts, the zipper should be compared with the BOM, trim card, PP sample, Golden sample, or another agreed physical reference. For most dress programs, the useful control fields include zipper type, usable length, tape color, chain or coil color, slider style, puller style, stop construction, intended garment position, and the style and colorway in which the trim will be used.
This step prevents surprisingly expensive mistakes. A zipper that is a little too short may reduce the opening enough to make dressing difficult, especially on fitted or structured dresses. A zipper that is too long may interfere with a waist seam, lining attachment, back neckline, hook-and-eye closure, or internal boning. A visually similar replacement can also behave differently when the tape is stiffer, the slider is heavier, or the coil profile is not the same as the approved sample. In lightweight satin, these small changes can become visible as a ridge or wave after sewing.
Color should be approved as part of the garment, not as an isolated accessory. The relevant comparison may include shell fabric, lining, thread, lace, mesh, binding, or nearby hardware. On repeat orders, retaining zipper type, length, and color records helps reduce drift between the original production and later replenishment. The goal is not simply to reorder a zipper with the same name; it is to reproduce the same garment result.
Component Checks
A zipper is an assembly of several parts, and each part can create a different failure mode. Inspectors should look at the slider body, puller, teeth or coil, zipper tape, top stops, bottom stop or lower end, chain alignment, and any decorative plating or coating. A secure puller does not compensate for a damaged chain, and a clean chain does not compensate for a weak stop. Looking only at whether the slider moves can miss defects that appear later in wear.
Component inspection should happen before the zipper reaches the sewing line because once it is attached to a dress, the diagnosis becomes more complicated. If the finished zipper is difficult to operate, the cause might be the trim itself, the seam allowance, the lining, a waist-seam intersection, or the garment fit. Incoming QC separates material problems from construction problems while the zipper can still be isolated as a trim item. In practical factory work, that saves both sewing time and rework.
For standard zippers, useful incoming checks include length, color, smoothness, puller security, and general chain condition. Invisible zippers need added attention to coil consistency, tape flatness, and the risk of bulging after installation. Metal zippers need closer review of tooth completeness, slider movement, surface finish, weight, plating consistency, and whether the hardware could scratch delicate fabric. These differences are why one generic zipper checklist is rarely enough for every dress category.
Functional and Appearance Criteria
A zipper can pass a visual check and still fail in use, while another can operate correctly but make the dress look unacceptable. A useful checklist therefore separates functional quality from appearance quality. Functional questions include whether the slider travels through the full opening, whether it hesitates or jams, whether the chain stays engaged after closing, whether the puller and stops remain secure, and whether normal operation is possible without fabric or lining entering the slider path.
Appearance questions are different. The inspector should ask whether the zipper lies straight, whether the seam remains flat, whether the color works with the garment, whether the top edge aligns, whether an invisible zipper is sufficiently concealed, and whether puckering, twisting, bulging, or visible tape changes the silhouette. On a fitted satin dress, a zipper that technically closes but leaves a pronounced wave down the center back is still a quality failure because the closure has changed the intended appearance of the product.
The acceptance reference should be the customer specification, approved sample, technical file, or documented factory standard agreed for that project. Avoid inventing a universal tolerance where none exists. Zipper length tolerance, shade tolerance, strength requirements, sampling level, and defect classification can differ among brands and product categories. Good QC records the measured or observed result first, then compares it against the correct reference.
Inspection Records
The checklist becomes genuinely useful when it creates a record that production, merchandising, sourcing, and quality teams can understand later. For every meaningful issue, record the garment style, color, size where relevant, zipper type, defect description, defect position, quantity found, trim lot or carton reference when available, and the action taken. Photos are particularly useful for bulging, puckering, plating variation, shade mismatch, zipper waves, and incorrect top alignment because these defects can be difficult to describe consistently in words.
Defect language should be specific. “Bad zipper” does not tell the sewing line what to correct. “Slider jams at waist seam,” “center-back invisible zipper waves below waist,” or “lining enters slider path near lower stop” immediately points the team toward a likely source. Precise language also helps repeat orders because it allows the next production team to see what happened previously instead of relying on memory.
QC Area | What to Verify | Recommended Reference | Typical Record |
Specification | Type, usable length, color, slider, puller, stops | BOM / trim card | Style, color, trim code |
Components | Teeth or coil, tape, slider, puller, stops | Approved zipper | Defect type and lot |
Function | Full open-close travel, engagement, snagging | Approved sample | Pass/fail plus defect point |
Installation | Alignment, stitching, flatness, top finish | PP / Golden sample | Line, operator, defect location |
Garment appearance | Bulging, puckering, twisting, visibility | Fit or approval sample | Photo and severity |
Repeat production | Same zipper and sewing construction | Golden sample + records | Supplier/lot comparison |
A strong zipper checklist is therefore not just a defect list. It connects product development, trim purchasing, sewing, QC, final inspection, and future replenishment. That is what makes it valuable to a brand with multiple styles and repeat orders: the approved zipper becomes part of a documented manufacturing standard rather than a small accessory that has to be rediscovered every season.
How Do You Inspect Zipper Components?
Inspect zipper components by examining the slider, puller, teeth or coil, tape, and stops separately, then operating the complete zipper through its full working length. Look for deformation, missing elements, rough movement, fraying, weak attachment, inconsistent finishes, and alignment problems. Component inspection is most useful before sewing because defective trim can still be isolated without disturbing finished garments.
Slider and Puller
Start with the parts the wearer actually handles. Move the slider through the complete usable length and pay attention to resistance, hesitation, side-to-side movement, sudden stiffness, or a point where the slider repeatedly catches. A good zipper does not necessarily feel loose; controlled resistance can be normal. What matters is consistency. If the slider moves smoothly through most of the chain but always becomes difficult at one location, that exact area should be examined rather than simply forcing the slider through it.
Inspect the slider body for deformation, cracks, burrs, unfinished edges, deep scratches, or plating defects. On delicate fabrics such as satin, chiffon, lace, and mesh, a small rough edge can create visible damage that would be less important on a heavy denim garment. Metal and decorative sliders also deserve a compatibility check because additional weight can pull on lightweight fabric or create a visible sag near the opening.
The puller should be secure at its connection point and should tolerate normal hand movement in the directions a wearer is likely to use. Decorative, branded, or unusually long pullers need extra attention because geometry and weight can change slider behavior. A puller can look substantial but still have a weak connection. The practical question is whether the puller feels stable under normal operation without twisting, opening, or creating sharp contact with the garment.
Teeth and Coil
For metal or molded teeth, inspect continuity, spacing, alignment, surface condition, and complete engagement after closing. Missing, bent, or irregular teeth can cause local resistance, incomplete closure, or chain separation. Close the zipper fully and inspect both sides instead of assuming the chain is correct because the slider reached the top. A small section that remains partly open after the slider passes is a meaningful failure because it indicates unstable engagement.
For coil zippers, pay attention to flattened sections, twisted coil, damaged coil stitching, inconsistent coil position, irregular curvature, or partially detached areas. Invisible zippers need particularly careful coil inspection because the coil is turned close to the seam during installation. A defect that seems minor when the zipper lies loose on a table can become more visible after the coil is rolled, stitched close to the seam, and pressed into a satin or fitted dress.
When the slider repeatedly catches in the same location, inspect that chain position before blaming the slider. The real cause may be one damaged tooth, one distorted coil section, or inconsistent alignment between the two sides. This kind of localized diagnosis is more useful than repeatedly replacing sliders without understanding why the same problem returns.
Tape and Stops
Zipper tape needs enough stability for sewing but should not be so stiff that it creates a ridge or wave in the garment. Inspect both tape edges for fraying, cuts, staining, uneven dyeing, curling, damaged selvedges, inconsistent width, or areas where the chain is no longer properly supported. Tape quality is especially important on lightweight dresses because the closure can become more visible through the shell fabric after pressing.
Top stops should hold the slider securely and should be positioned consistently. Their location affects more than slider retention. On a center-back zipper, uneven top-stop position can influence how neatly the neckline or upper edge meets. The bottom stop or closed end should also be secure and correctly formed for the zipper type. If a zipper is shortened during preparation, the finished end should follow the approved construction rather than being treated as an invisible internal detail.
Fabric compatibility belongs in this inspection. A stiff zipper tape that works well on a structured woven dress may look poor in a soft satin slip dress. A heavy metal zipper may suit a denim dress or structured set but be inappropriate for a lightweight fashion top. The correct trim is the one that meets both functional and visual requirements after it becomes part of the garment.
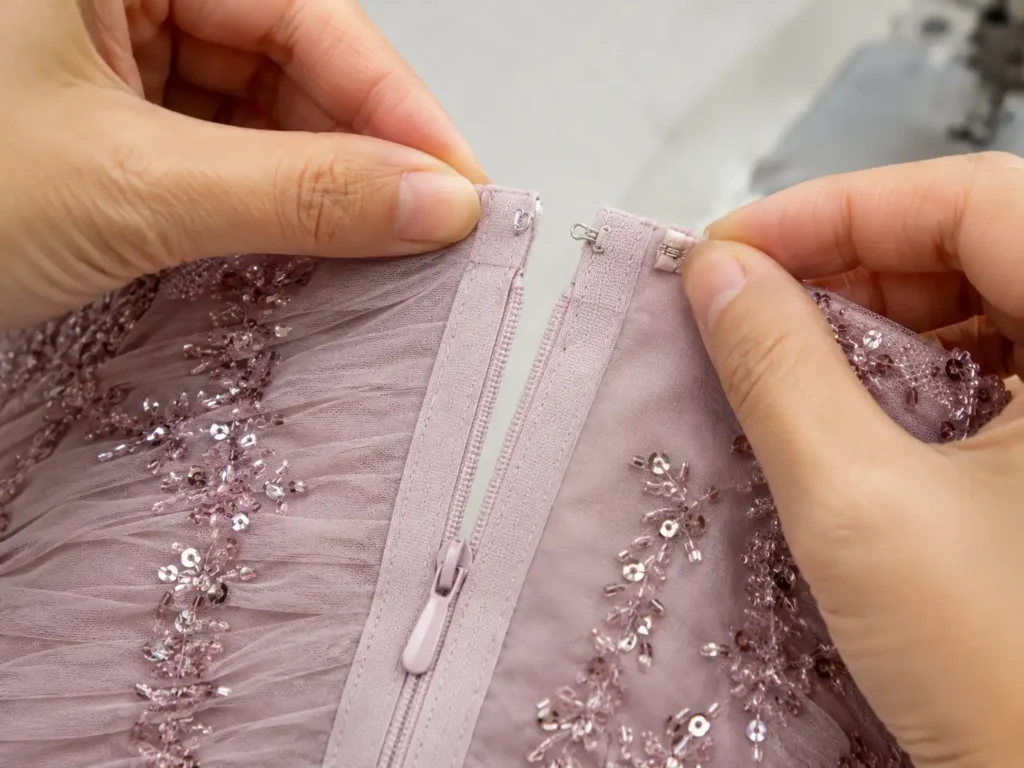
Lot Consistency
One good zipper does not prove an entire delivery is good. Incoming QC should compare pieces across cartons, color lots, or supplier batches when the order structure makes that relevant. This matters most for custom colors, special plating, branded pullers, and zippers purchased over different production periods. Small variations can become highly visible once identical dresses are packed together for retail or photographed in the same collection.
Typical lot-to-lot differences include tape shade, slider finish, puller shape, top-stop position, zipper stiffness, coil appearance, usable length, or mixed versions in the same shipment. Custom trims also have their own sourcing constraints. In Jinfeng Apparel’s recorded trim-sourcing practice, special-color and some metal zipper developments may begin around 300-500 pieces depending on supplier stock, color, hardware, and specification; those figures are project examples rather than universal industry rules.
The practical lesson is that special trims deserve controlled approval and incoming inspection. When a collection uses several colors or multiple dress styles, record which zipper lot belongs to which production group. That information becomes extremely useful if a shade or performance issue appears later because the team can isolate the affected material instead of treating the entire order as one undifferentiated batch.
Which Zipper Defects Should You Reject?
Reject zipper defects that prevent normal operation, weaken the closure, visibly distort the garment, conflict with the approved specification, or create unacceptable inconsistency across bulk production. Common rejectable problems include jamming, chain separation, damaged teeth or coil, loose pullers, failed stops, severe color mismatch, bulging, puckering, twisting, exposed tape, lining entrapment, and uneven zipper installation.
Jamming and Separation
Jamming is easy to notice but often misdiagnosed. When a zipper becomes difficult to move, first locate where resistance starts. If the same loose zipper catches at the same point before sewing, a component problem is likely. If different zippers work normally on the table but all jam after installation at the same waist seam or lining junction, the construction deserves more attention than the trim supplier. That distinction determines whether the correct action is to isolate a zipper lot or revise a sewing operation.
Frequent causes include slider distortion, damaged teeth or coil, fabric entering the slider, lining entering the slider, excessive seam bulk, seam allowance sitting too close to the chain, misaligned zipper halves, or garment tension across the closure. Chain separation is more serious because it can make the garment unusable. Inspect whether the problem comes from unstable engagement, chain damage, a distorted slider, or excessive stress created by a garment that is too tight at bust, waist, or hip.
A stronger zipper is not automatically the solution. If the garment measurements are outside tolerance or the pattern creates excessive tension, replacing the zipper may simply hide the real problem. Experienced QC therefore reviews closure failure together with measurements, fit, fabric stretch, seam construction, and the exact point where the problem appears.
Bulging and Puckering
Bulging and puckering are among the most visible zipper defects in fashion dresses because they change the silhouette even when the zipper still functions. Bulging usually appears as a broader curve, wave, or raised section around the closure, while puckering appears as smaller ripples along the seam. Both may result from unequal fabric feeding, excessive thread tension, unstable stretch, incorrect seam allowance, a zipper tape that is too stiff, inaccurate pattern balance, poor pressing, or a zipper length that does not suit the construction.
Stretch fabrics create a classic problem. The shell fabric may elongate during sewing while the zipper tape remains comparatively stable. When the fabric relaxes, the seam can become wavy. Satin makes the problem more obvious because reflected light exaggerates small surface distortions. In corset and strapless dresses, the issue may be compounded by bust support, boning, lining, back height, and waist tension, so the zipper should be judged as part of the garment structure rather than as an isolated seam.
The practical response is to identify whether the wave begins before sewing, during the zipper operation, after pressing, or only when the garment is worn. Each timing pattern points to a different source. A trim change may help in one case, while pattern correction, seam handling, fabric relaxation, or a different sewing method may be needed in another.
Color and Surface Problems
Color defects are not limited to dramatic mismatches. An invisible zipper may be mostly hidden, yet the tape can still be visible at the neckline, top edge, seam opening, or inside a partially open garment. A slight mismatch that looks harmless on the trim table can become distracting on pale satin, sheer lace, mesh, or a carefully coordinated lining. Metal zippers add surface concerns such as scratches, plating variation, oxidation marks, sharp points, and inconsistent metal tone.
The zipper should be compared with the finished color relationship of the garment, including shell fabric, lining, nearby thread, lace, binding, or hardware. Reasonably consistent lighting is important because warm and cool light can make a borderline match appear different. Physical approved references are more reliable than casual comparisons on a phone screen, particularly for satin and velvet, where surface direction and light reflection can alter apparent color.
For repeat orders, zipper color records help prevent gradual drift. A new supplier lot may carry the same color name but look different next to the previous production. The decision should therefore be based on the approved garment effect, not merely on whether the supplier calls both trims “navy,” “ivory,” or another generic color name.
Installation Defects
Some of the most expensive zipper defects are installation defects rather than defective zippers. Common examples include a twisted zipper, unequal seam widths, incorrect height, visible zipper tape, a center-back seam that is off-center, waist seams that do not match across the closure, neckline edges at different heights, a stitch line too close to the coil, a stitch line too far away, or a bulky lower end that pushes through the shell fabric.
These problems should be rejected when they affect the approved appearance or normal function even if the loose zipper itself is completely sound. The correct remedy may involve the sewing method, seam allowance, panel length, pattern symmetry, lining attachment, or handling of stretch fabric. That is why factory reports should distinguish “zipper material defect” from “zipper installation defect.” The two problems may look similar in a finished dress but require completely different corrective actions.
Defect | First Area to Check | Typical Garment Effect | Common Corrective Direction |
Slider jams | Chain, seam bulk, lining | Difficult dressing | Isolate source before replacement |
Chain separates | Slider, teeth/coil, fit stress | Closure failure | Check component and garment tension |
Zipper bulges | Pattern, feeding, stretch | Wavy back or side seam | Review sewing and fit |
Seam puckers | Tension, fabric handling | Poor surface appearance | Adjust process and pressing |
Lining catches | Lining clearance | Slider blockage | Revise lining attachment |
Shade mismatch | Trim lot / approval | Visible inconsistency | Compare with approved standard |
Metal scratches fabric | Hardware surface | Snags or marks | Reassess hardware compatibility |
Uneven top alignment | Sewing / stop position | Crooked neckline or back | Correct before finishing |
Clear defect classification makes corrective action faster. “Bad zipper” is a dead end. “Invisible zipper bulges 6 cm below waist after pressing” gives the team something measurable to reproduce, investigate, and solve. That level of detail also prevents the same defect from being rediscovered on every repeat order.

How Do You Test Zipper Performance?
Test zipper performance by checking smooth operation, stable chain engagement, puller and stop security, strength-related risks, and behavior after relevant care or durability conditions. Production-floor checks are valuable for identifying obvious problems, but formal strength, cycling, washing, corrosion, or laboratory tests should follow the customer’s specified method and acceptance criteria rather than arbitrary factory numbers.
Opening and Closing
The most basic useful performance check is also the one most often rushed. Open and close the zipper through its complete usable length while watching and feeling for changes in resistance. Pay particular attention around waist seam intersections, neckline finishing, heavy lining joins, corset seams, lace overlays, and the lower end because local bulk often changes slider behavior. Do not test only the easiest central section and assume the rest will perform the same way.
Use the kind of hand force a normal wearer would use. If the inspector has to grip the garment aggressively or pull unusually hard to move the slider, the result should not be disguised as a pass. Several manual cycles are useful as a production-floor screening tool because some problems appear only after repeated movement, but a few hand cycles should not be presented as a formal durability test unless the customer’s specification defines that method.
Always test selected zippers before sewing and again after installation. A loose invisible zipper may operate perfectly on the table but begin to catch after the seam allowance, lining, or waist join moves closer to the slider path. The finished garment is therefore a second test environment, not merely the same test performed later.
Strength and Security
Strength review should consider the parts that may fail under real use: chain or coil engagement, slider body, puller attachment, top and bottom stops, zipper tape, zipper-to-garment stitching, and the surrounding garment structure. There is no responsible universal strength number that applies to every dress. Load, test setup, sample conditioning, and acceptance values should come from the customer specification or an applicable laboratory method for the project.
Garment fit matters as much as trim strength. A relaxed resort dress and a fitted corset dress can place very different forces on the closure. If a size is too tight at the bust or waist, zipper stress can rise even when the trim has not changed. A strong zipper can still fail when the garment asks it to absorb a problem created by measurements, insufficient wearing ease, or unstable stretch fabric. That is why closure complaints should be reviewed together with the size chart and fit result.
Production-floor security checks can still identify obvious risks, such as a loose puller, unstable stop, partial chain engagement, or stitching that is separating from the tape. When the customer requires measurable strength results, samples can be sent for controlled testing rather than replacing laboratory work with improvised hand pulling.
Durability and Care
Durability testing should reflect how the garment is expected to be worn and cared for. Depending on the product and customer requirement, the program may consider repeated opening and closing, washing, dry-cleaning exposure where relevant, post-care slider function, puller stability, stop security, plating appearance, corrosion risk for metal parts, color change, tape distortion, and the appearance of the zipper seam after care.
Not every dress needs the same test package. A decorative exposed metal zipper on a structured denim dress has different risks from an invisible zipper on an evening dress. The metal style may deserve more attention to surface finish, coating, and hardware weight, while the invisible zipper may need more attention to tape shade, seam flatness, and post-pressing behavior. Tests are useful when they reflect the actual product risk, not when they are performed merely to make the QC file look comprehensive.
Formal testing should also be separated from line QC. Sewing and in-line inspectors are excellent at identifying visual and functional abnormalities, while laboratory testing provides controlled measurements when the brand requires them. Both are important, but they answer different questions and should not be confused.
Garment-Level Performance
The finished garment is the most realistic environment for judging zipper performance because the zipper is now interacting with fabric, lining, seam allowance, fit, and body shape. Close the dress fully and inspect whether the surrounding seam remains stable. Open it again and watch whether anything moves into the slider path. On fitted styles, evaluate the zipper while the garment is on a form or fit model when the product-development process allows it, because tension problems may be invisible when the dress lies flat.
Look for excessive stress at bust, waist, hip, or structured back seams. If the zipper bows away from the body, the source may be sewing, pattern balance, garment tightness, boning placement, or a combination of several factors. Corset and strapless dresses are particularly sensitive because the closure works inside a system of support layers, lining, cup shape, waist control, and sometimes hook-and-eye reinforcement.
This distinction is central to practical quality control: testing the zipper is not the same as testing the closure in the dress. A component can be technically sound and still be wrong for the garment. The final decision should therefore consider both trim performance and the way the entire construction behaves during normal dressing and wear.
How Do You Inspect Zippers on Dresses?
Inspect dress zippers for position, alignment, sewing quality, flatness, smooth operation, top and bottom finishing, lining clearance, and the effect on fit and silhouette. Evaluate the zipper both flat and vertically on a hanger, mannequin, or fit body where appropriate because bulging, twisting, and tension problems may only appear when gravity and garment shape act on the closure.
Installation Quality
Begin with the garment laid flat. Check whether the zipper follows the intended seam line without twisting and whether both sides of the opening are balanced. On center-back zippers, compare the left and right neckline edges. If a waist seam crosses the closure, the waistline should meet cleanly instead of stepping up or down. Also review stitch consistency, seam allowance, top edge, lower end, visible tape, localized bulk, skipped stitches, thread damage, and any signs that one garment panel was stretched more than the other.
Then hang the dress or place it on a form. A zipper seam that appears acceptable on a table can develop a wave when the skirt weight pulls downward. Long satin dresses, structured evening dresses, and garments with heavier lower panels are particularly sensitive to this change. Finally, operate the zipper while watching the garment rather than staring only at the slider. If the waistline shifts, the back seam twists, or the fabric pulls sideways during normal operation, the surrounding construction needs investigation.
The approved sample remains the most useful visual reference. The inspection is not simply asking whether the zipper was sewn in; it is asking whether the closure reproduces the intended fit, line, and finish of the approved garment.
Invisible Zippers
Invisible zippers deserve a stricter appearance review because concealment is part of their purpose. When closed, the seam should read visually as a clean seam rather than as an obvious zipper installation. The coil should be sufficiently hidden, but sewing too close to the coil can make the slider stiff or cause repeated catching. The most attractive-looking zipper is not acceptable if the wearer has to struggle to open it.
Check coil concealment, zipper flatness, bulging, puckering, top alignment, tape visibility, color, slider clearance, lining clearance, and lower-end construction. Satin is one of the more demanding fabrics because its smooth reflective surface makes small waves easy to see. Lace can hide some seam irregularity but introduces snagging and placement concerns. Mesh needs careful handling because thin layers can move toward the slider or distort near the seam.
In Jinfeng Apparel’s product records, invisible zippers are common in satin, cocktail, evening, bodycon, midi, and lace dresses, with recurring risks including bulging, lining catching, uneven stitching, satin wrinkling, and color mismatch. Those risks explain why invisible zipper control belongs in both trim inspection and garment inspection rather than only at one stage.
Lining Clearance
A zipper that repeatedly catches the lining is generally a construction problem, not a problem the wearer should be expected to manage. Open the zipper and examine the inside of the dress through the full length of the closure. Move the slider slowly while watching how the lining, seam allowances, lace layers, mesh, loose threads, and internal support materials behave. If any layer repeatedly moves toward the slider path, the sample construction should be corrected before bulk production.
Common causes include insufficient lining clearance, unsecured seam allowances, lining cut too generously, lightweight lining that shifts easily, bulky seam intersections, loose threads, or lower-end finishing that pushes material toward the chain. Corset and strapless dresses can be particularly crowded inside because boning, cups, lining, support layers, and hook-and-eye closures may all meet near the back opening. That internal complexity makes a good-looking outside inspection only half of the job.
A practical rule is to inspect the inside with the same seriousness as the outside. The zipper can look perfectly flat when closed and still be unacceptable if normal dressing repeatedly traps the lining. Catching problems also tend to worsen in use because users pull harder after the first jam, increasing the chance of damaging either the lining or the slider.
Dress-Specific Risks
Different dress constructions require different zipper priorities. Satin dresses need close control of flatness, puckering, shade, snagging, and pressing. Bodycon dresses add stretch recovery and fit tension. Corset dresses require the zipper to work with bust support, boning, cup shape, waist compression, and lining. Strapless dresses add upper-bust stability and back-height control. Lace and mesh styles introduce snagging, transparency, and delicate seam handling, while evening dresses can combine long skirt weight with a structured bodice and multiple fabric layers.
Dress Type | Common Zipper Choice | Main QC Risks | Practical Focus |
Satin dress | Invisible zipper | Waves, puckering, shade, snagging | Flatness, tape compatibility, pressing |
Bodycon dress | Invisible / coil zipper | Stretch tension, bulging | Fit, recovery, waist-hip stress |
Corset dress | Invisible / structured back zipper | High tension, boning interaction | Bust-waist fit, lining, zipper flatness |
Strapless dress | Back invisible zipper | Back bulging, top instability | Upper bust, back height, closure support |
Lace dress | Invisible zipper | Snagging, seam visibility | Coil clearance, lace placement |
Mesh dress | Invisible zipper | Layer catching, distortion | Lining clearance, delicate handling |
Evening dress | Invisible / concealed zipper | Long seam weight, layered construction | Balance, flatness, internal bulk |
The useful lesson is that zipper QC should follow the garment’s construction, not force every style through one identical checklist. A metal zipper on a structured set has different risks from an invisible zipper in stretch satin. For brands developing several categories, the best time to define the zipper standard is during sample development and PP approval, when trim, fabric, pattern, lining, and fit can still be adjusted together.
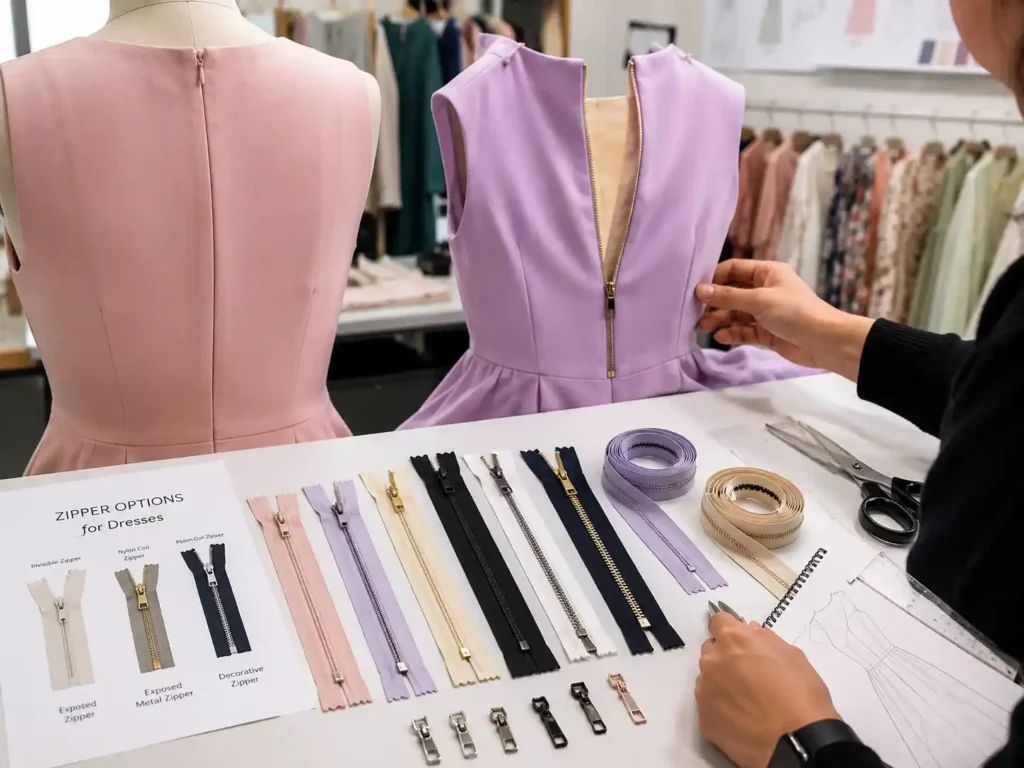
How Do You Control Zipper Quality in Bulk Production?
Control zipper quality in bulk production through staged inspection: approve the zipper during development, verify incoming lots before sewing, check installation during early and in-line production, inspect zipper function on finished garments, apply the agreed pre-shipment sampling plan, and preserve trim and QC records for repeat orders. Early detection prevents a small zipper problem from becoming a large-scale repair program.
Incoming and In-Line QC
Bulk control starts before the first zipper is attached. Incoming inspection should separate zippers by style, color, specification, and lot where practical, then compare them with the approved reference. Check usable length, color, slider and puller condition, teeth or coil, tape, stops, opening-and-closing behavior, and consistency across the shipment. If a repeated problem appears, isolate the affected material instead of asking sewing operators to sort good and bad pieces one by one while production continues.
Once sewing begins, inspect early output rather than waiting until a large quantity accumulates. The first completed garments can reveal zipper waves, waist-seam mismatch, poor concealment, visible tape, fabric stretching, lining interference, wrong seam allowance, or inconsistent zipper height. If a recurring defect appears on the first pieces, the line should identify the cause before the same method is repeated hundreds of times.
This staged approach also helps separate root causes. A zipper that is already stiff at incoming inspection points toward the trim. A zipper that becomes wavy only after sewing points toward fabric handling, pattern balance, or construction. A zipper that looks flat after sewing but catches after lining is attached points toward internal clearance. Each stage provides a different piece of evidence.
Final Garment Inspection
Final inspection should reproduce the customer’s real experience as closely as practical. Close the dress completely and inspect the silhouette, then open the zipper fully and close it again using normal hand force. Check whether neckline, waist seams, design lines, and other crossing seams meet correctly. Confirm that the puller is accessible, the zipper does not twist, the lining remains clear, and the top and lower finishes look intentional rather than improvised.
Pressing should be considered part of the final appearance review. It can improve minor handling marks, but it should not be used to hide a structural wave that returns when the dress hangs or is worn. Satin and other smooth fabrics can change appearance after pressing, so the zipper seam should be reviewed again rather than assuming a passed sewing inspection guarantees a passed finished garment.
The final inspector should also distinguish zipper failure from fit failure. If several garments in the same size are unusually tight at the waist and their zippers are difficult to close, measurements and pattern balance deserve attention before the zipper lot is blamed. Strong final QC connects function, measurement, appearance, and workmanship instead of treating them as unrelated boxes on a form.
AQL and Defect Classification
Pre-shipment sampling becomes much more useful when zipper defects are described consistently and classified according to the customer’s agreed inspection plan. There is no single AQL level or acceptance number that should be copied blindly across every fashion order. Sample size, inspection level, and defect acceptance depend on the customer’s quality requirements, order structure, and inspection agreement. The practical objective is consistency: the same zipper problem should be judged in the same way across cartons and inspectors.
Impact matters. A zipper that cannot open or close normally is more serious than a minor internal cosmetic mark that is not visible during wear. A sharp damaged component may raise a different concern from a small shade deviation. Rather than using vague language, record the exact symptom and location. “Slider jams at waist seam,” “invisible zipper bulges below center-back waist,” and “lining enters slider path near lower end” are descriptions that production teams can act on.
Jinfeng Apparel’s documented QC system supports internal inspection, AQL sampling, client inspection, and third-party pre-shipment inspection according to project requirements. The value of that system is not the acronym itself; it is the ability to connect the inspection result back to material, sewing, fit, finishing, or packing so that corrective action is traceable rather than improvised.
Repeat-Order Consistency
Repeat orders are where disciplined zipper records begin to save real time. Before new trim is ordered, compare the previous Golden sample, BOM, zipper type, zipper length, zipper color, slider and puller, approved trim reference, sewing construction, size chart, lining specification, QC checklist, previous defect records, and any after-shipment feedback. “Same zipper” is not always truly the same several months later because supplier batches, dye lots, slider finishes, or tape feel can change.
One anonymized occasionwear program in Jinfeng Apparel’s records covered 12 satin mini and midi dress styles and approximately 20,000 pieces. The main controls included satin color consistency, invisible zipper flatness, lining comfort, zipper specification, PP approval, Golden sample standards, and consistency across several colors; the program later supported follow-up color repeats. This kind of scale shows why a zipper cannot be managed as an informal accessory decision once a collection moves into bulk production.
A reliable production loop is therefore simple in principle even when the garments are complex: approve the right zipper, stop defective material before sewing, check installation early, verify the finished closure, classify defects consistently, and preserve the approved information for the next order. That sequence turns zipper QC into a repeatable manufacturing standard rather than an emergency response after defects are already packed.
Conclusion
Zipper quality control works best when the zipper is treated as part of the dress rather than as a separate piece of hardware. The trim must be correct, but so must the pattern, fabric behavior, lining clearance, sewing method, pressing, fit, and final inspection. A zipper that performs well in a carton can still fail after installation, while a zipper that appears defective in the garment may actually be revealing an underlying fit or construction problem. The most effective QC system follows the closure from approval and incoming inspection through sewing, fitting, finishing, pre-shipment sampling, and repeat production records.
For fashion brands developing satin, bodycon, corset, strapless, lace, mesh, evening, or other zipper-sensitive dresses, the strongest results usually come from discussing zipper specification during sample development rather than after bulk sewing has started. That is also the right stage to compare tape stiffness, color, zipper length, lining clearance, seam construction, and garment tension. When those decisions are documented and carried into bulk QC, zipper problems become easier to trace, cheaper to correct, and less likely to repeat in the next production run.
Share This Article :

Jerry Lee
Categories

Latest blogs



Table of Contents
Here, developing your OEM/ODM private label clothing collection is no longer a challenge—it’s an excellent opportunity to bring your creative vision to life.

