 Skip to content
How to Improve Fit for Plus-Size Dresses: Pattern, Fabric and Fit Testing Guide

Your trusted Women’s Apparel Manufacturer from China
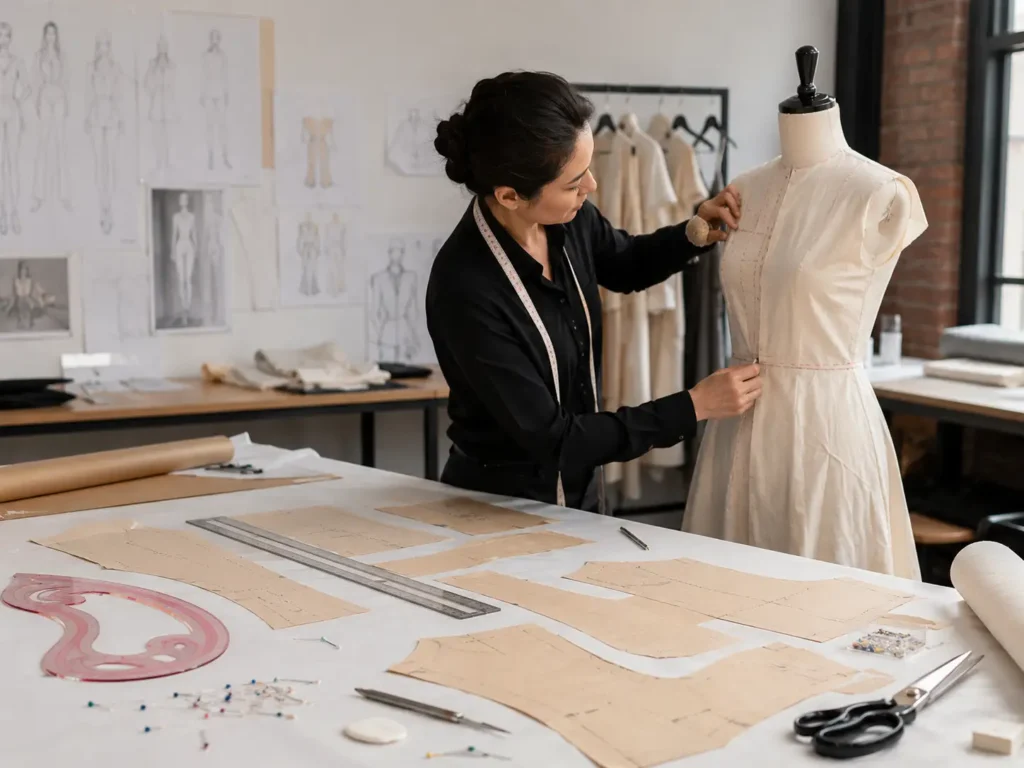
A plus-size dress can match the published bust, waist and hip measurements and still feel wrong the moment the wearer sits down, reaches forward or walks across a room. That is because good fit is not created by circumference alone. It depends on where body volume is located, how the pattern balances front and back length, how the fabric reacts under tension and whether the graded sizes preserve the original design.
To improve fit for plus-size dresses, use representative body measurements, build or correct a dedicated pattern block, control horizontal and vertical balance, match ease to the actual fabric, and test more than one size on suitable fit models. Protect the approved fit through size-set samples, pre-production approval and systematic bulk measurement checks.
The most expensive fit problems are often quiet during development. A fitted midi dress may look polished on one model while standing, then roll at the waist when seated and twist at the side seam in the largest size. The pattern does not need a vague instruction to “make it bigger.” It needs a precise diagnosis of where width, length, shaping or movement has been lost.
What Causes Poor Fit in Plus-Size Dresses?
Poor fit usually comes from incorrect proportion, balance or fabric behavior rather than a garment simply being too small. Bust projection, abdominal volume, shoulder width, upper-arm circumference, torso length and hip shape must be distributed correctly. Adding width everywhere may enlarge the dress while leaving the original tension, gaping or movement problem unresolved.
Reading Fit Lines
Wrinkles, folds and displaced seams are useful evidence when they are read in context. Horizontal tension lines often show that fabric is being pulled across an area or that the pattern lacks enough length to travel over body projection. Diagonal lines usually point toward the source of tension, while vertical folds can indicate excess width, weak shaping or a garment that is hanging away from the body.
The direction of a wrinkle matters more than its size. Lines running from the armhole toward the bust may indicate inadequate bust projection, a misplaced dart or a front armhole that has been cut too short. Lines pulling from the side seam toward the abdomen can show that the front body needs more width, more length or a different distribution of both. Lower-back folds may come from excess back length, insufficient seat shaping or a waistline that sits below the intended position.
Fit should be reviewed from the front, side and back before any fabric is pinned away. A dress may look acceptable from the front while the side seam has moved several centimeters forward, proving that the front and back pattern balance is wrong. Correct the source of the tension first. Removing the visible fold without restoring the missing volume or length can produce a cleaner standing photograph but a less comfortable garment.
Visible fit sign | Likely issue | First check | Typical correction |
Front hem rises | Insufficient front length | Bust and abdominal projection | Add front length above the tension point, not around the full hem |
Side seam pulls forward | Front body lacks volume | Full bust, high hip and abdomen | Redistribute width and length from back to front |
Armhole gaps | Upper-chest and bust mismatch | Upper bust, full bust and dart position | Add bust projection and refine the armhole |
Waist seam curves upward | Body projection is using vertical length | Front waist length | Increase controlled front length |
Lower-back folds | Excess back length or weak seat shaping | Back waist length and seat projection | Shorten back length or reshape the seat |
Sleeve restricts movement | Bicep and armhole mismatch | Upper arm, sleeve cap and armhole | Add bicep width and rebalance the sleeve |
Skirt twists | Balance, grain or cutting problem | Side seams and grainline | Correct pattern distribution and cutting direction |
Neckline stands away | Excess upper-chest width or weak stabilization | Upper bust and neckline construction | Refine upper chest and stabilize the edge |
Practical reference values should be adapted to the brand size chart, fabric and approved fit standard.
High-Risk Areas
The bust, abdomen, hip, upper arm and back are high-risk areas because a change in one location can disturb several others. Fuller bust projection can shorten the apparent front length, lift a waist seam and pull the side seam forward. More abdominal projection can make the skirt climb even when the listed waist circumference is technically correct. A fuller seat can shorten the back skirt and shift the side seams toward the rear.
The full-bust measurement should never be treated as a complete description of the upper body. Two wearers can have the same full-bust circumference while one has a broad back and moderate projection and the other has a narrower back with more forward volume. The first may need additional back width; the second may need more front length and bust shaping without a wider neckline or shoulder.
Sleeved dresses create another linked problem. Increasing bicep width without rebalancing the sleeve cap and armhole can add fabric but reduce movement. Likewise, deepening the armhole does not automatically create comfort; an armhole that sits too low may lift the entire dress whenever the wearer raises her arms. The sleeve and bodice must be evaluated as one moving system.
Size or Shape
A size problem usually affects several parts of the dress at the same time. The bust, waist and hip may all feel tight, or the garment may be broadly loose from shoulder to hem. A shape problem is more selective: the overall size may be reasonable, but the fabric is positioned in the wrong place. This distinction prevents teams from solving every complaint by moving the customer up or down one size.
Consider a dress that fits around the full bust but gaps at the armhole and feels compressed at the bust point. Selecting a smaller size would reduce the gap but increase pressure. Selecting a larger size would release the bust while adding even more upper-chest fabric. The more accurate correction is likely to add forward bust projection, adjust dart or princess-seam shaping and refine the armhole without enlarging the entire upper body.
The same logic applies below the waist. A fuller abdomen may need added front width and front length without extra back-waist volume. A fuller seat may require more back-hip projection and back length while the front remains unchanged. Better fit often comes from moving fabric to the correct pattern area, not from increasing the total garment measurement.
Silhouette Risks
Every silhouette creates a different set of fit risks. A stretch bodycon dress depends on tested negative ease, recovery and stable side seams. A woven corset dress depends on cup position, underbust shaping, boning, waist placement and closure strength. A wrap dress depends on overlap that remains secure while walking and sitting, not merely a neat appearance while the wearer stands still.
Strapless styles are especially sensitive because the upper edge, internal support, waist contour and closure must work together. Tightening only the top edge may reduce slipping but create pressure and visible bulging. Slip dresses appear simple, yet a small change in strap length can alter neckline depth, armhole exposure and bust coverage. Bias-cut satin may also continue to lengthen after cutting and hanging.
Long dresses magnify balance errors. A front hem that rises slightly on a mini dress becomes much more noticeable on a floor-length style. Relaxed silhouettes are not exempt from fit discipline either. Extra sweep can hide hip tightness, but it cannot correct a dropped shoulder, unstable neckline, poor arm mobility or an uneven waist position.
Which Measurements Matter Most?
Reliable plus-size dress development requires upper bust, full bust, underbust, waist, high hip, full hip, shoulder width, back width, upper arm, front waist length and back waist length. Garment-specific points such as neckline depth, armhole, strap length, skirt sweep and finished length must also be controlled to preserve comfort and the intended silhouette.
Core Body Measurements
Bust, waist and hip measurements are useful for size labeling, but they do not explain how the body is shaped between those points. Technical development needs measurements that describe both circumference and position. Upper bust helps define the upper frame, full bust records total circumference and underbust supports fitted bodices, corset panels and seam placement below the bust.
High hip is particularly important because it captures the transition through the abdomen and upper hip. Two customers with the same full-hip measurement may have very different high-hip profiles. One may carry more volume at the front abdomen, while another carries more at the side hip or seat. A pattern based only on the full hip can fit one body and pull badly on the other.
Vertical measurements must be recorded with the same care. Front waist length shows how far the garment must travel over the bust and abdomen, while back waist length controls back balance. Measurements should be taken over suitable undergarments, with the tape level and firm but not compressing soft tissue. Posture and bra type should be noted for structured or low-neck styles.
Measurement | Main purpose | Practical control point | Common failure if inaccurate |
Upper bust | Defines upper frame | Tape above fullest bust and under arms | Armhole gaping or oversized upper chest |
Full bust | Controls overall bust circumference | Tape level over fullest point | Compression, pulling or neckline distortion |
Underbust | Controls lower-bust shaping | Measure directly below bust | Floating bodice or weak support |
Natural waist | Sets waist circumference and position | Measure at natural bend | Tightness or misplaced waistline |
High hip | Captures abdomen and upper hip | Usually 8-10 cm below waist, adjusted to chart | Front pulling or waist roll-up |
Full hip | Controls seat and lower-body fit | Measure fullest hip and seat | Skirt riding and restricted movement |
Upper arm | Controls sleeve comfort | Measure fullest bicep with arm relaxed | Pressure and limited reach |
Front waist length | Accommodates bust and abdomen | Shoulder through bust to waist | Raised front waist and uneven hem |
Back waist length | Controls back torso balance | Back neck to waist | Lower-back pooling |
Waist-to-hip length | Positions hip shaping | Measure vertically at side | Hip curve begins too high or low |
Practical reference values should be adapted to the brand size chart, fabric and approved fit standard.
Ease and Balance
Ease is the difference between the body measurement and the finished garment measurement. Positive ease provides additional room, zero ease follows the body closely and negative ease makes the garment smaller than the body so the fabric stretches during wear. No single ease value works for every plus-size dress because comfort depends on silhouette, fabric resistance, recovery, lining and construction.
For early development, a fitted woven dress may begin with roughly 5-8 cm of full-bust ease and 5-8 cm of full-hip ease, while waist ease may begin around 3-6 cm. These figures are starting points rather than fixed standards. A sleeved dress, a rigid satin, a fuller abdomen or a customer preference for comfort may require more. A stretch bodycon style may use zero or negative ease, but only after the actual fabric has been tested.
Ease must also be distributed correctly. A dress can contain 8 cm of total hip ease and still pull at the front if too much of that allowance sits in the back pattern. Balance describes how the garment hangs: side seams should remain close to vertical, waistlines should stay level and hems should not rise after movement. Correct circumference without correct distribution still creates poor fit.
Base Size
The base size is the size used to develop and fit the first pattern before the remaining sizes are graded. It should represent a meaningful commercial center of the intended customer range, not simply the sample size that is easiest to make. Brands should review strongest-selling sizes, return patterns, product categories and the availability of a consistent fit model before fixing the base.
A fit model should match more than the labeled size. Upper bust, full bust, underbust, waist, high hip, full hip, shoulder width, upper arm and front and back torso lengths should be close to the brand standard. A model with the correct full bust but a much smaller upper bust can lead the team to approve more forward projection and less back width than the wider customer group actually needs.
When a size range becomes broad, one base block may not remain reliable at both ends. A second block may be justified when shoulders grow too wide, necklines become too large, armholes deepen excessively or waist-to-hip proportions drift. The decision should come from repeated fitting evidence rather than a fixed industry size label.
Vertical Control
Many problems described as tightness are actually shortages of vertical length. A fuller bust requires more distance from the shoulder to the waist. A fuller abdomen changes the front waist-to-hem distance, and a prominent seat may need additional back skirt length. When that length is missing, the garment borrows fabric from the neckline, armhole, waist or hem and begins to pull upward.
Important vertical checkpoints include high-point shoulder to bust point, high-point shoulder to front waist, center-back neck to back waist, bust depth, waist-to-high-hip length, waist-to-full-hip length and front, side and back skirt length. Strap length, sleeve length and the vertical position of the upper arm also influence how a dress settles on the body.
Front and back lengths should be adjusted independently. Adding 3 cm around the complete hem does not correct a front-balance problem caused by bust or abdominal projection. The extra length must be inserted above the area where tension begins. Final hemming should take place only after the bodice, waist and hip balance are approved, otherwise the production pattern may preserve the distortion.

How Should Plus-Size Patterns Be Built?
Plus-size patterns should be developed from body data that represents the intended customer rather than repeatedly enlarged from a smaller block. Shoulder width, bust projection, abdomen, seat, upper arm and vertical length need separate control. The block and grade rules must then be validated on several sizes so that fit, movement and design proportions remain consistent.
Dedicated Blocks
A dedicated plus-size block becomes valuable when the target range extends beyond the body assumptions of the original straight-size pattern. The need is not defined by one universal size number. It appears when ordinary grading begins to produce shoulders that are too wide, necklines that gape, armholes that deepen without improving movement or fronts that remain short over the bust and abdomen.
Uniform enlargement can increase the total circumference while preserving the wrong distribution. The back may grow faster than the forward bust projection, the shoulder may expand before the upper arm gains enough room and the waist and hip may increase at the same rate even when the intended customers show stronger growth through the high hip. A dedicated block resets these relationships instead of forcing corrections onto every new style.
The block should also suit the product category. A fitted party-dress block needs accurate bust, waist and hip shaping, while a stretch bodycon block must reflect the recovery and resistance of the fabric group. A relaxed woven block may allow more design ease but still needs controlled shoulders, armholes and vertical balance. A better block reduces repeated corrections; it does not remove the need for real fitting.
Proportion and Grading
Grading changes a pattern by moving specific points according to planned increments. It is not a percentage enlargement of the complete shape. Neck width, shoulder length, upper bust, full bust, armhole depth, bicep, waist, high hip, full hip and vertical lengths may all require different movements, and those movements may change between the lower and upper portions of a broad size range.
The grade must also preserve the design. Princess seams should continue to pass through the correct bust area, waist darts should not drift away from the shaping they are meant to control and a cutout should not become lower or wider merely because the circumference has increased. Slit height, neckline depth, strap position and pocket placement should be reviewed as visual and functional points rather than passive pattern details.
A clean digital nest of graded pattern pieces is not proof of successful fit. Selected garments from the lower, middle and upper range should be made and assessed. The largest size should still look like the same design, with similar neckline coverage, waist position and overall proportion. When the design changes character across sizes, the grading rule needs correction even if the measurement chart has been met.
Targeted Adjustments
Pattern adjustments should respond to an identified symptom rather than being applied automatically to every larger size. A full-bust adjustment is useful when the upper frame fits but the front needs more projection and length. It should be followed by a review of dart intake, dart position, armhole shape, neckline stability and front waist length, because these areas are connected.
Abdominal adjustments should provide controlled front width and length without making the back waist unnecessarily loose. Depending on the style, the change may be distributed through the side seam, center front, princess seams or panel lines. A full-seat adjustment adds back-hip projection and back length so that the skirt can pass over the seat without climbing or pulling the side seams backward.
Upper-arm corrections require equal attention to the sleeve and bodice. Adding bicep width without correcting the sleeve cap can create a sleeve that is larger but still difficult to lift. Deepening the armhole too far may cause the entire dress to rise with the arm. Every correction should record the location, amount, direction and purpose so that the revised sample and production pattern can be checked objectively.
Body-Shape Validation
Body-shape terms such as apple, pear, hourglass and rectangle are useful for conversation, but they are too broad to control technical fit by themselves. Two people described as pear-shaped may have different waist definition, seat projection, thigh distribution, posture and torso length. Measurable profiles provide a more reliable basis for block development and fitting decisions.
Useful profiles might include a fuller bust with a relatively smaller waist, a fuller abdomen with limited waist definition, a fuller hip and seat with a narrower upper body, or a broad back with moderate forward bust projection. Short and long torsos create another important distinction because the same circumference measurements can place the bust, waist and hip at different vertical positions.
A brand cannot make one ready-to-wear dress fit every possible body, but it can define the customer profile its block is intended to serve and test that standard consistently. Upper-end physical fitting is especially important for woven, sleeved, corset, strapless and closely fitted dresses. Digital simulation is useful for early review, yet comfort, pressure and recovery still need to be judged on a moving human body.
How Do Fabric and Construction Affect Fit?
Fabric and construction determine how a plus-size dress behaves after it is worn. Stretch percentage, recovery, weight, drape, shrinkage and lining performance can change finished measurements and support. Seams, cups, boning, elastic, straps and closures should reinforce a correctly developed pattern rather than compensate for missing width, length or balance.
Fabric Behavior
Two fabrics with the same fiber content can produce very different fit because knit structure, yarn, weight, finishing and recovery change how the garment carries tension. A soft jersey may feel comfortable at first but become wider at the waist or longer at the seat after several hours. A firm ponte may hold the silhouette well while feeling restrictive if the pattern uses excessive negative ease.
Stretch mesh can contour smoothly but needs careful control of transparency, edge stability and lining. Woven satin offers an elegant surface and fluid drape, yet it provides little natural movement unless elastane is included. Bias-cut satin can continue to lengthen after cutting, sewing and hanging. Chiffon moves freely but requires adequate lining sweep and seam construction that can resist slippage.
Fabric selection should be confirmed before final pattern approval. Replacing a stable stretch satin with a softer quality can alter bust support, waist position, dress length and seam appearance even when the color and composition look similar. The outer fabric, lining, interfacing and support layers should be assessed as one system because the customer experiences their combined resistance.
Material | Typical fit benefit | Main fit risk | Useful development check |
Jersey | Comfortable stretch and easy movement | Growth and weak recovery | Remeasure waist, hip and length after wear |
Ponte | Stable stretch and body support | Compression, heat and seam bulk | Check pressure, recovery and seam thickness |
Stretch mesh | Flexible contouring and layering | Transparency and edge distortion | Check recovery, lining and neckline stability |
Stretch satin | Dressy surface with added mobility | Variable stretch and seam puckering | Test directional stretch and sewn seams |
Woven satin | Fluid drape and premium appearance | Limited movement, snagging and bias growth | Check sitting ease, seam stress and hanging length |
Chiffon | Light drape and generous movement | Seam slippage and transparency | Check seam strength, lining sweep and hem balance |
Lace | Texture and shaped placement | Uneven stretch and edge irritation | Map stretch, motifs and skin-contact finishes |
Crepe | Balanced drape and surface coverage | Shrinkage and quality variation | Test steam, washing and dimensional stability |
Practical reference values should be adapted to the brand size chart, fabric and approved fit standard.
Stretch and Recovery
Stretch percentage describes how far a material can extend, but it does not reveal how much force is required or whether the fabric returns to its original measurement. Two materials may both stretch by 30 percent, while one feels supportive and recovers quickly and the other becomes loose after a short wear period. Both numbers are technically correct, but the garments will behave differently.
A practical development test can mark a 20 cm fabric section. If the section stretches comfortably to 24 cm, it has extended by 20 percent; if it reaches 26 cm, it has extended by 30 percent. Test the width and length directions separately, then measure the section immediately after release and again after rest. A fabric that returns to 21 cm has retained 1 cm of growth.
The test should be repeated across a representative sewn seam and after the expected care or pressing process. Surface whitening, mesh opening, print distortion and seam puckering may appear before the fabric reaches its maximum extension. Negative ease should be calculated from comfortable usable stretch, not from the maximum force a technician can apply. The completed sample should also be remeasured after a movement-based fit session.
Supportive Construction
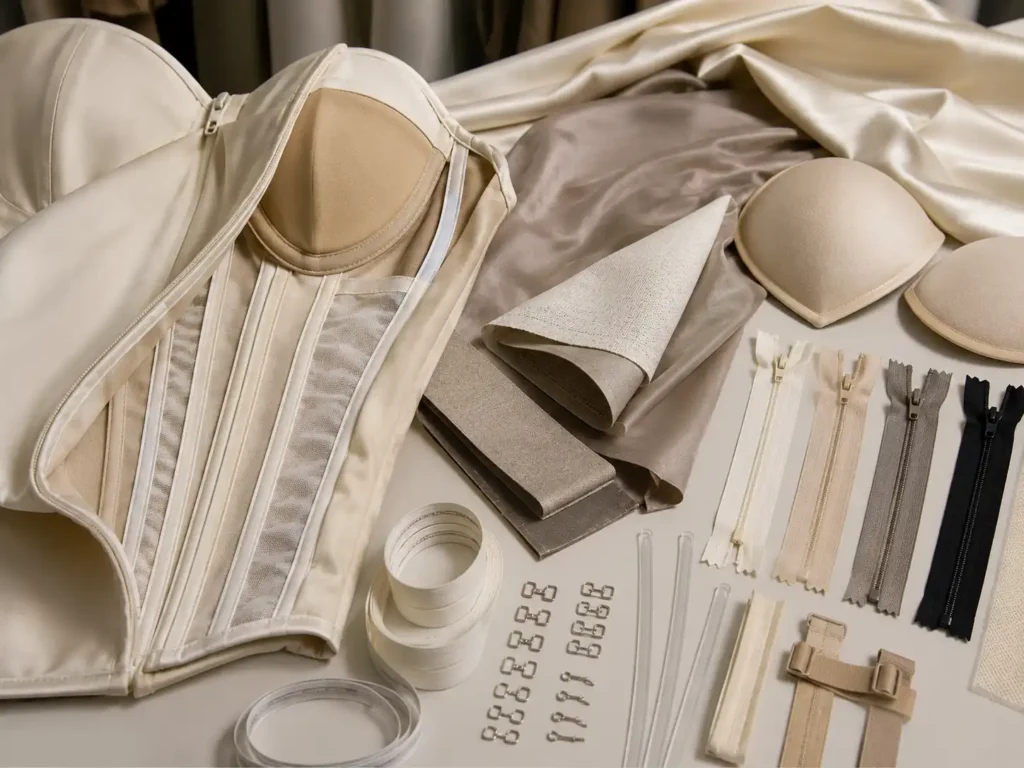
Support works best when several components share the load. Cups alone cannot stabilize a fuller bust if the underbust seam, straps and back closure are incorrectly positioned. Boning can control vertical collapse, but it cannot correct a neckline that is too wide or a waist seam that sits too high. The pattern must create the correct space before construction adds reinforcement.
Princess seams distribute shaping through long seam lines and can produce smoother control than one large dart. Power mesh can provide flexible support, while stay tape can stabilize a neckline or upper edge. Adjustable straps are useful when customers have different torso lengths and bust positions, but the adjustment range and hardware strength must be sufficient for the garment rather than added as a decorative detail.
Closures should be tested while the wearer sits, bends and breathes normally. A zipper may lie flat on a hanger but curve or expose its teeth under body tension. Internal waist stays, hooks or secondary fastenings can reduce stress in fitted occasion dresses. Supportive construction should make the garment feel stable and secure; it should not depend on uncomfortable compression.
Linings and Silhouettes
The lining often determines the true movement of the dress. A stretch shell paired with a rigid lining can feel much smaller than the outer measurement suggests, while a lining with limited seat or stride room can pull the shell upward. Surface friction also matters: a rough or static-prone lining may cling to the body and prevent the outer fabric from falling naturally.
A bodycon dress usually needs a stretch lining with compatible recovery. A chiffon maxi requires enough lining sweep for walking and stairs without adding visible bulk. A corset dress may include a support layer, comfort lining and outer fabric, each performing a different job. Bias-cut dresses need the shell and lining to relax before final hemming because the two layers may lengthen at different rates.
Final fit approval should include every layer, cup, bone, strap, closure, label and attachment intended for production. Approving an outer shell and adding the lining later is risky because the internal layer can reduce circumference, change the neckline or restrict the armhole. The finished customer experience is created by the complete garment, not by the most visible fabric alone.
How Do Brands Test and Control Fit?
Brands should test plus-size dresses on representative fit models in the base size and selected larger sizes, using standing and movement checks. Approval should move through revised samples, size-set samples and a pre-production sample. Bulk fit is then protected through fabric checks, cutting control, inline measurements, finished-garment inspection and structured review of return reasons.
Fit Models
A fit model should represent the brand’s intended measurements and proportions, not simply be able to wear the stated size. Record upper bust, full bust, underbust, waist, high hip, full hip, upper arm, shoulder width and front and back torso lengths. Posture and the type of undergarment used should also remain reasonably consistent, especially for fitted, corset, low-neck or strapless styles.
One model is rarely enough to validate a broad extended-size range. A practical plan usually tests the base size and at least one larger size, while woven or highly structured styles deserve an additional check near the upper end. The number of fit checkpoints should reflect risk. A relaxed stretch maxi is generally more forgiving than a woven corset dress with cups, sleeves, a close waist and a fitted hip.
Fit-model comments become useful when they identify location and movement. “The sleeve feels tight when reaching forward” is actionable; “the dress feels wrong” is not. Combine wearer feedback with photographs, measurements, seam position and visible drag lines. The fit model supplies important evidence, but the approved size chart and target body profile remain the technical standard.
Stage or control point | Primary purpose | Key fit evidence | Approval output |
First sample | Interpret design and construction | Silhouette, proportion, major seams | Initial pattern correction list |
Fit sample | Evaluate body relationship | Bust, waist, hip, balance and movement | Measured fit comments |
Revised sample | Confirm corrections | Original issues resolved without new problems | Revised pattern approval |
Size-set sample | Check grading | Lower, middle and upper size consistency | Grade-rule confirmation |
Pre-production sample | Confirm bulk-ready combination | Bulk fabric, lining, trims and workmanship | Production approval package |
Golden sample | Retain final physical reference | Approved appearance, measurement and construction | QC and repeat-order benchmark |
Inline measurement | Catch variation during sewing | High-risk points by size | Correction before finishing |
Final inspection | Verify finished consistency | Measurements, seams, closures, lining and appearance | Shipment decision and records |
Practical reference values should be adapted to the brand size chart, fabric and approved fit standard.
Fit Sessions
A consistent fit-session sequence prevents teams from correcting one area while overlooking another. Begin with the wearer standing naturally and do not pull the garment into position. Review the front, side and back, then check shoulder placement, neckline stability, bust position, waist level, side-seam direction, hip balance and hem before using pins or temporary markings.
The wearer should sit in a normal chair, walk, raise both arms, reach forward, bend slightly, take a longer step and return from sitting to standing. After movement, check whether the dress returns to its original position. A skirt that must be pulled down repeatedly, a waist that rolls upward or a neckline that opens only when seated still represents a real fit problem.
Temporary pinning can test an idea, but every change should be reviewed across the complete garment. Removing excess waist fabric may pull the bust downward or reduce hip movement. Fit comments should state the location, amount, direction and purpose of a correction. “Add 1.5 cm front length over the bust and taper to zero at the side seam” creates a repeatable instruction.
Sample Stages
Each sample stage should answer a different question. The first sample confirms whether the design, proportion and construction direction have been interpreted correctly. A fit sample focuses on the relationship between the garment and the target body. A revised sample proves that requested changes solved the original problem without creating new tension, gaping or movement restrictions.
A size-set sample checks selected graded sizes, normally representing the lower, middle and upper portions of the range according to product risk. The pre-production sample should combine the approved pattern with the intended bulk fabric, lining, trims, closures and workmanship. A Golden sample can then remain as the physical reference for production, inspection and repeat-order review.
Not every repeat style needs the same number of rounds, but skipping a stage should be a conscious risk decision. A familiar pattern in a previously approved fabric may move faster. A new structured plus-size dress should not be approved from a substitute fabric or from pins alone. Pattern files, measurement specifications, grade rules, construction details and the physical sample should be controlled as one approval package.
Bulk Control
An approved sample does not guarantee that every bulk garment will fit the same way. Fabric lots can vary in shrinkage, weight, stretch and recovery. Cutting layers can shift, seam allowances can change and pressing can lengthen or shrink sections. Fit control therefore needs checkpoints before cutting, during sewing and after finishing rather than relying only on final inspection.
Fabric should be inspected and, where appropriate, relaxed before cutting. Shrinkage and recovery tests should reflect the planned pressing, washing or care process. First production pieces should be measured before the complete order continues, and inline checks should focus on high-risk points such as bust, waist, hip, upper arm, front length, zipper position and waist-seam level.
Measurement tolerances should be specific to the product and point of measure. A 1 cm variation at the sweep of a relaxed maxi may have limited effect, while 1 cm at the top edge of a strapless bodice can change security. After launch, return reasons should be separated by size and location so that “runs small” becomes useful evidence about bust pressure, upper-arm restriction, front length or hip balance.

Develop Your Plus-Size Dress Collection
A reliable fit program connects customer data, measurement standards, pattern development, fabric testing, sample approval, bulk control and post-launch feedback. Before a style enters production, the team should be able to explain who the block is designed for, which movements matter most, how the chosen fabric changes ease, which sizes were physically validated and how the approved measurements will be protected on the sewing floor.
Jinfeng Apparel supports custom dress development from reference images, original samples, sketches, line sheets or technical packs. Verified resources include 7+ senior womenswear pattern makers, 2 sample rooms, 20+ sample machinists and 15+ QC inspectors, with development covering fit samples, revised samples, size review, pre-production approval and bulk measurement control. Production starts from 200 pieces per style and color, subject to fabric, trims and construction.
For a productive technical review, send the intended size range, body or garment measurement chart, fabric direction, sample or design files, expected order quantity and launch schedule. The development team can then identify likely bust, armhole, waist, abdomen, hip, lining and grading risks before they are repeated across bulk production. Contact Kelly at info@jinfengapparel.com or WhatsApp +86 18929465598 to discuss a custom plus-size dress project.
Share This Article :

Jerry Lee
Categories

Latest blogs

Table of Contents
Here, developing your OEM/ODM private label clothing collection is no longer a challenge—it’s an excellent opportunity to bring your creative vision to life.

