Skip to content
What are the types of satin dress, and how do I choose the right one for drape, shine, and occasion?
Many satin dresses look amazing online, but in real wear they can cling, wrinkle, or show every seam. That gap hurts sell-through.
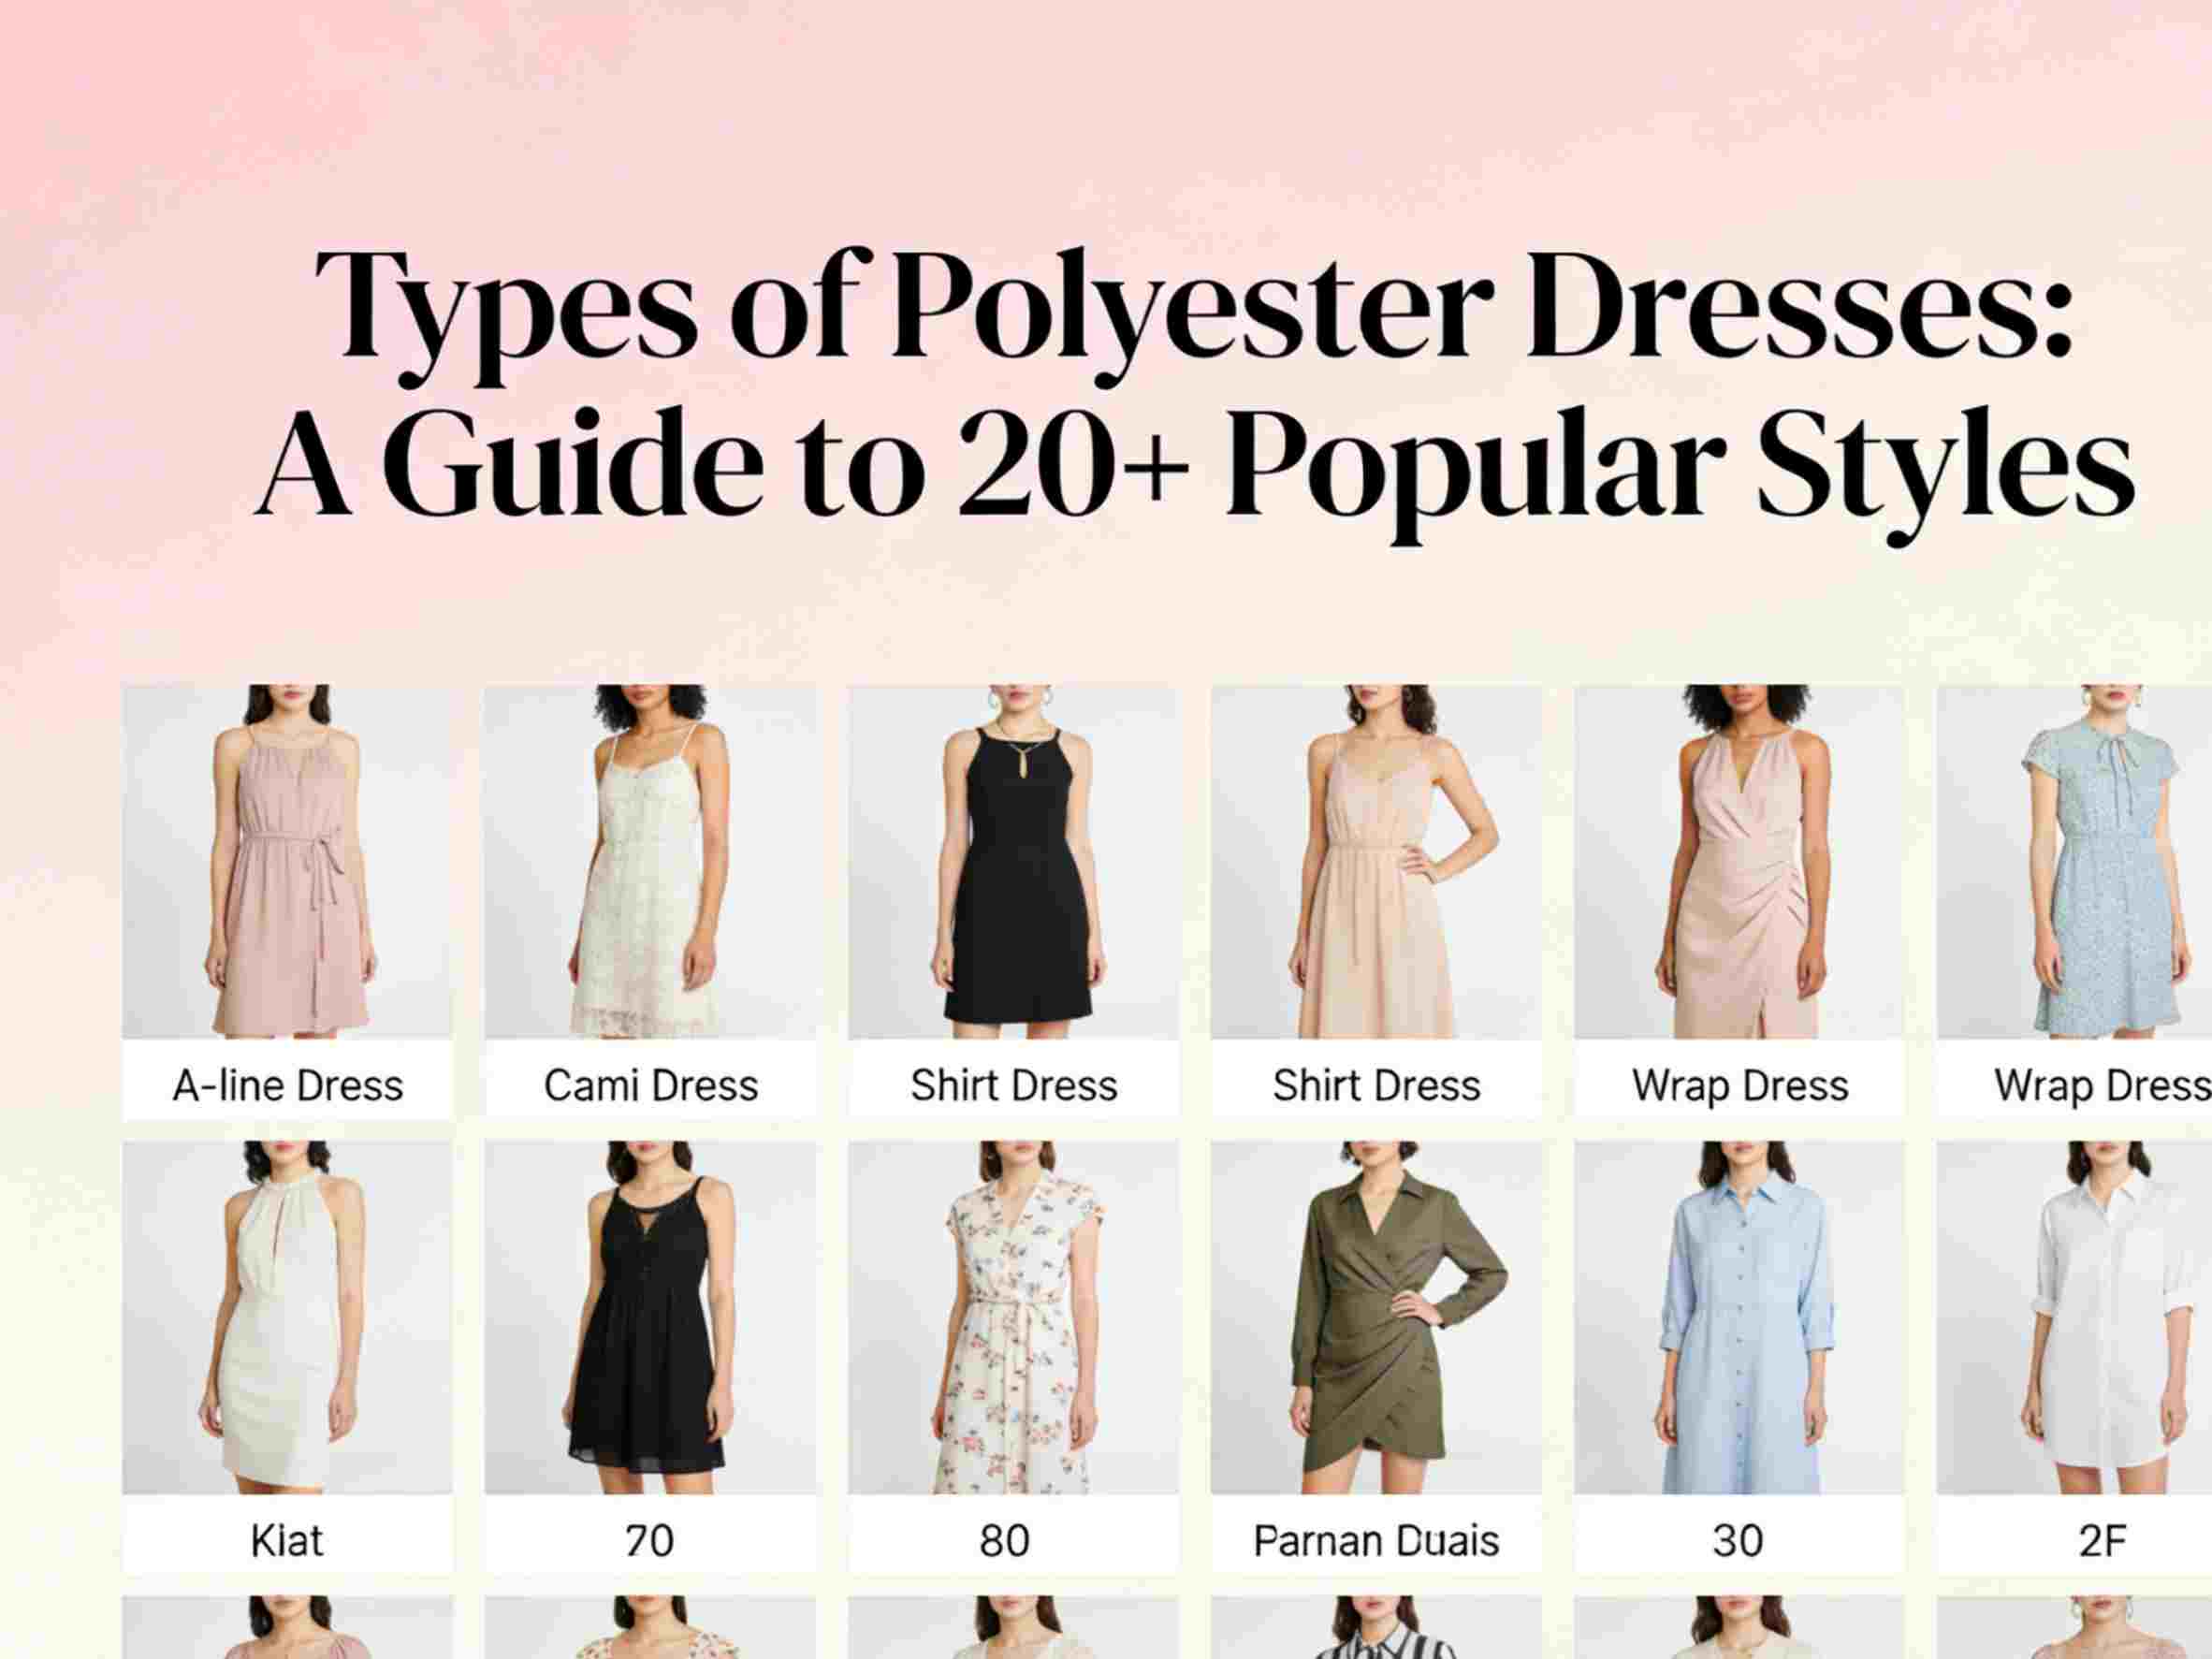
The main types of satin dress are defined by silhouette, neckline, straps/sleeves, and construction details like bias cut and lining. Popular options include slip, bias-cut, cowl neck, wrap, A-line, fit-and-flare, mermaid, trumpet, sheath, bodycon, ball gown, high-low, maxi, midi, mini, off-shoulder, one-shoulder, halter, strapless, puff-sleeve, shirt dress, and corset satin styles. The right choice depends on satin type, weight, and how much structure you need.
I learned this when a buyer asked me for “one satin dress for all customers.” I couldn’t do it. Satin is beautiful, but it is picky. So I treat it like a technical fabric, not just a shiny one.
How do satin dress types change fit, comfort, and body lines?
Satin highlights curves and also highlights mistakes. Fit rules are stricter than cotton.
Satin dress types control fit through seam count, bias direction, lining, and support. Bias-cut and slip styles flatter with drape but can cling and grow. Corset and strapless styles need structure to stay up. Wrap styles look easy but require strong stability at the neckline and waist tie points.
Fit signals I watch in sampling
1) “Cling” risk
- High in bodycon, sheath, and tight slip.
- Lower in A-line, fit-and-flare, and ball gown.
2) “Growth” risk (fabric stretches on the bias)
- High in bias-cut and cowl styles.
- Medium in slip and wrap.
- Low in structured corset styles.
3) “Show-through” risk (seams and undergarments)
- High in light satin and pale colors.
- Lower with lining, heavier weight, or darker colors.
What are the best satin dress types for each occasion?
Customers buy satin for shine and mood. But they also need comfort and confidence.
For weddings and formal events, I choose bias-cut, cowl neck, mermaid/trumpet, or fit-and-flare satin styles with lining. For parties, I choose slip, mini, high-slit, or one-shoulder styles. For work or smart casual, satin shirt dresses and satin-backed crepe sheath styles are safer and easier to wear.
Occasion mapping
| Occasion | Best satin dress types | Why it works |
|---|---|---|
| Wedding guest | midi slip, cowl, wrap, fit-and-flare | polished, not overdone |
| Formal / prom | mermaid, trumpet, corset, ball gown | structure + glamour |
| Date night | slip, bias-cut, high-slit | romantic drape |
| Party / club | mini, bodycon, one-shoulder | bold and trendy |
| Office | shirt dress, sheath in satin-backed crepe | controlled shine |
| Vacation | halter maxi, wrap midi | breathable styling |
Dive deeper: Why satin is “hard mode” in design, and how I engineer each satin dress type to avoid returns
Satin fails in predictable ways. If I control those failure points, the product becomes stable, comfortable, and premium.
1) Shine shows every decision, so I reduce “visual noise”
Satin reflects light like a mirror. That means:
- puckered seams look worse
- uneven hems look obvious
- poor pressing marks stay visible
So I simplify seam lines when possible and choose clean pattern shapes.
- For slip and bias-cut, I reduce seam count and avoid heavy topstitch.
- For corset and strapless, I hide support layers inside so the outside stays smooth.
2) Bias-cut is beautiful, but it “grows,” so I manage it like a living material
Bias-cut satin dresses are the most premium-looking, but also the most risky.
I control growth with:
- relax time before hemming (so the fabric drops naturally)
- stay tape at shoulder seams and neckline
- stabilized waist seams on wrap and fitted bias styles
If I skip this, the hem becomes uneven after hanging, and customers complain fast.
| Risk point | What happens | My fix |
|---|---|---|
| bias growth | dress gets longer | rest panels before hemming |
| neckline collapse | cowl becomes messy | add hidden stay and soft facing |
| side seam twisting | garment rotates | balance grain and notch control |
3) Lining is not optional in most satin styles
Many people think lining is only for luxury. For satin, lining is often functional.
It helps:
- stop cling
- hide seam allowances
- reduce show-through
- improve slip on the body
I choose lining by goal:
- anti-cling: lightweight tricot or smooth lining
- shape support: power mesh in bodice areas
- comfort: soft breathable lining for warm climates
4) Construction method matters more than decoration
Satin hates bulky seams. So I select seam finishes based on style:
- French seams for slip and bias styles (clean inside, no scratch)
- narrow rolled hem for skirts and ruffles
- clean facing for necklines instead of thick bindings
I also control stitch tension, needle size, and thread choice because satin can snag.
5) “Stay up” engineering for strapless and off-shoulder
These styles look simple but require real support.
I build them with:
- inner elastic grip or silicone tape at the top edge
- boning in the side seams for structure
- stable interfacing in the bodice
Without this, the dress slides down, and customers blame sizing, not structure.
| Style | Common complaint | Engineering fix |
|---|---|---|
| strapless satin | slips down | grip tape + boning |
| off-shoulder | restricts arm movement | adjust sleeve cap + add stretch panel |
| corset satin | wrinkles at bust | cup shaping + foam option |
6) Fabric weight strategy changes the whole product tier
Buyers often choose satin by color, not by GSM. That is a mistake.
My simple rule:
- lighter satin = best for flowy styles (cowl, bias)
- heavier satin = best for structured styles (corset, ball gown)
| Satin weight feel | Best styles | Why |
|---|---|---|
| light, airy | cowl, bias-cut, maxi | drape and movement |
| medium | wrap, midi, slip | balanced wearability |
| heavier, crisp | corset, strapless, ball gown | holds structure |
7) Quality control points that reduce returns in bulk
When I run bulk for satin dresses, I lock these checks:
- shade matching per dye lot (satin shows shade shifts)
- snag test on high-friction points
- hem drop test on bias styles
- zipper wave check (invisible zipper must lay flat)
- pressing standard to avoid shine marks
| QC check | What I measure | Why it matters |
|---|---|---|
| hem balance | hanging drop | bias styles change shape |
| seam pucker | light reflection | satin makes it obvious |
| zipper flatness | ripple vs smooth | looks “cheap” if waved |
| snag rate | needle marks | reduces complaints |
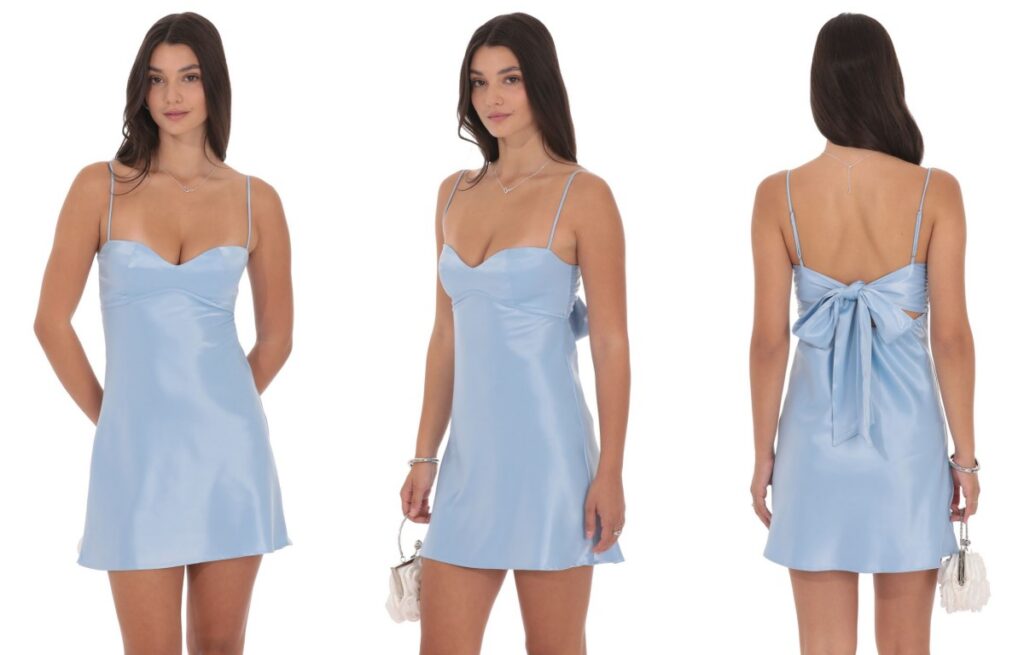
Satin Slip Dress
A satin slip dress looks easy, but it is one of the fastest ways to lose money in bulk. One small fabric flaw shows on camera. One wrong pattern choice causes clinging and twisting. Then returns rise, and reorders stop.
A satin slip dress sells best when I choose the right satin base (weight, weave, and sheen), cut it to control stretch and skew, and protect the garment with clean seams and stable finishing. I also lock shade, snag resistance, and slip performance with real strike-offs and wear tests before bulk.
I once had a buyer push for the cheapest satin option to win price. The dresses arrived with uneven shine and seam puckering under flash photos. Since then, I treat satin like a “photo fabric.” If it fails on camera, it fails in sales.
What counts as a “satin slip dress,” and how is it different from other satin dresses?
People often call any satin dress a “slip.” That creates wrong expectations in fit and construction. I define it clearly before I quote.
A satin slip dress is a minimal, lingerie-inspired silhouette with thin straps, a simple neckline (often cowl or V), and a straight-to-softly A-line body. Unlike structured satin dresses, it relies on drape, bias behavior, and surface finish, so fabric and cut quality matter more than heavy shaping.
Core visual cues I use to confirm the style
- Spaghetti straps or narrow straps
- Clean front with limited seams
- Light shaping, not corset structure
- Drape that moves, not stiffness that stands
Common variations buyers still call “slip”
- Satin bias midi with a cowl neck
- Satin mini slip with lace trim
- Satin maxi slip with side slit
- Satin slip with back cowl or cross straps
Why does satin behave differently, and how does that change pattern and grading?
Satin is not difficult because it is “fancy.” It is difficult because it moves. It shifts on the table, it stretches on bias, and it shows tension lines.
Satin slip dresses are sensitive to grain and bias. If I cut the body on bias, I get better drape but higher risk of growth and twisting. If I cut on straight grain, I get more stability but less fluid movement. I adjust pattern balance, seam angles, and grading to keep the dress hanging straight in all sizes.
The satin problems I design around
- Skew and twisting after hanging
- Growth at neckline and hip on bias cuts
- Seam puckering from needle tension
- Shine marks from pressing
- “Drag lines” across bust and hip in photos
Grading risks that show up in slip dresses
- Strap length grows too slowly across sizes
- Bust point shifts incorrectly, causing neckline gaping
- Hip ease is under-added, causing cling and riding up
- Hem sweep changes too much, causing side flare
A simple cut decision map I use
| Cut Direction | Best Look | Best For | Main Risk |
|---|---|---|---|
| True bias body | most fluid drape | premium midi/maxi | growth + twist |
| Partial bias (skirt only) | controlled movement | commercial best-sellers | balance issues |
| Straight grain body | clean + stable | entry price tiers | less “slip” drape |
Which satin fabrics are best for a satin slip dress, and how do I avoid “cheap shine”?
Not all satin is equal. Some satins look glossy and plastic. Some look soft and expensive. Buyers usually describe this as “cheap shine,” but it is really fiber + weave + finishing.
For satin slip dresses, I usually choose heavier satin (more body) for clean lines, and softer satin (more drape) for romantic movement. I avoid overly high-gloss finishes for daywear brands, and I confirm the face sheen under strong light, because the camera exaggerates shine and surface defects.
Satin bases I see most in bulk
- Polyester satin: stable supply and price, but sheen control is critical
- Recycled polyester satin: good story, still needs strict shade control
- Viscose/rayon satin: softer hand, but shrinkage and creasing need control
- Silk satin: premium, but cost and care labels limit volume
What makes satin look expensive
- Even luster, not patchy shine
- Fine yarn feel, not rough face
- Good drape with enough weight
- Clean dyeing with low shade banding
Fabric specs I ask for before sampling
- GSM (weight) target range
- Weave type and finishing method
- Snag rating expectation
- Colorfastness and crocking targets
- Width and roll length stability
A practical fabric selection table
| Buyer Positioning | Recommended Satin | Suggested Weight Feel | Notes |
|---|---|---|---|
| Entry price | poly satin / poly charmeuse | lighter | watch “plastic shine” |
| Mid tier | poly satin with softer finish | medium | best balance for photos |
| Premium | viscose satin / silk blend | medium-heavy | more care and testing |
How do I control cowl neck, straps, and bias stretch so the slip dress fits well?
Most returns are fit-related, not color-related. The top fit issues are neckline collapse, strap slip, and bust gaping. Satin makes these issues louder.
I control fit by stabilizing the neckline edge, engineering the cowl depth for each size, and using adjustable straps with strong hardware. For bias slips, I also pre-hang panels before final hemming, so the garment finishes at the correct length after natural drop.
Cowl neck: the most misunderstood area
- Cowl depth must match bust volume, not only size label
- Cowl width must not pull at side seams
- Neck edge needs stabilization, or it will “grow”
- Lining can help, but it can also kill drape if too stiff
Strap engineering that reduces returns
- Adjustable straps with quality sliders
- Correct strap angle so it does not cut into the neck
- Hidden elastic option for comfort in larger sizes
- Bar tack reinforcement at strap joins
Bias control techniques I use in factory
- I relax fabric before cutting when possible
- I keep single-direction cutting for consistency
- I hang panels 12–24 hours before hemming (for bias-heavy bodies)
- I use a narrow hem that stays flat, not a thick turned hem
Fit checkpoints for approval samples
- Walk test: does it ride up at hip?
- Sit test: does it pull across thigh?
- Arm raise test: does neckline gap?
- Flash photo test: does the bust show drag lines?
Satin shows every needle hole. So I do not “hide” problems with heavier stitches. I aim for clean, low-bulk finishing that stays flat.
Premium satin slip dresses use low-bulk seams (often French seams or clean serged + topstitch options), precise thread tension, and narrow hems that do not wave. I also manage pressing temperature and use protective cloth, because shine marks can permanently damage the face.
Seam options and when I use them
- French seam: clean inside, premium feel, higher labor
- Narrow serge + topstitch: cost-effective, needs skilled operator
- Bound seams: nice inside look, can add bulk on light satin
Hem finishing choices
- Narrow baby hem: best for light to medium satin
- Rolled hem: good for very light satin, needs stable tension
- Blind hem: clean outside, but can show impressions on shiny face
Details that signal quality to end customers
- Even strap stitching and no puckering
- Flat side seams that do not twist
- Smooth hemline with no “lettuce edge”
- Clean inner labels that do not imprint on the face
What are the biggest QC risks in bulk, and how do I prevent them before shipment?
If satin fails, it fails in obvious ways. That is good, because I can test it early. The key is to run the right checks, not only basic measurements.
The biggest QC risks are shade variation, snagging, seam puckering, length drop on bias, and shine marks from pressing. I prevent them by approving bulk shade against a standard, running snag and crocking tests, controlling sewing specs, and checking finished garments after hanging to confirm final length and twist.
The satin QC list I always run
- Shade banding check across rolls under daylight
- Snag test on straps, rings, and packaging edges
- Crocking test for dark colors
- Seam puckering review under flash lighting
- Hang test for 24 hours to confirm final hem level
What I write into the tech pack to reduce arguments later
- Allowed shade tolerance and grouping rules
- Sewing needle type and size
- Stitch density and tension notes
- Pressing temperature and protective cloth requirement
- Packaging rules to prevent crease lines
Bulk defect examples I treat as “stop ship”
- Visible shade differences within one carton
- Repeated seam puckering along side seams
- Noticeable twist from underarm to hem
- Permanent press shine on front body panels
- Snags or pulls on the face in A-grade units
Satin Midi Dress
A satin midi dress can look expensive in photos, but it can also look cheap after one wear. I often see issues like puckered seams, clingy fit, and uneven shine. When that happens, returns rise and the buyer loses trust in the supplier.
A satin midi dress sells best when I match the right satin type and weight with a midi-friendly silhouette, then I control fit at bust and hip, stabilize key seams, and confirm shine, color, and drape with a real fabric sample before bulk. The goal is smooth lines, clean movement, and repeatable quality.
I still remember a satin midi project where the buyer wanted “silky luxury” at a very tight cost. The fabric looked fine on the roll. After steaming, it showed shine marks and seam impressions. Since then, I treat satin as a fabric system, not just a category name.
What satin fabrics are actually used for satin midi dresses, and how do they behave?
Many buyers say “use satin,” but satin is only a weave, not one single material. If I do not clarify the base fiber and finish, the dress can change a lot between sampling and bulk.
Satin midi dresses are usually made from polyester satin, silk satin, acetate satin, or blended satin, and each one drapes, shines, and wrinkles differently. I choose based on target price, care needs, and how stable the fabric is in production, because midi lengths show every ripple and twist.
Satin types I see most in wholesale
- Polyester satin: stable supply, affordable, strong color range, can show shine marks
- Silk satin: premium hand feel, breathable, higher cost, tighter MOQ in many mills
- Acetate satin: soft drape and rich look, but it can weaken under heat and moisture
- Satin-back crepe: satin face with crepe back, less cling, more stable for fitted midis
- Hammered/crinkle satin: texture hides wrinkles, good for travel-friendly stories
How I translate fabric behavior into buyer outcomes
| Satin Type | Shine Level | Drape | Wrinkle Risk | Best Use in Midi |
|---|---|---|---|---|
| Poly satin | Medium–High | Medium | Medium | slip midi, bias midi |
| Satin-back crepe | Medium | Controlled | Low–Medium | cowl neck midi, fitted midi |
| Silk satin | High but soft | Fluid | Medium | premium capsule, event |
| Hammered satin | Diffused | Fluid | Low | vacation midi, easy fit |
The key point I explain to buyers
- The same pattern in different satin bases can look like two different products
- Midi length makes the “hang” obvious, so fabric choice is not optional
Which satin midi dress silhouettes are the most popular, and what do they signal to customers?
A midi length sits in the “everyday to event” zone. That is why silhouette matters. The wrong silhouette makes satin look like sleepwear or it makes it look heavy.
The most popular satin midi dress silhouettes include slip/bias cut, cowl neck, wrap midi, fitted sheath midi, A-line midi, and ruched midi. I choose one based on the buyer’s customer lifestyle, then I build the rest of the design around movement, coverage, and undergarment compatibility.
The silhouettes I recommend most often
- Slip or bias midi: minimal seams, premium look, but high risk for distortion
- Cowl neck midi: strong photo impact, needs neckline stability
- Wrap midi: flexible fit, can reduce returns, but bust gaping risk
- A-line midi: easier fit, less cling, more reorder-friendly
- Ruched midi: hides belly and hip lines, but adds sewing time
- Shirt-style satin midi: fashion-forward, but can look “shiny workwear” if not balanced
A quick wholesale selection view
| Silhouette | Best Customer Use | Styling Story | Production Risk |
|---|---|---|---|
| Bias slip midi | night out | minimalist, premium | high (twist, growth) |
| Cowl midi | events | glam, soft drape | medium (stretching) |
| A-line midi | everyday | easy elegant | low (stable) |
| Ruched midi | body confidence | flattering | medium (labor) |
| Wrap midi | versatile fit | day-to-night | medium (gaping) |
How do I control fit and prevent cling, transparency, and “cheap shine” in satin midi dresses?
This is where most satin midi projects fail. Satin is honest. If the fit is off by even a small amount, it shows. If the underwear line shows, customers complain.
I prevent cling and cheap shine by choosing the right weight, adding controlled ease at hip, stabilizing the neckline and waist, and using lining or slip solutions when needed. I also reduce seam puckering with correct needle choice, stitch tension, and pressing rules.
Fit rules I use for satin midi
- I avoid “too tight” hip measurements, because satin highlights stress lines
- I add walking ease for midi, especially if there is no slit
- I balance bust shaping with clean lines, usually via darts or princess seams
- I check strap length and back neckline so it does not slide and expose bra lines
Lining and opacity choices
- Full lining: best for light colors, reduces cling, increases cost
- Half lining (skirt only): helps movement, keeps bodice lighter
- Self-lining at bust: supports cowl and prevents show-through
- Separate slip solution: useful for buyers who want lower garment cost
Shine control decisions
- I avoid overly glossy finishes for everyday midis
- I suggest satin-back crepe when the buyer wants “soft luxe” without high glare
- I control pressing temperature and use press cloth to avoid shine marks
What are the biggest production risks for satin midi dresses, and how do I reduce them?
Satin looks smooth, but it is difficult in bulk. Small sewing errors become visible. Cutting errors create twisting. Packing creates permanent creases.
The biggest satin midi risks are seam puckering, fabric growth on bias, twisted side seams, shade variation, snagging, and permanent press marks. I reduce them by using correct cutting direction, stabilizing key seams, controlling needle and thread specs, and approving a pre-production sample made from bulk fabric.
Cutting and grain control
- For bias styles, I control lay time, because bias can grow before sewing
- I keep all panels cut in the same direction to avoid shade shift
- I add stay tape to necklines and waist seams on styles that stretch
Sewing specs that keep satin clean
- Needle: fine needle to reduce holes and snags
- Thread: smooth filament thread for clean seams
- Seam type: French seams or clean finish on unlined styles
- Stitch length: balanced so it does not pucker or wave
Pressing and finishing rules I write into SOP
- Low heat, press cloth, and limited steam
- Do not over-press seams, because seam impressions show on satin face
- Hang test for 24 hours before final hem on bias midi
Packing control
- I avoid tight folding on satin
- I use tissue between layers to reduce rub marks
- I recommend hanging shipment for premium clients when possible
How do I build 20+ satin dress styles around a satin midi dress without repeating myself?
Buyers want variety, but they do not want confusion. I treat the satin midi as a “core pillar” and build out other satin styles around it.
I use satin midi dress as the core, then I expand the range by changing neckline, sleeve, and skirt structure, not by changing everything at once. This keeps fit stable and sampling faster, while still giving 20+ distinct satin dress styles for a full collection.
A practical style system I use
- Change neckline: cowl, square, sweetheart, halter
- Change sleeve: strap, cap sleeve, long sleeve, off-shoulder
- Change skirt: straight midi, A-line midi, slit midi, wrap midi
- Add one trend detail: scarf neck, rosette, cut-out, asymmetric hem
Example “20+ satin dress” building blocks
- Slip satin midi
- Bias satin midi
- Cowl neck satin midi
- Square neck satin midi
- Wrap satin midi
- Ruched satin midi
- A-line satin midi
- Satin midi with slit
- Satin midi with puff sleeve
- Satin midi with long sleeve
- Satin midi with off-shoulder
- Satin midi with one-shoulder
- Satin midi with halter
- Satin midi with corset bodice
- Satin midi with tie back
- Satin midi with draped skirt
- Satin midi with scarf neck
- Satin midi with pleated skirt panel
- Satin midi with button front (shirt style)
- Satin midi with lace trim accents
- Satin midi with asymmetric hem
- Satin midi with rosette detail
How I keep cost and MOQ under control
- I reuse the same base skirt block for 6–8 styles
- I keep zipper type consistent across the range
- I standardize lining for light colors
- I limit trims to one “hero” detail per style
What should a buyer request in the tech pack for a satin midi dress to avoid delays?
Most delays happen because the buyer sends reference photos but no clear specs. Satin needs clear tolerance rules, because “close enough” still looks wrong.
For satin midi dresses, the tech pack should clearly define fabric specs, grain direction, seam finishes, lining plan, measurement tolerances, and pressing rules. When I receive those details early, I reduce resampling rounds and protect the buyer’s launch date.
Tech pack items I consider non-negotiable
- Fabric composition, weight, and finish target
- Color standard and shade tolerance
- Pattern grain direction notes for all panels
- Measurement points + tolerance (bust, waist, hip, length)
- Seam construction and finishing method
- Lining and interfacing placement
- Packaging method and hanger requirement
A simple tolerance example I often use
| Point of Measure | Suggested Tolerance | Why it matters in satin |
|---|---|---|
| Bust | ±1.0 cm | prevents gaping and drag lines |
| Waist | ±1.0 cm | keeps silhouette sharp |
| Hip | ±1.5 cm | reduces stress shine and cling |
| Length | ±1.0 cm | midi looks wrong if hem is uneven |
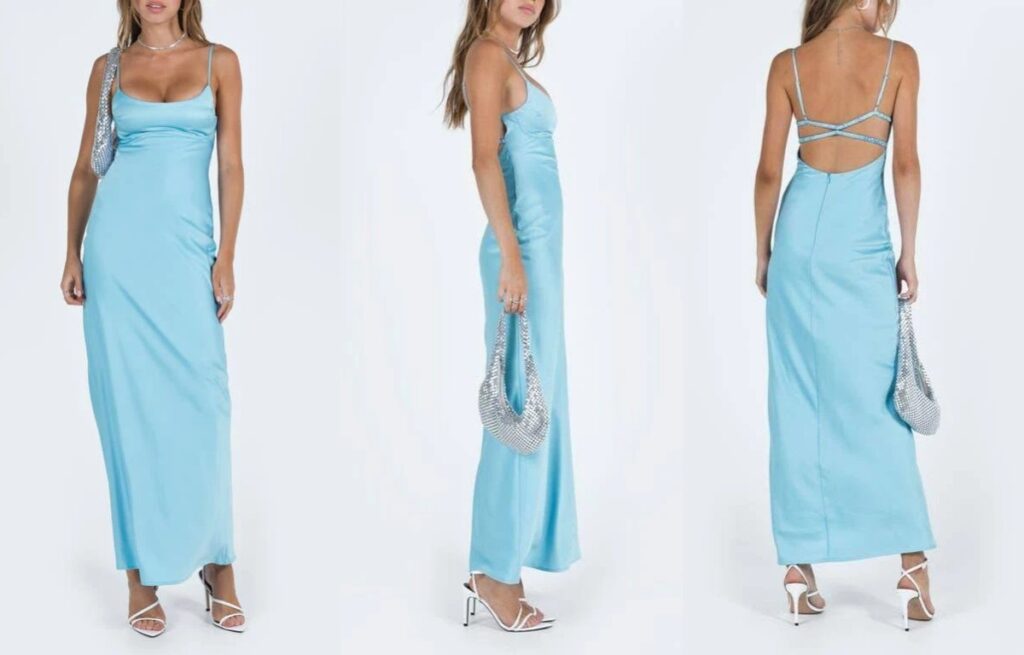
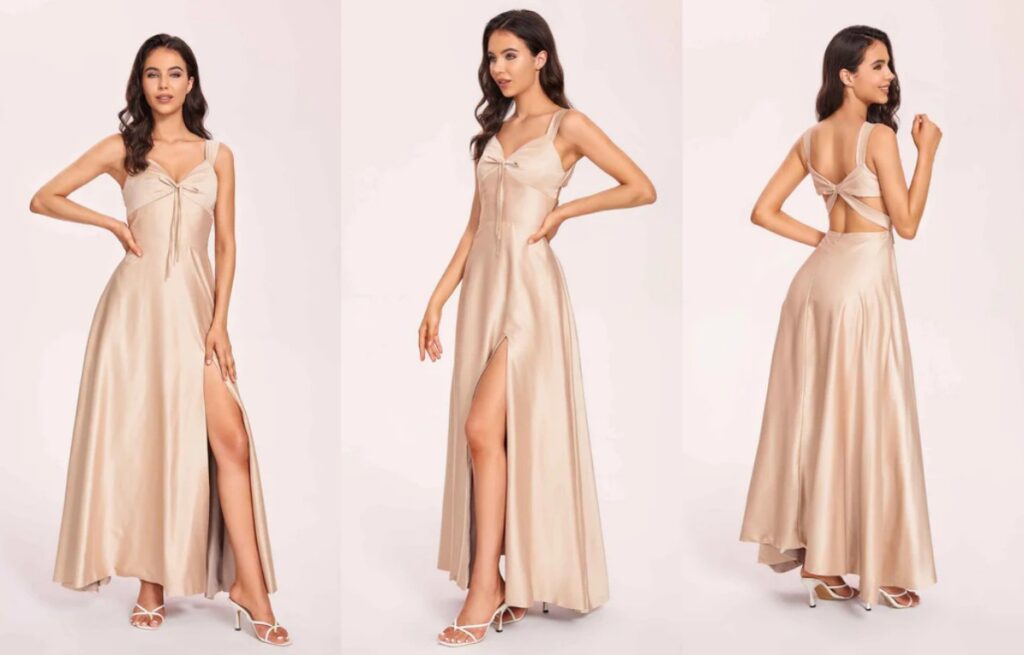
Satin Maxi Dress
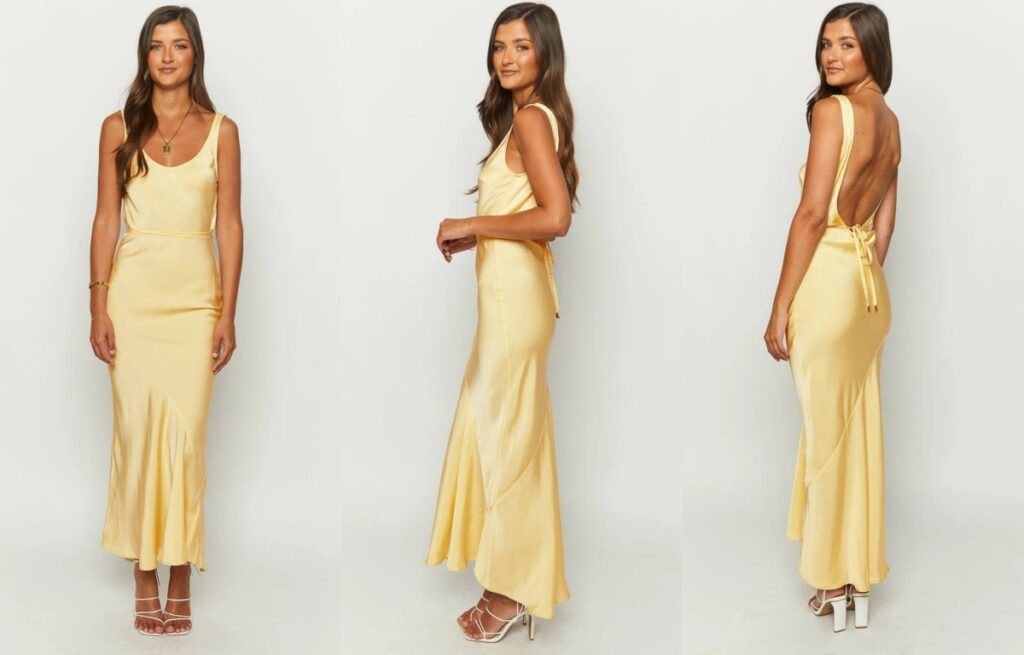
A satin maxi dress can look premium in one photo and look cheap in real life. The shine shows every wrinkle and every seam. If the fit or fabric is wrong, returns rise fast and reorders stop.
A satin maxi dress is a floor-length or near-floor-length dress made with satin (often polyester satin or silk-like satin) that uses shine and drape as the main visual feature. The best-selling types usually combine stable bodice support, clean seam lines, and controlled skirt volume, so the dress looks smooth on the body and photographs well.
I once shipped a “simple” satin maxi that had a perfect pattern but the wrong packing method. It arrived with deep fold marks that did not recover fast. Since then, I treat satin maxi as a full system: fabric, pattern, sewing, pressing, and packing.
Which 20+ types of satin dress should I consider before I commit to a satin maxi program?
When I plan “types of satin dress,” I do not only list silhouettes. I also think about how satin behaves. Satin highlights shape, and it punishes weak construction.
For a satin maxi program, I normally shortlist these 20+ satin dress types: slip, cowl neck, bias-cut, wrap, faux-wrap, halter, one-shoulder, strapless, corset bodice, empire waist, fit-and-flare, A-line, mermaid, column, shirt dress, ruching dress, draped dress, cut-out dress, backless, high-slit, tiered, and pleated satin styles.
A fast map: which types convert into satin maxi best
| Satin Dress Type | Works as Maxi? | Why it works | Main risk |
|---|---|---|---|
| Slip | Yes | clean lines + drape | cling + transparency |
| Cowl neck | Yes | premium neckline effect | gaping + stretching |
| Bias-cut | Yes | smooth body skim | growth + distortion |
| Corset bodice | Yes | stable top + flowy skirt | cost + fit complexity |
| One-shoulder | Yes | event-ready look | support + twisting |
| Wrap | Yes | adjustable fit | shifting + opening |
| Mermaid | Yes | formal + strong shape | hip fit + drag |
How I avoid a “same-same” satin line
- I keep 2–3 neckline families only (cowl, straight, one-shoulder)
- I keep 2 bodice support levels (soft slip vs structured corset)
- I keep 2 skirt directions (column/bias vs fuller A-line)
- I keep one hero length (true maxi) and one “easy maxi” (ankle)
What makes a satin maxi dress hard to produce compared to other maxi dresses?
Satin maxi looks simple, but production is not simple. It is slippery, it marks easily, and it shows needle damage.
A satin maxi dress is hard to produce because satin shifts during cutting and sewing, the surface can snag or shine under heat, and long hems show waviness fast. I reduce issues by using proper cutting lay control, stabilizing key seams, controlling needle choice, and setting strict pressing and packing rules.
The “satin behavior” I plan around
- High sheen = every ripple is visible
- Low friction = seams can creep and twist
- Bias areas can grow and change length
- Heat can cause shine marks and seam impressions
The factory controls I use on satin maxi
- Single-ply or low-ply cutting for key panels when needed
- Walking foot or differential feed settings on slippery satin
- Tissue paper support during stitching on delicate satin
- Fine needle selection to avoid pulls
- Longer rest time for bias panels before hemming
A practical risk list by style
| Satin Maxi Detail | Why buyers like it | What can go wrong | How I control it |
|---|---|---|---|
| Cowl neck | sexy and premium | neckline grows | stay tape + lining |
| High slit | leg line photos | slit curls | facing + bar tacks |
| Backless | event vibe | strap slip | adjusters + grip elastic |
| Bias cut | luxury drape | length growth | hang test + trim after rest |
| Ruching | hides belly | uneven gathers | guide marks + consistent elastic |
How do I choose the right satin fabric for a satin maxi dress?
Most buyers only say “satin.” I always ask what satin they mean. The base fiber and weave quality decide the real outcome.
For satin maxi dresses, I choose fabric by weight, drape, and surface quality. Polyester satin is common for wholesale because it is stable and cost-effective. Higher-end options include silk satin and acetate satin, but they need stricter handling. For most brands, 120–180 GSM satin with controlled slip and good weft stability is safer.
Satin types I use and what they do
- Polyester satin: strong supply, easy color control, good for volume
- Satin charmeuse: softer, more fluid, but can cling and show lines
- Duchess satin: heavier, structured, best for formal bodices and skirts
- Hammered satin: texture hides wrinkles, good for daily maxi
- Stretch satin: fit friendly, but can shine and pick more easily
What I test before I approve bulk
- Snagging and seam slippage
- Shade consistency across rolls
- Pressing sensitivity and shine marks
- Shrinkage after steam and wash
- Pilling risk on the inside face
Fabric selection table for satin maxi
| Target look | Best satin option | Best use | Notes |
|---|---|---|---|
| Soft luxury drape | charmeuse | slip, bias maxi | needs lining often |
| Clean formal shape | duchess satin | corset, A-line maxi | heavier, higher cost |
| Easy everyday | hammered satin | relaxed maxi | hides wrinkles |
| Better fit | stretch satin | fitted column maxi | watch snags |
How do I engineer fit and structure for a satin maxi dress so returns stay low?
Satin maxi is usually worn for events. That means customers expect a clean fit. They also move, dance, and sit. If the neckline slips or the hem drags, reviews drop.
I keep returns low by stabilizing the bodice, controlling stretch on bias areas, and making the skirt walkable. I often add lining or partial lining, use hidden elastic or grip tape at edges, and design adjustable straps. For structured looks, I use light boning and fusing in the bodice.
Bodice support levels I offer buyers
- Soft support: lining + stay tape + adjustable straps
- Medium support: partial bust cups + power mesh + side boning
- Strong support: corset bodice + full lining + multiple boning channels
Where satin maxi fails most often
- Cowl neck that collapses and opens too wide
- Strapless top that slides down
- Backless styles with strap slip
- Bias skirt that grows and becomes uneven
- Hip area too tight for walking
Fit and movement checks I run in sampling
- 10-step walking test, then sit test
- Dance movement test for strap stability
- Hang test for bias growth (24 hours)
- Hem balance check under flashlight (shine shows waves)
How do I control sewing, hemming, and finishing to make satin maxi look expensive?
Customers judge satin by “smoothness.” If the hem waves, the dress looks low quality. If the seam puckers, the shine makes it obvious.
To make a satin maxi look expensive, I focus on clean seam finishing, stable hems, and controlled pressing. I often use French seams or narrow overlock with careful tension, add seam support tape on stress points, and choose a hem method that matches fabric weight, like baby hem for light satin or blind hem for heavier satin.
Hem options and when I use them
- Baby hem: best for light satin, clean edge, needs skill
- Narrow turned hem: stable, but can wave if not controlled
- Blind hem: premium look on heavier satin
- Rolled hem: good for chiffon satin blends, not always for heavy satin
Stitch and needle choices that matter
- Fine needle to reduce pulls
- Longer stitch length to reduce puckering
- Balanced tension, slow speed for shiny surfaces
- Seam direction planning so panels do not twist
Finishing details that upgrade perceived value
- Covered buttons or satin loops (if shirt maxi)
- Clean invisible zipper insertion
- Lined slit facing that stays flat
- Proper hanger loops for retail
How should I pack and ship satin maxi dresses to reduce wrinkles and shine marks?
This is a hidden cost area. Satin can show fold lines that do not recover. Some satins also get “press shine” from heat or pressure.
I reduce shipping issues by using low-pressure folding, tissue separation on shiny faces, and the right carton density. For higher-end satin maxi, I suggest hanging pack or half-hanging pack when possible. I also set a clear steaming guideline for the buyer’s warehouse team.
Packing rules I use for satin maxi
- Tissue between folds and between front/back faces
- Avoid tight rubber bands or hard clips
- Control carton fill so garments do not crush
- Use polybag size that does not compress the skirt
- Add “steam care” card for retail teams
Common shipping complaints and fixes
| Complaint | Likely cause | Fix I use |
|---|---|---|
| deep fold marks | tight folding pressure | looser fold + more tissue |
| shine patches | heat/pressure during press | lower heat + press cloth |
| snag pulls | rough handling | better bag + corner protection |
| uneven hem | bias growth in transit | hang rest before final steam |
Satin Mini Dress
A satin mini dress looks “easy,” but it can turn into high returns fast. The fabric shows every pull line and every fit mistake. If the shine looks cheap, or the hem flips, the whole drop loses trust.
A satin mini dress works best when I match the mini length to a stable bodice structure, choose the correct satin type and weight, and control seam choices to prevent puckering and shine marks. In a 20+ style collection, I treat satin mini dresses as the high-impact trend drivers, not the volume basics.
I once rushed a satin mini for a holiday capsule and approved it from photos only. The bulk came back with seam puckering and slight shade banding. The dresses still sold, but the reviews hurt. Now I force myself to approve satin minis under real light and real movement tests.
What are the most popular satin mini dress style types for wholesale?
When buyers say “satin mini,” they often mean very different shapes. I separate the category into clear best-selling silhouettes so the collection feels wide, but production stays controlled.
The most common satin mini dress types include slip mini, cowl-neck mini, bias-cut mini, wrap mini, corset-bodice mini, puff-sleeve mini, off-shoulder mini, halter mini, one-shoulder mini, strapless mini, blazer-style mini, and ruched bodycon mini. I pick 4–6 of these as core styles and rotate the rest as trend pieces.
Core satin mini silhouettes I see reorder often
- Slip mini (simple straps, clean lines)
- Cowl-neck mini (best photo impact, but needs control at neckline)
- Corset-bodice mini (high conversion, higher cost)
- Puff-sleeve mini (balances shine with volume)
- One-shoulder mini (eventwear feel)
Trend satin mini silhouettes that spike fast
- Cut-out mini
- Blazer mini
- Asym hem mini
- Bubble hem mini
- Scarf-neck mini
What satin fabrics work best for a satin mini dress, and why?
This is where many projects fail. “Satin” is a weave idea, not one material. In mini length, the wrong satin can look stiff, clingy, or too shiny.
For satin mini dresses, I usually recommend polyester satin or poly-spandex satin for stability and cost control, and I use heavier satin or double-faced satin when I need a premium drape. I avoid very thin, high-shine satin for minis unless the pattern is extremely clean and fully lined.
Satin options I use in bulk
- Poly satin (common): stable supply, strong color, easy care
- Poly-spandex satin: better comfort, fewer pull lines, better fit forgiveness
- Double-faced satin: premium body, nicer hem, higher cost
- Charmeuse: very fluid, very delicate, shows every defect
- Satin crepe: softer shine, hides flaws better, great for “quiet luxury” look
Fabric weight matters more in mini length
- Too light: hem flips, seams pucker, underwear lines show
- Too heavy: skirt stands out, looks boxy, feels hot
My fabric decision table for satin minis
| Satin Type | Best Look | Best Mini Styles | Main Risk |
|---|---|---|---|
| Poly satin | bright, clean | slip, wrap | shine looks cheap if finishing is poor |
| Poly-spandex | smooth + comfy | bodycon, ruched | heat marks during pressing |
| Double-faced | premium structure | strapless, corset | higher MOQ and cost |
| Charmeuse | liquid drape | cowl, bias | snagging + puckering |
| Satin crepe | soft shine | puff sleeve, blazer | limited “wow” shine |
How do I engineer fit and structure so the satin mini does not look cheap?
Satin exposes tension lines. If the bodice is weak, the shine makes every wrinkle look worse. I treat structure as the “invisible design” that protects the surface.
To keep a satin mini dress looking premium, I stabilize the neckline and waist, control ease at bust and hip, and use internal support like lining, light boning, or power mesh when needed. I also pick seam directions that follow body curves so the fabric lays flat under light.
Where satin minis usually fail
- Bust gaping on cowl and slip styles
- Waist rolling on strapless or fitted minis
- Hip drag lines on bodycon minis
- Armhole gaping on thin straps
- Back zipper ripple from poor interfacing
My structure toolbox for different styles
- Slip/cowl mini: bias control + stay tape at neckline + hidden snap option
- Strapless mini: inner corset + silicone tape + boning + strong top edge
- Corset mini: proper cup shaping + stable lining + steel/plastic boning mapping
- Bodycon mini: poly-spandex + power mesh panels + controlled negative ease
A practical structure mapping table
| Style | Lining | Interfacing | Extra Support |
|---|---|---|---|
| Cowl mini | partial lining | none or very light | stay tape at cowl edge |
| Strapless mini | full lining | strong at top edge | boning + grip tape |
| Corset mini | full | medium at bodice | cups + boning |
| Ruched mini | partial | light at zipper | mesh for ruching base |
What sewing, cutting, and pressing details make or break satin mini production?
This is the part I push hardest in production meetings. Satin does not forgive messy handling. One bad operator can create a full day of defects.
Satin mini production succeeds when I control cutting direction, prevent fabric shifting, use the right needle and stitch settings, and set strict pressing temperature rules. I also manage seam allowances and zipper insertion methods to avoid puckering that becomes obvious under shine.
Cutting control I require
- One-way lay for directional sheen, especially on charmeuse
- Sharp cutters and low drag table surface
- Notches that are small and clean to avoid fraying marks
- Panel pairing for left/right symmetry when needed
Stitch and needle choices that reduce damage
- Fine needle selection to reduce snag holes
- Shorter stitch length for stable seams without tunneling
- Clean tension settings to avoid ripples
- French seams or narrow overlock where possible for clean inside
Zipper and closure decisions
- Invisible zipper: premium look, but needs skilled handling
- Side zipper: less visible in photos, but fit must be perfect
- Lace-up back: fashion, more adjustable, more labor
Pressing rules I put on the line
- Low heat, always with press cloth
- No direct iron on face side for high-shine satin
- Test one piece per roll before mass pressing
- Cool-down time before folding to avoid shine marks
How do I set QC standards for satin mini dresses to reduce returns?
Satin minis get judged in mirrors, flash photos, and party lighting. If I miss small defects, customers will not.
My QC focus for satin mini dresses is surface perfection, seam flatness, shade consistency, and fit stability. I run movement tests, flash-photo checks, and carton checks for crease recovery. I also set clear tolerances for puckering, pulled yarns, and oil marks.
What I inspect first in inline QC
- Seam puckering at side seams and zipper
- Snag marks and pulled yarns on skirt front
- Shade banding between panels
- Hem wave and hem flip on minis
- Strap length symmetry
Simple tests I use that save money
- Flash photo test on mannequin
- Sit/stand/walk test for hem riding
- Hand rub test for snag risk
- Steam test for shine marks
- Packing test: fold lines after 24 hours
| Defect Type | Accept/Reject Rule | Why it matters |
|---|---|---|
| Puckered seam | reject if visible at 1m | shine makes it look worse |
| Pulled yarn | reject on front body | reads as “damage” |
| Shade mismatch | reject obvious panel shift | photos look inconsistent |
| Hem wave | reject if hem flips up | ruins mini shape |
| Oil mark | reject always | cannot fix reliably |
How do I merchandize satin mini dresses inside a 20+ satin dress range?
If every style is shiny and short, the collection becomes noisy. I like to use satin minis as the “hook,” then I balance them with calmer silhouettes.
In a 20+ satin dress collection, I place satin mini dresses as 20–35% of the offer, then I support them with midi and maxi satins for broader occasions. I also balance high-shine satin with satin crepe and add one neutral color story to improve cross-selling.
My practical range structure
- 4–7 satin minis: trend + holiday + party
- 8–10 midis: day-to-night and wedding guest
- 3–6 maxis: resort, bridesmaid, formal
Color and trim rules that improve sell-through
- One hero color for campaigns
- Two safe colors for reorders (black + champagne is common)
- Minimal trims, because satin already shines
- Consistent hardware tone across the drop
Satin A-Line Dress
Satin looks expensive, but it also shows every mistake. If the fit is off or the fabric is too thin, the dress looks cheap fast. Then the buyer gets high returns and slow reorders.
A satin A-line dress is a satin dress where the skirt flares gradually from the waist or high hip, so it keeps a clean, feminine line without heavy volume. I pick the right style by matching satin weight, lining plan, and bodice structure to the occasion, then I control shine, seam marks, and fit stability during sampling.
I once made a satin A-line sample with the “right” pattern but the wrong pressing method. The seam shine looked like damage under flash. Since then, I treat satin handling like a technical project, not just sewing.
What are the most popular types of satin A-line dress for wholesale lines?
When I build a satin A-line range, I do not only change colors. I change the structure points that matter: neckline, strap type, waist placement, and skirt length.
The most popular satin A-line dress types include classic satin A-line, satin fit-and-flare, satin wrap A-line, satin slip A-line, satin corset A-line, satin strapless A-line, satin halter A-line, satin one-shoulder A-line, satin square-neck A-line, satin cowl-neck A-line, satin midi A-line, satin maxi A-line, satin mini A-line, satin puff-sleeve A-line, satin off-shoulder A-line, satin long-sleeve A-line, satin tie-back A-line, satin open-back A-line, satin pleated A-line, satin tiered A-line, and satin bridesmaid A-line.
A practical way I group them for buyers
- Event and bridesmaid: corset, strapless, one-shoulder, maxi
- Day-to-night: square neck, wrap, midi, puff sleeve
- Trend drops: open back, tie-back, mini, cowl neck
A simple assortment table
| Group | Best Length | Best Price Position | Main Risk |
|---|---|---|---|
| Bridesmaid/event | midi/maxi | mid-high | shine + fit support |
| Party mini | mini | mid | wrinkles + hem flip |
| Everyday satin | midi | mid | snag + seam marks |
How do satin types and fabric weight change the A-line silhouette?
A-line is about shape. Satin is about surface. If the surface and the shape fight each other, the dress looks “off” even if the pattern is correct.
Heavier satin holds a cleaner A-line line and hides underwear better, while lighter satin drapes more but shows every pull line and seam impression. For A-line, I usually prefer mid-weight satin with a stable weft, then I add lining or interlining only where the body needs support.
Satin categories I see most in bulk
- Satin charmeuse: very fluid, high shine, high risk for showing lumps
- Duchess satin: heavier, structured, more formal, higher cost
- Satin crepe-back: balanced, good for A-line stability
- Stretch satin: easier fit, but can grow at seams if not controlled
How weight changes the “A-line look”
- Light satin: skirt swings more, but can cling and look cheap in bright light
- Mid satin: best balance for most wholesale programs
- Heavy satin: premium and formal, but can feel stiff and hot in summer
A fabric-to-style matching table
| Satin Base | Best Satin A-line Use | Notes |
|---|---|---|
| Charmeuse | cowl-neck, slip A-line | needs lining + careful sewing |
| Crepe-back satin | square-neck, wrap, midi | stable, less “cling” |
| Duchess | strapless, corset, bridesmaid | needs structure, higher MOQ risk |
| Stretch satin | fit-and-flare, mini | easier fit, watch seam growth |
With satin, small construction choices decide if the dress looks $30 or $130. I do not let “basic” sewing pass on satin.
A premium satin A-line dress needs clean panel balance, stable neckline edges, controlled seam allowance, and a hem that hangs evenly. I also use support pieces like fusible, stay tape, and sometimes boning in bodices, because satin alone cannot hold a sharp shape.
The pattern details I lock early
- Waist placement: natural waist for most markets, empire for softer fit
- Bust shaping: darts vs princess seams based on target cup range
- Skirt sweep: enough flare for movement, not so wide it wrinkles badly
- Grain choice: straight grain for stability, limited bias for controlled drape
Stitch and seam choices that matter on satin
- French seams or clean bound seams for unlined styles
- Narrow seam allowances to reduce ridge marks
- Understitching on facings to keep edges flat
- Lightweight stay tape on neckline and armholes to stop stretching
Pressing and handling rules I enforce
- Low heat, press cloth, and short press time
- No heavy steam on shiny face without testing
- Hang rest time before hem leveling
How do I control common satin problems like shine marks, puckering, and seam slippage?
This is where most “satin complaints” come from. Buyers think it is a fabric defect, but many times it is process control.
I control satin problems by choosing the right needle and thread, reducing presser foot pressure, using correct stitch length, and stabilizing stress seams. I also set pressing standards to avoid shine marks, and I run wear tests for seam slippage on high-stress areas like side seams and straps.
The big satin failure modes
- Shine marks from pressing or friction
- Puckering from wrong tension or dull needles
- Seam slippage, especially on looser weaves
- Snagging and pulls during packing and shipping
- Color shading across panels under different lighting
My production settings that reduce defects
- Needle: fine needle choice to reduce holes
- Thread: smooth filament thread for cleaner seam
- Stitch length: slightly longer to reduce puckering
- Feed: walking foot on slippery satin if needed
Where I add reinforcement
- Strap join points
- Side seam at waist
- Zipper area and top stop
- Waist seam on fitted bodice
A small QC checklist I run on satin A-line
| Check Item | How I test | Pass Standard |
|---|---|---|
| Seam shine | flash photo + daylight | no visible glossy streak |
| Puckering | flat table + hanger | seams lie flat |
| Slippage | gentle pull at side seam | no yarn shift |
| Hem hang | 24h hang then measure | even hem within tolerance |
How do I choose the right satin A-line dress for bridesmaid, party, or everyday drops?
Satin A-line is flexible, but each use case needs a different risk plan. Bridesmaid orders need consistency. Party drops need speed. Everyday satin needs comfort and care simplicity.
For bridesmaids, I choose stable satin with strong shade control and offer midi/maxi lengths. For party, I use trend necklines like strapless or open-back but add support. For everyday, I reduce shine, add lining only where needed, and pick colors that do not show wrinkles too easily.
Bridesmaid program approach
- Stable base satin and approved color standard
- Same pattern base, multiple colors
- Clear tolerance rules for shade between lots
Party and holiday approach
- Higher neckline variety: one-shoulder, strapless, corset
- More internal support: boning, grip tape, stronger zipper area
- Faster sampling, but tighter fit testing
Everyday satin approach
- Lower-shine satin or crepe-back satin
- Relaxed A-line with sleeves or wrap options
- Easy-care guidance for end customers
What should I include in a tech pack for a satin A-line dress order?
When a buyer gives me a mood board only, satin becomes risky. I need measurable control points to keep bulk aligned with the sample.
A satin A-line tech pack should include fabric specs, shine level reference, lining plan, stitch and seam standards, pressing and packing rules, and clear measurement tolerances. I also include photo references for acceptable seam appearance, because satin is judged visually more than most fabrics.
The must-have tech pack items for satin
- Fabric composition, weight, and weave notes
- Face side identification and cutting rules
- Lining material and coverage zones
- Zipper spec, hook/eye, and any grip tape
- Stitch type, SPI, and seam finish method
- Pressing temperature guidance and press cloth rule
- Packing method to reduce crease marks
My “satin-specific” notes that save time
- I request a bulk fabric swatch before PPS
- I request a seam slippage test if the weave is loose
- I require a flash-photo check on PPS
Satin Wrap Dress
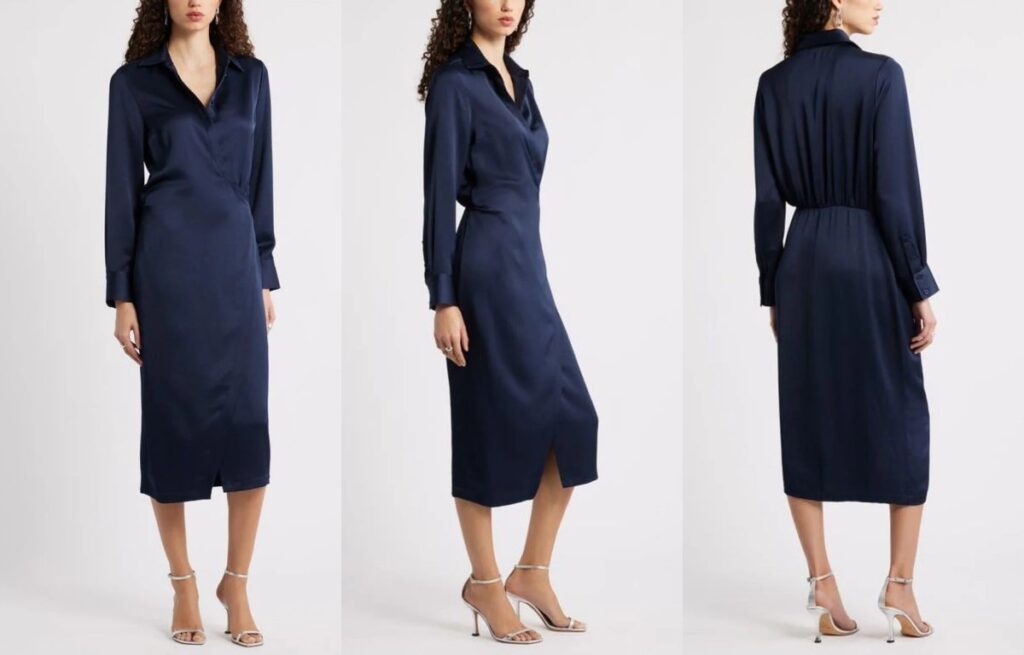
Many satin dresses look expensive on the model, then disappoint after delivery. The wrap gapes, the skirt twists, and the fabric shows every needle mark. Then my buyer faces returns, bad reviews, and slower reorders.
A satin wrap dress works because it gives an adjustable waist, a flattering V neckline, and a soft drape that reads premium in photos. I reduce returns by controlling wrap overlap, adding hidden security points, choosing the right satin weight, and testing slip, shine, and seam puckering before bulk production.
I once rushed a satin wrap sample to hit a holiday drop. The fit was fine, but the fabric was too thin and shiny. Under studio light it looked cheap. Now I always treat satin as a material system, not just a fabric name.
What exactly is a satin wrap dress, and how is it different from a normal wrap dress?
A wrap dress is a structure. Satin is a behavior. When I combine them, small errors become very visible.
A satin wrap dress is a wrap-style bodice with a tie or closure, made in satin weave fabric that highlights drape and shine. Compared with a normal wrap dress in crepe or viscose, satin shows puckers, gaping, and distortion more clearly, so I need stronger internal control even if the outer look stays minimal.
The 3 parts I define in a tech pack
- Wrap bodice: overlap width, neckline depth, and bust coverage
- Waist control: tie position, inner button/snap, and waist stay options
- Skirt behavior: grain direction, hem sweep, and slit placement
Why satin changes the risk profile
- Satin slides, so wrap edges move more during wear
- Satin reflects light, so seam waves look worse
- Satin can snag, so construction must be cleaner
How do I choose the right satin for a wrap dress so it drapes well but does not look cheap?
Most “satin wrap dress problems” start at fabric selection. People say satin is satin. I never assume that.
I pick satin based on weight, yarn quality, and surface shine. For most wholesale satin wrap dresses, I prefer a medium-weight satin or satin crepe that holds shape at the waist but still flows at the skirt. I also confirm shrinkage, colorfastness, and snag resistance before I lock bulk fabric.
Satin options I use often
- Polyester satin: stable supply and price, strong sheen, but can look “plastic” if too shiny
- Satin crepe (often poly): softer shine, better for premium look, less reflective in photos
- Silk satin: best hand feel, but higher cost and higher QC pressure
- Acetate satin: beautiful drape, but can be sensitive to water and heat
The fabric specs I ask for first
- Weight (gsm): controls opacity and hem behavior
- Weave density: affects snagging and seam puckering
- Luster level: affects how “premium” it reads online
- Bias growth: affects skirt twisting and size stability
A practical fabric matching table
| Satin Type | Best Use | Why it works | Main Risk |
|---|---|---|---|
| Satin crepe | day-to-night wrap | softer shine, less cheap-looking | color shade control |
| Medium poly satin | eventwear wrap | strong drape and flow | needle marks + snags |
| Lightweight satin | summer wrap | airy look | gaping + transparency |
| Silk satin | luxury capsule | best hand feel | cost + care claims |
How do I engineer the wrap closure so it does not gape at the bust or slip open?
This is the core of satin wrap success. If the dress opens, the customer will not forgive the shine.
I prevent gaping by increasing wrap overlap, controlling neckline angle, and adding hidden security points like an inner button, snap, or waist stay. For satin, I also stabilize the wrap edge with interfacing or stay tape, because the fabric’s slip makes the neckline move during wear.
4 closure systems I use in bulk
1) Classic tie-only wrap
- Fast and cheap, but highest gaping risk in satin
2) Tie + hidden snap at bust
- Good balance, keeps neckline stable
3) Tie + inner button at side seam
- Strong security, better for larger bust sizes
4) Faux wrap (fixed wrap look)
- Lowest returns, but less “adjustable” selling point
The overlap rules I set
- Minimum overlap at bust: enough to cover when the wearer sits and reaches
- Minimum overlap at waist: enough to prevent edge flipping
- Tie placement: positioned to pull the wrap inward, not downward
Fit tests I run on wrap bodices
- Standing, sitting, and raising arms
- Turning torso left and right
- Walking test with skirt slit
- “Bra test” to check coverage and strap visibility
How do I cut and sew satin to avoid puckering, needle marks, and twisting seams?
Satin is honest. It shows everything. So I treat construction like a high-visibility product.
I reduce puckering and marks by choosing the right needle and thread, using smaller stitch settings with stable tension, and controlling feed with proper presser foot setup. I also cut key panels with consistent grain rules, because satin can distort and twist if the skirt panels are slightly off-grain.
Cutting rules that protect the silhouette
- I keep the bodice on straight grain when possible
- I avoid extreme bias on wrap edges unless the design needs it
- I add stay tape on neckline and wrap edge to stop growth
- I mark nap or sheen direction so panels match under light
Sewing settings that usually work better for satin
- Needle: finer needle to reduce holes
- Thread: smooth filament thread to reduce drag
- Stitch length: not too short, to avoid perforation
- Seam type: French seams or clean finish for unlined styles
Pressing and handling control
- I use lower heat and a press cloth
- I avoid over-pressing seams to prevent shine marks
- I let panels rest after cutting if bias is involved
A construction decision table
| Problem | What causes it | What I change |
|---|---|---|
| Seam puckering | tension mismatch + fabric drag | thread/needle change + tension reset |
| Needle holes | needle too thick + high tension | finer needle + softer tension |
| Skirt twisting | off-grain panels + bias growth | stricter grain rules + stay tape |
| Snags | rough handling + sharp trims | trim audit + clean packing |
How do I control lining, slips, and static for satin wrap dresses?
A satin wrap dress can cling. It can ride up. Static can ruin the wearing experience. Buyers often ignore this until returns start.
I control cling and static by adding lining or a partial slip solution, choosing anti-static finishes when possible, and adjusting skirt ease so the satin does not stick to tights or skin. For wrap styles, I also make sure the lining does not pull the wrap edge open.
Lining strategies I use
- Full lining: best comfort, higher cost, better for light colors
- Partial lining (skirt only): controls transparency and cling
- Bodice facing + skirt lining: keeps neckline clean, reduces bulk at waist
Static and comfort checks
- Rub test with tights
- Walking test in dry environment
- Photo test under flash to spot cling lines
What I avoid
- Lining that is heavier than the satin
- Lining that grabs the satin and causes drag
- Bulky waist seam stacks that print through
How do I plan a “20+ styles” satin dress range while keeping the satin wrap dress as a hero item?
In wholesale, the satin wrap dress can be a hero. But the range needs structure. I do not want ten items fighting for the same customer.
I place satin wrap dresses as the “adjustable-fit” hero, then I surround them with satin slip, satin bias-cut, satin cowl-neck, satin shirt dress, and satin fit-and-flare styles to cover different occasions. I keep one satin base quality and vary necklines and lengths to speed sampling and reduce bulk risk.
A practical satin dress lineup map
- Core sellers: satin wrap midi, satin slip midi, satin shirt midi
- Trend sellers: satin cowl mini, satin one-shoulder, satin corset A-line
- Event sellers: satin wrap maxi, satin halter maxi, satin off-shoulder
How I reduce sampling time for buyers
- I reuse one wrap bodice block and change sleeves and skirt length
- I keep one approved satin and change color only
- I standardize closures and label placement
What QC and pre-production controls matter most for satin wrap dresses?
If I miss the QC plan, satin punishes me later. It shows defects faster than most fabrics.
The key controls are fabric inspection for snags and shade, strike-off approval for color, pattern approval for wrap overlap, and inline checks for seam puckering and neckline growth. I also pack carefully to prevent crease shine and I run wear tests on the closure system before shipment.
The QC checklist I use
- Fabric roll check for snags, shade banding, and luster consistency
- Fit approval with movement tests for gaping and slip
- Seam appearance check under strong light
- Closure strength test on ties, snaps, and buttons
- Packing test to see if creases recover after steaming
Defects I classify as “stop shipment”
- Visible shade variation within the same color
- Repeated seam puckering on bodice
- Wrap opening during movement test
- Obvious needle marks on front panels
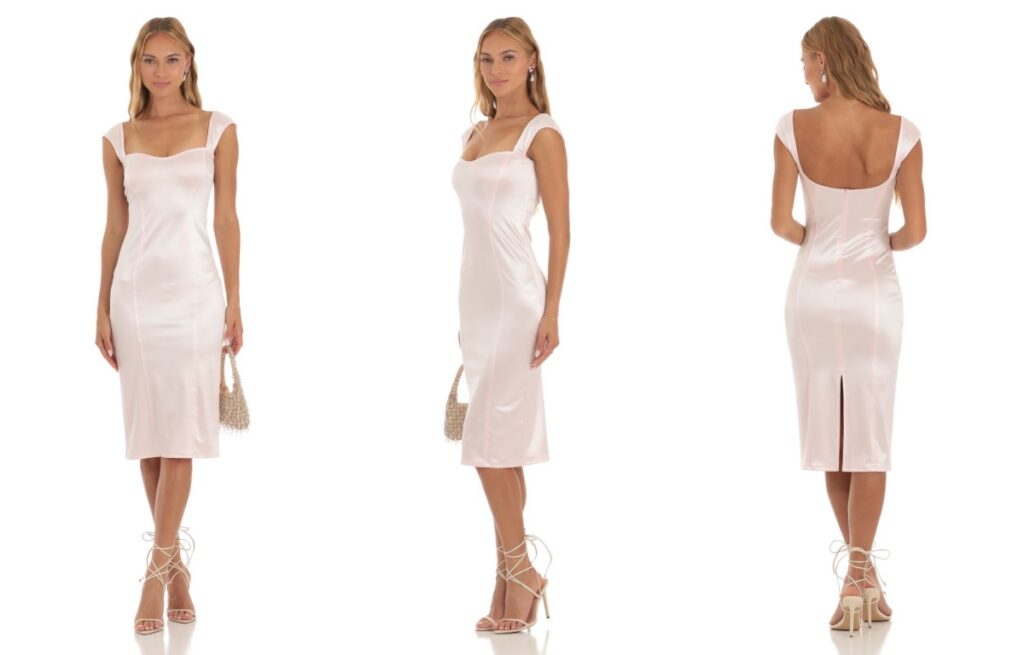
Satin Bodycon Dress
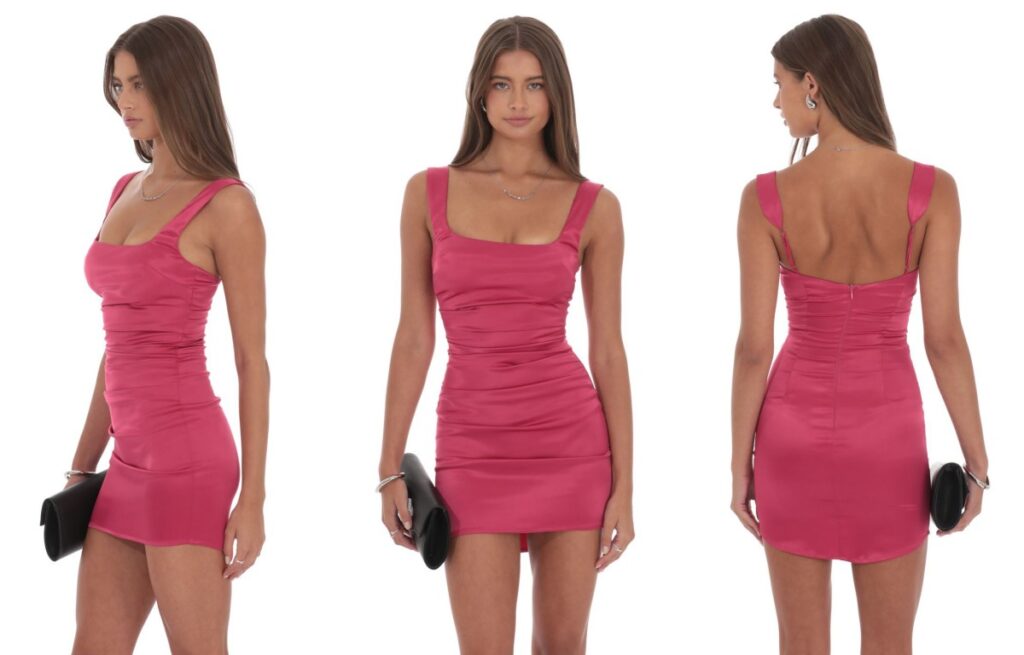
A satin bodycon dress can look expensive online, but it can fail fast in real life. It can cling in the wrong places, show every seam, and crease during packing. If I miss one control point, the return rate can wipe out the profit.
A satin bodycon dress works when I balance shine, stretch, and structure. I choose the right satin base (often stretch satin), control pattern compression and seam placement, add lining or power mesh where needed, and lock needle, thread, and pressing specs so the surface stays smooth and the fit stays consistent in bulk.
I still remember a buyer who wanted “high shine, super tight, and no lining” at a mid price. The first sample looked fine on a mannequin. On a real model, it showed every undergarment line and pulled at the hip. Since then, I always treat satin bodycon as a technical product, not a simple dress.
What exactly is a satin bodycon dress, and how is it different from other types of satin dress?
Many people use “bodycon” as a vibe. In production, I need it to be a measurable fit concept. If I cannot measure it, I cannot control it in bulk.
A satin bodycon dress is a close-fitting satin dress designed with negative ease, meaning the garment is smaller than the body and relies on stretch and pattern shaping to fit. Compared with satin slip or satin A-line styles, satin bodycon needs more structure, better recovery, and stricter seam engineering to avoid rippling and shine marks.
What “bodycon” means in my tech pack
- Negative ease at bust, waist, and hip
- Stable neckline that does not gape
- Hem that stays level when walking
- Compression that feels firm but not painful
Why satin makes bodycon harder
- Satin reflects light, so every wrinkle looks bigger
- Satin can show needle marks and seam ridges
- Some satin bases have low recovery and “bag out”
- Satin can snag, so finishing must be clean
Which satin fabrics are best for a satin bodycon dress, and which ones I avoid?
This decision controls everything. If the satin base is wrong, I can fix fit with pattern, but I cannot fix surface problems and recovery.
For a satin bodycon dress, I usually prefer stretch satin with strong recovery, or satin backed with knit. I avoid very stiff duchess satin for true bodycon, and I avoid low-quality poly satin that creases permanently or shows press shine. I match GSM, stretch %, and recovery to the target compression level.
Satin bases I use often
- Stretch satin (poly/spandex): best balance of shine + fit
- Satin-backed crepe: smoother drape, less cling, more stable seams
- Charmeuse with stretch: soft and premium look, but needs control
- Double-faced satin with stretch: better opacity, higher cost
Satin bases I avoid for “tight bodycon”
- Duchess satin: beautiful structure, but fights the body and wrinkles at bends
- Non-stretch charmeuse: looks premium, but will pull and split seams in bodycon fit
- Cheap flat satin: high snag risk and weak recovery
Fabric specs I ask for before sampling
| Spec | My Target Range | Why it matters |
|---|---|---|
| Weight (GSM) | 180–260 | heavier hides lines, too heavy feels hot |
| Stretch (weft) | 10–25% | controls comfort and size tolerance |
| Recovery | strong, low bagging | keeps shape after sitting |
| Opacity | medium to high | reduces lining needs |
How do I engineer pattern and seam placement for satin bodycon so it looks smooth?
Most bodycon failures come from pattern shortcuts. Satin does not forgive shortcuts. I want the body to look clean in photos and also feel wearable in movement.
I engineer satin bodycon by using shaping seams that follow the body, placing seams away from high-shine stress zones, and controlling negative ease by area. I often use princess seams, side panels, or a center-back seam with a stable zipper, and I add strategic lining or power mesh to flatten and support.
Seam strategy: where the light hits is where people judge
- I avoid bulky seam intersections on the front waist
- I keep seam allowances consistent to prevent ridges
- I use seam direction that reduces puckering in hip curve
Construction options I choose by price tier
- Entry tier: side seam shaping + simple darts
- Mid tier: princess seams + partial lining
- Premium tier: multi-panel body + full lining + inner support
Support components that change the result
- Power mesh lining at waist and tummy area
- Bust cups or inner shelf for strapless or thin strap styles
- Waist stay or elastic at top edge for strapless silhouettes
A practical seam map I use
| Area | Best Seams | What I avoid |
|---|---|---|
| Bust | princess seams, dart + facing | heavy topstitch on shiny face |
| Waist | panel seams, controlled lining | thick seam stacks |
| Hip | side panels, curved seams | straight seams that pull diagonally |
| Back | CB seam + invisible zip | weak zipper tape that ripples |
How do I control shine, needle marks, and “water marks” during sewing and pressing?
This is the part many suppliers do not mention. Satin can look perfect before pressing. Then one wrong iron setting ruins the surface forever.
I control satin surface quality by using fine needles, correct thread tension, and low-heat pressing with protection cloth. I also set strict rules for pinning, basting, and seam ripping, because satin shows holes and shine marks easily. In bulk, I standardize pressing stations and packing methods to protect the face.
Needle and thread setup I test in sampling
- Needle: fine ballpoint or microtex depending on satin base
- Thread: smooth filament thread for clean seams
- SPI: not too dense, or the seam line becomes visible
- Tension: balanced to prevent puckering and tunneling
Pressing rules I put in SOP
- Press from the wrong side when possible
- Use press cloth and low temperature
- Avoid direct steam blasts on shiny face
- Use seam clapper lightly to set seams without shine
Common surface defects and root causes
- Press shine: heat + pressure on face
- Water marks: uneven steam and minerals
- Needle holes: wrong needle, too much unpicking
- Puckering: tension imbalance, shrink mismatch, wrong stitch type
Do I need lining for a satin bodycon dress, and what lining options work best?
Lining is not just “extra cost.” In bodycon, lining is a performance layer. It changes comfort, opacity, and the way the dress holds shape.
Most satin bodycon dresses benefit from at least partial lining. I use full lining when the satin is thin, light-colored, or very shiny. I use power mesh lining when the buyer wants compression and smoother appearance. For cost control, I often do a half lining from bust to mid-hip and leave the skirt unlined if opacity is safe.
Lining options I use
- Stretch jersey lining: comfort, easy sewing, mid support
- Power mesh: shaping, compression, better smoothing
- Tricot lining: stable, good for zippers, less cling than satin
When I can skip lining
- Dark colors + heavier stretch satin
- Multi-panel pattern with stable seams
- Customer accepts visible undergarment lines
| Buyer Goal | Best Lining | Notes |
|---|---|---|
| Smoother look | power mesh | raises cost but reduces returns |
| Soft comfort | stretch jersey | good for mid price |
| Premium finish | full lining + clean edges | better reviews |
What are the biggest fit risks for satin bodycon, and how do I reduce returns in wholesale?
Emily wants fast-moving styles. But bodycon is size sensitive. If the sizing is off by even a small amount, the customer feels it immediately.
The biggest fit risks are bust gaping, zipper rippling, hip pull lines, and hem riding up. I reduce returns by defining target stretch and negative ease, testing on two body types, keeping a stable zipper spec, and setting measurement tolerances tighter than for loose satin styles.
Fit issues and what they usually mean
- Diagonal pull lines at hip: not enough hip room or wrong grain direction
- Ripples around zipper: zipper tape too soft, poor stabilization
- Top edge rolling: neckline needs elastic, facing, or inner stay
- Hem hiking: too much negative ease at thigh or wrong hem sweep
My bulk fit control steps
- I approve a size set, not only one size sample
- I lock fabric stretch and recovery before bulk cutting
- I run inline fitting checks every production batch
- I keep seam allowance and stitch specs consistent
Measurement tolerance I often use for bodycon
| Point | Typical Tolerance | Why |
|---|---|---|
| Bust | ±0.5 cm | comfort and neckline stability |
| Waist | ±0.5 cm | compression consistency |
| Hip | ±0.7 cm | reduces pull lines |
| Length | ±1.0 cm | hem level and look |
How do I package and ship satin bodycon dresses so they arrive looking new?
Satin is a packaging product. If the dress arrives with hard creases, the customer blames the brand, not the shipping carton.
I package satin bodycon dresses with face protection, controlled folding, and anti-crease inserts. I also avoid over-compressing cartons. For premium buyers, I suggest hanger packing or loose fold packing with tissue layers to protect the satin face from friction and shine marks.
Packing methods I use
- Tissue wrap on the satin face
- Loose fold with minimal sharp corners
- Polybag with enough space, not vacuum tight
- Carton fill to prevent movement friction
Shipping risks I plan for
- Heat exposure in transit can set creases
- Friction can create shine patches
- Moisture can cause water marks on some finishes
Satin Fit-and-Flare Dress

Satin looks expensive, but it can turn into refunds fast. The bust can gape, the skirt can twist, and the shine can highlight every needle mark. I see buyers lose money when they treat satin like “just another woven.”
A satin fit-and-flare dress sells well when I combine a stable bodice with a controlled flare, then match it with the right satin type, lining plan, and pressing rules. I avoid surprises by locking grainlines, adding internal support, and approving fabric shade, hand feel, and seam performance before bulk.
I once shipped an early satin order where the skirt looked perfect on the cutting table, but it spiraled slightly after steaming. The pattern was fine. The fabric was not stabilized, and the seam balance was off. Now I always treat satin as a material system, not just a fabric choice.
What exactly is a satin fit-and-flare dress, and why does it behave differently from other satin styles?
Many people group satin dresses together. Fit-and-flare is a special case, because it mixes a fitted top with a skirt that moves a lot.
A satin fit-and-flare dress has a shaped bodice that fits close at bust and waist, plus a flared skirt that increases hem sweep for movement. It behaves differently because satin drapes and slips, so the bodice needs structure while the skirt needs controlled bias and balanced seams to prevent twisting and shine marks.
The core design logic I follow
- Bodice: stability first, then beauty
- Waist seam: stress point, needs reinforcement
- Skirt: flare that moves, but does not distort
Why this style is popular in wholesale
- It photographs well under flash and indoor light
- It fits many occasions: cocktail, bridesmaid, party
- It allows many neckline variations without changing the skirt block
Which satin types work best for a fit-and-flare silhouette?
The word “satin” is not one fabric. If I pick the wrong satin, the bodice collapses or the skirt looks cheap.
For satin fit-and-flare dresses, I usually choose satin-backed crepe, heavier duchess satin, or mid-weight polyester satin, depending on price and occasion. I avoid very light, slippery satin for structured bodices unless I add strong lining and support, because it will show ripples and sewing marks.
How I judge satin for fit-and-flare
- Weight: controls flare body and hem hang
- Slip: controls sewing difficulty and seam stability
- Luster: controls how much flaws show
- Yarn quality: controls snagging and pilling risk
Satin options and what I use them for
| Satin Type | Feel + Look | Best Use in Fit-and-Flare | Main Risk |
|---|---|---|---|
| Satin-backed crepe | softer face, less shine | day-to-night, bridesmaid | can relax at waist |
| Duchess satin | firm, structured, premium | formal, statement skirt | can crease, needs care |
| Charmeuse satin | very fluid, high shine | softer flare, slip feel | shows every ripple |
| Poly satin (mid-weight) | cost-friendly, stable supply | volume programs | shade variation |
| Stretch satin | comfort fit, better recovery | fitted bodices | shine can highlight stretch lines |
A practical fabric picking rule I use
- If the skirt flare is wide, I increase fabric weight a little
- If the bodice is strapless, I require stronger structure inside
- If the dress is for hot weather, I reduce lining coverage but keep support zones
How do I engineer the bodice so satin looks smooth and stays in place?
This is where most failures happen. Satin does not forgive weak pattern work. The buyer sees it as “cheap,” even if the fabric cost is high.
I engineer the bodice by using stable lining, controlled ease, and internal structure like fusible, boning, or waist stay when needed. I also plan dart shapes and seam placement to reduce shine stress lines, and I test the bodice on movement, not just standing fit.
The bodice decisions that matter most
- Dart vs princess seam: princess seams shape better, but need cleaner sewing
- Neckline support: stay tape or clear elastic prevents stretching
- Waist support: waist stay reduces pull on satin shell
- Closure choice: invisible zipper placement must avoid wavy seams
Internal support options I pick from
- Full lining: best for smoothness, adds cost
- Partial lining: supports bodice only, faster and cheaper
- Underlining: improves body without adding bulk seams
- Boning: for strapless or deep sweetheart, higher labor
- Silicone/grip tape: for off-shoulder, comfort risk if too tight
A small decision table I use in sampling
| Neckline Type | Recommended Support | Why |
|---|---|---|
| Strapless | boning + waist stay + stable lining | prevents slipping and rolling |
| Sweetheart | shaped cups + tape at top edge | controls gaping |
| V-neck | tape + balanced darts | prevents neckline growth |
| One-shoulder | strong strap base + lining | stops strap stretching |
Fit tests I always run
- Sit test: waist seam stress and skirt ride-up
- Arm lift test: neckline stretch and zipper strain
- Walk test: skirt swing and seam twist
- Flash photo test: shine shows puckers and needle lines
How do I build the skirt flare so it moves well and does not twist or “spiral”?
A fit-and-flare skirt is supposed to swing. In satin, swing can become distortion if grainlines are wrong.
I build the flare by choosing the right panel count, controlling bias zones, and balancing seam lengths so the skirt hangs evenly. I also stabilize the waist seam and let the skirt hang before hemming, because satin can relax and change length after sewing and steaming.
Panel strategy I use most
- 2-panel circle look: fast, but higher twist risk in satin
- 4-panel or 6-panel: better balance and cleaner drape control
- Gathered skirt: easier flare, but can look bulky in satin
Grainline rules that prevent twisting
- I avoid putting too much skirt on true bias unless the design needs it
- I mirror panels so left and right behave the same
- I keep seam allowances consistent to avoid pulling
Hem planning in satin
- I allow hang time before final hem
- I prefer narrow baby hem for fluid satin
- I use wider hem or horsehair braid for structured satin when the buyer wants volume
A quick skirt construction map
| Skirt Style | Best Satin Choice | Hem Method | Risk Level |
|---|---|---|---|
| Soft flare (less volume) | charmeuse / satin-back crepe | baby hem | medium (ripples) |
| Structured flare (more volume) | duchess / heavier poly satin | wider hem + optional braid | medium (crease) |
| Full circle flare | mid-weight satin | controlled bias + hang hem | high (spiral) |
How do I control sewing marks, shine, and puckering on satin during production?
This is the “invisible” factory skill that buyers do not see until the goods arrive. Satin can show every needle hole.
I control satin appearance by using the right needle, thread, stitch length, and pressing temperature, plus strict handling rules to prevent scuffs and shine. I also test seam puckering on the real bulk fabric, because one needle change can fix a whole production problem.
Sewing settings I often start with
- Fine needle choice to reduce holes
- Slightly longer stitch length to reduce puckering
- High-quality thread with smooth finish
- Walking foot or proper feeding to stop shifting layers
Pressing and handling rules I enforce
- Low heat and press cloth to protect shine
- No hard pressing on the face side
- Steam control to avoid water marks
- Clean worktables and gloves to reduce snagging
The defects I track in inline QC
- Wavy zipper seam
- Puckered princess seams
- Shiny press marks at waist seam
- Random pulled yarns and snags
- Shade shift between panels
How should I plan sizing, grading, and reorder stability for a satin fit-and-flare program?
Emily cares about speed, but she also cares about repeat quality. Satin is sensitive, so I need a grading plan that does not break the shape.
I plan satin fit-and-flare grading by keeping bodice increments controlled and maintaining skirt balance across sizes. I also lock fabric sources and shade standards early, because reorder complaints often come from small shine and color changes, not from big pattern changes.
Grading priorities I do not compromise
- Bust point position shifts with size
- Waist seam stays level and stable
- Armhole and neckline growth stays controlled
- Skirt panels stay symmetrical in every size
Reorder controls I set with buyers
- One approved fabric standard with backup mill option
- One approved lining standard
- One approved zipper and slider spec
- One approved pressing and packing method
| Risk Type | What the buyer sees | My prevention method |
|---|---|---|
| Shade shift | “not same as last time” | shade band + lot control |
| Shine difference | “looks cheaper” | lock satin type + finish |
| Fit drift | “waist feels smaller” | locked block + PPS checks |
| Snagging | “pulls easily” | yarn quality + handling rules |
Satin Shirt Dress
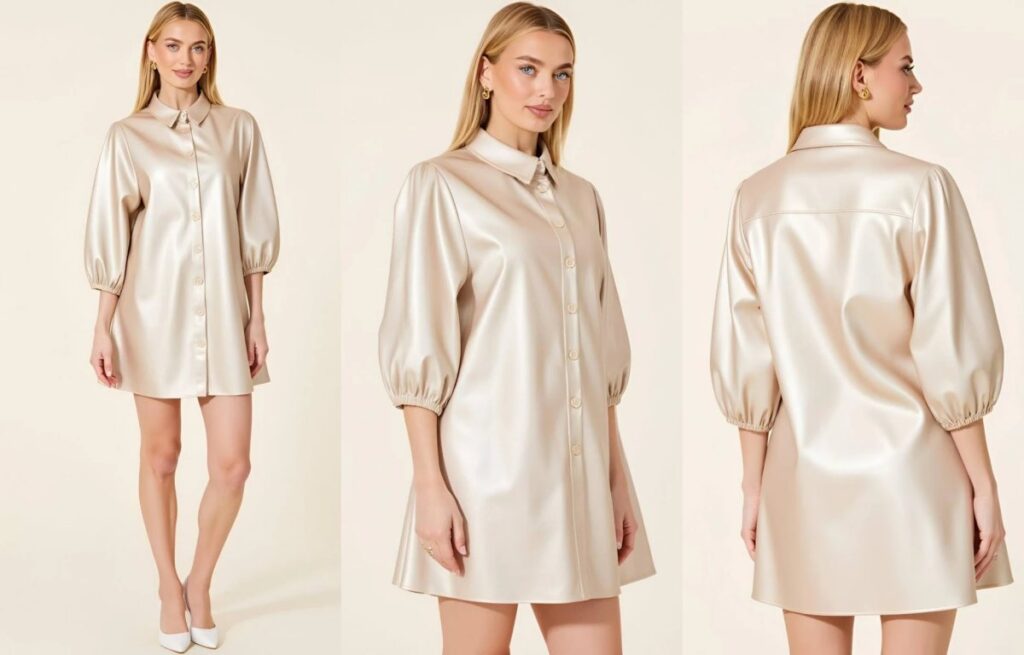
A satin shirt dress can look expensive, but it can also look cheap fast. I see problems like rippling plackets, shiny press marks, and fits that pull at the bust. When that happens, buyers lose trust and the product page dies.
A satin shirt dress works best when I treat it as a structured shirt pattern made in a fluid, glossy fabric. I control the collar and placket with the right interfacing, choose satin that resists snagging and shading, and set button spacing and bust ease for real movement, not only photos.
I still remember one boutique buyer who wanted a “clean office satin” story. The first sample looked fine on the mannequin. On a real body, the placket waved and the buttons gaped. After that, I stopped guessing and I started building a clear satin shirt dress checklist for every order.
What is a satin shirt dress, and how is it different from other satin dress styles?
A satin slip dress is mostly about drape. A satin wrap dress is mostly about waist adjustment. A satin shirt dress is different, because it mixes structure and shine in the same garment.
A satin shirt dress is a button-front, collared dress that keeps classic shirt details like a stand collar, cuffs, and a placket, but uses satin for a glossy, soft hand feel. It needs more internal support than most satin styles, because the fabric shows every ripple, stitch line, and fit strain.
Why this style sells in B2B
- It fits both “workwear” and “going-out” edits
- It looks premium in photos with simple styling
- It can be repeated with new colors fast for reorders
Why this style fails in bulk when it is not controlled
- Placket waves and collar collapse
- Button gaping at bust
- Shading, watermarking, and press shine
- Snags at hip and cuff areas
How do I choose the right satin fabric for a satin shirt dress?
This is the base decision. If the satin is wrong, no pattern fix will fully save it. I always test satin like I test a “surface,” not only a fabric.
For a satin shirt dress, I choose satin based on weight, weave stability, snag resistance, and how it reacts to pressing. I usually prefer heavier satin or satin with a bit more structure for shirt details, then I check shading and seam puckering before I approve bulk.
Satin types I use most for shirt dresses
- Satin charmeuse: very fluid and glossy, but it can show ripples easily
- Satin crepe (crepe-back satin): better body and less “cling,” good for shirts
- Duchess satin: very structured, more formal, can feel stiff for casual shirts
- Polyester satin: stable supply and cost, but I watch shine level and snagging
- Silk satin: premium hand feel, but higher risk on consistency and care
Fabric specs I ask for before sampling
- GSM and width
- Shrinkage after wash or steam
- Snag test notes and yarn quality
- Colorfastness and crocking
- Shade tolerance between lots
A practical fabric direction table
| Fabric Option | Look | Best Use | Main Risk |
|---|---|---|---|
| Satin crepe | premium, controlled shine | office + day-to-night | seam puckering if needle is wrong |
| Charmeuse | high shine, sexy drape | going-out edit | placket waves, cling |
| Duchess | strong structure | statement shirt dress | stiff feel, higher cost |
| Poly satin | cost-friendly | fast drops | snag + cheap shine if low grade |
How do I engineer the collar, placket, and cuffs so satin stays crisp?
This is the core technical area. Satin is slippery and it “remembers” every press mistake. A shirt dress needs clean edges, but satin wants to soften.
I keep satin shirt dresses crisp by using the correct interfacing weight, controlling stitch tension, and building a placket that stays flat under movement. I also balance collar stand height and collar point shape, so it frames the face without collapsing or twisting.
Interfacing strategy I use
- I avoid very stiff interfacing that creates bubbling
- I match interfacing shrinkage to fabric shrinkage
- I test fusible vs sew-in based on satin sensitivity
Collar details that decide quality
- Collar stand height: too high looks tight, too low looks floppy
- Collar point length: long points look fashion, short points look classic
- Under-collar piece: I sometimes use a slightly firmer base for shape
Placket construction options
- Standard folded placket: cleaner look, but needs stable satin
- Separate placket piece: better control, more sewing steps
- Hidden placket: premium look, but risk of bulk and misalignment
Cuff and sleeve decisions
- Single-button cuff: clean and easy, good for speed
- Double-button cuff: more adjustability, slightly higher cost
- Elastic cuff: casual and forgiving, but less “shirt” identity
A placket stability checklist I follow
- Button spacing tightened at bust zone
- Extra button added if CF pulls open on size M
- Topstitch SPI tested to avoid puckering
- Placket edge pressed with low heat + press cloth
How do I prevent common satin shirt dress fit problems like gaping and pulling?
Shirt dresses are already sensitive at bust and hip. Satin makes the problem louder, because shine shows strain lines. I always fit satin shirt dresses on a moving body.
I prevent gaping by adding correct bust ease, improving dart or princess shaping, and adjusting button spacing and placement. I prevent pulling by balancing shoulder width, armhole depth, and hip ease, then I test sitting and reaching so the placket stays closed and smooth.
The fit zones I treat as “high risk”
- Bust: gaping between buttons, strain lines across chest
- Waist: belt loops and waist shaping can twist
- Hip: satin clings and shows every tight point
- Armhole: too tight causes ripples into the chest
Pattern tools I use to solve gaping
- Hidden snap at the bust
- Slight overlap increase at center front
- Micro-adjusted button positions in bust zone
- Bust dart relocation for better shaping
A simple grading note I give buyers
- If the customer base includes fuller bust, I set a different button spacing plan
- I keep sleeve cap and armhole balance consistent across sizes, or satin twists
How do I control shine marks, seam puckering, and “cheap-looking” satin in bulk?
This is the difference between “premium satin” and “cost satin” in customer reviews. Many defects are not visible until the garment is pressed, packed, and shipped.
I control satin quality by setting needle and thread specs to reduce puckering, using low-temperature pressing with proper tools, and enforcing fabric inspection for shading and snags. I also choose seam finishes that do not create ridges, because ridges reflect light and look messy online.
Sewing and needle setup I use often
- Fine needle size to avoid visible holes
- Balanced thread tension to prevent tunneling
- Smaller stitch length on edge topstitch for control
Seam finishing choices
- French seams: clean inside, premium feel, higher labor
- Overlock + narrow topstitch: faster, but can show ridges
- Bias binding: premium and stable, but higher material cost
Pressing and packing controls
- Press cloth and low heat
- No direct steam blast on high-shine satin
- Flat cooling to avoid watermarking
- Tissue placement in folds to reduce crease shine
A defect control table I use with QC
| Defect | What it looks like | Main Cause | How I prevent it |
|---|---|---|---|
| Puckering | wavy seam line | needle/thread mismatch | test needle + tension on real satin |
| Shading | panels look different tone | roll variation | group by lot, inspect before cutting |
| Shine marks | “bruised” glossy spots | wrong pressing | press cloth + low heat tools |
| Snags | pulled threads | low yarn quality | snag test and stricter inspection |
How do I merchandise a satin shirt dress for buyers like Emily?
Emily needs fast content and clear stories. A satin shirt dress can be styled in many ways, so it is a strong product for ads and short videos.
I merchandise satin shirt dresses by building one base pattern in 2–3 colors, then adding styling hooks like a waist tie, contrast buttons, or cuff details. For most boutique drops, I suggest one “work” color, one “night” color, and one trend color to cover different traffic intent.
Commercial styling hooks that work
- Self belt with clean belt loops
- High slit for movement on midi lengths
- Statement cuff or contrast piping
- Matte buttons to balance shine
A quick color plan I often suggest
- Work: black, navy, champagne
- Night: emerald, wine, cobalt
- Trend: butter yellow, silver-gray, soft lilac
Satin Blazer Dress
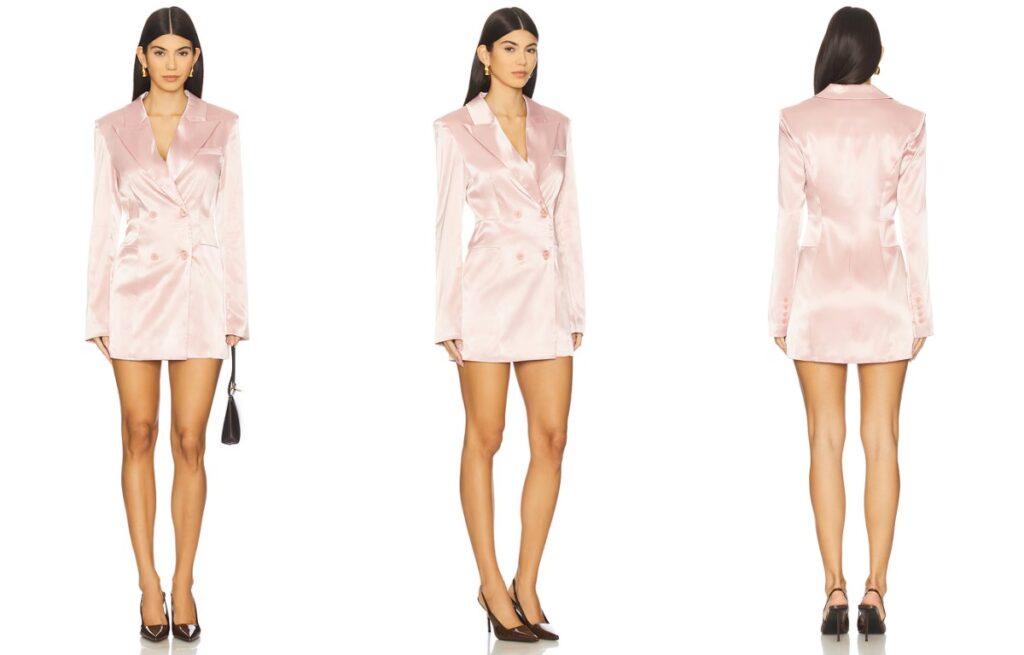
A satin blazer dress can look “expensive” online, but it can also look cheap in real life. I often see shine lines, puckered seams, and poor structure. Then the customer complains that it feels like a costume, not a blazer.
A satin blazer dress works best when I treat it like tailoring first and satin second. I choose the right style by locking a stable blazer block (shoulder, lapel, and waist shaping), then I pick a satin with the right weight and low snag risk, and I add inner support like fusing, lining, and clean finishing to control shine and wrinkles.
I once rushed a satin blazer sample because the buyer wanted a quick holiday drop. The lapel rolled badly, and the pocket area bubbled after steaming. Since then, I always do one extra fit and pressing test on satin tailoring, even if it costs me a few more days.
What exactly is a satin blazer dress, and how is it different from other satin dresses?
This style is not only “a satin dress with buttons.” The blazer DNA changes the whole construction logic. The wrong approach will fail fast in bulk.
A satin blazer dress is a dress built on blazer tailoring elements like lapels, structured shoulders, a front closure, and often welt or flap pockets, but executed in satin. Compared with slip or bias satin dresses, it needs more internal structure, stronger seam control, and better pressing methods to keep the garment sharp without damaging the satin surface.
Key blazer elements that must be real, not fake
- Collar and lapel that roll clean and stay flat
- Shoulder line that holds shape on hanger and on body
- Front edges that do not ripple
- Waist shaping that creates a blazer silhouette, not a robe
Common “wrong versions” I avoid for wholesale
- Soft robe wrap with lapel shape only
- Thin satin with no fusing, so the lapel collapses
- Oversized drop-shoulder block that looks sloppy in satin
Which satin types and weights work best for a satin blazer dress?
This is where most problems start. Some satin is made for drape, not for structure. If I use the wrong base, no amount of sewing skill can fully save it.
For a satin blazer dress, I usually use medium-weight satin that can hold a tailored edge, such as satin-backed crepe, heavier charmeuse, or duchess satin for formal looks. I avoid ultra-light satin for sharp lapels because it ripples, shows every stitch, and snags easily.
How I classify satin for this style
- Satin-backed crepe: matte inside, better stability, good for tailored edges
- Charmeuse satin: smooth and drapey, works if weight is not too light
- Duchess satin: stiff and formal, best for statement and occasionwear
- Stretch satin: comfort fit, but needs careful fusing to avoid bubbling
Fabric behaviors I test before I approve bulk
- Snag resistance (especially at hip and sleeve)
- Seam puckering under standard stitch tension
- Shine marks after pressing
- Wrinkle recovery after packing
A practical fabric selection table
| Satin Base | Best Look | Best Season | Main Risk |
|---|---|---|---|
| Satin-backed crepe | sharp, modern | all seasons | cost slightly higher |
| Heavier charmeuse | sexy, soft tailoring | spring/holiday | seam puckering |
| Duchess satin | structured, formal | holiday | stiffness, comfort |
| Stretch satin | fitted, comfortable | all seasons | fusing bubbles |
What are the 20+ popular satin dress styles, and where does the satin blazer dress sit in that range?
Many buyers ask for “satin dresses” as a category. I prefer to map the full range, then place blazer dress as a tailored hero. It helps merchandising and pricing.
Common satin dress styles include slip, bias-cut, cowl neck, wrap, ruched, corset satin dress, satin mini, satin midi, satin maxi, satin shirt dress, satin wrap midi, satin cami dress, satin off-shoulder, one-shoulder satin, halter satin, strapless satin, satin A-line, satin fit-and-flare, satin mermaid, satin sheath, satin column, satin blazer dress, satin tuxedo dress, and satin cape dress.
Why blazer dress is a strong “category bridge”
- It serves customers who want “power” styling, not only romantic styling
- It can sit between workwear and partywear depending on length and finish
- It supports higher perceived value if tailoring is clean
How do I build a satin blazer dress that fits well across sizes?
Fit is harder than it looks because satin shows every drag line. A small shoulder issue can look like a big problem. This is why I treat fit and internal structure as one topic.
I build good fit by controlling shoulder width, armhole shape, and waist suppression, then I balance skirt ease so the dress does not ride up when the buyer walks. I also add lining and controlled fusing so the outer satin stays smooth across sizes.
Fit points I lock early
- Shoulder point placement and shoulder slope
- Armhole depth that allows movement but stays clean
- Bust shaping through darts or princess seams
- Waist placement and button spacing to avoid pulling
Mini vs midi blazer dress fit logic
- Mini blazer dress: needs more hip movement control, watch riding up
- Midi blazer dress: needs slit planning, watch walking ease and hem balance
- If the buyer sells XS–XL, I can usually keep one button layout
- If the buyer sells extended sizes, I often need button spacing changes and more bust shaping, or the front will pull open
How do I control shine, puckering, and “cheap-looking” issues in satin tailoring?
This is the real professional part. Satin is unforgiving. Tailoring adds seams and edges. So I have to control the surface at every step.
I control satin quality by choosing the right needle and thread, using the correct stitch density, stabilizing edges with fusing or stay tape, and setting strict pressing rules to avoid shine marks. I also test the lapel roll, front edge ripple, and pocket area bubbling before bulk production.
The main problems and the true causes
- Puckering at seams
- Causes: wrong needle size, tension, too-short stitch, fabric feed mismatch
- Shine marks on lapels and seams
- Causes: too hot pressing, direct iron contact, wrong pressing cloth
- Bubbling at lapel and front edge
- Causes: wrong fusible type, heat/pressure mismatch, poor cooling time
- Wavy front edge
- Causes: bias edge stretch, lack of stay tape, uneven topstitch tension
- Snags and pulls
- Causes: low-quality yarn, rough trims, sharp hardware, poor handling
What I specify in the tech pack for satin blazer dresses
- Fusing type and placement map (lapel, front edge, pocket area)
- Edge stabilization (stay tape along front edge and neckline)
- Stitch type and SPI for main seams vs topstitch
- Lining material and attachment method
- Pressing temperature range and press cloth requirement
Pocket and lapel construction choices I compare
- Welt pockets: premium look, high skill requirement
- Flap pockets: classic blazer look, more bulk control needed
- Fake pocket welts: faster, but can look cheaper
| Component | Premium Option | Safer Option | When I choose it |
|---|---|---|---|
| Lapel | full canvas feel with stable fusing | clean fusible + stay tape | most wholesale orders |
| welt pocket | fake welt | fast fashion drops | |
| Lining | full lining | partial lining | hot climates or lower price |
Pressing rules I enforce on the line
- I never let operators press satin directly without cloth
- I require low-to-mid heat with steam control
- I require cooling time on a flat surface before moving panels
- I test one finished piece for shine marks under strong light
How should I price, position, and pack a satin blazer dress for export markets?
A satin blazer dress can be a high-return item if it arrives wrinkled or glossy in the wrong way. Packaging matters as much as sewing.
I position satin blazer dresses as “tailored partywear” or “night-out power dressing” and price them above basic slip dresses because of structure and labor. For export, I use protective packing, control folding lines, and recommend steaming guidelines so the garment looks like the product photos on day one.
Cost drivers buyers should understand
- More pattern pieces and more sewing steps than slip styles
- Fusible + lining cost
- Tailoring operations (lapel, collar, pockets)
- Higher QC time because defects are more visible
Packing and shipping controls I use
- Tissue at lapel fold points to reduce shine lines
- Hanger pack for higher tier orders when possible
- Carton testing to reduce crush wrinkles
- Clear care label for steaming, not hard ironing
A simple positioning map
| Customer Use | Best Length | Best Satin Type | Styling Angle |
|---|---|---|---|
| Night out | mini | satin-backed crepe | sharp and sexy |
| Holiday party | mini/midi | heavier charmeuse | glossy and rich |
| Formal event | midi | duchess satin | structured luxury |
Satin Cowl Neck Dress
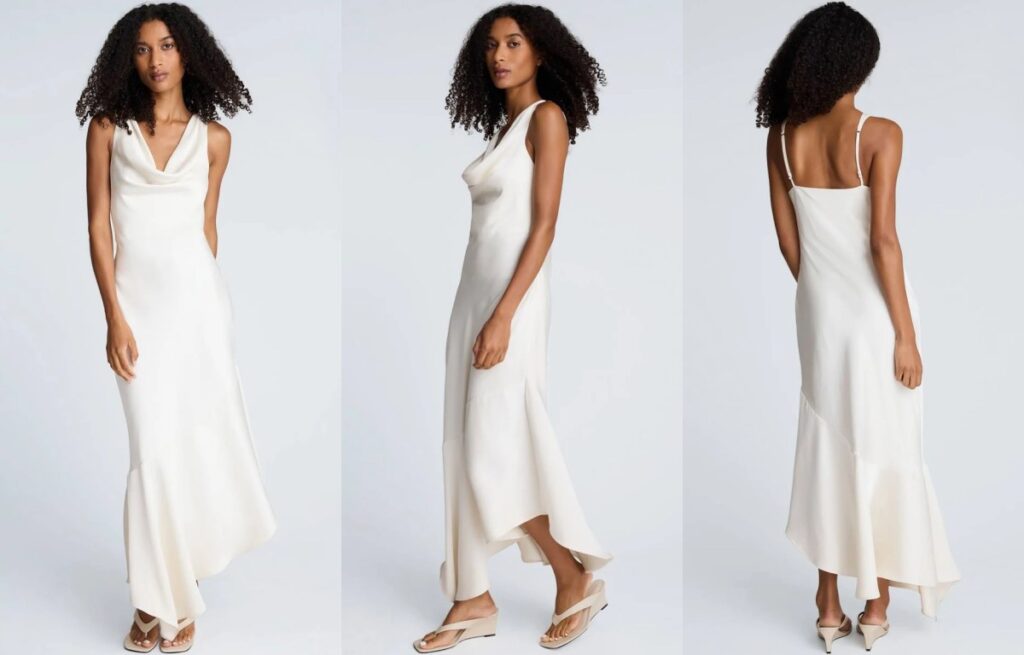
Many satin dresses look expensive on a hanger, but they fail once the model moves. The neckline collapses, the bias stretches, and the shine shows every ripple. Then the buyer gets complaints about fit, photos, and quality.
A satin cowl neck dress works because the drape hides small body-fit differences while still reading “premium” on camera. I make it safe for bulk by controlling satin quality, bias stretch, neckline shape, and strap support, then I approve a strike-off and a wear test sample before production.
I once shipped a cowl style where the fabric looked great in the swatch book, but the bulk lot had a slightly stiffer hand feel. The cowl did not fall cleanly, and the photos looked “flat.” Now I treat cowl drape as a measurable spec, not a feeling.
What are the 20+ types of satin dress, and where does the satin cowl neck dress fit in?
When a buyer says “satin dress,” I always ask what job it needs to do. Party? Bridesmaid? Resort? A cowl neck is one of the best bridge styles because it can sit between minimal and romantic.
Common satin dress types include satin slip, satin cowl neck, satin wrap, satin bias-cut maxi, satin midi, satin mini, satin corset dress, satin bustier dress, satin halter, satin one-shoulder, satin off-shoulder, satin strapless, satin backless, satin high-neck, satin shirt dress, satin A-line, satin mermaid, satin ruched dress, satin draped dress, satin tiered dress, satin fit-and-flare, and satin blazer dress. The satin cowl neck dress is a top pick for “easy elegance” with strong conversion in photos.
Where I place cowl neck in a wholesale range
- It sits next to slip and bias-cut styles
- It shares the same fabric story, so buyers can shoot one content theme
- It offers better “bust forgiveness” than straight slip necklines
- It still looks clean enough for bridal events and holiday drops
How do I engineer a satin cowl neck so it drapes right and stays stable?
This is the part that separates a “pretty sample” from a reliable bulk item. A cowl neck is not one curve. It is a system of weight, bias, and support.
I engineer a satin cowl neck by controlling three things: neckline opening width, cowl depth, and the fabric’s bias stretch. I also stabilize the shoulder/strap line with the right construction, so the cowl falls naturally instead of collapsing or gaping.
The key pattern variables I set before sampling
- Neckline width: decides how open the cowl looks
- Cowl depth: decides how many folds form
- Center front drop: decides if it reads sexy or elegant
- Strap angle: decides if the cowl twists during wear
- Bust shaping: decides if the cowl sits flat on smaller bust sizes
How I avoid the two common failures
1) Collapsed cowl (looks flat)
- Cause: satin too stiff, cowl depth too shallow, neckline too tight
- Fix: softer satin, deeper cowl, slightly wider neckline
2) Gaping cowl (shows bra or feels unsafe)
- Cause: neckline too wide, strap support too weak, bias stretch too high
- Fix: reduce neckline width, add stabilizer, adjust strap placement
A practical spec range I often use (directional, not absolute)
| Feature | Safer Commercial Range | What happens if I push it too far |
|---|---|---|
| Cowl depth | medium | too deep looks messy in motion |
| Neck opening | moderate | too wide gapes on small bust |
| Strap width | thin to medium | too thin cuts in and twists |
| Bias content | controlled | too much bias stretches after wear |
Support options I choose based on target market
- Hidden bust darts: keeps the bodice controlled without killing drape
- Inner facing: cleans edge and adds light stability
- Clear elastic at seam: helps recovery, but must be tested for shine marks
- Lightweight fusible tape: strong control, but risky on satin if heat is wrong
Which satin fabric is best for a cowl neck dress, and how do I avoid “cheap shine”?
Not all satin behaves the same. The wrong satin can make a perfect pattern look low-end, even if the sewing is clean.
For satin cowl neck dresses, I prefer satin with soft drape and smooth face, like polyester satin with good yarn quality or satin-backed crepe for more control. I avoid overly stiff satin and overly thin satin, because they either flatten the cowl or show every seam and undergarment line.
Satin choices and what they do to a cowl
- Polyester satin: stable supply, strong color, good for bulk
- Satin-backed crepe: less shine, more premium, better for “grown-up” styling
- Silk satin: top drape, but higher cost and higher care risk for mass retail
- Stretch satin: comfort, but can distort cowl folds if stretch is high
How I judge satin quality fast in the sampling room
- I rub test: checks snag and fuzz risk
- I fold test: checks if the crease turns white or stays clean
- I hang test: checks if cowl forms natural folds in 10 minutes
- I light test: checks if the face shows weaving lines or streaks
A fabric choice table for buyers
| Target Price Tier | Satin Recommendation | Why it works for cowl neck |
|---|---|---|
| Value fast fashion | polyester satin (soft hand) | good drape at low cost |
| Mid-tier boutique | satin-backed crepe | premium look, fewer ripples |
| Premium capsule | silk or silk blend satin | best drape and feel |
What construction details matter most for bulk production of satin cowl neck dresses?
Satin is unforgiving. Every needle mark and every press line can show under light. So I build the sewing plan to protect the face fabric.
In bulk, the most important details are clean edge finishing on the cowl, stable strap attachments, controlled seam puckering, and correct pressing settings. I also plan for lining or partial lining when the satin is thin, so the dress feels expensive and photographs well.
Sewing choices I use to keep satin clean
- Fine needle and correct thread tension to reduce puckering
- French seams or clean overlock + top finish based on price point
- Narrow hems with steady hem guides to avoid waving
- Bar tacks at strap joins to avoid tearing in shipping and wear
Pressing and finishing rules I set
- I set low heat and use a press cloth
- I avoid heavy steam on some satins that watermark
- I test fusing temperature on scrap first
- I pack with tissue at cowl folds to reduce hard creases
Lining decisions that change customer reviews
- No lining: looks minimal, but can feel cheap if fabric is thin
- Partial lining: best balance for most mid-tier buyers
- Full lining: best for bridal and premium, but cost goes up
How do I control fit, grading, and returns for satin cowl neck dresses?
This is where buyer pain shows up. Satin has low forgiveness for bad grading. If the bust point shifts, the cowl looks wrong fast.
I control returns by building a stable size base, limiting extreme neckline openings, and testing the cowl on at least two body types. I also add small hidden controls like adjustable straps, inner snaps, or silicone tape when the style is more open.
Fit controls that help the cowl across sizes
- Adjustable straps: the fastest fix for bust height differences
- Side zipper: keeps the neckline stable compared to pull-on styles
- Hidden bust support: reduces “bra show” complaints
- Waist seam or waist shaping: stops the dress from sliding forward
My sampling and approval flow for cowl styles
1) I approve fabric hand feel and color first
2) I approve the first fit sample on a real body
3) I approve the cowl in motion (walking + sitting test)
4) I approve PPS from bulk fabric, not from leftover yardage
| Risk | Why it happens | How I reduce it |
|---|---|---|
| Neckline gaping | opening too wide | strap move + inner snap |
| Cowl collapse | satin too stiff | softer base + deeper drape |
| Seam puckering | tension/needle wrong | needle spec + sewing test |
| Shine marks | wrong pressing | press cloth + low heat |
Satin Halter Dress
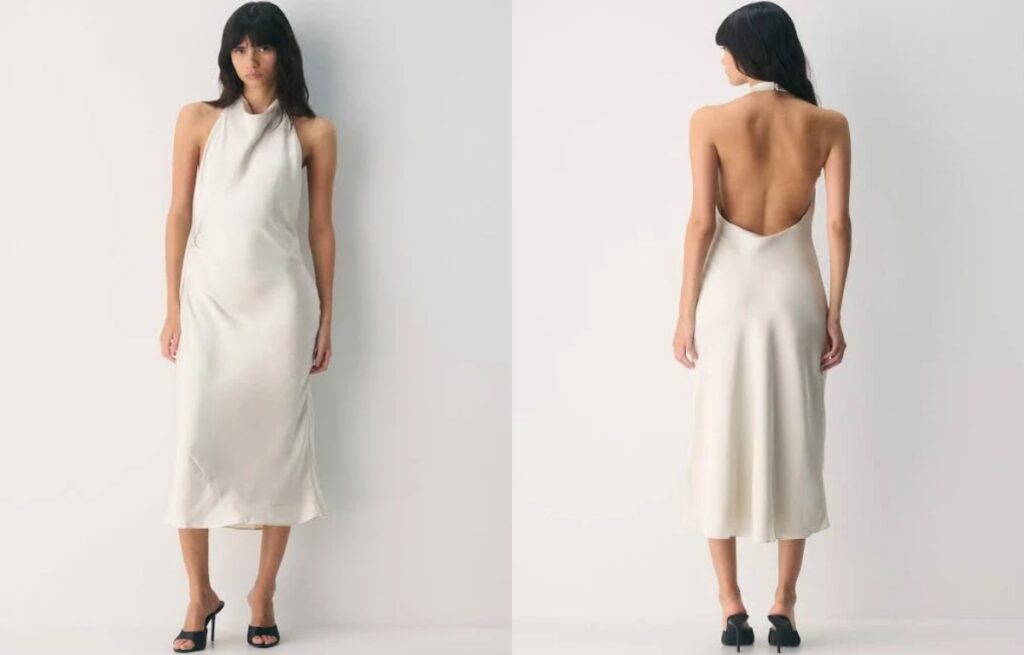
A satin halter dress can look luxury in a photo, but it can fail fast in real life. I see issues like neckline pulling, shiny press marks, and rippling seams. When that happens, the buyer gets returns and loses trust.
A satin halter dress works when I control three things: neckline support, satin quality, and clean construction. I pick the right satin weight and weave, add hidden structure at the halter and bust, and set strict sewing and pressing rules so the dress keeps its shine without looking cheap or wrinkled.
I once approved a halter sample that looked perfect on a mannequin. In bulk fitting, real customers tied it tighter and the neck seam started to wave. Since then, I treat the halter area like a load-bearing part, not just a styling detail.
How is a satin halter dress different from other types of satin dress?
People group all satin dresses together. In production, halter styles behave very differently because the neck carries more tension than straps.
A satin halter dress needs stronger stress management at the neckline and bust than a satin slip or strapless dress. The halter shape creates upward pull, and satin shows every ripple. So I use better stabilizers, smarter pattern balance, and more controlled pressing to avoid twisting and shine marks.
Where halter satin dresses fail most often
- Neck seam stretching after wear
- Bust gaping because the pull direction changes
- Collar rolling or flipping in photos
- Side seam puckering from tension imbalance
- Shine marks from over-pressing
The simple “tension map” I use
- Halter tie/neck point = highest tension
- Bust edge = medium tension, high visibility
- Waist seam = medium tension, controls fit
- Hip/hem = lower tension, but shows drag lines if grain is wrong
Which satin fabrics work best for a satin halter dress?
Satin is a finish, not a single fabric. When I say “satin,” I still need to decide weave, fiber, weight, and how it will behave under lights and heat.
For a satin halter dress, I usually choose medium-weight satin with stable yarns, like polyester satin or poly-blend duchess satin for structure, and heavier satin for formal shapes. If the design needs more drape, I use satin-backed crepe or heavier charmeuse, but I add stabilizing because soft satins stretch and show every seam.
Satin options I use and why
- Polyester charmeuse satin
- Pros: glossy, good drape, cost-friendly
- Cons: seam puckering risk, can snag
- Satin-backed crepe
- Pros: better stability, less cling, still premium
- Cons: higher cost, heavier feel
- Duchess satin
- Pros: holds shape, formal look, clean lines
- Cons: less fluid, shows needle marks
- Stretch satin
- Pros: comfort fit, easier size range
- Cons: shine distortion, seam waviness if not stabilized
Fabric weight guide I rely on
| Use case | Suggested satin direction | Why it works |
|---|---|---|
| Minimal halter slip look | charmeuse / satin-backed crepe | drape + clean shine |
| Structured party halter | duchess satin | shape + stability |
| Bridal-inspired halter | heavier satin-backed crepe | premium hand + less cling |
| Tight fit halter | stretch satin + lining | comfort + recovery |
Fabric checks I run before I approve bulk
- Snag test with jewelry contact
- Seam slippage test at side seams
- Heat sensitivity check for pressing
- Shade check under warm and cool lighting
- Wrinkle recovery check after packing fold
How do I engineer the neckline and bust so the halter does not pull or gape?
This is the part where I go deeper than style talk. Halter dresses fail when the pattern ignores force direction. The neck pulls up. The bust tries to open. Satin does not forgive.
I engineer a satin halter dress by adding internal support and controlling stretch at the neckline edge. I use stay tape or a hidden facing, build a stable bust shape with darts or princess seams, and often add an inner bust stay or light boning so the dress hangs from the torso, not from the neck alone.
Neckline stabilization methods I choose from
- Stay tape inside seam allowance
- Best for: clean edges, less visible bulk
- Risk: wrong tape makes edge stiff
- Self-fabric facing with fusing
- Best for: structured halter looks
- Risk: fusing can bubble on satin if wrong heat
- Lining-as-structure (bagged edge)
- Best for: premium finish, soft feel
- Risk: lining must match stretch behavior
Bust control options
- Darts (simple, fast)
- Good for: smaller size range, minimal styles
- Princess seams (better shaping)
- Good for: fuller bust, premium fit
- Built-in cups (consistent shape)
- Good for: eventwear, photo consistency
When I add an inner bust stay
I add it when:
- the halter tie is thin
- the dress is backless or low-back
- the fabric is soft charmeuse
- the buyer wants low returns across a wider size range
| Design choice | What it improves | New risk it adds | How I control it |
|---|---|---|---|
| Backless halter | sexy look, higher CTR | neckline pull, bust gaping | inner bust stay + tape |
| Deep V halter | longer neck look | edge rolling, exposure | facing + hidden snap |
| Thin tie halter | delicate style | neck discomfort | wider tie or soft padding |
| Soft charmeuse | fluid premium drape | seam puckering | stitch + tension control |
How do I prevent seam puckering, needle marks, and shine on satin?
This is where many factories “know how,” but they still miss details. Satin is high-sensitivity fabric. One wrong needle or wrong iron setting can ruin a full carton.
To prevent puckering and shine on a satin halter dress, I control needle size, thread choice, stitch balance, and pressing temperature. I also set rules for handling, because satin bruises easily. I do test seams on real bulk fabric and lock machine settings before the line starts.
Sewing settings that usually work better
- Fine needle (smaller size) to reduce visible holes
- Finer thread for cleaner topstitch
- Slightly longer stitch length to avoid “perforation” look
- Walking foot or careful feed to reduce rippling
- French seams for unlined styles
- Clean bias binding for armholes
- Lined bodice with clean bagging for neckline
Pressing rules I enforce
- Lower heat, always with press cloth
- Press from the wrong side when possible
- No dragging iron, only lift and press
- Cool down flat to set the seam
Packing rules that protect the shine
- Tissue between folds
- Larger polybags for less crease memory
- Hang packing for higher price tiers
How do I select the best satin halter styles within “types of satin dress” for a 20+ style collection?
If I am building a “types of satin dress” range, I use halter as a key style family. It gives variety without changing the whole production base.
In a 20+ satin dress lineup, I usually include 3–5 satin halter variants: a simple halter slip, a structured halter midi, a backless halter mini, a cowl-front halter, and a formal halter maxi. I keep the same satin base and change neckline and back details to control MOQ and timing.
Practical halter variants that cover most demand
- Cowl halter satin dress: strong evening story, needs bust stay
- High-neck halter satin dress: safer fit, cleaner returns
- Backless halter satin dress: marketing hero, higher QC focus
- Halter satin midi: best balance of wearability and margin
- Halter satin maxi: resort + formal overlap
A range planning table I use
| Halter variant | Best customer intent | Risk level | My control strategy |
|---|---|---|---|
| High-neck halter | dinner, events | Low | stable neckline + lining |
| Cowl halter | party, wedding guest | Medium | tape + hidden snap |
| Backless halter | trend, social content | High | bust stay + fit testing |
| Midi halter | repeat sales | Low | stable skirt + safe colors |
| Maxi halter | resort + formal | Medium | hem balance + packing |
What QC checkpoints should I require before shipping satin halter dresses?
This is the final gate. Satin problems often show only under light and movement. I do not rely on a flat table check.
Before shipping satin halter dresses, I check neckline stretch, seam puckering, shine marks, shade consistency, and strap strength. I also do a hanger test and movement test, because halter tension changes when a person walks and turns.
My pre-shipment checklist
- Pull test on halter tie and neck seam
- Light check for bruising and shine marks
- Seam inspection for puckering on curves
- Shade grouping if multiple rolls are used
- Try-on test for gaping at bust and underarm
The “movement test” I always do
- Raise arms
- Turn shoulders
- Sit down and stand up
- Walk 10 steps and check hem swing
- Re-tie the halter to simulate real use
Satin Off-the-Shoulder Satin Dress

Off-the-shoulder satin dresses look expensive in photos, but they fail fast when the top edge slips or the satin shows every wrinkle. I see buyers lose reviews because the neckline feels unsafe, and the fabric shines in a cheap way under flash.
A satin off-the-shoulder satin dress works when I build real neckline support, choose the right satin weight and backing, and control shine, seam puckering, and fit across sizes. In bulk, I focus on grip structure, clean pattern balance, and strict fabric inspection to keep the neckline stable and the surface premium.
I once shipped a small test run where the neckline elastic was too soft. The dress looked fine on the mannequin. On real bodies it slid after ten steps. Since then, I treat the off-shoulder line as a technical “load-bearing” area, not a styling detail.
What exactly is an off-the-shoulder satin dress, and which occasions does it fit best?
This style is popular because it frames the collarbone and reads “feminine” with minimal effort. Satin adds the light and the “occasion” signal.
An off-the-shoulder satin dress is a satin dress with a neckline that sits below the shoulders, usually held by elastic, inner support, or a structured bodice. It fits best for weddings, bridesmaids, formal dinners, holiday parties, and evening events where customers want shine and a clean neckline.
The 3 most common off-shoulder constructions I see
- Fold-over band (simple): clean look, higher slip risk
- Draped cowl off-shoulder (soft): romantic, higher wrinkle risk
- Structured off-shoulder bodice (strong): best support, higher cost
Why is satin especially tricky for off-the-shoulder dresses?
Satin is beautiful, but it is not forgiving. It shows everything, and it moves a lot. Off-shoulder necklines also move a lot. That combination is where most problems start.
Satin is tricky because it is slippery, it can pucker at seams, it reflects light in uneven ways, and it highlights fit tension. When the neckline sits off the shoulder, small balance errors in the bodice cause slipping, gaping, or pulling, and satin makes those errors visible immediately.
Satin issues that hit off-shoulder styles hardest
- Low friction surface makes neckline slide
- Bias edges stretch and distort over time
- Stitch holes can stay visible on glossy faces
- Pressing marks and shine lines show on photos
- Wrinkles set easily during packing and shipping
What “cheap shine” usually means in practice
- yarn luster is too strong for the garment’s cut
- the fabric face has uneven reflection due to tension
- the dress is unlined so the body shadow shows through
- the seam is puckered so the light breaks in waves
Which satin types and fabric weights work best for an off-the-shoulder silhouette?
Many buyers say “use satin” as if it is one fabric. In production, satin is a family. I choose satin based on weight, drape, and stability first.
For a satin off-the-shoulder satin dress, I prefer medium-weight satin with enough body to hold the neckline, such as satin with a stable weave or satin backed with lining or interlining. Light satin works for draped styles but needs extra support, while heavy satin suits structured silhouettes but can look stiff if the skirt is too wide.
Satin options I use in real sampling
- Satin charmeuse: soft, glossy, great drape, high slip risk
- Duchess satin: heavier, structured, great for formal, higher cost
- Stretch satin: easier fit, but shine can highlight pulling if too tight
- Poly satin: stable supply, good price, quality range is wide
- Silk satin: premium feel, but care and cost are higher
Weight guide I use for decision-making
| Satin Weight Feel | Best Off-Shoulder Style | Main Benefit | Main Risk |
|---|---|---|---|
| Light and fluid | draped/cowl off-shoulder | romance + movement | slipping + wrinkles |
| Medium and balanced | fold-over band off-shoulder | best overall | needs clean finishing |
| Heavy and structured | corset/boned off-shoulder | strong hold | stiffness + bulk |
The backing choices that raise quality fast
- Full lining: improves comfort and reduces show-through
- Partial lining: saves cost, still helps bodice stability
- Interlining at neckline: keeps shape without adding heat
- Fusible at top edge: risky if heat leaves marks, so I test first
How do I engineer neckline support so it does not slip in wear?
This is the heart of the product. Off-shoulder sells because it looks relaxed, but the build must be strict. I treat this like bra engineering.
I stop slippage by combining three layers of control: a stable neckline edge, internal grip or anchoring, and balanced bodice patterning. In bulk, I prefer a structured inner layer, correct elastic tension, and optional clear grip tape, so the neckline stays in place without cutting into the skin.
The support system I choose from
- Elastic channel inside fold-over band
- good for simple dresses, but must be tuned to size grading
- Clear elastic stabilization at seam
- keeps stretch controlled, helps shape retention
- Silicone grip tape (light use)
- increases friction, but can irritate sensitive skin
- Inner bustier or boning
- best for strapless-like support, higher cost, higher satisfaction
- Hidden straps option
- removable straps for customer confidence, strong for mass market
Pattern balance checks I run in sampling
- Front-to-back neckline length balance
- Shoulder slope and arm movement allowance
- Bust apex position by size
- Side seam angle so bodice does not rotate
- Grain direction on neckline pieces to reduce stretch
A practical “no-slip” checklist I use
- neckline edge stabilized, not only folded
- elastic stretch % defined per size group
- inner layer anchored at side seam and CF/CB
- fit tested with movement: arms up, sit, walk, dance
How do I keep seams clean and avoid puckering on glossy satin?
If seams look wavy, the dress looks cheap. Satin reflects light, so small puckers become big visual defects. This is where my factory process matters.
I reduce puckering by controlling needle choice, stitch length, thread tension, and feed, then I stabilize critical seams with the right interfacing or stay tape. I also cut and sew in a way that respects satin grain, because off-shoulder necklines often include bias edges that stretch easily.
Sewing controls that actually work
- smaller needle and fine thread for fewer holes
- longer stitch length to reduce tension marks
- walking foot or controlled feed on slippery layers
- stay stitching on curved neckline edges
- pressing with low heat and a press cloth
The seam areas that need extra attention
- neckline seam where elastic sits
- side seam at bust level where tension is highest
- zipper seam where satin can ripple
- waist seam if bodice is fitted and skirt is full
Finishing choices and when I use them
- French seams: great on light satin, higher labor
- Clean binding: stable and neat, good for neckline
- Overlock only: fast, but can look low-end on glossy fabric
How do I control fit and grading for wholesale sizes without raising returns?
Off-shoulder fits are sensitive. One cm off at the neckline can change customer confidence. Satin also does not forgive tightness.
I control returns by grading the neckline and elastic tension in size groups, not with one fixed rule. I also build extra ease at bust and upper arm, and I add internal structure when the buyer’s size range includes larger cups. In bulk, I insist on fit tests on at least two body types.
The fit points that decide comfort
- upper bust circumference and elastic tension
- sleeve/arm band position so it does not cut the arm
- bust support method for cup range
- zipper placement and length for easy wear
A grading logic I often use
| Size Group | Neckline Control | Support Suggestion | Why |
|---|---|---|---|
| XS–S | lighter elastic | optional cups | keeps comfort, avoids digging |
| M–L | medium elastic | cups + light boning | better stability |
| XL–XXL | tuned elastic by size | boning + inner layer | prevents slip and improves shape |
My buyer-facing fit test routine
- sit + stand cycles to see rolling
- arms raised to check slip
- dance/walk to check rotation
- photo under flash to check shine and wrinkles
How do I prevent wrinkles, shine marks, and shipping damage in bulk?
Satin can leave the factory perfect and arrive ruined. If the buyer sells online, packaging is part of product quality.
I prevent damage by setting a pressing standard, using protective packing, and choosing a satin that recovers from wrinkles. I also avoid high heat during final press, and I pack with tissue and controlled folding to reduce hard creases on the bodice and neckline.
Packing methods I recommend by style
- draped off-shoulder: hang pack or loose fold with tissue
- structured bodice: strong bust shaping support, avoid crushing
- long maxi satin: roll fold with tissue to reduce crease lines
What I write into bulk packing spec
- no direct heat on face satin
- press cloth mandatory
- anti-friction polybags or tissue layers
- carton drop test standard for long-distance shipping
Satin One-Shoulder Dress
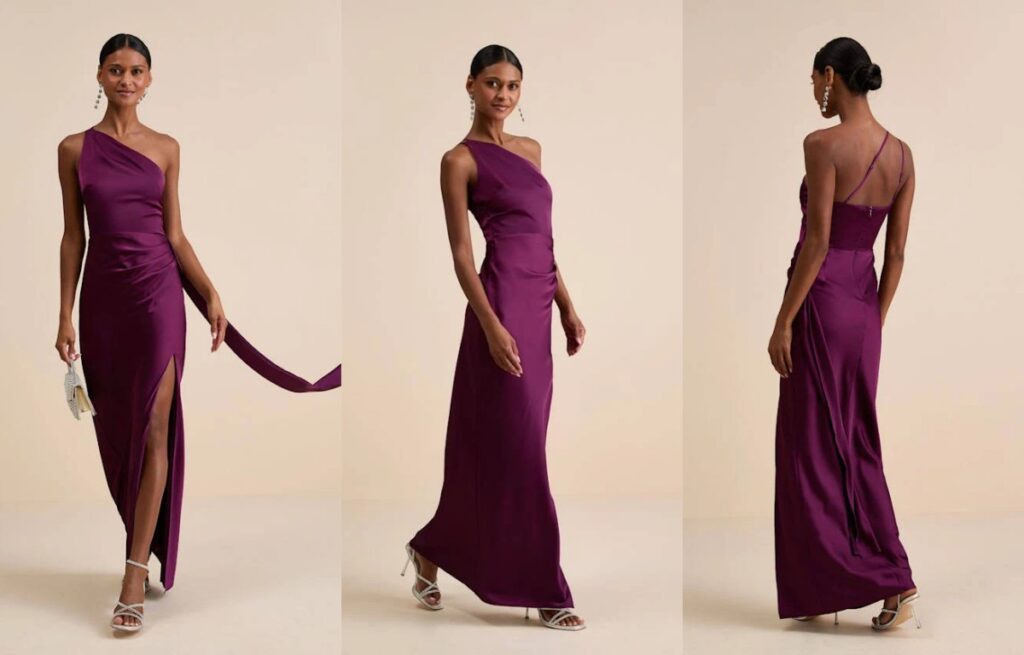
Satin sells fast, but it also creates fast complaints. One small fit issue becomes obvious, and one small sewing issue becomes “cheap.” If the one-shoulder neckline slips, the buyer loses reviews and reorders.
A satin one-shoulder dress looks premium when I control three things: the neckline structure, the fabric behavior, and the inside finishing. I also balance the asymmetry with correct pattern weight distribution, then I lock sewing specs and pressing limits so the shine stays clean in bulk production.
I still remember a holiday capsule where the front looked perfect, but the neckline rolled after two hours on a model. The satin was too soft, and the inner support was too weak. Now I treat one-shoulder satin like light tailoring, not like a simple slip dress.
What makes a satin one-shoulder dress different from other satin dress styles?
Many satin styles depend on drape. One-shoulder depends on control. The asym neckline creates tension points that a normal strap dress does not have.
A satin one-shoulder dress is different because the neckline has uneven load. One side holds the whole garment, and the other side tries to slide down. To fix that, I add internal support, stabilize stretch direction, and use construction that keeps the neckline flat without killing comfort.
The 3 risks I see most often
- Neckline slipping or gaping after movement
- Twisting side seams because weight is not balanced
- Shine marks and puckering that ruin the “luxury” look
Where the structure must live
- On the shoulder seam area
- Around the underarm curve on the open side
- Along the top edge and side seam that carries the load
How do I choose the right satin for a one-shoulder silhouette?
“Satin” is not one fabric. Buyers often use the word satin to mean shine, but factories must select a base that behaves well in sewing and wearing.
For a satin one-shoulder dress, I choose satin by weight, weave stability, and surface quality. I usually avoid ultra-light, overly slippery satin for fitted one-shoulder styles unless I add lining and inner support. For wholesale, I prefer satin that can pass snag and seam puckering control.
Satin options I use and how they behave
- Satin charmeuse: soft, high drape, high slip, higher risk
- Satin crepe-back: better stability, good for structured bodice
- Duchesse satin: heavier, very premium shape, higher cost
- Stretch satin: easier fit, but needs elastic control to avoid ripples
- Poly satin: stable supply, good consistency, must check hand feel
The fabric tests I run before bulk approval
- Seam slippage test at side seam and neckline edge
- Snag test on face side
- Pressing test for shine marks
- Color and shade consistency under warm and cool light
- Drape check on mannequin for twisting risk
A quick selection table
| Satin Type | Best Use | Pros | Main Risk |
|---|---|---|---|
| Charmeuse | draped midi/maxi | fluid, sexy | slips, shows every defect |
| Crepe-back | fitted bodice | stable, cleaner seams | can crease if packed tight |
| Duchesse | formal shapes | holds structure | cost + heat sensitivity |
| Stretch satin | body-skimming | easier fit | edge rippling |
| Poly satin | volume wholesale | consistent | can feel “plasticky” |
How do I engineer the neckline so it does not slip or roll?
This is where most samples fail. One-shoulder looks simple from the outside. Inside, it needs a plan.
I prevent slipping by stabilizing the top edge with proper interfacing, adding an internal stay or tape, and balancing the bodice with support on the open side. For satin, I also control seam allowance, stitch density, and pressing temperature so the neckline stays flat and does not wave.
The neckline support system I use
- Fusible interfacing: light but stable, applied in bias-friendly way
- Stay tape: on the top edge and key seams to stop stretching
- Inner facing or lining: holds edge shape and hides construction
- Silicone grip tape: optional for strapless-like security on the open side
How I decide between facing and full lining
- Facing: faster, lower cost, good for stable satins
- Full lining: best for slippery satins and for comfort on skin
- Partial lining (bodice only): common for wholesale, good balance
A practical neckline spec example I often write
- Top edge seam allowance: 1.0 cm
- Stay tape: applied before closing lining
- Underarm curve: reinforced with narrow binding or clean finish
- Stitch: consistent SPI, avoid long stitches that show puckering
How do I keep an asymmetrical satin dress from twisting in wear?
Twisting is not only a sewing problem. It is usually a pattern balance problem. Satin makes it worse because the fabric slides.
I reduce twisting by balancing the pattern pieces, controlling grain direction, and adding internal anchoring points. I also check the dress during walking and arm movement, because one-shoulder tension changes when the wearer lifts the arm on the supported side.
Pattern balance checks I do in sampling
- I compare left and right side seam lengths under tension
- I check grain line and bias usage on key panels
- I check hem hang on mannequin and on body
- I confirm the weight of any drape or sash does not pull one side down
Internal anchoring options
- Clear elastic at waist seam inside lining
- Small inner loop + bra strap holder on the shoulder side
- Hidden snap or hook at side seam to stabilize overlap (if wrapped detail)
A movement test list I use
- Model lifts both arms to 90 degrees
- Model walks 20 steps and turns twice
- Model sits and stands 5 times
- Model wears it for 30 minutes to see creep and slip
How do I handle zipper, closures, and fit for a satin one-shoulder dress?
Zippers and satin are a sensitive match. If the zipper waves, the whole dress looks low quality in photos.
I choose closures based on style: invisible zipper for clean lines, side zipper to protect the back look, and inner elastic or hook to reduce stress. For fit, I control bust shaping and waist stability, because satin does not forgive wrinkling when the fit is too tight or too loose.
Closure choices that work well
- Invisible zipper at side seam: clean back, less visual focus
- Invisible zipper at center back: easiest production, must control waviness
- Corset back (rare for wholesale fast styles): flexible fit, higher labor
Fit points that drive returns
- Bust gaping on the open side
- Underarm cutting too deep and exposing bra
- Waist seam too loose, causing bodice drop
- Hip tightness that causes diagonal pull lines
A quick fit tolerance idea for bulk control
| Measurement Point | Why it matters | Typical Risk |
|---|---|---|
| Top edge length | prevents gaping | stretching in sewing |
| Underarm height | comfort + coverage | too low for retail |
| Waist | holds bodice | slip-down problem |
| Hip | movement | diagonal wrinkles |
How do I avoid shine marks, puckering, and “cheap” finishing in bulk?
This is the part buyers rarely write clearly, and it becomes a factory guessing game. Satin punishes guessing.
I avoid shine marks by controlling pressing tools, using low heat and press cloth, and limiting rework. I avoid puckering by using correct needle size, fine thread tension control, and stabilizing seams that sit on bias. I also choose clean inside finishing so the dress feels expensive.
Sewing and pressing controls I require
- Needle choice based on satin type, no blunt needles
- Fine thread, consistent tension, test on real fabric first
- Press cloth on face side, no direct hot iron
- Minimal steam on some poly satins to avoid watermark
- Fully lined bodice, clean edge finish
- French seams for certain slip-style one-shoulders
- Narrow overlock only where it will not show through
- Clean zipper ends with zipper guard
Packaging rules that protect the shine
- Tissue at fold points
- Avoid tight folding on heavy satin
- Hang test after unpacking to check crease recovery
Satin Strapless Dress
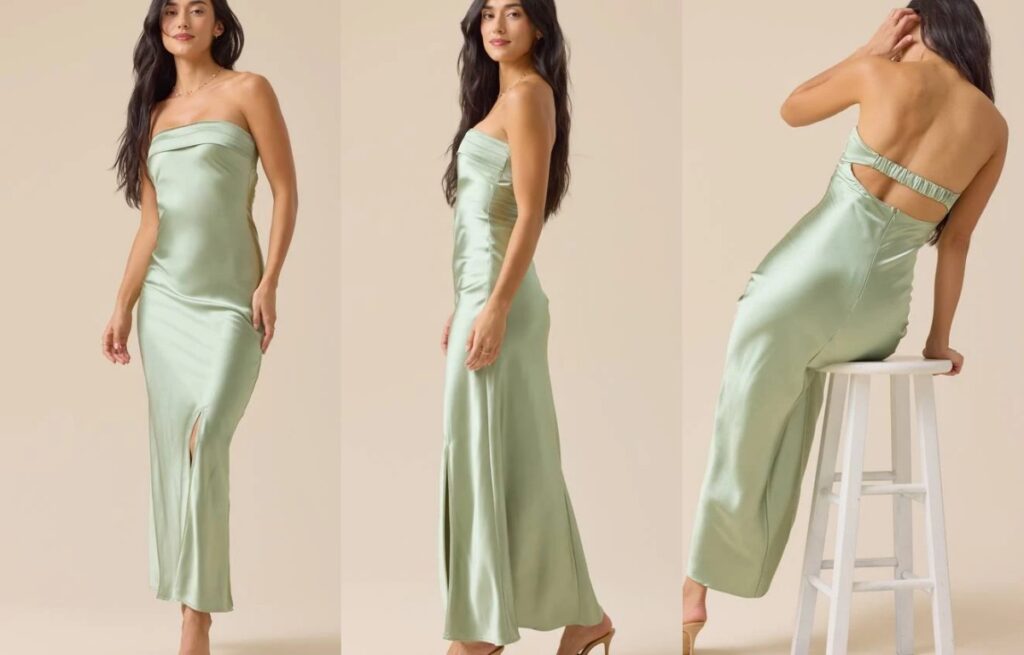
A satin strapless dress can look stunning in photos, but it can fail fast in real wear. The bodice slips, the top edge rolls, and the satin shows every mark. When that happens, customers blame the brand, not the pattern.
A satin strapless dress looks expensive and stays secure when I build a stable inner structure (boning + inner corset or strong lining), control the top edge with correct elastic or grip tape, and choose satin with the right weight and low snag risk. I also balance the skirt volume so the bodice does not carry all the stress.
I once saw a “perfect” strapless sample pass on a mannequin and fail on a real fit model in ten minutes. The fix was not adding tighter elastic. The fix was rebuilding the inside, then adjusting the bodice length and waist tension.
What are the 20+ popular types of satin dress, and where does the satin strapless dress fit?
Satin is not one dress type. Satin is a surface and a drape story. So I sort satin dresses by structure, neckline, and occasion first.
Common types of satin dress include satin slip, satin wrap, satin cowl-neck, satin bias-cut, satin mermaid, satin A-line, satin mini, satin midi, satin maxi, satin one-shoulder, satin halter, satin off-shoulder, satin strapless, satin corset dress, satin ball gown, satin sheath, satin empire-waist, satin shirt dress, satin puff-sleeve, satin high-slit, and satin backless styles. The satin strapless dress is the “structure-heavy” style in this family.
How I group satin dress styles for a wholesale line
- Minimal structure: slip, bias-cut, cowl-neck
- Medium structure: wrap, sheath, A-line, shirt dress
- High structure: strapless, corset, ball gown, mermaid
Why strapless satin is its own category
- It needs internal support, not just good sewing
- It needs stronger QC, because satin shows defects
- It is more sensitive to size grading and fit tolerance
What satin fabrics work best for a strapless dress, and what should I avoid?
This decision controls everything: fit, shine, marks, and how “premium” it reads. Many buyers say “use satin,” but there are several satins, and they behave very differently.
For a satin strapless dress, I usually choose medium-weight satin with enough body, like duchess satin or heavier satin-back crepe, because it supports structure and resists wrinkling. I avoid very light satins for strapless styles unless I add strong inner corsetry and lining, because they slip and show every seam.
Satin options I use in real production
- Duchess satin: structured, formal look, holds shape well
- Satin-back crepe: smoother on face, more stable, good for events
- Charmeuse satin: soft and shiny, but risky for strapless without inner build
- Polyester satin vs silk satin: poly is stable and scalable, silk is premium but sensitive
What I check before I approve fabric
- Surface snag resistance (rings, nails, metal bags)
- Crease and recovery after sitting
- Color depth and reflection under flash
- Seam puckering risk after pressing
A practical fabric choice table
| Satin Type | Best For Strapless? | Visual Look | Main Risk |
|---|---|---|---|
| Duchess satin | Yes | structured, luxe | can feel stiff in hot weather |
| Satin-back crepe | Yes | elegant, less “glare” | needs clean pressing control |
| Charmeuse | Sometimes | liquid shine | slippage + shows underwear lines |
| Lightweight satin | Not ideal | airy | top edge instability |
How do I build the inside of a satin strapless dress so it does not slip?
This is where professional quality shows. A strapless dress is basically a wearable engineering project. If I build the inside wrong, no styling can save it.
I keep a satin strapless dress secure by using an inner bodice system: firm lining, structured fusing where needed, vertical boning, and a waist stay that carries weight on the waist instead of the top edge. I also shape the bust with cups or seaming so the top edge does not rely on tightness alone.
The core support systems I use
- Boning channels: creates vertical stability and stops rolling
- Inner corset layer: holds the body, satin face stays smooth
- Waist stay: transfers load to the waist, reduces slipping
- Bust cups or built-in bra: improves shape and reduces gaping
What “waist stay” means in simple terms
A waist stay is an internal band that closes tightly at the waist. It anchors the garment. So the bodice does not need to choke the ribcage to stay up.
Common internal construction options
- Light support: power mesh + soft boning + elastic top edge
- Medium support: firm lining + spiral boning + waist stay
- Heavy support: full inner corset + steel boning + molded cups
Support level vs. customer expectation
| Customer Use | Support Level I suggest | Why |
|---|---|---|
| Dinner/party | Medium | comfort + stability |
| Wedding guest | Medium to heavy | long wear, lots of movement |
| Formal event | Heavy | photos + dancing + long hours |
How do I control the top edge and prevent gaping, rolling, and skin irritation?
This is the part customers feel. If the top edge is scratchy, they hate it. If it rolls, they keep pulling it up in every photo.
I prevent top-edge problems by shaping the neckline correctly, adding a stable facing, using silicone grip tape only where it helps, and controlling elastic tension so it supports without cutting skin. I also design for movement by testing sitting, raising arms, and dancing on the fit model.
Top edge solutions that work
- Shaped facing + understitching to keep the edge flat
- Silicone grip tape in short sections, not always full circumference
- Soft brushed elastic at the inside edge for comfort
- Hidden clear elastic only when the satin face can handle it
Where gaping starts
- Bust apex is too low for the target size range
- Side seam height is not balanced with front height
- Back neckline is too straight, so it “floats” off the body
Fit tests I run in sampling
- Raise arms, twist, and sit test
- “Deep breath” test for comfort
- Jump test for top edge stability
- Photo test under flash to catch shine and puckers
How do I pattern and grade a satin strapless dress for fewer returns?
Grading strapless is harder than grading a dress with straps. Straps can hide small mistakes. Strapless cannot.
I reduce returns by controlling bodice length, cup shaping, and back closure tension across sizes. I also limit tolerance on top edge, bust, and waist more tightly than on other satin styles. For wider size ranges, I recommend adding more internal support rather than only scaling the same structure.
Pattern elements that decide success
- Bodice height at center front and side seam
- Curve of top edge (too flat causes gaping)
- Bust shaping method (darts, seams, cups)
- Waist seam position and stability
Back closure options and what they change
- Invisible zipper: clean look, but less adjustability
- Lace-up back: more adjustability, higher perceived value, more labor
- Hook + zip combo: stronger hold, good for formal
A grading risk table I use
| Area | Why it fails | How I reduce risk |
|---|---|---|
| Bust | gaping or flattening | cup shaping + better grade rules |
| Top edge | rolling, slipping | facing + boning + grip control |
| Waist | riding down | waist stay + tighter tolerance |
| Back | zipper strain | add ease + stronger seam finish |
How do I keep satin looking clean in production, packing, and shipping?
Satin is honest. It shows press marks, needle marks, and even careless folding. If I ignore finishing, the dress looks cheap even if the pattern is perfect.
I keep satin clean by controlling needle choice, stitch tension, pressing temperature, and packing method. I also separate light colors, use protective tissue, and set clear rules for handling to prevent snags, shine marks, and crease lines before the customer opens the bag.
Production controls that matter
- Fine needle selection to reduce pulled threads
- Clean seam allowances to avoid ridges on face
- Press cloth use and lower heat to prevent shine
- Thread color matching for high-reflection fabric
Packing rules I give my team
- Fold on safe lines, avoid sharp creases on the bodice
- Use tissue between folds
- Hang pack for premium orders when possible
- Add snag protection around zippers and hooks
Common satin defects I catch early
- Puckering at zipper seam
- Shiny press marks on seams
- Snags near side seams from handling
- Shade variation between panels
Satin Mermaid Dress
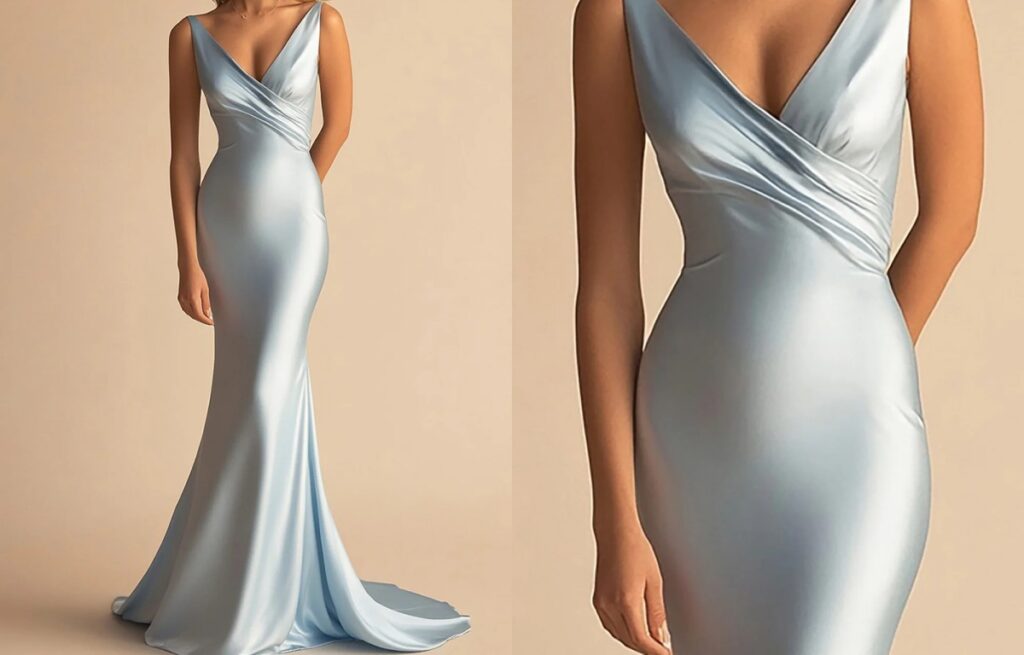
Many satin mermaid dresses look “luxury” online, but the bulk product tells the truth. The hips pull, the hem twists, and the shine highlights every seam puckering. Then the dress looks cheap, even if the design is correct.
A satin mermaid dress is a fitted satin gown that hugs the bodice and hips, then flares out around the knee or lower into a “tail” shape. I make it look premium by controlling fabric weight and stretch, adding stable internal structure, using the right seam and hem techniques, and approving fit on movement, not only on a standing model.
I still remember a buyer who wanted a dramatic mermaid shape at an aggressive price. The first sample looked fine on a mannequin. When the model walked, the skirt rode up and the flare collapsed. Since then, I always test mermaid dresses with real movement and real lighting.
What design elements define a satin mermaid dress compared with other satin dress types?
Satin has shine, and shine amplifies shape. That is why the mermaid silhouette feels so “event ready,” but it is also why it is unforgiving.
A satin mermaid dress is defined by a tight fit through the waist and hip, a controlled knee break point, and a flared hem that holds volume without twisting. Compared with a satin slip or satin A-line, the mermaid relies more on pattern shaping, internal support, and clean seam engineering to avoid puckering and drag lines.
The 3 silhouette checkpoints I lock before sampling
- Bodice stability: neckline stays flat, no rolling, no gaping
- Hip control: smooth fit with enough walking ease
- Break point: flare starts at a consistent level on the body
Mermaid vs other satin silhouettes
| Satin Style | Fit Through Hip | Skirt Volume | Main Risk |
|---|---|---|---|
| Satin slip | light skim | low | cling + static |
| Satin A-line | moderate | medium | dull drape if too heavy |
| Satin mermaid | tight | high at hem | puckering + mobility |
| Satin trumpet | fitted but softer | medium-high | break point too high/low |
| Satin ball gown | not fitted | very high | weight + cost |
What satin fabrics work best for a mermaid dress, and what specs matter most?
This is where buyers often get stuck. “Satin” is not one fabric. It is a weave look. The fiber and finish change everything.
For a satin mermaid dress, I prefer heavier satin options with controlled stretch, like satin-back crepe, duchess satin, or stretch satin with stable recovery. I focus on GSM, stretch direction, weave density, and surface quality, because mermaid patterns need smooth shaping without shine highlighting every needle mark.
Fabric options I use most for mermaid silhouettes
- Duchess satin: structured shine, holds flare well, heavier feel
- Satin-back crepe: matte back, better body, less “cheap shine”
- Stretch satin: comfort fit, but needs strong recovery and careful seams
- Charmeuse: beautiful drape, but too soft for many mermaid designs
The key specs I confirm before I quote
- Weight (GSM): affects drape and how the flare stands
- Stretch % and direction: affects hip fit and walking ease
- Yarn quality: affects snags and uneven shine
- Dye consistency: affects shade shifts under flash photos
A practical fabric matching table
| Fabric Type | Best Mermaid Use | Pros | Cons |
|---|---|---|---|
| Duchess satin | strapless, structured | holds shape, premium look | heavier, cost higher |
| Satin-back crepe | clean modern mermaid | smooth body, less glare | needs good pressing control |
| Stretch satin | fitted + comfort | easier fit, less return risk | seam puckering risk |
| Charmeuse | soft mermaid with drape | elegant flow | shows every line, weak flare |
How do I engineer fit and movement so a satin mermaid dress does not pull or twist?
This is the real professional part. Mermaid dresses fail when the pattern is drawn for photos, not for walking.
I engineer fit by building hip and knee ease into the pattern, setting the break point based on the size range, and using seam placement that “holds” the body. I also add a walking slit or godet options when the target customer needs mobility, because a perfect standing fit can still fail on steps.
The movement test I always run
- Walk 10 steps forward and back
- Sit down and stand up
- Turn 360 degrees
- Climb 3 stairs
- Lift arms if it is strapless or off-shoulder
Pattern tools I use to reduce pulling
- Princess seams: better shaping than side seams alone
- Multiple skirt panels: control flare and grain direction
- Knee darts or shaped panels: keep break point stable
- Godets: add flare without forcing the hip to stretch
Where mermaid dresses usually go wrong
- Break point too high: looks like trumpet, loses drama
- Break point too low: walking becomes difficult
- Wrong grain direction: skirt twists and shine looks patchy
- No hip ease: drag lines appear from crotch area
A fit tolerance map I use with buyers
| Area | What I aim for | Typical Complaint |
|---|---|---|
| Bust | stable, no gaping | neckline rolls |
| Waist | smooth, no dip | waist pulls up |
| Hip | snug but not tight | horizontal drag lines |
| Knee | controlled ease | cannot walk |
| Hem flare | balanced volume | tail collapses |
What construction methods make a satin mermaid dress look expensive in photos and in real life?
Satin is honest. Bad construction becomes “shiny bad.” Good construction becomes “clean luxury.”
To make a satin mermaid dress look expensive, I use clean seam finishes, controlled pressing, stable lining or partial lining, and internal support like boning or waist stays when needed. I also choose needle and thread specs that reduce needle marks, because satin can show every hole and every seam wave.
Seam and finishing choices that matter
- French seams or clean overlock + top clean finish for certain areas
- Narrow seam allowances where bulk causes ridges
- Understitching at neckline to prevent rolling
- Invisible zipper with proper tape support to avoid ripples
- Horsehair braid at hem: gives a clean flare and shape memory
- Bias facing: clean, less bulky than wide turn-up
- Rolled hem: only for softer mermaids, not structured ones
Internal structure options (and when I use them)
- Boning: strapless or heavy bodice shaping
- Waist stay: prevents bodice from sliding down
- Built-in cups: improves fit consistency for e-commerce
- Full lining vs partial lining: depends on friction and transparency
| Feature | Entry Level | Premium Level | Why it matters |
|---|---|---|---|
| Hem | simple turn-up | horsehair + facing | flare shape + photos |
| Zipper | standard invisible | invisible + tape support | no ripples |
| Bodice | single layer | lining + boning | stability |
| Seams | basic overlock | cleaner finish zones | less ridge lines |
How do I control shine, color, and defect risk for satin mermaid dresses in bulk production?
Most “quality issues” on satin are visual. Customers judge it under flash, under warm indoor lights, and in motion.
I control risk by approving fabric under multiple lights, locking shade standards, and using strict QC for snags, shading, seam puckering, and press marks. I also define packing methods early, because satin can crease, shine-burn, or show fold lines if cartons are handled poorly.
The lighting check I use
- Daylight: true color perception
- Warm indoor: event lighting reality
- Flash/photo light: e-commerce reality
The defects I inspect more on satin than other fabrics
- Shading and “water marks”
- Snag lines and pulled yarn
- Needle holes and seam impressions
- Puckering at curved seams
- Gloss variation between panels
Bulk QC steps I require
- First-roll inspection for shading and defects
- Inline checks on zipper area and princess seams
- Random press test to confirm no shine-burn
- AQL final inspection with snag tolerance rules
Packing rules that protect satin
- Tissue layers between folds
- Low-tension folding to reduce crease lines
- Hanger pack for premium programs when possible
- Separate dark and light shades to avoid transfer
How should I position a satin mermaid dress in a 20+ satin dress style collection?
I do not treat mermaid as a “basic.” It is a hero style. It anchors the eventwear story and lifts the average order value.
In a 20+ satin dress collection, I position the satin mermaid dress as the structured, high-impact option. I pair it with easier fits like slip, wrap, and A-line satin dresses for volume sales, then I use colors like black, wine, navy, and champagne to cover both classic and seasonal demand.
A simple assortment split I use for buyers
- Volume sellers: satin slip, satin wrap, satin A-line
- Trend drivers: cowl neck slip, one-shoulder satin, cut-out satin
- Hero margin: satin mermaid, satin corset gown, satin ball gown
Color strategy that usually works in wholesale
- Core: black, navy, champagne
- Seasonal: wine, emerald, ice blue, soft pink
- Print: only if the satin base holds print cleanly
Satin Empire Waist Dress
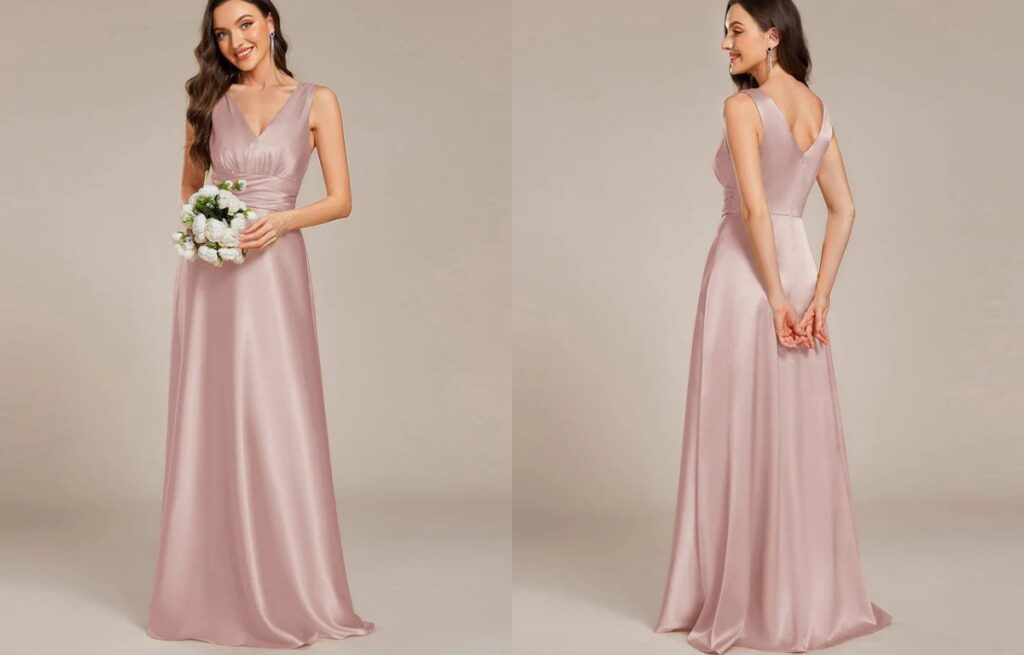
Satin looks expensive, but it also exposes every mistake. If the fit is off or the shine is wrong, customers notice in one second. Then the dress sits in stock, and the return rate climbs.
A satin empire waist dress is a satin dress with a raised waist seam placed under the bust, and an A-line or flowing skirt that falls from that seam. I choose the right style by matching satin type, lining, and bust support to the occasion, climate, and target body shapes, then I confirm drape and shade with a real-fabric sample.
I once shipped a “simple” satin empire style that looked perfect on the mannequin. On real bodies, the underbust seam sat too high for some sizes, and the shine made every wrinkle look worse. Now I treat satin and empire waist as a technical combo, not just a cute design.
What are the 20+ most popular types of satin dress used in wholesale collections?
When buyers ask me for “satin dresses,” they usually mean 3 different things: a glossy party look, a soft romantic look, or a clean bridesmaid look. So I map the collection by silhouette and support needs.
Common satin dress types include satin slip, satin wrap, satin empire waist, satin bias-cut, satin cowl neck, satin halter, satin strapless, satin one-shoulder, satin off-shoulder, satin fit-and-flare, satin A-line, satin midi, satin maxi, satin mini, satin shirt dress, satin corset dress, satin mermaid, satin column, satin babydoll, satin tiered, satin ruched, satin pleated, satin blazer dress, and satin knit satin bodycon.
How I group these styles for faster buying decisions
- Minimal + sleek: slip, bias-cut, column, cowl neck
- Romantic + soft: empire waist, wrap, off-shoulder, tiered
- Structured + event: corset, strapless, mermaid, blazer dress
- Day-to-night: shirt dress, ruched, pleated, midi A-line
A quick assortment table I use
| Group | Best Use | Best Length | Risk Level |
|---|---|---|---|
| Minimal | everyday glam | midi/maxi | Medium (wrinkles) |
| Romantic | weddings, dates | midi/maxi | Medium (bust fit) |
| Structured | parties, formal | mini/midi | High (support) |
| Day-to-night | office to dinner | midi | Low-Med (shine control) |
What makes a satin empire waist dress flattering, and who does it suit best?
This style looks easy, but the flattering part is very specific. The seam position, the neckline, and the skirt volume must work together.
A satin empire waist dress flatters by defining the underbust, lengthening the legs, and letting the skirt skim over the midsection and hips. It suits many body types, especially when the bust has proper shaping and the skirt has controlled volume, not random fullness that adds bulk.
The “empire” zone I target in pattern work
- Underbust seam: it must sit stable and level on the body
- Bust shaping: darts or princess lines should point to the apex
- Strap and neckline balance: controls lift and comfort
- Skirt attachment: controls how satin drapes from the seam
Who it suits, in real buyer terms
- Customers who want a softer waist definition than a tight waistband
- Maternity-friendly and post-meal comfort styling
- Petite customers who want longer leg proportion
- Buyers building bridesmaid or occasion capsules
How do I choose the right satin fabric for an empire waist dress?
This is the most important decision. Satin is a weave structure, not one single fabric. Two “satins” can behave like different materials.
For a satin empire waist dress, I pick satin based on weight, drape, and surface shine. I use heavier satin or duchess satin when I need structure and less cling, and I use softer satin like charmeuse when I want flow. Then I confirm color, snag risk, and wrinkle recovery before bulk.
Common satin bases I use and how they behave
- Satin charmeuse: very fluid, shiny face, can cling and show lines
- Duchess satin: heavier, holds shape, looks formal and clean
- Stretch satin: comfort fit, but can create shine stress marks at seams
- Satin crepe-back: more stable, less cling, good for bridesmaid programs
- Polyester satin vs silk satin: poly is stable and scalable, silk is premium but sensitive
Fabric weight and why it matters for empire waist
- Light satin: beautiful drape, but needs lining to avoid see-through and seam show
- Midweight satin: best commercial balance for boutique wholesale
- Heavy satin: best for structured bodices and strapless options
A practical fabric selection table
| Satin Type | Best Empire Waist Use | Best Season | Main Risk |
|---|---|---|---|
| Charmeuse | soft romantic maxi | spring/summer | cling + wrinkles |
| Crepe-back satin | bridesmaid midi | all year | shade control |
| Duchess satin | structured bodice | fall/holiday | stiffness if skirt too full |
| Stretch satin | fitted bust + comfort | all year | shine stress marks |
How do I build bust support and lining for a satin empire waist dress?
If the bust is not stable, the empire seam slides. If the seam slides, the whole dress looks cheap. I focus on hidden structure.
I build bust support with the right neckline, stable straps, and internal layers like lining, light fusing, and sometimes boning. For satin, I almost always add lining or at least a partial lining, because it improves drape, reduces cling, and protects the outer satin from stress at seams.
Support options I choose based on price and use
- Budget-friendly: full lining + elastic underbust stay
- Mid-tier: lining + built-in cups + light fusing at bust
- Premium: lining + boning at side seams + waist stay tape
Where I add structure without changing the look
- Along neckline edge to stop rolling
- At underbust seam to stop stretching
- At side seams to stop twisting
- At zipper area to prevent rippling
Lining choices that work with satin
- Lightweight poly lining: smooth, scalable, common for wholesale
- Stretch lining: helps comfort, but can pull the satin if too tight
- Partial lining: saves cost, but needs clean finishing at waist seam
What are the most common production and QC risks for satin empire waist dresses?
Satin is unforgiving. Empire waist is placement-sensitive. When I combine them, QC must be stricter than normal.
The biggest risks are puckering seams, uneven shine, wrinkles that do not recover, underbust seam distortion, and shade variation between fabric rolls. I reduce these risks with correct needle/thread setup, controlled pressing temperature, pre-production fitting across sizes, and roll-to-roll shade checks.
The technical issues I watch during sampling
- Seam puckering near bust darts or princess lines
- Needle holes showing on light colors
- Zipper waves on the side seam or back seam
- Skirt “drag lines” from wrong grain direction
- Hem waving from poor tension control
My satin handling rules in factory
- I control pressing heat and use press cloths
- I reduce pin marks by using clips where possible
- I test stitch length because short stitches can pucker satin
- I keep cutting tables clean to avoid snag pulls
- Check shade under daylight and warm light
- Hang test for 24 hours to see bias growth
- Movement test: sit, walk, raise arms
- Steam test for shine marks and seam imprint
- Measure underbust seam levelness on 3 sizes
How do I position satin empire waist dresses in a wholesale drop for North America, Australia, and the UK?
This is where a “good product” becomes a “selling product.” Satin is seasonal, but events happen all year. So I build it around calendars.
I position satin empire waist dresses as romantic occasion pieces for spring weddings, holiday parties, and year-round date-night edits. For Australia, I push lighter satin and midi lengths earlier. For the UK and Western Europe, I add sleeves or layering-friendly straps. For North America, I keep both mini party options and maxi bridesmaid options.
A practical launch map I use
- Spring: pastel charmeuse empire maxi, floral satin empire midi
- Summer: light satin slip-empire hybrids, halter empire midi
- Fall: crepe-back satin empire with sleeves, deeper colors
- Holiday: duchess satin structured empire, jewel tones
How I reduce slow stock risk
- I keep the same base pattern, then change colors
- I offer two neckline options on one block
- I limit hero colors and add safe carryover shades
- I lock lead time early because satin supply can move fast
Satin Ruched Dress
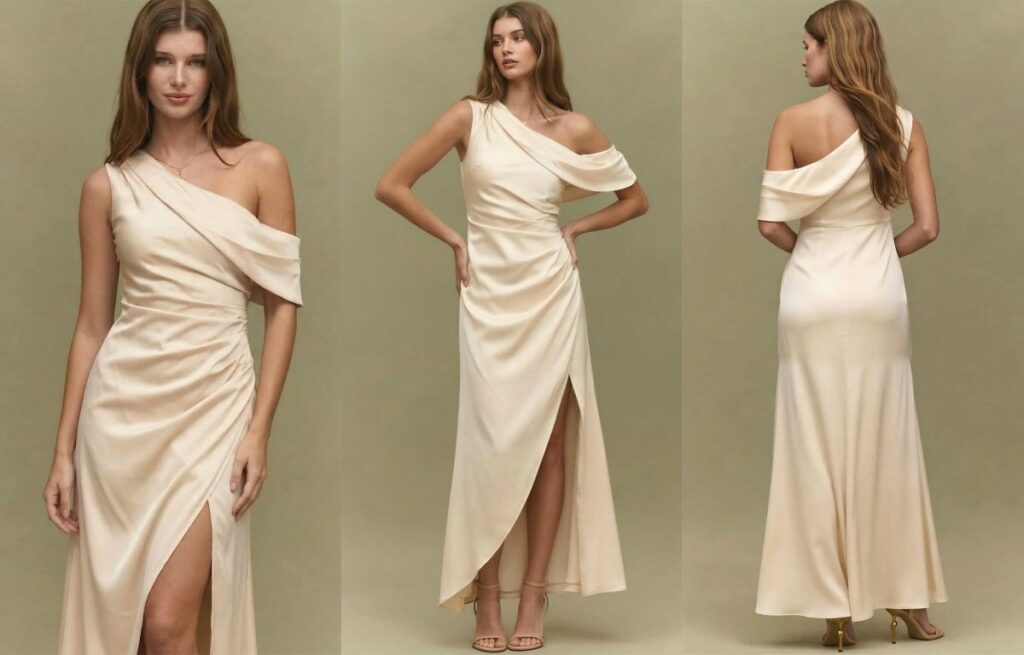
What makes a satin ruched dress one of the most reliable “event sellers” in a satin dress collection?
Many satin styles look expensive on the hanger, but they fail on the body. Satin shows every wrinkle, every seam wave, and every fit mistake. When that happens, my buyer gets bad reviews fast.
A satin ruched dress sells well because ruching controls shine, hides minor fit issues, and creates a body-skimming shape without heavy structure. I make it work in bulk by choosing the right satin base, setting stable ruching ratios, and controlling stretch, lining, and seam methods so the dress stays smooth under flash photos.
I once had a buyer rush a ruched satin mini for a holiday drop. The fabric was shiny, but the elastic tunnels were uneven. The ruching looked “lumpy” on models. Since then, I treat ruching like engineered shaping, not decoration.
What are the main types of satin ruched dress buyers ask for?
When I plan a satin assortment, I treat ruched pieces as the “confidence styles.” They convert well because they look sexy but still feel forgiving.
The main satin ruched dress types are side-ruched bodycon, all-over ruched mesh-overlay satin, ruched bust with smooth skirt, ruched skirt with clean bodice, ruched wrap satin, and ruched off-shoulder styles. I pick the type based on the buyer’s target body fit, return history, and photo style.
The most requested ruched directions in wholesale
- Side seam ruching (most commercial)
- Center front ruching (strong shaping, higher risk)
- Center back ruching (helps “lift” look)
- Bust cup ruching (romantic, better support story)
- Skirt-only ruching (safer for grading)
A fast selection table I use
| Type | Best Length | Best Occasion | Main Risk |
|---|---|---|---|
| Side-ruched | mini/midi | party, date | seam twist if not stabilized |
| Bust-ruched | midi | cocktail | cup fit inconsistency |
| Skirt-ruched | midi/maxi | wedding guest | uneven hem if ratio is off |
| Wrap + ruched | midi | events | gaping + slip at waist |
| Off-shoulder ruched | mini | holiday | neckline slip |
How do I choose the right satin base for ruching so it does not look cheap?
Satin is a family, not one fabric. The wrong satin will fight the ruching. It will either look stiff and bulky, or it will collapse and show every stitch.
For a satin ruched dress, I prefer satin with controlled drape and slight stretch, like stretch satin, satin back crepe, or charmeuse with elastane. I avoid very stiff satin for heavy ruching, and I avoid ultra-thin satin without lining because the ruching will show elastic lines and seam shadows.
Satin options that behave well with ruching
- Stretch satin: good recovery, better body fit, safer for returns
- Satin back crepe: matte back helps sewing control, face still shines
- Charmeuse with spandex: soft luxury look, needs careful needle choice
- Duchess satin (limited use): only for light ruching or structured bodices
Fabric properties I check before sampling
- Surface shine under flash and strong light
- Yarn slippage risk at seams
- Stretch % in weft and warp
- Pilling and snag sensitivity
- Heat sensitivity for pressing
A quick fabric choice table
| Satin Type | Ruching Compatibility | Best Use | Notes |
|---|---|---|---|
| Stretch satin | High | side-ruched minis | stable recovery |
| Satin back crepe | High | midi with shaping | easier sewing |
| Charmeuse (stretch) | Medium | luxury drape looks | needs lining often |
| Duchess satin | Low/Medium | formal, structured | bulky when ruched |
How do I engineer ruching so it looks smooth and consistent across sizes?
This is the part most people skip. Ruching is not “just gather it.” It is a ratio. It is also tension control. If I do not engineer it, bulk production will look uneven.
I engineer ruching by setting a clear gather ratio, defining the anchoring points, and choosing a method (elastic channel, drawstring, or ruched overlay) that matches the fabric’s stretch. I also grade ruching so larger sizes keep the same visual density, instead of looking over-gathered or under-gathered.
The 3 most used ruching constructions
- Elastic channel ruching
- Most stable for bulk
- Risk: elastic twist, tunnel waviness
- Drawstring ruching
- Adjustable look, strong styling
- Risk: inconsistent pulling in production
- Overlay ruching (mesh or lining layer)
- Premium look, hides base satin issues
- Risk: extra labor and alignment control
Gather ratio is the “secret number”
I usually define it as:
- Cut length ÷ finished length = gather ratio
Common working ranges I see in factory sampling:
- Light ruching: 1.3–1.6x
- Medium ruching: 1.7–2.2x
- Heavy ruching: 2.3–3.0x
Where I set anchor points
- Top and bottom of ruched panel
- Waist and high hip
- Side seam notch positions
- Zipper end points (to avoid bubbling)
How I grade ruching without ruining the look
- I keep the visual density consistent, not the raw ratio
- I increase panel width slightly for larger sizes
- I adjust elastic length by size, not one elastic for all
- I test on at least two body forms, not only XS
A practical grading table concept
| Size Group | Visual Goal | What I change | What I keep |
|---|---|---|---|
| XS–S | sharp shaping | less panel width | same anchor points |
| M–L | balanced shaping | moderate elastic change | same ruching zones |
| XL–XXL | smooth shaping | more panel width + tuned elastic | same seam direction |
How do I prevent common satin ruching problems like twisting, puckering, and “elastic shadow”?
Satin is unforgiving. If the stitch tension is wrong, the face will pucker. If the elastic is too strong, the dress will look cheap. If the seam is not stabilized, the ruching twists on the body.
I prevent ruching problems by stabilizing key seams, using correct needles and thread, controlling stitch tension, and adding lining or an overlay when the satin is thin. I also specify pressing limits and packing rules to avoid shine marks and crease lines.
The top bulk issues I see
- Twisted ruched panel at side seam
- Wavy elastic tunnel lines
- Puckering around zipper and hip curve
- “Elastic shadow” showing through on light colors
- Snags from wrong needle point
Sewing and pattern controls I use
- I add stay tape or clear elastic on stress seams
- I use narrower seam allowances in ruched areas when needed
- I avoid long straight seams on bias without stabilization
- I choose invisible zipper + clean facing to reduce bulk
Needle and stitch choices that usually work better
- Microtex needle for woven satin face cleanliness
- Slightly shorter stitch length on curves
- Differential feed control if sewing knits/overlays
Lining choices that actually help
- Stretch lining for bodycon ruched satin
- Lightweight tricot lining for smooth slip feel
- Mesh overlay for premium “filtered” surface
How do I choose length, neckline, and support so the satin ruched dress fits more customers?
If the dress looks sexy but feels unsafe, returns will rise. Support is not only for strapless. Satin needs hidden engineering.
I choose neckline and support by matching the ruched zones to the body’s movement points. For minis, I keep support at bust and side seams. For midis and maxis, I add waist stability and sometimes hidden shaping. I also use straps, grip elastic, or light boning when the neckline is open.
Support options I use often
- Adjustable straps with bar tacks
- Bust lining with soft cups
- Clear elastic at top edge for off-shoulder
- Light boning at side seam for strapless
- Hidden waist stay for heavier skirts
A quick style + support table
| Neckline | Best Ruched Zone | Support Must-Have | Main Risk |
|---|---|---|---|
| Sweetheart | bust + side | cups + lining | cup grading |
| Off-shoulder | side + bust | grip elastic | slipping |
| Halter | center front | neck strength | pulling |
| Strapless | all-over | boning + waist stay | roll-down |
How do I price and plan MOQ for satin ruched dresses without losing margin?
Ruching adds labor and sometimes extra fabric. If I do not plan it, the cost creeps up and the buyer still expects a “basic satin dress” price.
I price satin ruched dresses by separating fabric consumption, labor minutes, and risk allowance. Then I set MOQ based on color count and the printing/dye lot constraints of the satin. In most cases, I suggest fewer colors with deeper quantities, because shade consistency matters more than color variety in satin.
Cost drivers I explain clearly to buyers
- Extra fabric from ruching ratios
- Additional stitching steps for tunnels/overlays
- Lining or mesh overlay requirements
- Higher QC due to shine and puckering risk
- Packaging needs to prevent creasing
A clean bulk plan I use
- 2–3 core colors (black, champagne, red)
- 1–2 trend colors for the season
- One consistent satin base across the drop
- One approved fit block reused for multiple necklines
Satin Tiered Dress
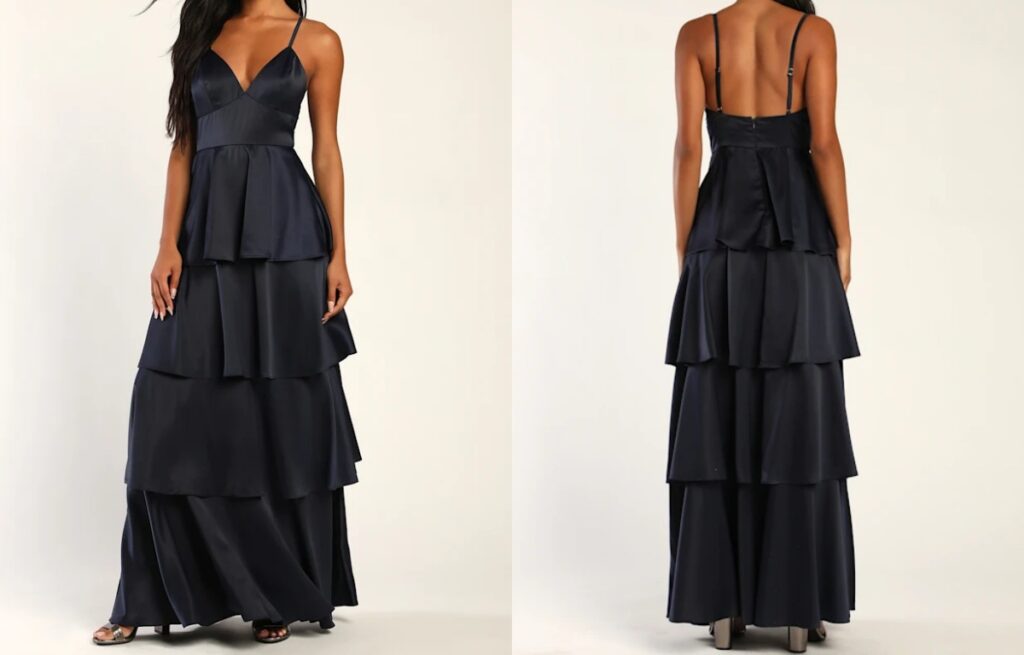
Satin looks expensive, but it also shows every problem. Tier seams can add volume fast, and bad drape can make the dress look puffy. If the tiers sit in the wrong place, the style turns into dead stock.
A satin tiered dress is a satin dress built with two or more horizontal tier seams that add controlled volume while keeping a clean, flowing shine. I make it look premium by using the right satin weight, placing tiers to support body proportions, controlling seam bulk with correct finishing, and approving drape and shine under real lighting before bulk.
I once produced a tiered satin style that looked perfect on a flat lay. On-body it looked heavy, because the tiers started too high and the seam allowance was thick. Now I treat tier placement and seam engineering as the core of the product, not decoration.
What are 20+ popular types of satin dress, and where does the satin tiered dress fit?
Satin is not one style. It is a fabric family that can sit in many silhouettes. If I only sell “a satin dress,” I lose the chance to cover different occasions and price points.
Common satin dress styles include slip satin, bias-cut satin, satin wrap, satin cowl neck, satin halter, satin one-shoulder, satin strapless, satin corset dress, satin bodycon, satin A-line, satin fit-and-flare, satin shirt dress, satin mini, satin midi, satin maxi, satin mermaid, satin trumpet, satin ball gown, satin empire waist, satin drop waist, satin tiered dress, and satin ruffle dress. The satin tiered dress sits between casual-boho and eventwear, depending on tier count and shine level.
A quick map I use for satin tiered positioning
- Casual tiered satin: softer shine, looser fit, fewer tiers, easier returns control
- Event tiered satin: structured bodice, higher shine, more tiers, higher QC needs
What satin fabric options work best for a tiered construction?
This is the first technical decision. Satin can be slippery, it can snag, and it can crease. Tier seams make those risks bigger.
For a satin tiered dress, I prefer satin with enough body to hold tier shape but not so stiff that it balloons. I often use polyester satin for stability and supply, viscose satin for softer drape, and heavier charmeuse only when the tier design is minimal and the lining plan is strong.
Satin types I use and why
- Charmeuse satin: very fluid, high shine, shows seam marks easily
- Duchess satin: structured, lower drape, can look bulky with many tiers
- Crepe-back satin: better grip, easier sewing, good for controlled tiers
- Washed satin: softer shine, hides wrinkles better, strong for casual tiers
Fabric specs I check before sampling
- Weight (GSM) and thickness feel
- Shine level under daylight and flash
- Snag and pull resistance
- Color consistency across rolls
- Crease recovery after packing
A practical fabric selection table
| Satin Type | Best Tier Look | Best Tier Count | Main Risk |
|---|---|---|---|
| Charmeuse | flowing, romantic | 2–3 | seam marks + snag |
| Crepe-back satin | clean, controlled | 2–4 | shine variation |
| Duchess satin | structured, formal | 1–2 | bulk + stiffness |
| Washed satin | casual, soft | 2–4 | shade drift |
How do I place tiers on satin so the dress flatters instead of adding width?
Tier placement decides everything. Satin reflects light, so extra volume looks bigger than it is. I plan tiers like I plan a merch layout, with one main message and no noise.
I place tiers based on proportion rules: I keep the first tier seam below the fullest bust area, I avoid putting a tier seam at the widest hip point, and I adjust tier depth by dress length. For most satin midis, I use 2–3 tiers with longer lower tiers, so the shine reads smooth, not choppy.
The tier placement rules I use most
- First seam: usually below waist, not on the waist
- Second seam: usually mid-thigh for midi, not at the widest hip
- Lower tier: longer and calmer, to keep a long vertical line
Tier depth and volume control
- Shallow tiers: look busy in satin and show seam lines
- Deep tiers: look cleaner and more premium
- Too much gather: makes “balloon” volume and kills the luxury feel
A tier strategy table by length
| Dress Length | Recommended Tiers | Tier Depth Feel | Why it works in satin |
|---|---|---|---|
| Mini | 1–2 | medium | reduces bulk near hip |
| Midi | 2–3 | deeper lower tier | smoother shine flow |
| Maxi | 2–4 | long lower tiers | keeps vertical elegance |
How do I engineer seams, lining, and finishing to reduce bulk and keep satin smooth?
This is where many factories lose the premium look. Satin shows seam ridges. It also shows puckering. Tier seams make both problems more likely.
To keep a satin tiered dress smooth, I reduce bulk at every seam. I control seam allowance width, I choose finishes that do not create ridges, and I plan lining or partial lining to stop show-through and improve drape. I also set pressing rules, because wrong heat can add shine marks that look like defects.
Seam engineering choices that matter
- Seam allowance: consistent and trimmed, not left thick at tier joins
- Stitch tension: balanced to avoid puckering on slippery satin
- Grain control: I keep panels stable so tiers do not twist
Finishing options I use, and when
- French seams: clean inside, good for light satin, adds some bulk if overused
- Narrow overlock + topstitch: fast, lower bulk, needs clean machine setup
- Bias binding at seam: premium interior, but adds labor cost
- Rolled hem: best for flowing tiers, but needs skilled operator
Lining strategy for satin tiers
- Full lining: best for light colors and eventwear, improves hang
- Skirt-only lining: controls flare and avoids cling at bodice
- No lining: only for heavier satin with controlled sheerness
| Satin Weight Feel | Recommended Finish | Lining Suggestion | Risk |
|---|---|---|---|
| Light | French seam or narrow finish | skirt lining | seam ridges |
| Medium | overlock + topstitch | optional | puckering |
| Heavy | clean seam + trimming | partial lining | bulk at tiers |
How do I handle fit, sizing, and wear comfort in satin tiered dresses?
Tiered dresses often look “easy fit,” but satin can cling and slide. If the bodice is loose, the whole dress shifts. If it is tight, satin wrinkles and pulls.
I build comfort by stabilizing the bodice and letting the skirt carry the volume. I use light fusing where needed, add hidden support like elastic at the back waist, and choose closures that do not distort satin. For sizing, I focus on bust and upper waist accuracy, because tier volume can hide lower fit issues but cannot hide a bad bodice.
Bodice options that work well with tiers
- Smocked back: flexible fit, strong for boutique sizing ranges
- Bias or shaped bust: more premium, needs better pattern control
- Adjustable straps: reduces return risk
Closures and hardware choices
- Invisible zipper: clean look, must be installed with correct stabilizer
- Side zipper: reduces back seam interruption for prints and shine
- Button back: pretty, but higher labor and more failure points
Comfort tests I run in sampling
- Sit and stand test for skirt climb
- Arm raise test for bodice shift
- Flash photo test for shine lines and wrinkles
- Snag test with rings and handbags
What are the biggest QC risks in bulk production for satin tiered dresses?
Satin defects feel louder than defects on matte fabric. One small puckered seam can destroy the “premium” impression.
The biggest QC risks are seam puckering, tier mismatch, twisting panels, snag marks, shade variation, and shine marks from pressing. I reduce them by locking fabric roll control, setting strict sewing tension standards, using correct pressing temperature, and checking tier alignment on the first production run before full output.
QC points I require on the line
- Tier seam straightness and gather evenness
- Panel grain and twist check on hanger
- Shade grouping by roll lot
- Puckering inspection under angled light
- Pressing and packing method control
Packing rules that protect satin
- Tissue between folds to reduce crease lines
- No heavy compression in cartons
- Hang packing for premium programs when possible
Satin Lace-Trim Dress
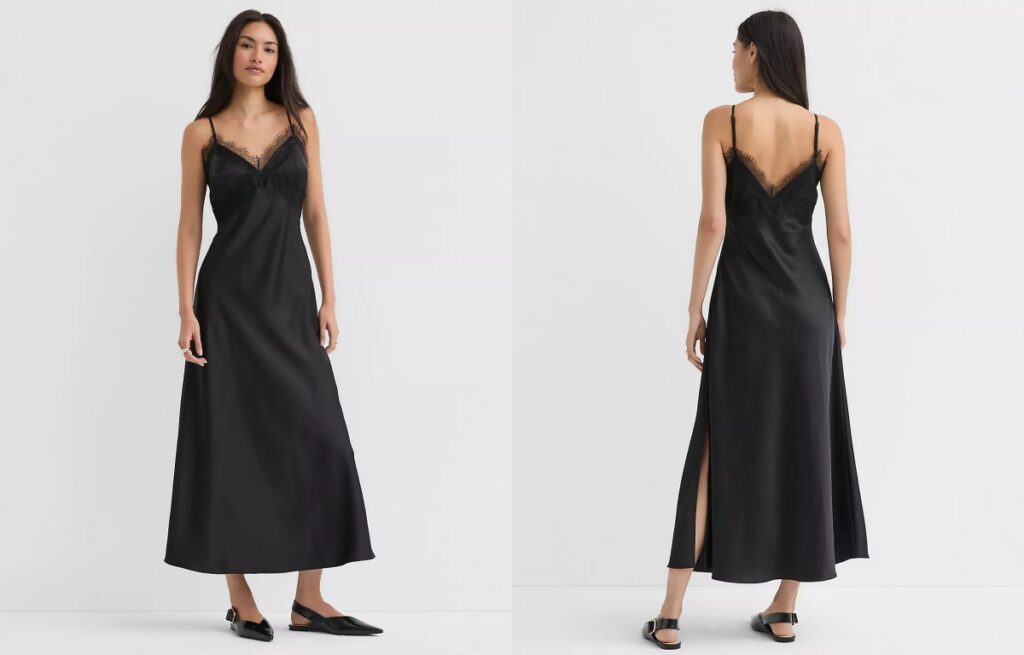
Satin looks expensive, but it also shows every mistake. Lace trim adds even more risk, because small issues in placement and tension become obvious. If I miss these details, the dress can look cheap, fit can shift, and returns can climb.
A satin lace-trim dress works best when I pair the right satin base (weight, weave, and stretch) with lace that matches the garment’s curve and function. I also control seam construction, trim tension, and pressing temperature, then I approve lace placement and shade on a pre-production sample before bulk.
I once shipped an early lace-trim slip style that looked perfect on the table. On body, the neckline waved and the lace flipped out after steaming. Since then, I treat lace-trim satin as a technical product, not a simple “pretty” dress.
What is a satin lace-trim dress, and why is it a key style in satin dress collections?
When buyers ask me for satin dresses, they often want a “soft luxury” look that still feels wearable. Lace trim is a fast way to add romance and raise perceived value without changing the whole pattern.
A satin lace-trim dress is any satin-based dress that uses lace edging or lace inserts at key areas like neckline, bust, hem, side seams, or slits. It sells well because it upgrades a simple satin silhouette into a more detailed, feminine story that works for night-out, bridal events, and holiday drops.
Where lace trim usually appears
- Neckline and straps (most common for slip styles)
- Bust cup edge and underbust seam
- Hem and slit edge for movement
- Back neckline for a “lingerie look”
- Side panel inserts for a more fitted look
The business value for wholesale buyers
- Higher perceived value than plain satin
- Better content for product photos and ads
- Easy to create a mini capsule with shared lace
What are 20+ popular types of satin dress, and which ones work best with lace trim?
I do not force lace trim onto every satin style. Lace trim works best when the dress has clean lines and controlled curves. It also depends on where the garment needs support.
The most common satin dress styles include slip, bias-cut slip, cowl neck, halter, wrap, corset satin, bustier, bodycon, A-line satin, fit-and-flare satin, shirt satin, midi satin, maxi satin, mini satin, one-shoulder satin, off-shoulder satin, strapless satin, mermaid satin, high-slit satin, draped satin, and tiered satin. Lace trim performs best on slip, cowl, bustier/corset, wrap, and high-slit satin styles.
Satin styles that pair well with lace trim
- Slip / bias slip: lace edge upgrades the neckline fast
- Cowl neck: lace can frame the cowl, but needs stabilization
- Bustier/corset: lace softens structure and adds romance
- Wrap satin: lace adds detail to a simple tie front
- High-slit satin: lace trim on slit creates movement
Satin styles where lace trim is risky
- Shirt satin: lace can fight the clean tailored look
- Tiered satin: bulky seams plus lace can feel heavy
- Mermaid satin: hem shape plus lace can distort easily
Which satin base fabric should I use for a lace-trim satin dress?
This is the first technical decision I make. “Satin” is not one thing. The weave and fiber decide how it drapes, shines, snags, and handles lace stitching.
For a satin lace-trim dress, I choose satin based on weight, weave stability, and surface quality. I prefer polyester satin or poly-blend satin for consistent bulk supply, and I use heavier satin for structured styles like bustier dresses. For bias slips, I use a fluid satin with controlled stretch and low snag risk.
Satin base options I see most in bulk
- Polyester satin: stable, scalable, strong color consistency, common for wholesale
- Silk satin: premium but high cost and higher care risk
- Acetate satin: beautiful drape but more sensitive to heat and water marks
- Stretch satin (with spandex): better fit, but lace tension must be balanced
Weight and hand feel guidelines I use
- 90–120 gsm: light, good for cowl and summer slips, higher sheerness risk
- 120–160 gsm: balanced, best for most commercial slips and midis
- 160–220 gsm: structured, best for corset, bustier, and strapless
Fabric risk checklist for satin
- Snagging resistance on face
- Seam slippage at stress seams
- Water marks and press shine
- Color shading between rolls
- Static cling on lighter weights
How do I choose lace trim that won’t ripple, flip, or scratch the skin?
Many lace trims look good on the lace card. They fail when stitched onto satin curves. Lace has its own stretch, stability, and edge behavior.
I choose lace trim by matching lace stretch direction and scallop shape to the garment curve. I also test lace softness against skin, because scratchy lace creates negative reviews. For most slip necklines, I use lighter, flexible lace with a stable edge, then I control tension during sewing to prevent ripples.
Lace types I use often
- Nylon lace: soft, flexible, good for curved edges
- Polyester lace: stable and consistent, good for bulk
- Cotton lace: pretty but can shrink and feel heavier
- Chantilly-style lace: delicate look, but needs careful sewing and packing
Lace edge forms and how they behave
- Scalloped edge: premium look, but needs precise placement
- Straight edge: easier sewing, good for under-layer trims
- Eyelash edge: high fashion look, but sheds and can snag
Comfort checks I run
- Rub test on inner arm for scratch feel
- Stretch test to see if lace snaps back
- Steam test to see if lace curls
- Wash test for shrinkage and fraying
How do I pattern and engineer lace placement on a satin dress so it looks expensive?
This is where most “professional” vs “cheap” outcomes are decided. Lace placement needs logic. It should look intentional across sizes, not random.
I engineer lace placement by defining one “lace story” per style, then I lock placement points to stable pattern landmarks like neckline seam, CF/CB, and hem fold. I also build grading rules so lace stays visually balanced in larger sizes, and I avoid placing lace across areas that need stretch recovery.
Placement strategies that work
- Lace on neckline + hem only: clean and commercial
- Lace on neckline + slit edge: sexy but controlled
- Lace insert panels: premium look, higher cutting complexity
Placement strategies that often fail
- Lace across the waist seam without stabilization
- Lace sitting on top of bust apex with high contrast
- Lace ending at random points near side seams
How I control placement across sizes
- I set a fixed distance from neckline seam to lace peak
- I keep lace focal motifs away from bust apex points
- I adjust lace length rules for graded hem sweeps
- I use matching points at CF/CB for symmetry
A practical lace placement guide
| Area | Best Lace Width | Why it works | Main risk |
|---|---|---|---|
| Neckline | 1–3 cm | frames the face, adds value | rippling on curves |
| Strap edge | 0.8–1.5 cm | subtle upgrade | scratch on shoulder |
| Hem | 2–6 cm | movement and romance | snag + curling |
| Slit edge | 1–3 cm | sexy detail | uneven tension |
| Bust cup edge | 1–2 cm | softens structure | distortion at apex |
What sewing methods and construction details keep satin + lace stable in bulk?
Satin moves under the needle. Lace can stretch while sewing. If I use the wrong stitch or tension, the edge waves. If I use too much heat, satin shines and lace curls.
I keep satin lace-trim dresses stable by using the right seam types, needle choice, and feeding control. I also stabilize curves with stay tape or lightweight fusible where needed, and I use low-pressure pressing with protective cloth. In bulk, I add inline QC on lace tension and seam puckering.
Needle, thread, and machine settings I rely on
- Fine needle to reduce snag holes
- Polyester thread with balanced tension
- Differential feed or walking foot for slippery satin
- Shorter stitch length on curves to reduce waviness
Seam construction choices that matter
- French seams for slip dresses: clean inside, less fray, premium feel
- Narrow rolled hem for light satin: reduces bulk, keeps drape
- Clean finish facing at neckline: supports lace and stops flipping
- Lining or partial lining: controls cling and improves comfort
Stabilization tools I use carefully
- Clear elastic or stay tape on bias necklines
- Lightweight fusible on strap anchors
- Twill tape at corset top edge for strapless support
- Soft lining to hide scratchy lace seams
The top failure points I check in PPS
- Neckline ripple after hanging 24 hours
- Lace scallop flipping after steam
- Puckering along lace stitch line
- Strap anchor tearing under pull test
- Hem lace curling after packing fold
How do I handle shade matching, lace dye lots, and reorder consistency?
This is the quiet killer in wholesale. Lace and satin often come from different suppliers. Even if both are “black,” they can be different blacks.
I control shade matching by approving satin and lace under the same light, then I lock dye lots for bulk. For reorders, I keep a physical shade standard and I request lace from the same mill when possible. If not, I adjust lace shade first, because satin shade drift is harder to hide in photos.
My matching routine
- I check in daylight, warm indoor light, and LED light
- I photograph satin + lace together with phone flash
- I record supplier lot numbers on packing lists
- I keep a sealed reference swatch from the first bulk
Where mismatch shows worst
- Black satin with “green-black” lace
- Ivory satin with “yellow” lace
- Blush satin with lace that turns “grey pink”
Reorder strategy I recommend to buyers
- Keep the same lace for the whole season
- Change only print or color in the base satin if needed
- Use the same base pattern for 2–3 drops for speed