 Skip to content
How Does Ruching Affect Dress Production Cost?

Your trusted Women’s Apparel Manufacturer from China
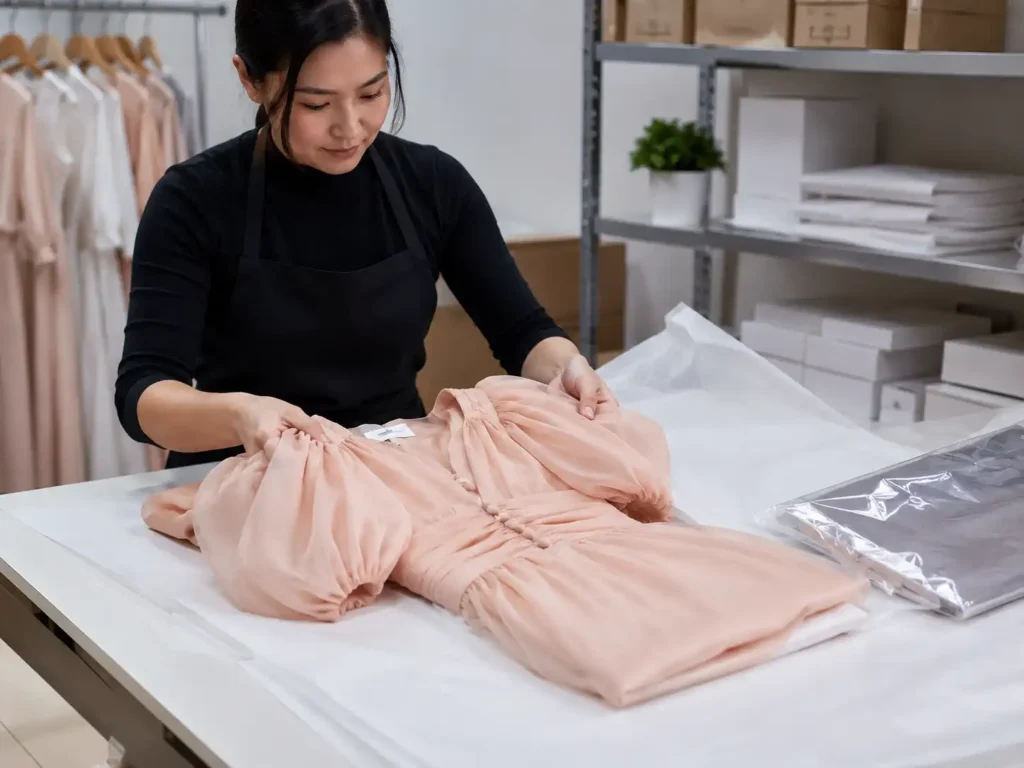
Ruching is one of those dress details that looks almost effortless in a campaign photograph. A few soft folds can define the waist, smooth the hip line, add texture to a plain fabric, or let the wearer adjust the hem. On a production floor, however, every fold has to be designed, measured, sewn, checked, pressed, and repeated across multiple sizes. The visual effect may appear simple, but the manufacturing work behind it can range from one controlled elastic seam to a fully lined, hand-distributed mesh overlay.
Ruching usually raises dress production cost because it can require extra fabric, longer pattern pieces, additional sewing operations, elastic or drawcord components, more skilled handling, and tighter quality control. The size of the increase depends on the ruching method, coverage, fabric behavior, lining structure, size range, order quantity, and how closely every garment must match the approved sample.
This does not mean ruching should be removed whenever a collection has a strict cost target. Well-engineered ruching often adds more retail value than it adds factory cost. The expensive mistakes usually begin earlier, when a reference image says “ruched side” but the technical file does not define the method, finished length, tension, or supporting layer. Two factories can then quote two reasonable prices for two completely different dresses, and the difference only becomes visible after the first sample arrives.
What Is Ruching in Dress Production?
Ruching is a controlled method of compressing fabric into visible folds to create shape, texture, stretch, or adjustable length. In dress manufacturing, it may be formed with gathering stitches, elastic, drawstrings, channels, or layered panels. Its cost depends on the added fabric, the securing method, the placement accuracy, and the consistency required across sizes and bulk quantities.
Ruching vs Gathering
Ruching and gathering use the same basic idea – a longer piece of fabric is controlled into a shorter space – but they do not always create the same structure or workload. Gathering usually joins a longer edge to a shorter seam, such as a full skirt attached to a waistband. The fullness begins at that join and then falls freely through the garment, so the operator mainly controls how evenly the fabric is distributed before the pieces are sewn together.
Ruching normally remains visible inside a defined section of the dress. The folds may run along a side seam, cross the waist, shape the bust, or cover an entire overlay. Because the folds affect fit and finished length, the production file must identify where they begin and end, the flat panel length, the compressed length, and whether the effect is fixed, elasticated, adjustable, symmetrical, or intentionally irregular. Without those details, the word “gather” can lead different suppliers toward different constructions and therefore different quotations.
Common Ruching Methods
Fixed seam ruching is often the most direct construction. A longer fabric panel is gathered between two marked points and secured into a seam or onto a shorter supporting section. Elastic ruching uses elastic tape, clear elastic, or elastic thread to create compression and recovery. Drawstring ruching adds a casing, cord, reinforced exits, and sometimes stoppers or decorative ends, giving the wearer control over the finished length.
Layered ruching is common in mesh party dresses, occasionwear, and fitted evening styles. A longer outer layer is arranged over a shorter lining or foundation panel, which produces depth and coverage but also increases fabric use and handling time. Asymmetric ruching can be even more demanding because the folds must follow a deliberate direction across shaped body panels. The right method is therefore chosen by the desired appearance, wearer function, fabric behavior, and target production cost rather than by appearance alone.
Ruching method | Typical components | Relative complexity | Main cost drivers |
Fixed seam ruching | Extended panel, gathering stitches, securing seam | Low to medium | Sewing time and fold placement |
Elastic ruching | Elastic tape or thread, tension-controlled seam | Medium | Elastic consistency and recovery |
Drawstring ruching | Channel, cord, exits, bartacks, optional stoppers | Medium to high | Extra trims and sewing operations |
Layered ruching | Outer panel, lining, control marks, securing points | High | Fabric consumption and manual handling |
Asymmetric ruching | Shaped panels and directional fold placement | High | Pattern development and visual control |
Where Ruching Is Used
Side-seam ruching is common in bodycon mini and midi dresses because it softens the outline of a close fit and can make the waist and hip area more forgiving. Bust ruching is frequently used in party dresses and occasionwear, where it creates shape and visual volume, but small errors can affect neckline coverage and make the left and right sides look unbalanced. Waist ruching can define the body, while hip ruching may create a draped effect or adjust skirt length.
Full-body ruching often appears in mesh overlay dresses where the folds become the main surface design. Adjustable ruching is used in resort, clubwear, casual, and maternity-related styles because the wearer can change the hem or redistribute fullness. The same feature behaves differently across products: a short section in stable jersey may be relatively easy to repeat, while an identical-looking detail in satin, chiffon, velvet, or fine mesh can require slower handling, additional support, and more inspection.
What Makes It Difficult
Ruching becomes more difficult when the design relies on large coverage, high fold density, delicate material, multiple layers, strict symmetry, or a shaped direction across the body. A relaxed, irregular texture is easier to approve than evenly spaced folds that must look nearly identical across every garment. Large-area ruching also interacts with the neckline, side seams, zipper, lining, slit, and hem, so one change can alter the balance of the entire dress.
Dense folds can make seam allowances thick enough to interfere with an invisible zipper or side opening. Curved and diagonal ruching need more pattern development because the fabric is not simply compressed between two straight points. A reliable development request should define the flat dimension, finished dimension, fold direction, support layer, placement line, and acceptable visual variation. Those details turn a subjective photograph into a repeatable construction and allow production cost to be discussed before the sample becomes expensive to revise.
How Does Ruching Change Material Cost?
Ruching changes material cost by increasing panel dimensions, lowering cutting efficiency, and adding components such as elastic, drawcords, linings, channels, or foundation layers. The increase may be small for a short seam detail but substantial for dense, full-body, double-layer, or adjustable ruching made from expensive or difficult-to-handle fabric.
Fabric Consumption
Most ruching requires more fabric than the visible finished area suggests. A finished 30-centimeter ruched section may begin as a 40-, 50-, or 60-centimeter panel before it is compressed. The exact extension depends on the desired fold density, fabric thickness, stretch, drape, and the position of the detail. A lightly textured waist section can use a modest extension, while a full mesh overlay may need substantially more outer-layer length.
Additional panel length does not automatically produce the same percentage increase in total garment consumption. The final cost depends on how the larger pieces fit inside the cutting marker. An extension may fit into unused space and add only a small amount, or it may force the marker to consume another length of cloth because of fabric width, grain direction, print placement, nap, border design, or paired components. Reliable costing therefore uses an approved pattern and marker rather than applying one general percentage to every ruched dress.
Ruching Ratio
The ruching ratio compares the flat fabric length with the finished compressed length. A ratio of 1.5:1 means that 45 centimeters of fabric is controlled into roughly 30 centimeters. A ratio of 2:1 uses about 60 centimeters for the same finished area. Higher ratios usually create deeper folds, but the result changes with fabric weight, thickness, surface friction, and elasticity.
Fine stretch mesh can absorb a relatively high ratio while remaining soft, whereas heavy jersey or ponte may look bulky at a much lower ratio. Using more fabric does not automatically improve the dress. Excess volume can thicken side seams, distort the hem, reduce comfort, and hide the intended silhouette. The approved ratio should therefore be linked to the actual material and physical sample. Recording both flat and finished dimensions in the technical file also prevents one production batch from appearing softly ruched while another looks heavily compressed.
Visual effect | Illustrative flat-to-finished ratio | Likely material impact | Typical application |
Light texture | 1.15:1-1.35:1 | Small increase | Short waist or side detail |
Medium ruching | 1.35:1-1.70:1 | Moderate increase | Bodycon side seams |
Dense ruching | 1.70:1-2.20:1 | Significant increase | Mesh overlays and statement panels |
Very full effect | Above 2.20:1 | High and marker-dependent | Occasionwear and dramatic draping |
The ratios above are practical development references rather than universal standards. Final consumption should be confirmed with the selected fabric, approved pattern, sample, and production marker.

Fabric Behavior
Fabric price per meter is only one part of the material-cost decision. A lower-priced fabric may create a higher finished cost when it slips during cutting, curls at the edge, stretches unpredictably, snags, shows needle marks, or requires a separate lining. Stretch jersey often works efficiently for bodycon ruching, but weak recovery can flatten the folds after hanging. Fine mesh creates depth and softness, although it normally needs a supporting layer and careful tension control.
Satin can produce elegant bust or waist ruching, yet it exposes drag lines, puckering, needle damage, and pressing marks. Chiffon shifts easily during cutting and sewing, while velvet requires nap control and can retain pressure marks inside dense folds. Before approval, production teams commonly review usable width, weight, stretch, recovery, opacity, shrinkage, surface sensitivity, shade consistency, and lining compatibility. The cheapest fabric on a swatch card is not always the least expensive fabric once cutting loss, sewing difficulty, inspection, and possible rework are included.
Linings and Underlayers
Linings and foundation layers often create the difference between uncontrolled gathers and a stable, retail-ready ruched effect. A single-layer knit dress may form the detail directly along a seam, but a mesh or lightweight woven dress often needs a shorter support layer to hold the shape, provide coverage, and prevent the folds from moving. The added cost includes not only lining fabric but also separate patterns, cutting, component handling, extra seams, and alignment checks.
The stretch of the outer and inner layers must be compatible. Highly elastic mesh over a firm lining may feel restricted and pull flat, while a stable outer layer over an overly soft lining may sag or move independently. Double-layer construction also creates extra control around the neckline, armholes, zipper, slit, and hem. Brands should confirm whether a reference style is unlined, partially lined, fully lined, built over a nude foundation, or constructed over a bodysuit base before comparing quotations, because those options can look similar online but carry very different material and assembly costs.
How Does Ruching Increase Sewing Cost?
Ruching increases sewing cost by adding gathering, elastic attachment, channel construction, drawcord insertion, fold distribution, securing, alignment, and repeated measurement. It can also slow production because operators must control fabric tension and visual placement rather than complete one continuous seam. The impact depends on the method, fabric, coverage, symmetry, and approved quality standard.
Added Operations
The number of visible details on a dress is not the same as the number of sewing operations. A simple-looking ruched side seam may require panel preparation, one or two rows of gathering stitches, elastic cutting, elastic attachment, fold distribution, seam assembly, reinforcement, thread removal, and finished measurement. Layered mesh can require several hidden securing points before the main side seam is closed, while a drawstring version adds channel preparation, reinforced exits, cord insertion, bartacks, and end finishing.
Every added operation contributes labor minutes, machine use, handling time, inspection points, and the possibility of correction. Dense ruching near an invisible zipper can require manual redistribution so the zipper remains flat and the seam does not become bulky. A practical workmanship sheet should therefore define the sequence, stitch type, elastic specification, placement notches, reinforcement points, gathering-thread removal, and acceptable appearance. Costing from a photograph alone often misses these hidden steps, which is why the production sample and operation breakdown are important before a final quotation is confirmed.
Labor Minutes
Sewing labor is commonly linked to the standard time needed to complete the garment and the production cost per minute, adjusted for realistic efficiency. Ruching adds time because the operator must prepare, align, compress, distribute, secure, and inspect the fabric. A technically secure seam may still fail visually when the folds are concentrated in the wrong place, so appearance control becomes part of the operation rather than a separate cosmetic choice.
The added time varies widely. A short fixed section may require only a few additional minutes, while full-body layered mesh or complex asymmetric ruching can add much more. Quantity can improve operator familiarity, but it does not remove the physical steps. A two-minute increase repeated over 5,000 garments represents more than 166 production hours before line-efficiency losses, inspection, and rework are considered. This is why seemingly small design details can have a meaningful effect on unit cost when they are repeated across a commercial order.
Construction example | Typical added tasks | Illustrative added sewing time |
Short fixed side section | Gather, distribute, secure | 1-3 minutes |
Two matched side sections | Repeat and balance both sides | 2-5 minutes |
Elastic full side seam | Prepare elastic, tension sew, measure | 3-6 minutes |
Adjustable drawstring side | Build channel, insert cord, reinforce exits | 5-10 minutes |
Full mesh overlay | Gather zones, align lining, control several seams | 8-18 minutes |
Complex asymmetric ruching | Mark, distribute, shape, visually correct | 10-25+ minutes |
These time ranges are illustrative development references. Actual minutes depend on the pattern, fabric, machinery, operator skill, workmanship standard, and factory method.
Operator Skill
Ruching often needs experienced operators because fabric tension must be controlled without stretching the seam, twisting the panel, or changing the finished dress length. The skill requirement rises with fine mesh, slippery satin, high-stretch jersey, curved seams, bust shaping, and asymmetric folds. An operator may sew the seam quickly and still create a costly problem if the distribution is uneven, the elastic is overstretched, or the side seam rotates toward the front or back.
Fit-sensitive areas need particular care. Excess tension at the hip can make the dress ride upward, while insufficient tension around the bust can reduce coverage or loosen the neckline. Experienced manufacturers normally test the operation in the sample room, confirm the machine and stitch method, and then train selected line operators with the approved sample. Jinfeng Apparel supports this process through two sample rooms, more than twenty sample machinists, and seven or more senior pattern makers who work on fitted dresses, mesh, satin, corset structures, and other technically sensitive womenswear.
Line Efficiency
A sewing line performs best when each operation takes a predictable amount of time. Ruching can become a bottleneck because its duration changes with fabric behavior and visual adjustment. One garment may pass quickly, while the next needs the folds redistributed before it matches the approved sample. If that station is slower than the following operations, unfinished pieces build up before it and later operators wait for work, lowering the output of the entire line.
Factories may respond by assigning another operator, preparing part of the detail off-line, using guides, or dividing one complex step into several simpler operations. Color can also change efficiency: dark jersey may hide small irregularities, while pale satin shows every pull line. A pilot run or early-line review helps identify these differences before full production. Jinfeng Apparel’s wider production system includes eighteen or more sewing lines and six or more flexible lines, allowing styles to be matched with production units according to fabric, construction, order structure, and delivery schedule rather than forcing every ruched dress through the same workflow.
Which Ruching Details Raise Cost Most?
The costliest ruching details are usually large-area overlays, delicate fabrics, adjustable drawstring systems, asymmetric fold directions, multiple layers, strict left-right matching, and designs that change significantly across the size range. These features increase pattern work, trims, sewing time, fit risk, inspection points, and the likelihood of correction during bulk production.
Placement and Symmetry
Placement determines both construction difficulty and fit risk. Side-seam ruching is often efficient because the folds can be controlled along an existing assembly seam. Center-front ruching may need a separate panel, under-layer, or visible stitching, and any twisting is immediately noticeable because the detail sits on the visual center line. Bust ruching is more sensitive because small changes affect cup shape, neckline coverage, and the balance between the left and right sides.
Waist and hip ruching interact with body circumference. Too much fabric can create bulk, while excessive tension can cause the dress to ride upward. Diagonal folds usually cost more because they need shaped pattern extensions and several control points instead of one straight distribution line. Symmetry adds another inspection layer: start points, end points, finished lengths, elastic tension, and fold density must remain visually balanced. The approved sample should show whether the two sides must match closely or whether controlled irregularity is acceptable, because that decision changes both sewing speed and rejection criteria.
Cost-sensitive detail | Why it adds cost | Useful control before production |
Large-area layered ruching | More outer fabric, lining, securing, and manual distribution | Approve flat and finished panel dimensions |
Adjustable drawstring system | Channel, cord, exits, hardware, and function testing | Confirm minimum and maximum finished lengths |
Strict bilateral symmetry | Slower distribution and tighter visual inspection | Use matched notches and finished-length tolerances |
Bust or curved ruching | Direct effect on fit, coverage, and neckline balance | Review on body and in multiple sizes |
Delicate satin or mesh | Higher risk of distortion, marks, and rework | Run sewing, hanging, and pressing trials |
Extended size range | Separate rules for panel extension and elastic length | Approve a representative size set |

Adjustable Construction
Adjustable ruching normally costs more than fixed ruching because it introduces materials, operations, and functional checks. A drawstring system can include a channel, cord, reinforced exits, buttonholes or eyelets, bartacks, knots, stoppers, and decorative metal ends. The channel must suit the cord diameter so it slides smoothly without becoming loose, and the exits must withstand repeated pulling without tearing or distorting the surrounding fabric.
The technical file should state the shortest and longest acceptable garment length, the amount of visible cord, the stopper position, and whether the fabric remains covered when the drawstring is released. Hardware adds sourcing, color approval, attachment, care testing, and packing protection. The extra cost may still be justified when adjustable length is a meaningful product benefit. A dress that changes from midi to mini can support stronger styling content and broader use, so the commercial decision should compare added retail value with the additional trim, sewing, testing, and inspection workload.
Size Grading
Ruching cannot always be enlarged across sizes using the same grading rule as the rest of the garment. If every section grows proportionally, smaller sizes may appear too flat while larger sizes become bulky or over-compressed. The pattern maker may need separate grade rules for panel extension, finished ruched length, elastic cut length, waist level, hip placement, and overall dress length so that the folds stay in the intended body area.
A stable base-size sample therefore does not guarantee a stable size set. Highly fitted or technically sensitive styles should usually be checked in the base size and at least one smaller and one larger verification size, with more review when the range is extended. The factory should compare start and end points, fold density, elastic tension, side-seam balance, hem position, and movement. Grading work can increase development cost, but it protects the product from a common failure in which the photographed sample looks strong while several commercial sizes lose the intended proportion or comfort.
Stretch and Recovery
Stretch describes how far a fabric extends, while recovery describes how well it returns to its original dimension. A fabric can stretch easily but recover poorly, looking correct in the first fitting and then growing after hanging or wear. When that happens, the folds flatten, the side length increases, the hem drops, and the seam may twist. Stretch direction also matters because a fitted dress normally needs controlled crosswise stretch around the body.
Outer and inner layers must behave together. Highly elastic mesh over firm lining may feel restricted and pull the folds flat, while a stable outer layer over an overly soft lining may sag. Even fabrics with the same composition can show different recovery between colors or dye lots. Production teams therefore check weight, width, stretch, recovery, shrinkage, relaxation, shade, and hanging performance before cutting. These controls add development work, but they are far less expensive than discovering after shipment that one color rides up while another loses its shape.
How Can Brands Control Ruching Cost?
Brands can control ruching cost by choosing a construction that suits the target price, concentrating fullness in visible areas, matching fabric behavior to the design, simplifying hidden layers, and defining measurable specifications before bulk production. Sampling should confirm appearance, fit, recovery, and manufacturing repeatability so that cost decisions are made before the detail reaches the sewing line.
Choose the Right Method
The most suitable ruching method is not automatically the cheapest one. It is the method that delivers the required visual and functional result without adding work that the customer will not notice or value. A fixed elastic side seam may be enough for a fitted jersey mini dress, while separate drawstrings, metal stoppers, and reinforced openings only make sense when adjustable length is an important selling feature.
A premium mesh party dress may need layered ruching because surface depth is central to the design. Replacing it with one gathered seam could reduce the perceived quality more than it reduces cost. Product teams should decide what the customer must see, what the garment must do, and which internal construction is truly required. Sharing the target ex-factory price before final sample approval gives the manufacturer room to compare practical alternatives such as reducing coverage, adjusting density, moving the detail away from a difficult zipper, or selecting a material with better natural drape.
Engineer the Pattern
Pattern engineering can reduce material and labor without weakening the visible design. Extra fullness should be concentrated where it contributes to shaping or texture rather than hidden inside seams or under overlapping layers. Marker planning may show that a small change in panel shape or seam position improves fabric use. In some styles, dividing one irregular piece into two controlled pieces saves material; in others, the additional seam costs more than the fabric saved.
Useful simplifications include reducing folds in low-visibility areas, using one controlled overlay instead of two, integrating a channel into an existing seam, limiting decorative hardware, stabilizing only critical zones, and choosing a lining with compatible stretch. Dense seam allowances also need attention because excessive bulk near zippers, slits, or side openings increases handling and rejection risk. The strongest cost reductions usually come from several small technical improvements that preserve the customer-facing appearance rather than one aggressive change that makes the dress look visibly cheaper.
Use Sampling as Cost Control
Sampling is the most practical stage for finding cost and quality risks before they are repeated across a commercial order. The first sample tests the basic construction and visual effect. Fit and revised samples verify bust, waist, hip, length, movement, fold placement, and corrections. The pre-production sample should reflect the confirmed fabric, trims, pattern, workmanship, labels, and packing method as closely as possible so that the production team is not solving design questions after cutting has begun.
A careful review should compare flat and worn length, fold start and end points, direction, density, left-right balance, elastic recovery, drawstring function, lining alignment, side-seam rotation, hem balance, and comfort while walking or sitting. Hanging and packing tests are useful for long or heavily ruched styles because gravity and compression can change the finished look. Jinfeng Apparel manages this development path through dedicated sample rooms and pattern resources, then converts approved comments into patterns, measurement files, bills of materials, workmanship instructions, and quality checkpoints for bulk production.
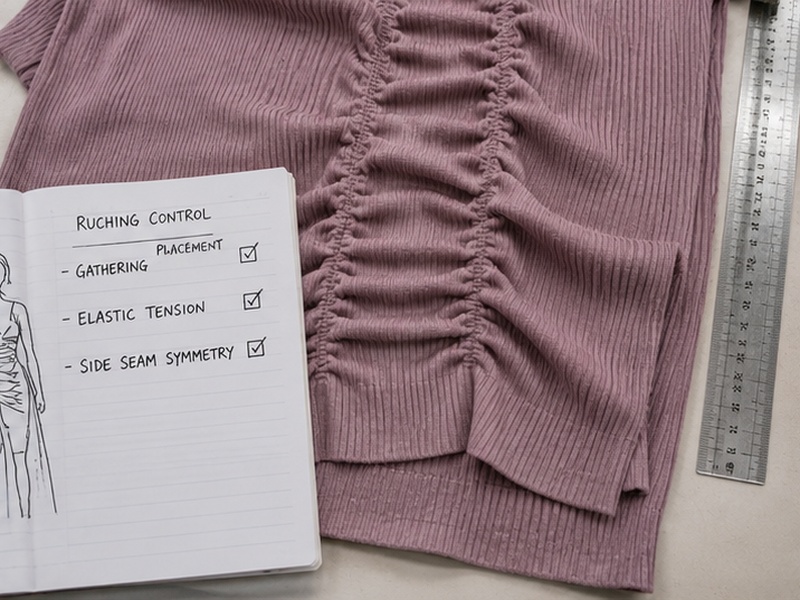
Specify the Tech Pack
A strong tech pack turns a subjective visual effect into a measurable production standard. A note such as “add ruching at side seam” leaves too much room for interpretation. Fixed ruching should show flat panel length, finished compressed length, start and end notches, fold direction, securing method, and tolerance. Elastic ruching should include elastic composition, width, cut length, overlap, attachment method, stretch direction, and finished seam length.
Drawstring construction needs channel width, cord diameter, exit position, reinforcement, end treatment, stopper details, and minimum and maximum garment lengths. Close-up reference photographs help, but they should support measurements rather than replace them. The bill of materials should list every related component, and the measurement chart should include all points affected by compression. Clear specifications improve quotation accuracy, reduce sample revisions, shorten production discussions, and give the inspection team an objective bulk standard instead of asking each operator or quality checker to make a personal visual judgment.
Ruching is not automatically expensive, and a simple-looking ruched dress is not automatically easy. Its true cost comes from the engineering behind the surface: additional panel length, fabric behavior, elastic or drawcord components, pattern correction, sewing minutes, operator skill, line balance, size grading, and the work required to keep every garment close to the approved sample. When these decisions are made early, ruching can become a controlled design investment rather than a production surprise.
Jinfeng Apparel is a Guangdong-based custom women’s fashion manufacturer established in 2008. Its production system includes six owned women’s fashion factories, more than ten long-term satellite production partners, eighteen or more sewing lines, two sample rooms, more than twenty sample machinists, and seven or more senior pattern makers. The company supports custom dresses, partywear, occasionwear, bodycon styles, mesh, satin, lace, sequin, sampling, bulk production, quality control, private-label packaging, and export coordination for established fashion businesses.
Share This Article :

Jerry Lee
Categories

Latest blogs


Table of Contents
Here, developing your OEM/ODM private label clothing collection is no longer a challenge—it’s an excellent opportunity to bring your creative vision to life.

