 Skip to content
Loop Closures for Dresses: What Types Are Used and How Do They Work?

Your trusted Women’s Apparel Manufacturer from China

A loop closure can look like one of the smallest details on a dress, yet it can become one of the first details a customer notices when something goes wrong. A loop that is slightly too short can make a button frustrating to fasten, while one that is too long can release under movement or leave the garment edge gaping. On satin, lace, corset-inspired, bridal, evening, and other occasion dresses, those small errors are especially visible because the closure often sits in a high-attention area such as the neckline or center back.
Loop closures for dresses are fastening systems in which a fabric, cord, elastic, thread, or pre-made loop passes around a button instead of using a conventional buttonhole. The right loop depends on button dimensions, fabric weight, stretch, closure position, expected tension, desired appearance, and production method. Rouleau loops, elastic loops, thread loops, non-elastic cords, and continuous loop tapes are among the most common options.
Two dresses can use nearly identical covered buttons and still need very different loop engineering. A soft rouleau loop may work beautifully on a decorative keyhole neckline, yet the same construction can become unreliable down the back of a fitted corset dress. That contrast is what makes loop closures worth understanding: the visible detail is tiny, but the decisions behind it affect comfort, fit, production consistency, and the finished impression of the whole garment.
What Is a Loop Closure?
A loop closure is a fastening system in which a small loop made from fabric, cord, elastic, or thread wraps around a button rather than passing through a conventional buttonhole. On dresses, a loop may be used once at a neckline or repeated along a back opening. Its reliability depends on loop dimensions, button geometry, attachment strength, fabric stability, and wearing tension.
How the Closure Works
A loop closure works by creating controlled resistance around the button. The loop must move or stretch far enough to clear the button at its widest point, then settle into a position where normal movement cannot release it accidentally. With a non-stretch fabric loop, most of that control comes from geometry. With an elastic loop, the material temporarily extends during fastening, which can make a smaller resting opening practical as long as recovery remains consistent.
The location of the closure changes the load considerably. A single loop at the back of a high neckline may carry very little continuous force, while a row of loops on a fitted bodice can be pulled repeatedly as the wearer breathes, sits, bends, raises her arms, or twists. For that reason, a loop that feels secure on a trim card is not automatically suitable once it is sewn into stretch satin, open lace, fine mesh, or a structured corset-style bodice.
A useful development check treats the button and loop as one closure system rather than two separate trims. The team should confirm the finished button diameter and thickness, loop material, visible loop projection, loop spacing, seam insertion depth, reinforcement method, and expected wearing tension. If one of those variables changes after sample approval, the fastening can behave differently even when the overall design still looks identical on a technical sketch.
Loop vs Buttonhole
A conventional buttonhole is normally built into the garment panel. The area is reinforced, stitched around an opening, and then opened so the button can pass through the fabric. A loop closure projects from the edge of the garment and wraps around a button positioned on the opposite side. That structural difference is one reason loops work well on narrow openings, covered-button backs, delicate neckline details, and designs where a stitched buttonhole would look visually heavy.
Loops are not automatically a more premium solution, however. A poorly controlled row of loops can look less refined than a clean zipper or a well-made buttonhole. Unequal loop lengths, different loop angles, off-center buttons, visible tape bases, and puckering around the edge become obvious when the closure is repeated down the back of a dress. The design decision should therefore combine appearance, function, fabric behavior, and realistic use rather than rely only on how the closure looks in a sketch.
For a functional decision, it helps to ask whether the fastening carries real body tension or is mainly decorative, how often the wearer will open it, whether the fabric can support repeated pulling, and whether the edge contains enough lining, facing, or reinforcement to anchor the loops. Those questions usually reveal whether a loop closure is the best solution or whether a zipper, hook-and-eye, buttonhole, or mixed closure system would be more dependable.
Where Loops Are Used
Loop closures appear in more dress constructions than many shoppers realize. They are common at center-back evening-dress openings, bridal-inspired button backs, keyhole necklines, high-neck dresses, halter necklines, sleeve cuffs, corset-style bodices, decorative front openings, and other narrow areas where a small closure is preferable to a larger fastening. In some designs the loop is meant to disappear visually; in others, a repeated button-and-loop row becomes a defining design feature.
The required strength varies widely between those applications. A neckline loop may mainly stop the opening from spreading, while a fitted back closure can become part of the primary garment structure. Stable crepe or suiting provides a much firmer anchor than open lace or soft mesh. Satin can be strong enough but still reveal pulling and puckering very quickly, while chiffon often needs a supporting facing or lining so the attachment does not distort the edge under even modest tension.
The practical lesson is that the loop itself is only one part of the fastening. A strong loop attached to an unstable seam is still an unstable closure. During development, the closure should be evaluated together with the outer fabric, lining, facing, seam allowance, button attachment, and the amount of strain created by the fit of the dress. That broader view prevents a common mistake: strengthening the trim while leaving the surrounding construction as the actual weak point.
H2 Image Prompt: Create a high-resolution 16:9 editorial technical photograph showing five dress closure examples on a clean fashion worktable: a satin rouleau loop with covered button, a small elastic button loop, a thread loop at a keyhole neckline, a non-elastic cord loop, and a short section of pre-made loop tape. Include fabric swatches, a pattern ruler, and sewing tools, with realistic garment construction details, neutral studio lighting, no logos, no text overlays, and no exaggerated luxury styling.
Which Loop Types Are Used?
The most common loop closures for dresses are rouleau or self-fabric loops, elastic button loops, non-elastic cord loops, thread loops, and pre-made loop tape. Each has a different balance of appearance, stretch, strength, consistency, and production efficiency. The right choice depends on fabric weight, button size, closure position, fastening frequency, body tension, and whether the loops are decorative or load-bearing.
Rouleau Loops
Rouleau loops are narrow fabric tubes made by stitching and turning thin strips of fabric, then cutting them into controlled lengths and forming them into loops. When they are made from the same fabric as the dress, they create a coordinated finish that works especially well with fabric-covered buttons. Satin, crepe, occasionwear fabrics, and certain lightweight woven materials can produce elegant rouleau details when the fabric is stable enough to sew and turn consistently.
The challenge is repeatability. Tube width, seam allowance, cutting direction, fabric thickness, stretch, and pressing pressure all influence the finished diameter. On a single neckline loop, a small variation may barely be visible. On a back closure with fifteen or twenty repeated loops, that same variation becomes part of the garment’s visual rhythm. For production, it is more useful to specify both the cut length and the finished visible projection, because different insertion depths can make equal cut lengths look different after the seam is turned.
Bias cutting is often chosen because it helps a narrow fabric tube curve smoothly around a small button, but it is not a universal rule for every fabric. Highly elastic materials can elongate during turning, while loosely woven fabrics can fray or become uneven. The sample stage should therefore confirm the cutting direction, tube width, turning method, loop size, and pressing condition on the actual production-intent fabric instead of assuming that a technique that worked on one satin will transfer unchanged to another.
Elastic and Non-Elastic Loops
Elastic loops allow the opening to extend temporarily around the button, which can make fastening easier and offer some tolerance on fitted garments. Non-elastic loops depend much more on exact finished dimensions and usually maintain a more stable shape under light loads. Neither is automatically better. The choice should reflect how much tension the dress carries, how frequently the closure is used, and whether the visual line must remain extremely controlled when the garment is worn.
Excessive elasticity can create visible separation between the two sides of a fitted back even when every button remains closed. A loop may technically perform its fastening function but still make the garment look loose because it stretches under bust or waist tension. A non-elastic loop avoids that extension, yet it can become difficult to fasten if the button is thick, domed, covered in textured fabric, or slightly larger than the one used during sampling.
Loop Type | Common Dress Use | Practical Strength | Main Risk to Control |
Rouleau fabric loop | Evening, occasion, satin and covered-button dresses | Coordinated fabric-matched appearance | Tube and loop size inconsistency |
Elastic loop | Fitted multi-button closures | Easier fastening and controlled extension | Excess stretch or weak recovery |
Non-elastic cord | Structured edges and decorative closures | Stable geometry | Tight fastening if undersized |
Thread loop | Small neckline or keyhole openings | Very low visual bulk | Limited load capacity |
Loop tape | Repeated button rows | Faster, more repeatable placement | Fixed pitch or visible tape base |
This comparison is best treated as a development guide rather than a fixed hierarchy. A dress category does not determine the loop by itself. A fitted satin dress with an internal zipper may use delicate decorative loops successfully, while another satin dress that relies entirely on the loop row for closure may need a stronger and more reinforced solution despite looking similar from the outside.
Thread Loops
Thread loops are useful when the closure needs to remain visually minimal and the fastening does not carry substantial tension. They are often used at small neckline openings, delicate keyholes, cuffs, or hidden fastening points where even a narrow rouleau tube would look bulky. The major advantage is that the loop nearly disappears when the garment is open, which can preserve the light appearance of chiffon, lace, organza, and other fine fabrics.
The limitation is durability. A very fine loop should not be expected to perform like reinforced elastic cord or fabric tubing. Repeated rubbing against the button can weaken the thread, particularly when the button edge is sharp, textured, or difficult to pass through the loop. The design team should therefore consider how often the consumer will use the closure, not simply how delicate the detail looks in a product photograph.
Button selection also affects thread-loop performance. Smooth covered or polished buttons usually create less abrasive contact than rough metal components, while a very tight thread loop increases friction every time it is opened. Where the visual requirement is extremely delicate but the garment still carries real structural tension, a hidden zipper, hook, or other supporting closure can take the load while the visible thread loop remains a secondary or decorative detail.

Loop Tape
Pre-made loop tape contains multiple loops attached to a continuous base strip and is particularly practical when a dress uses a long row of buttons. Because the loops are formed at consistent intervals before sewing, the tape can reduce the variation that comes from cutting and positioning many individual loops. It can also make production more efficient when the design repeats the same closure across multiple sizes, colors, or reorder cycles.
Pre-made does not mean automatically suitable. Loop tape can vary in loop pitch, loop opening, elasticity, base width, thickness, color, surface finish, and recovery. A difference of only a few millimeters in pitch can noticeably change the visual rhythm of a long button row. The base tape also needs to fit inside the available seam allowance without creating bulk, and its color should not show through light-colored satin, lace, chiffon, or semi-transparent mesh.
The most dependable approval method uses the actual outer fabric, lining, button, and tape in a sewn sample rather than testing the trim components separately. Pressing is also important because the tape and garment fabric may react differently to heat and steam. If the tape shrinks while the fabric remains stable, the back edge can draw up; if the fabric stretches while the tape does not, puckering can appear along the finished closure.
H2 Image Prompt: Create a detailed 16:9 comparison image for a professional dressmaking article, showing five labeled-looking but text-free physical samples arranged side by side: self-fabric rouleau loops on satin, elastic button loops, non-elastic cord loops, a fine thread loop on a keyhole neckline, and continuous loop tape with small covered buttons. Show realistic seam construction, lining edges, and button scale, photographed in a clean apparel sample room with soft neutral lighting and no brand marks.
Which Dresses Need Loop Closures?
Loop closures are especially useful on dresses that need a delicate fastening, a narrow closure edge, or a repeated row of small buttons. They are common on eveningwear, bridal-inspired dresses, corset styles, keyhole necklines, halter designs, and selected lightweight dresses. Suitability depends less on the dress name than on closure load, fabric stability, wearing movement, and the intended visual effect.
Evening and Bridal Styles
Evening and bridal-inspired dresses often use loop-and-button systems because they allow many small buttons to sit closely along the garment edge without a row of conventional buttonholes interrupting the surface. The effect is especially refined when the buttons are covered in the same satin, crepe, or textured fabric as the dress. On center-back closures, the repeated rhythm of buttons and loops can become one of the most visible workmanship details in the entire garment.
The main engineering question is whether those buttons are actually carrying the closure load. Some dresses hide an invisible zipper underneath or beside the decorative button row, leaving the loops to contribute mainly to appearance. Other designs rely directly on the loops and buttons to keep the bodice closed. Those two constructions may look similar in photographs, but they require different reinforcement, fit testing, button security, and quality-control standards.
When loops are functional, the development team should consider bust and waist tension, edge reinforcement, lining construction, seam stability, and the effect of movement. A long button row can also magnify small positioning errors. If the first few buttons are accurately spaced but later positions are measured successively from one another, small errors can accumulate. Marking each button and loop from a fixed reference point helps prevent a back closure that gradually drifts out of alignment.
Keyhole Necklines
A single loop-and-button closure is one of the cleanest ways to finish a small keyhole opening at the back of a neckline. It requires little space, avoids adding a wide button extension, and can preserve the lightweight look of chiffon, crepe, lace, organza, and other delicate dress fabrics. The loop may be made from thread, rouleau tubing, fine elastic, or another narrow material depending on the visual and functional requirement.
Proportion matters even when there is only one loop. If the loop projects too far from the edge, the neckline can remain visibly open after fastening. If it is too short, the wearer may struggle to fasten a button positioned behind her neck. This is a good example of a detail that can look perfect on a mannequin but feel awkward during normal dressing, especially when the loop is tiny and the button is difficult to locate by touch.
Sample review should therefore include real dressing and undressing rather than static appearance alone. The button should also be proportionate to the neckline structure; an unnecessarily thick or heavy button can pull down a fine edge. A successful keyhole closure feels visually balanced, stays flat when closed, opens without excessive force, and can be operated without turning an elegant detail into a daily usability problem.
Corset and Fitted Dresses
Corset-inspired, bodycon, and other fitted dresses require more careful loop engineering because the garment can create meaningful horizontal strain through the bust, waist, and upper back. A fitted dress may lie perfectly flat on a worktable but place substantial force on the center-back closure once worn. If the loop row is the primary fastening system, the surrounding edge needs enough structural support to resist repeated tension without stretching, puckering, or tearing.
Possible support can come from structured lining, facing, stay tape, interfacing, reinforced seam allowances, boning, or a supplementary zipper, depending on the style. The aim is not simply to make the loop stronger. If a strong loop is anchored into unstable satin, open lace, or unsupported mesh, the fabric can distort or fail before the loop itself. The entire force path from button to button attachment, loop, seam, and supporting fabric should be considered.
Fit testing should also reflect real movement. Sitting, bending, raising the arms, breathing deeply, and twisting can reveal closure problems that are invisible during a static fitting. The highest-load area may occur at the bust or waist rather than evenly down the back. If one loop specification is used throughout the row, the team should confirm that it remains secure at the most stressed point without making the less-stressed sections unnecessarily tight.
Lightweight and Sheer Dresses
Lightweight dresses create the opposite challenge: the trim can become heavier and more stable than the fabric supporting it. A bulky cord loop may pull a fine chiffon edge out of shape, while a thick tape can create a ridge under soft satin. On transparent mesh or lace, even the color and width of the loop base can become visible from the outside, especially under daylight, studio photography, or strong event lighting.
The goal is therefore enough strength without over-building the closure. Fine garments may use narrow facing, lightweight lining, carefully placed reinforcement, binding, or strategically positioned lace motifs to hide and support the loop ends. The exact method should preserve the intended hand feel and transparency rather than turning a light neckline or back edge into a stiff structural strip.
Color approval also becomes more important as transparency increases. A white tape is not automatically invisible under ivory fabric, and a beige backing can still show through pale mesh if the undertone is wrong. Samples should be checked under realistic lighting and photographed when appearance is important. Components that seem invisible under factory fluorescent light can become surprisingly obvious in daylight or on an ecommerce product page.
H2 Image Prompt: Create a realistic 16:9 fashion construction montage showing loop closures used on four dress applications: a satin evening dress with a center-back covered-button row, a bridal-inspired fitted back with repeated loops, a chiffon keyhole neckline with one small loop, and a corset-style dress edge with reinforced functional loops. Show close-up sewing quality, natural garment drape, realistic human-scale proportions, no visible brands, no text overlays, and a premium but practical sample-development atmosphere.
How Do You Choose Loop Size?
Loop size should be determined with the actual production-intent button and a sewn garment sample rather than by button diameter alone. Button thickness, shape, surface friction, loop elasticity, insertion depth, and fabric behavior all affect fastening. The correct loop clears the button without excessive force, returns to a controlled resting position, and remains secure when the dress moves or comes under normal wearing tension.
Button and Loop Relationship
A button described as 10 mm wide does not provide enough information to specify the loop. A flat 10 mm button, a domed 10 mm covered button, and a thick 10 mm shank button require different clearance because the loop travels around different three-dimensional shapes. Surface friction changes the result further: satin-covered, velvet-covered, polished resin, textured metal, and other button finishes can feel very different even when their nominal diameter is identical.
The most reliable development method is physical testing with the intended button. Instead of approving the first loop that can technically fasten, the sample room can prepare a small range around the expected size and compare ease of fastening, resistance to accidental opening, appearance when closed, and behavior under tension. The purpose is not to find one universal mathematical formula; it is to establish a working range for a specific button-and-loop combination before the specification reaches bulk production.
Development Trial | Example Relative Length | What It Reveals |
A | Target – 2 mm | Whether the smallest opening is still practical |
B | Target | Baseline fastening feel and appearance |
C | Target + 2 mm | Whether easier fastening remains secure |
D | Target + 4 mm | Where the closure begins to feel visibly loose |
These increments are practical comparison examples, not universal industry tolerances. Large buttons, thick fabric coverings, or highly elastic loops may need different test steps. The useful principle is to compare controlled alternatives on the actual garment rather than approving loop dimensions from a trim sheet in isolation.
Loop Projection
Visible loop projection is often more meaningful than raw cut length because part of every loop disappears into the seam. Two loops can be cut to the same total length but produce noticeably different openings if one is inserted 3 mm deeper into the seam allowance than the other. A production specification should therefore control total cut length, insertion depth, finished visible projection, seam line, and loop orientation together.
The visible projection should be checked after the garment edge has been stitched, turned, and pressed. Construction can change the final dimensions, especially when the seam allowance is thick or the fabric is slippery. On small repeated loops, a difference of only 1-2 mm can become visible when it appears across a row of many buttons, although the appropriate tolerance should always be judged against button scale, fabric behavior, and the approved sample.
Elastic loops require one additional check because matching resting dimensions does not guarantee matching performance. Two cords can have the same diameter and loop projection while requiring very different force to stretch around a button. When elastic performance is part of the closure function, retaining an approved physical trim sample and comparing recovery during production is often more useful than relying on dimensions alone.
Spacing and Alignment
Loop spacing controls the rhythm of the finished closure as much as it controls function. On a long center-back row, the designer or pattern team normally establishes the visible button centers first, then aligns each loop to those centers. Center-to-center measurement is more dependable than measuring from loop edges because the visible shape of an individual loop can vary slightly after sewing and turning.
The start and end positions deserve as much attention as the repeated pitch. If the first button sits too far below the neckline, the upper back can look unfinished. If the final loop crowds a waist seam, zipper stop, or lower edge, the closure can appear compressed. Curved areas also require visual judgment because equal numerical spacing does not always look equal when buttons follow a shaped neckline or contoured back.
For tightly spaced fashion closures, production teams may work to visible placement tolerances around 1-2 mm where the fabric and design justify that level of control, but the golden sample should remain the final reference. A placement template or pattern notch system is more reliable than freehand measuring, especially on repeated loops where tiny errors can accumulate across the length of the garment.

Stretch and Fabric Effects
Elasticity changes loop sizing in ways that a simple length measurement cannot describe. Two loops with identical resting dimensions may behave completely differently because one requires very little force to stretch and the other is much firmer. A soft elastic loop can make dressing easier but may visibly elongate under body tension, while a firmer loop can hold the edges closer together yet be difficult to pull over a thick button.
The surrounding garment fabric changes the perceived tightness as well. On stable woven crepe, a snug loop may feel secure without distorting the edge. On bias-cut satin, the same fastening force can pull the seam inward and create puckering. On stretch mesh, the outer fabric itself may extend before the loop reaches its expected working tension, changing the geometry of the whole closure.
That is why a closure specification should be rechecked when a style is moved into a different fabric rather than treated as an interchangeable trim recipe. Converting a dress from matte crepe to stretch satin is not simply a color-and-texture change. Friction, stretch, seam stability, pressing response, and edge support may all change enough to require a different loop length or reinforcement method.
H2 Image Prompt: Create a 16:9 technical apparel-development image showing a sample maker measuring button-loop size on a dress mock-up with a precision ruler and caliper, comparing a flat button, a domed fabric-covered button, and an elastic loop. Include several controlled trial loops differing by a few millimeters, center-to-center spacing marks, seam allowance references, and a golden sample nearby. Use realistic workshop lighting, accurate scale, clean hands-on manufacturing context, no logos, and no explanatory text in the image.
How Are Loop Closures Made?
Loop closures are made by preparing the chosen loop material, setting the finished size, positioning each loop along the garment edge, securing the raw ends inside a seam or facing, and aligning buttons on the opposite side. Reliable production depends on controlling cut length, visible projection, spacing, insertion depth, seam construction, reinforcement, pressing, and final alignment before the closure is approved for bulk sewing.
Making Rouleau Loops
Rouleau construction begins with narrow fabric strips that are folded and stitched into a tube, then turned so the seam allowance sits inside. The resulting cord is cut into controlled lengths and formed into loops. The method looks simple, but the finished appearance can change significantly with fabric thickness, strip width, seam width, grain direction, operator handling, and the pressure used during turning and pressing.
If the tube is too narrow for the fabric thickness, turning becomes difficult and the finished diameter can vary. If it is too wide, small loops may look bulky beside delicate covered buttons. Slippery satin can shift during sewing, loosely woven materials can fray, and stretch fabrics can elongate as the tube is turned. A sample should therefore establish the cutting direction, strip width, seam allowance, finished tube diameter, turning method, loop length, and pressing condition before repeated production begins.
The tube itself should be inspected before it is divided into loops. Equal cut lengths do not guarantee equal-looking loops if the diameter varies along the cord. Pressing also needs restraint. Heavy pressure can flatten the rouleau and remove the rounded appearance that makes the detail attractive, while excessive heat can mark satin or synthetic fabric. Good rouleau loops look consistent before they are sewn into the dress, not only after the closure is complete.
Attaching Individual Loops
Individual loops are normally positioned before the garment edge is permanently closed. Their raw ends extend into the seam allowance, while the curved portion is arranged so that it projects correctly after the facing, lining, or outer edge is stitched and turned. At this stage, orientation matters. A loop that twists before sewing may not reveal the defect until the entire back edge has been completed and pressed.
Temporary basting, stay stitching, marked templates, or other positioning methods can reduce movement during assembly. The attachment depth should be consistent because inserting one loop farther into the seam shortens its finished opening and can also change the angle at which it meets the button. For a repeated row, the operation therefore needs to control loop-center position, visible projection, and insertion depth at the same time rather than treating them as separate checks.
After turning the seam, every loop should be inspected before the buttons are finalized. Loops should emerge at a consistent angle toward the button line and should not point noticeably upward, downward, or sideways. During sample development, it is often easier to adjust button positions after confirming the loop row than to remake an otherwise finished closure because the buttons were attached permanently too early.
Installing Loop Tape
Loop tape simplifies preparation because the loops are already attached to a continuous base. The tape is aligned along the closure seam, secured, and then enclosed by the facing, lining, or edge construction. This can improve both speed and repeatability, but it also means that a placement error affects the entire row. If the tape starts several millimeters too high or too low, every loop may be shifted relative to the intended button positions.
Before bulk cutting, the team should verify loop pitch, loop opening, base width, base thickness, elasticity, recovery, color, and compatibility with the selected button. The tape also needs to fit comfortably inside the seam allowance. Forcing a wide or stiff base into a narrow satin edge can create bulk, while a contrasting tape may remain visible through pale mesh, lace, or lightweight fabric even after the garment is fully assembled.
Pressing tests are worthwhile because tape and outer fabric can respond differently to heat or steam. Differential shrinkage can draw the edge up, while differential stretch can create rippling. Once the combination is approved, retaining the supplier reference, trim lot information, and physical sample makes repeat orders easier to control, especially when a closure detail is reused across several colors or seasonal versions of the same dress.
Reinforcing the Closure
Reinforcement should match the load rather than being added as a generic rule. A single neckline loop on stable crepe may work well with a normal facing, while a fitted bodice that relies on a long row of functional buttons can require a much more stable edge. Depending on construction, support may come from interfacing, stay tape, reinforced lining, wider seam allowance, additional stitching, boning, or another internal layer.
Too little support can cause seam slippage, stretched edges, or local tearing, but too much support can create its own problems. Heavy interfacing behind lightweight satin can produce a rigid ridge, and a bulky reinforcement layer can become visible through fine fabric. The goal is to distribute the fastening force without changing the intended hand feel, flexibility, or outside appearance of the dress.
Buttons need the same attention because the closure is only as strong as its weakest component. During sample review, the dress should be fastened and subjected to realistic movements such as sitting, standing, bending, arm lifting, twisting, and repeated opening and closing. That simple wear simulation often reveals edge distortion or loose buttons that cannot be identified by looking at the garment flat on a table.
H2 Image Prompt: Create a realistic 16:9 step-focused garment workshop image showing the manufacture of dress loop closures: narrow satin strips being sewn into rouleau tubing, turned cord being cut to equal lengths, individual loops pinned at marked positions along a center-back seam, and a separate sample of loop tape being enclosed under a facing. Include rulers, pattern notches, seam allowances, pressing tools, and close-up handwork, with accurate sewing details, natural factory lighting, no brand names, and no text overlays.
How Do You Prevent Loop Defects?
Loop defects are best prevented by controlling the complete fastening system rather than inspecting the loop alone. The most common problems are tight or loose openings, uneven spacing, twisting, weak anchoring, button misalignment, excessive stretch, and edge distortion. A good sample establishes measurable references, while bulk production reproduces the approved loop projection, spacing, button relationship, attachment strength, recovery, and finished appearance.
Tight or Loose Loops
A tight loop is not always caused by cutting the material too short. The original length may be correct, but excessive insertion into the seam, a shifted stitch line, thicker seam allowances, or a larger replacement button can reduce the usable opening after assembly. Rouleau tubing can also finish thicker than the sample if fabric or sewing conditions change, increasing friction even though the nominal loop length remains the same.
Loose loops can result from excessive cut length, insufficient insertion depth, smaller replacement buttons, over-stretchy elastic, stretching during sewing, or movement during pressing. The important control point is the finished garment rather than the loose component. A loop should be checked after the closure edge has been turned and pressed because that is when the consumer-facing dimensions and fastening feel are finally established.
Fastening should require deliberate but comfortable pressure. A row of twenty small buttons can technically meet a dimensional specification and still create a poor experience if every button takes excessive force to close. Conversely, an easy closure is not acceptable if the loops can slip off during movement. Usability, security, and appearance should be judged together because a dress is worn dynamically, not evaluated only as a flat measurement.
Uneven and Twisted Loops
Uneven loop rows usually come from inconsistent marking, uncontrolled cut length, fabric movement, or freehand positioning. A 1-2 mm difference may be hard to see on a single loop but becomes obvious when repeated down a long center-back closure. The same is true for angle: buttons may pull slightly twisted loops into position when closed, yet the garment can still look untidy when open and the fastening pressure may become inconsistent.
Fixed reference marks help prevent cumulative error. If every new loop is measured from the previous one, even a 0.5 mm error at each interval can become 5 mm after ten spaces. Measuring each position from a stable pattern reference, using notches or a placement template, reduces that drift. The first and last loop positions should also be confirmed because a row can be evenly spaced and still start or end in the wrong place.
Orientation should be checked before the seam is permanently enclosed. Once facing and lining are closed, correcting a twisted loop becomes time-consuming and can damage delicate fabric. For styles where the button row is a signature visual feature, it is more efficient to prevent variation at the sewing operation than to depend on final inspection to identify and repair defects after the entire back has already been completed.

Weak Attachment
Weak loops often fail at the point where they enter the dress rather than in the visible loop itself. The cause may be insufficient anchoring depth, loose securing stitches, seam slippage, fragile fabric, or reinforcement that does not distribute the load. On fine satin, the seam can slip before the loop breaks; on open lace, the attachment may sit over an area with too little yarn structure; on mesh, concentrated pulling can distort the edge.
A useful way to evaluate strength is to follow the load path through the entire closure: button, button attachment, loop, loop attachment, seam, and supporting fabric. The system is only as reliable as the weakest link. Reinforced lining, facing, stay tape, or other support may be needed to spread the force over a larger area instead of allowing a narrow stitch line to carry all the tension.
The testing should be realistic rather than destructive for its own sake. Repeated fastening, moderate pulling in the direction of wear, sitting, bending, and movement reveal whether the component loosens or the garment edge changes shape. The aim is to confirm that normal use will not quickly deform the closure while still preserving comfort and the clean appearance expected from fashion and occasion dresses.
Sample and Bulk QC
Sample approval should establish the physical reference for loop size, spacing, fastening resistance, button alignment, edge shape, and appearance. Written measurements are important, but an approved sample provides information that numbers cannot fully capture, such as how much force is required to fasten a loop, whether elastic recovery feels correct, and whether the row looks balanced when the dress is actually worn.
QC Point | What to Check | Common Failure |
Loop opening | Button passes with controlled resistance | Too tight or too loose |
Visible projection | Similar finished loop length | Irregular button line |
Spacing | Consistent center positions | Uneven visual rhythm |
Orientation | Loops point toward button centers | Twisted loops |
Attachment | Loop ends remain secure in seam | Pull-out or seam damage |
Button position | Button centers match loops | Edge shifts when closed |
Edge shape | Closure lies flat | Puckering, gaping or rippling |
Elastic recovery | Loop returns after extension | Permanent elongation |
Bulk inspection should also recognize that production conditions can change during a run. Different trim lots, fabric rolls, sewing operators, pressing settings, or replacement buttons can alter the finished closure even when the pattern remains unchanged. Keeping the approved button, loop material, physical sample, placement reference, and recorded sample corrections available to production makes it easier to detect drift before a large quantity is completed.
For brands developing dresses with rouleau loops, elastic loop tape, keyhole closures, or complex back-button constructions, a useful manufacturing discussion goes beyond asking whether a factory can sew the detail. The more important questions concern the approved button, loop material, dimensions, spacing, reinforcement, sample corrections, and repeatable QC standard. Jinfeng Apparel works with custom dress development, trim selection, sample revision, pattern and structure control, and bulk quality management, so these closure details can be reviewed as part of the garment rather than as an isolated accessory.
H2 Image Prompt: Create a high-resolution 16:9 apparel quality-control photograph showing an inspector checking a finished dress back with multiple button loops. Include a measuring ruler verifying center-to-center spacing, a gentle pull test on one loop, alignment checks between covered buttons and loops, comparison against a golden sample, and close-up examples of acceptable versus visibly twisted or loose loops placed on the worktable. Keep the setting realistic and professional, with no logos, no text overlays, and no staged laboratory aesthetic.
Conclusion
Loop closures work best when they are treated as part of the dress structure from the beginning rather than as a decorative trim added just before production. The correct solution may be a tiny thread loop at a lightweight keyhole, a self-fabric rouleau loop beside a satin-covered button, an elastic loop on a fitted back, or a pre-made tape system for a long repeated row. What matters is that the button, loop, seam, reinforcement, fabric, and fit have been tested as one fastening system.
For designers and fashion brands, the most useful sample is not simply the one that looks attractive on a hanger. It should also fasten comfortably, remain aligned on the body, tolerate normal movement, and give production teams a clear reference that can be repeated across sizes, colors, and future orders. When those details are resolved before bulk production, a small closure stops being a source of inconsistent workmanship and becomes exactly what it should be: a quiet, dependable detail that supports the design without calling attention to itself.
Share This Article :

Jerry Lee
Categories

Latest blogs


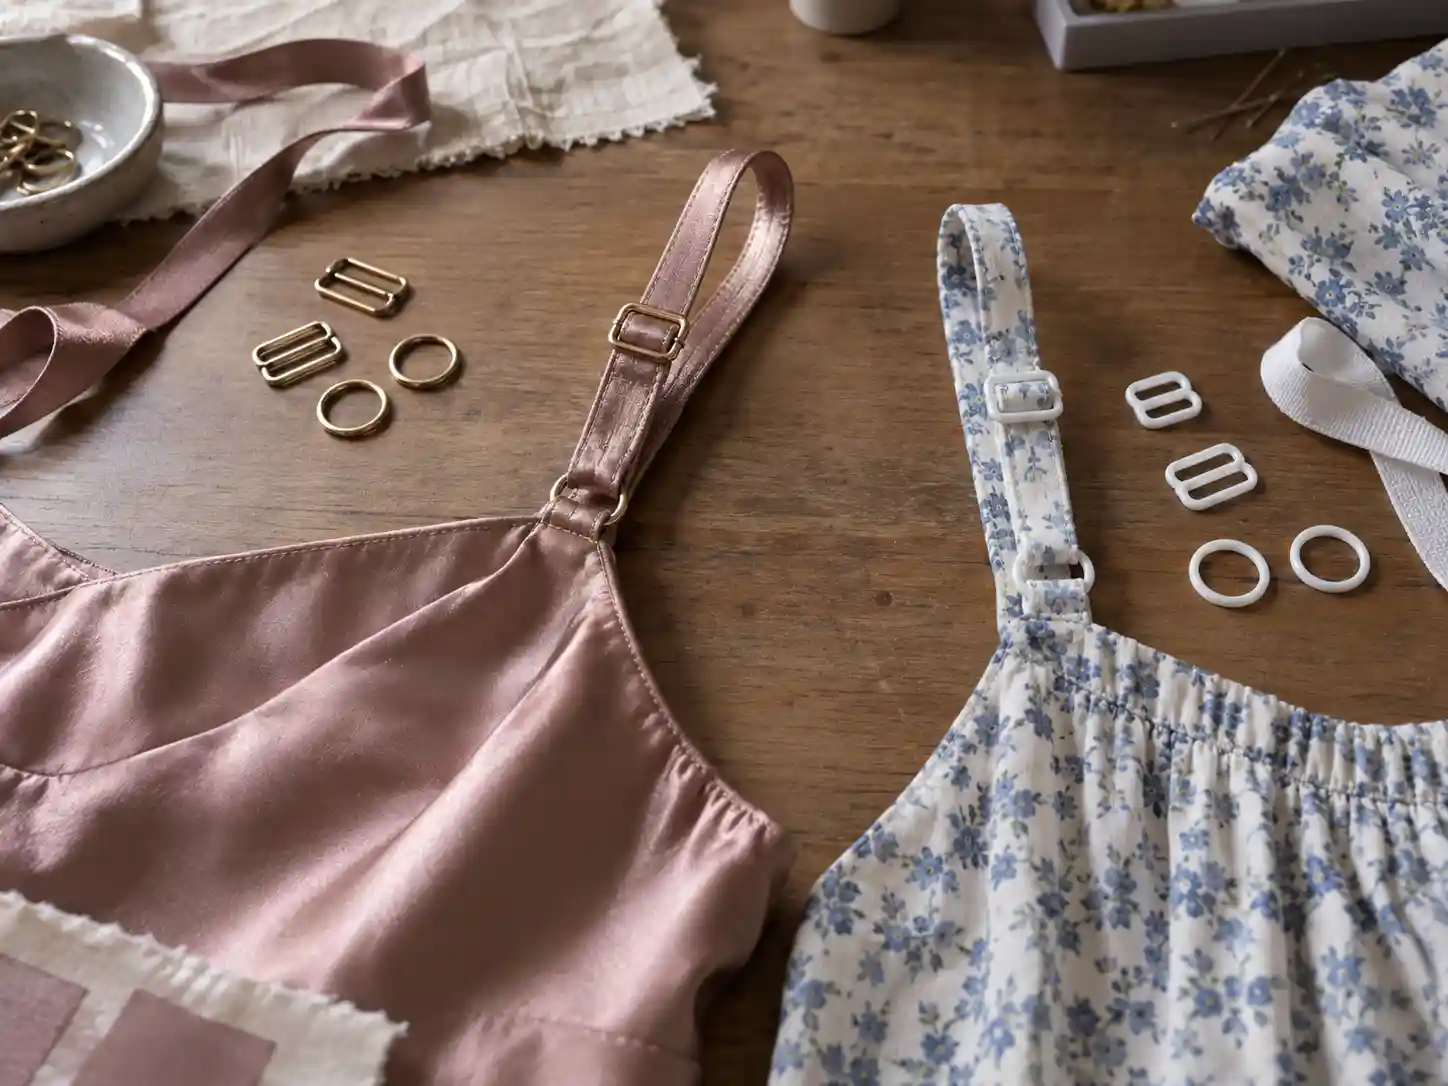
Table of Contents
Here, developing your OEM/ODM private label clothing collection is no longer a challenge—it’s an excellent opportunity to bring your creative vision to life.

