 Skip to content
How Does Elastic Support Work in Structured Dresses?

Your trusted Women’s Apparel Manufacturer from China

A structured dress can look flawless on a hanger and still become troublesome after ten minutes of real wear. The neckline may creep downward, the waist may rise, the back zipper may ripple, or the wearer may feel pressure in one narrow area even though the dress still does not feel secure. These problems happen because a structured silhouette is not created by stiffness alone. The garment has to manage body movement, skirt weight, bust shape, waist anchoring, closure load, fabric stretch, and the small but constant changes in circumference that happen while breathing and sitting.
Elastic support in a structured dress provides controlled stretch and recovery so selected areas stay close to the body while still allowing movement. It can stabilize the waist, upper bust, neckline, or back, but it should not replace correct patternmaking, boning, cups, lining, or a properly engineered closure. The best results come from treating elastic as one part of a complete internal support system.
That distinction is what separates a dress that merely feels tight from one that actually feels secure. A good structured dress should not require the wearer to keep pulling it up, adjusting the waist, or choosing between looking polished and being able to breathe. The most useful way to understand elastic is therefore not as a strip of stretch material, but as a controlled mechanical component whose tension, position, width, recovery, and relationship with the rest of the garment all matter.
What Does Elastic Support Do in a Structured Dress?
Elastic support creates recoverable tension in areas that need to remain close to the body while still responding to breathing and movement. It can help anchor the waist, stabilize an upper edge, reduce local shifting, and share load with other internal components. Its job is not to make the whole dress tight; its job is to control a specific type of movement without distorting the intended silhouette.
Support Is Not the Same as Tightness
One of the most common mistakes in structured-dress fitting is assuming that stronger compression automatically creates better support. It does not. A strapless bodice can feel very tight around the upper chest and still slide downward because the waist is not anchored correctly. A neckline can cut into the wearer while still opening at center front. A zipper can be difficult to close while the internal bodice continues to move during walking. These are signs that force is being applied in the wrong place, not simply that the garment needs more tension.
Elastic works because it stretches under load and then recovers toward its original length. That behavior makes it useful in areas where the body changes shape slightly during wear. Boning, by contrast, is mainly used to resist folding and vertical collapse. Cups create space and shape for the bust. Stable linings and underlayers help keep the shell controlled. A correct pattern defines the overall geometry. When each part performs its own job, elastic can make the dress feel secure without turning the garment into a compression device.
For sample review, this means elastic should usually be adjusted after the basic pattern has been checked. If the upper bust is too large, the waistline is positioned incorrectly, or the cup volume is wrong, shortening the elastic may improve one photograph while creating another problem elsewhere. A reliable fitting process first identifies where the garment is losing position, then determines which structural component should control that movement.
Strapless Stability
Strapless dresses make support problems especially visible because there are no shoulder straps helping to carry vertical load. The dress has to remain in place through the relationship between the waist, bust, torso, internal structure, and closure. When the entire job is given to a narrow elastic or silicone strip around the top edge, the result often feels restrictive without being truly stable. The wearer may still pull the dress upward because the garment is being squeezed at the neckline instead of anchored lower on the body.
A more reliable construction spreads the work. The waist or underbust can provide an anchoring zone, boning can prevent the bodice from folding, cups can establish bust shape, an internal layer can connect those components, and elastic or anti-slip material can help the upper edge maintain contact with the body. This is particularly important in corset minis, fitted party dresses, strapless evening styles, and dresses with heavier skirts, where downward load can be greater than it appears from the outside.
In practical development, a slipping strapless sample should trigger a short diagnosis before any trim is tightened. Check whether the waist is too loose, whether the upper edge is too open, whether boning ends at an ineffective position, whether the cups are pushing the front bodice away from the body, and whether the back closure is carrying excessive load. When the root cause is corrected, the elastic usually needs less force to do its job.
Movement and Breathing
A structured dress has to work on a moving body, not just a stationary mannequin. Breathing expands the rib cage, sitting changes the waist and abdomen, reaching forward changes the upper back, and raising the arms shifts the relationship between the bust, side seam, and neckline. A completely rigid bodice can resist these movements, but comfort deteriorates quickly. A construction that is too flexible may feel easy to wear while losing the clean silhouette that made the dress desirable in the first place.
Elastic is useful because it can provide a controlled middle ground. At an internal waist, limited extension can allow normal breathing while helping the garment return to its approved position. At the upper back, a carefully designed flexible section can absorb movement without changing the front appearance. Around a neckline, light tension can help an edge follow the body rather than standing away from it. The key is that the extension must correspond to a real movement requirement rather than being added simply because elastic is available.
A useful fitting habit is to ask three questions at every support point: what needs to stay in position, what needs to resist deformation, and what needs to move with the body. The answer often reveals whether elastic is appropriate. If the problem is vertical collapse, boning may be more important. If the issue is incorrect circumference, the pattern needs attention. Elastic is most effective when the garment already has a sound structural foundation.
Load Sharing
A structured dress becomes more predictable when load is shared instead of concentrated. The upper edge should not hold the whole garment up, the zipper should not carry all of the circumference tension, and one internal elastic should not be responsible for both shaping and stabilization. When support is distributed through the waist, cups, boning, lining, closure, and selected elastic components, each part can work within a more comfortable range and small production variations are less likely to cause a dramatic fit change.
This becomes more important as dress weight and construction complexity increase. A light mini made from compact stretch fabric may place relatively little downward load on the bodice. A lined floor-length satin style with embellishment, draping, or multiple skirt layers can pull much more strongly. The correct support system has to match the product, not just the visual idea. Two dresses with similar necklines can require different internal engineering because their fabrics, lengths, and target fit are different. For brands reviewing structured samples, the most useful question is not “Does this feel tight enough?” but “Where is this dress actually being supported?” If the answer is clear and the garment remains stable after breathing, sitting, walking, and arm movement, the support system is probably working as intended.
Which Elastic Types Work Best?
There is no single best elastic for every structured dress. Selection depends on the required holding force, stretch and recovery behavior, width, thickness, attachment method, body location, and surrounding fabric. Firm woven elastic may suit an internal support band, while softer knitted or clear elastic may be better for flexible edges or selected stretch seams. Physical behavior matters more than the category name alone.
Woven, Knitted and Clear Elastic
Elastic products that look similar on a trim card can behave very differently once they are sewn into a garment. Woven elastic is generally more dimensionally stable and often feels comparatively firm, which can make it useful in internal waist or support applications. Knitted elastic is usually softer and can be more comfortable where the elastic sits closer to the skin or where a gentler recovery is required. Braided elastic commonly changes width more noticeably as it stretches, so the design must account for narrowing and possible rolling.
Clear elastic has a different role. It is thin and low in bulk, which can make it useful for selected stretch seams, lightweight edges, or areas where a wider textile elastic would show through the outer fabric. It should not automatically be used as a substitute for a substantial internal waist support simply because it is less visible. The correct material depends on the load and the amount of control required. The comparison below is a practical starting point rather than a universal specification. Different suppliers can produce very different force levels within the same elastic category, so a development team should always compare actual samples under the intended working condition.
Elastic Type | Typical Behavior | Common Structured-Dress Use | Main Risk to Check |
Woven elastic | Firm, stable width, strong recovery | Internal waist or support band | Excess pressure or visible bulk |
Knitted elastic | Softer hand, flexible recovery | Comfort-sensitive support areas | Too little holding force |
Braided elastic | More width change under extension | Casings or narrow applications | Narrowing, rolling, uneven pressure |
Clear elastic | Thin, low bulk, localized stretch control | Stretch seams and selected edges | Overstretch, hard edge feel, aging |
A supplier description such as “high stretch” or “soft elastic” is not enough for production. The approved reference should be physically tested and recorded because the same width and composition can still produce noticeably different tension and recovery. That difference can affect wearer pressure, neckline stability, waist anchoring, and bulk consistency even when the elastic looks identical on a trim card.
Width and Pressure
Elastic width changes how pressure is distributed. A narrow elastic can create a strong localized feeling even when the total holding force is moderate, while a wider band spreads force across a larger area and may feel more comfortable. This is one reason internal waist supports are often broader than neckline elastics. The body can tolerate a distributed load more easily than a narrow line of compression, particularly during long wear.
Wider is not automatically better, however. Structured dresses often contain shell fabric, underlining, lining, cup support, boning channels, seam allowances, and closures in the same area. Adding a thick or wide elastic at an already bulky waist seam can produce a visible horizontal ridge. This is especially noticeable under smooth satin, lightweight suiting, or other fabrics that reflect light and reveal internal thickness changes.
During sampling, inspect the support from the outside as carefully as from the inside. Check the waist from the side, sit in the garment, and look for shadow lines or ridges that appear only when the body bends. Feel the elastic through the lining and confirm that the edges are not creating hard pressure points. The best elastic is not the one that feels strongest in the hand; it is the one that provides enough control while remaining visually and physically discreet. Width, thickness, and seam construction should therefore be developed together. A 25 mm elastic cannot be treated simply as a stronger version of a 10 mm elastic because it changes the bulk, pressure distribution, and the space required inside the garment.

Recovery and Force
Maximum stretch is easy to demonstrate by pulling an elastic as far as it will go, but maximum stretch tells relatively little about how a structured dress will feel. Recovery and force at the intended working extension are usually more useful. An elastic can extend a long distance yet feel weak at the small amount of stretch used in the garment. Another elastic may extend less overall but generate much more force within the first few percent of elongation.
For development, record the supplier reference, nominal width, relaxed length, installed path, attachment method, and how the material behaves after repeated extension. Where a program requires more formal evaluation, textile testing methods such as ASTM D4964 for tension and elongation of elastic fabrics or ISO 20932 methods for textile elasticity can be referenced. The important principle is that elastic performance must be described under defined conditions rather than with vague language such as “firm” or “very stretchy.”
A basic sample-room comparison can still be useful before laboratory testing. Cut equal lengths from candidate elastics, stretch them to the same marked extension, compare the hand force, release them, and observe how closely they return. Repeat the cycle several times. This will not replace standardized testing, but it quickly reveals differences that may affect fit. Once the elastic is approved, keep the exact reference in the technical file. Substituting a visually similar product in bulk production can change garment pressure even when width and cut length remain unchanged.
Fabric Compatibility
Elastic should be selected with the shell and lining in mind because the surrounding fabrics determine how tension is transferred. Rigid satin contributes little circumference stretch, so the internal structure carries more responsibility for movement. Stretch satin already changes length with the body, which means the elastic and shell may move at different rates. Soft mesh can distort around a narrow attachment point, while power mesh can contribute meaningful support as part of an inner layer.
Lace adds another complication. An open lace may look substantial but stretch or distort more than expected because the motif structure does not behave like a compact woven fabric. Velvet and sequin fabrics can add weight, while thin smooth fabrics may reveal internal elastic edges that would disappear under a heavier cloth. The support package therefore needs to be developed after the main fabric direction is reasonably stable.
When a brand changes fabric after approving the first sample, the old elastic setting should be treated as a reference rather than a guaranteed answer. Moving from rigid satin to stretch satin, from lightweight lining to power mesh, or from a simple shell to a lace overlay can change both pressure and visual appearance. A short confirmation sample is often cheaper than assuming the original support system will behave identically. The practical question is simple: is the elastic working with the fabric or fighting it? If puckering, rippling, differential movement, or visible ridges appear around the support area, the material combination needs to be reconsidered rather than merely sewn more tightly.
Where Should Elastic Support Be Placed?
Elastic should be placed where the garment needs controlled body contact or recoverable movement, not simply wherever a sample looks loose. Common positions include an internal waist support, selected upper-bust or neckline areas, and flexible back sections. The placement should follow the garment’s load path. Incorrect placement can create gathering, rolling, zipper distortion, pressure marks, or a silhouette that shifts instead of stabilizing.
Waist as an Anchor
The waist is one of the most useful anchoring zones in structured dresses because it can help prevent the whole bodice from migrating vertically. In strapless and corset-inspired styles, an internal waist support can transfer part of the garment load away from the upper edge and closure. This becomes especially valuable when the skirt is long, lined, embellished, or otherwise heavy enough to pull downward throughout wear.
Not every waist stay needs to be elastic. Stable grosgrain, ribbon, or another non-stretch tape may be better when the goal is a fixed anchor. Elastic becomes useful when the design requires some breathing allowance or a more flexible feel. The decision should be based on the intended wearing experience, the weight of the dress, and how much circumference change the support area needs to accommodate.
Placement has to be accurate. A support that sits above the intended waist can migrate upward, while one placed too low may press uncomfortably into the abdomen when the wearer sits. Attachment points also matter. If the band is fixed unevenly to side seams or to a weak lining, it can rotate or pull the internal construction out of balance. During fitting, mark the support position before movement, then check it again after sitting, walking, and raising the arms. A successful waist support remains level, feels secure without digging in, and does not create a visible ridge through the outer shell.
Bust and Neckline
Upper-bust and neckline elastic usually works best as a contact-control component rather than the main source of vertical support. This distinction is critical in strapless styles. When an upper edge gaps, the quickest correction is often to shorten the elastic, but gaping can come from several other causes: excessive upper-bust circumference, incorrect cup projection, an overly open neckline curve, insufficient pattern suppression, or a bodice that is being pushed outward by the bust.
If the cup is too shallow, for example, the wearer’s bust can push the front bodice away from the body. Tightening the top edge may pull the neckline inward, but the underlying shape mismatch remains. The dress becomes more compressive without becoming more accurate. A better correction may involve adjusting cup volume, moving the cup, reshaping the neckline, or changing the front pattern before refining elastic tension.
Anti-slip tape can complement elastic because it adds friction, while elastic adds tension. The two should not be treated as interchangeable. More friction cannot replace correct pattern fit, and more elastic tension cannot replace a stable internal structure. Used together in the right amount, they can help a strapless edge stay close to the body without forcing the entire garment to hang from that edge. A useful fit check is to inspect the neckline from the front, side, and back before altering the elastic. Localized gaping often points toward local pattern shaping rather than a need to reduce the full circumference.
Back Movement
The back of a structured dress must accommodate reaching, rotation, and shoulder movement without pulling the entire bodice out of position. In some designs, a flexible internal section or carefully placed elastic can allow movement while keeping the front clean and structured. This can be particularly useful when the design needs a close fit but the wearer still needs enough mobility for normal social movement, dancing, or sitting.
Elastic should not be used to hide incorrect back balance. If the side seam moves toward the front when the wearer reaches forward, the back may need more width or a different shape. If a center-back zipper buckles, the issue may be garment circumference, seam stretch, zipper installation, or fabric instability. Stronger elastic placed nearby can transfer even more force into the closure and make the ripple worse.
A simple fitting technique is to mark temporary reference points at the waist, side seam, center back, and upper edge. Ask the wearer to reach forward, rotate, and raise her arms. When she returns to neutral, compare the marks. If the entire garment has shifted, the anchor or pattern balance needs attention. If only the flexible section changes and then recovers, the elastic is doing useful work. The aim is not to stop the body from moving. The aim is to decide exactly where the garment is allowed to move and where it must remain stable.
When Elastic Is the Wrong Fix
Elastic should be reconsidered whenever it creates a new problem larger than the one it was meant to solve. Visible gathering on a smooth satin bodice is an obvious warning. Rolling suggests the band may be too narrow, too soft, or poorly attached for the amount of force it carries. Deep pressure marks indicate concentrated load. A zipper that becomes more distorted after elastic is shortened shows that tension is being transferred in the wrong direction.
Other warning signs include one side of the neckline pulling more strongly than the other, a waistline that rises after arm movement, side seams that twist, cups that move out of position, or lining that shifts independently from the shell. These symptoms often tempt teams to make several fast adjustments at once, but that can make diagnosis harder. A cleaner process changes one variable at a time whenever possible.
If the issue is circumference, correct the pattern. If the bodice is collapsing vertically, review boning. If the cup is wrong, correct the cup. If the fabric is growing, review fabric recovery and stabilization. If the elastic is losing recovery, replace or respecify the elastic. Support development becomes much more predictable when each fault is assigned to the component that can actually solve it. Elastic is valuable precisely because it moves. That same quality makes it a poor substitute for parts of the dress that are supposed to remain dimensionally stable.

How Does Elastic Work With Boning and Cups?
Elastic, boning, and cups solve different problems. Elastic provides recoverable tension, boning resists collapse and helps maintain vertical shape, while cups establish bust volume and contour. A reliable structured dress coordinates these components with the waist, lining, anti-slip elements, and closure so that no single part carries excessive load. The system should feel secure because forces are shared, not because one edge is extremely tight.
Elastic and Boning
Boning and elastic are sometimes discussed as if one can replace the other, but their mechanical roles are almost opposite. Boning is intended to resist bending and help a bodice maintain its vertical or directional structure. It can prevent fabric and internal layers from folding at the side seam, princess line, or other controlled locations. Elastic is intended to permit some extension and then recover, making it suitable for areas that need controlled movement.
Consider a strapless bodice that develops a horizontal fold at the side waist. Shortening the top elastic may make the garment feel tighter, but it will not necessarily stop the fold because the problem is structural collapse. Boning length, placement, bodice length, and pattern tension are more relevant. Now consider a bodice that stays perfectly upright but feels too rigid during breathing. Adding more boning would intensify the wrong quality. Limited elastic movement at an appropriate circumference may improve wearability.
A good structured dress often needs both. Boning helps preserve the silhouette while elastic allows the body to move inside that silhouette. The exact balance depends on style, fabric, size range, and target level of compression. A corset-inspired party dress designed for several hours of wear may need a more forgiving system than a highly rigid editorial piece intended mainly for short-duration presentation. Keeping those roles separate makes fitting decisions much more logical and prevents “tightness” from becoming the default answer to every support problem.
Cups and Bust Shape
Built-in cups are frequently described as support, but their first job is to establish shape and space for the bust. A cup that is too shallow can push the wearer and the entire front bodice outward. A cup that is too large can create empty volume or collapse. A cup positioned too high, too low, too far apart, or too close together changes the relationship between the neckline, underbust, center front, and waist.
Elastic cannot correct those geometric problems. Once the cup shape and position are correct, elastic may help maintain contact around selected edges, while boning can connect the bust structure to the waist. An internal underbust layer can help stabilize the cup base, and anti-slip material can improve upper-edge grip. The result is a network of components rather than one isolated “support feature.”
During fitting, mark the wearer’s bust apex and compare it with the cup apex. Check whether the cup base follows the intended underbust line, whether the center front sits where the pattern intends, and whether the side of the cup pushes the shell outward. Examine the profile, not just the front view. If these points are wrong, tightening the neckline may create compression without improving shape. When the cup geometry is correct, the upper edge usually needs less aggressive tension. That improves both comfort and visual smoothness, particularly in satin, mesh-overlay, and other fabrics that easily reveal stress.
Share the Load
The most stable structured dresses distribute force through several components instead of asking one part to do everything. Elastic controls recoverable tension, boning controls collapse, cups control bust shape, the waist provides an anchor, anti-slip material improves friction, and the closure provides access and final circumference control. When those roles are clear, the garment becomes easier to fit, grade, and reproduce.
Component | Main Mechanical Job | What It Should Not Do Alone | Common Failure Signal |
Elastic | Recoverable tension and contact | Hold the entire dress vertically | Cutting-in, rolling, gathering |
Boning | Resist collapse and maintain shape | Provide circumference flexibility | Buckling, poking, wrong contour |
Cup | Define bust volume and projection | Anchor the whole bodice | Gaping, flattening, empty volume |
Waist support | Anchor the garment lower on the torso | Correct a fundamentally wrong pattern | Riding up, concentrated pressure |
Anti-slip tape | Increase friction at selected edges | Replace structural support | Irritation, visible edge pressure |
Zipper or closure | Open, close and secure final circumference | Carry excessive garment load | Waving, difficult closure, seam stress |
The zipper is often one of the best diagnostic points. If it takes extreme force to close, the dress may be too small, but that is not the only possibility. Incorrect cup projection, poor waist anchoring, unstable lining, or excessive elastic tension can all transfer more load into the closure. A wavy zipper can therefore be a symptom of a broader support imbalance rather than a zipper problem by itself. Load sharing also improves bulk consistency. If one narrow component carries nearly all the support, a small production variation can create a large fit difference. A balanced system is generally more tolerant because each element operates within a narrower, more controlled range.
Build From the Inside Out
Structured dresses are easier to develop when the internal system is considered before the outside is treated as finished. Start by identifying the main anchor, often at the waist or underbust. Confirm bust volume and cup position. Check where vertical stability is needed and place boning accordingly. Then decide where movement must be allowed. Only after those decisions are made should elastic and grip components be fine-tuned.
The outer fabric still affects every choice underneath. Thin satin may reveal boning channels, cup edges, or elastic ridges. Lace may need a clean support layer because its open structure cannot hide internal work. Mesh may require reinforcement or binding around attachment points. Velvet and sequin fabrics can add weight that changes the load on the bodice. A design that looks identical in a sketch can therefore need a different support system when the fabric changes.
This inside-out method is particularly useful when a manufacturer is developing from a reference photograph instead of a fully resolved tech pack. A photograph shows silhouette and visible seams, but it does not show how the dress is being supported. A professional development team has to translate that visual idea into a support plan that states which components create shape, which carry load, which allow movement, and which maintain contact. Once those roles are defined, elastic selection becomes a technical decision rather than a guess based on how tight the first sample feels.
How Do You Set Elastic Tension and Fit?
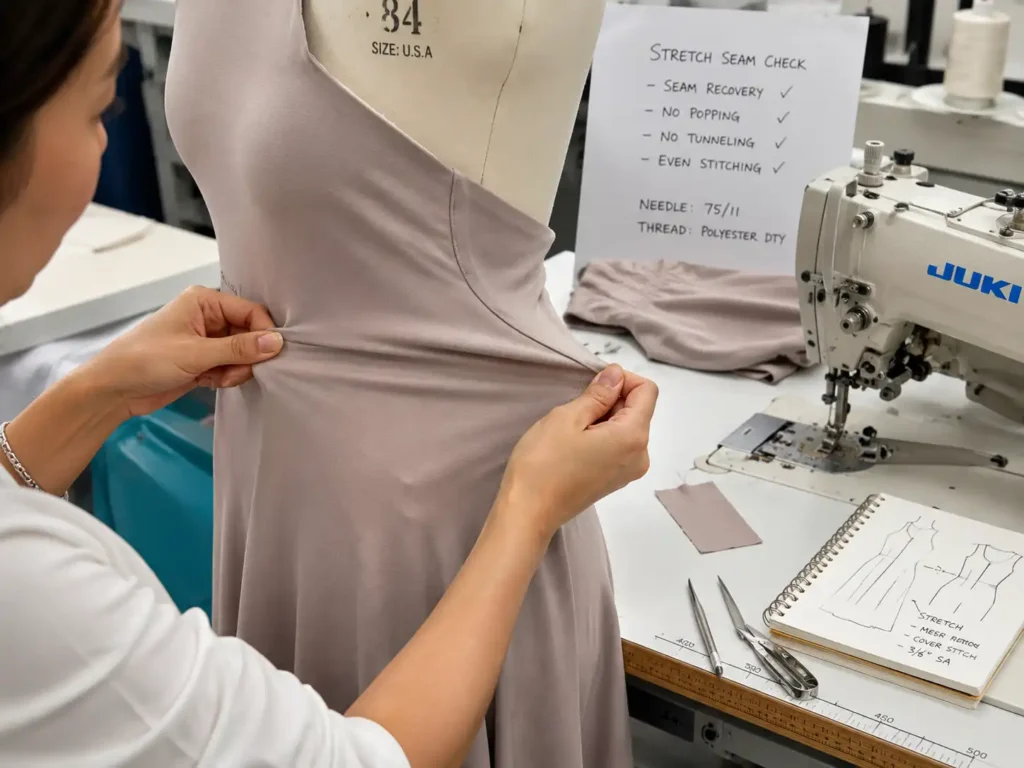
Elastic tension should be established through measured sample testing rather than a universal shortening percentage. The correct working length depends on elastic force, width, fabric stretch, body location, pattern circumference, and comfort. A good setting keeps the garment stable after movement without creating gathering, rolling, pressure marks, or closure distortion. Standing, breathing, sitting, walking, and arm movement should all be part of approval.
Measure the Working Relationship
Rules such as “cut the elastic 10% shorter” can be useful as rough experiments in simple garments, but they are too crude to serve as a universal rule for structured dresses. Two elastics cut to the same length can create very different pressure because their force-extension behavior is different. The same elastic can also feel completely different at the waist and upper bust because body shape and pressure distribution change.
It helps to distinguish between the garment path and the elastic’s actual working elongation. If a support path measures 720 mm and the relaxed elastic is 680 mm, the elastic is 40 mm shorter than the path. That is a 5.6% reduction relative to the garment path, but the elastic itself must extend about 5.9% from its relaxed length to reach 720 mm. Those percentages describe the same installation from different reference points.
Illustrative Case | Garment Path | Relaxed Elastic | Reduction vs. Path | Elastic Working Elongation |
A | 720 mm | 700 mm | 2.8% | 2.9% |
B | 720 mm | 680 mm | 5.6% | 5.9% |
C | 720 mm | 650 mm | 9.7% | 10.8% |
These figures are examples of calculation, not recommended tension settings. Whether Case B feels soft or restrictive depends on the elastic’s actual force and the rest of the support system. The useful production habit is to record real lengths and exact elastic references instead of relying on instructions such as “stretch slightly while sewing,” which can be interpreted differently by individual operators.
Fit Under Movement
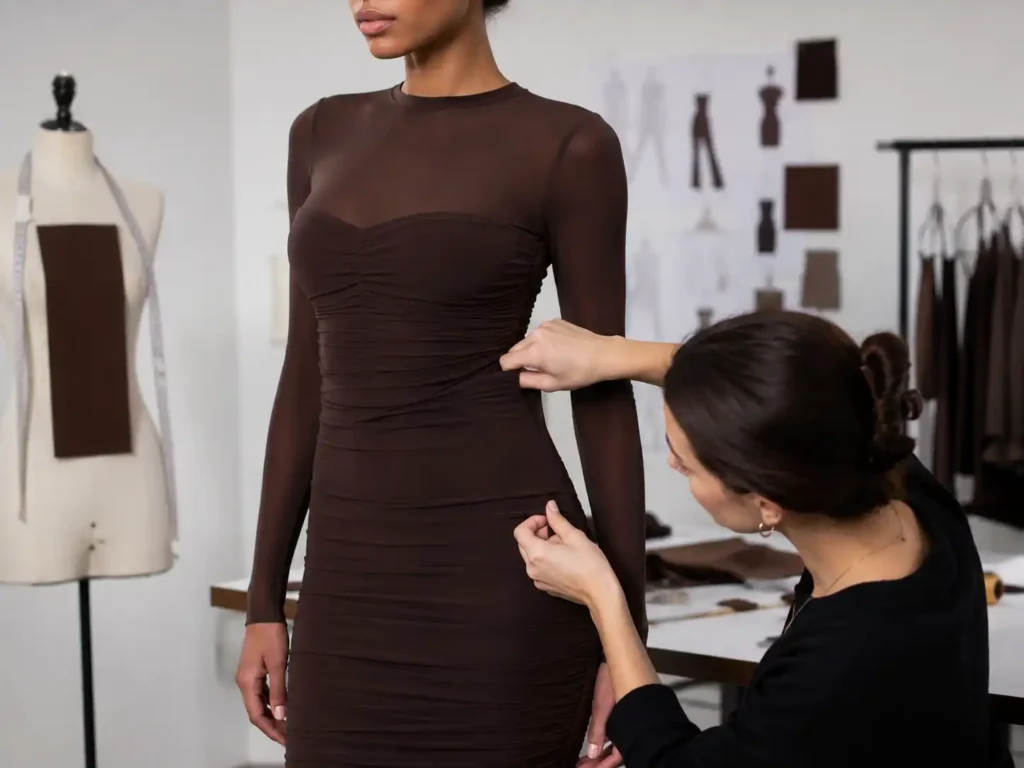
Elastic tension cannot be approved by looking at a model standing still for thirty seconds. Structured dresses should be worn long enough for the body and garment to settle, then tested through the movements likely to occur in real use. Ask the fit model to breathe normally, take several deeper breaths, sit upright, lean forward, stand again, walk, rotate the torso, reach forward, and raise both arms.
After each movement, look at whether key reference points return to their intended position. The waist should not gradually climb. A strapless neckline should not move downward and remain there. Side seams should stay reasonably balanced. The zipper should not develop additional rippling. Internal elastic should not twist or roll. Most importantly, the wearer should not feel that one narrow area is doing all the work. Comfort comments should be specific. “Too tight” is less useful than “pressure increases at the side rib after sitting” or “upper edge cuts into the side bust when the arms are raised.” Specific comments help determine whether the issue is elastic length, elastic width, placement, cup shape, or overall pattern circumference.
For brands and sample rooms, short movement videos can be more useful than still photographs because slipping, recovery, and garment migration happen dynamically. The objective is not simply to make the dress look correct at the beginning of the fit session, but to confirm that it returns to the same visual position after the wearer has moved.
Diagnose Before Shortening
When a dress feels unstable, shortening elastic is one of the fastest sample-room alterations, which also makes it one of the easiest ways to create a misleading improvement. A strapless dress may be sliding because the waist is too loose. A neckline may gape because the cup projection is wrong. An internal band may roll because it is too narrow. A zipper may ripple because the garment is transferring excessive load into the center back.
Before changing elastic length, inspect the whole support chain. Check waist circumference and position, underbust fit, cup width and projection, boning direction, upper-bust circumference, back balance, zipper behavior, lining stability, and the stretch and recovery of the shell fabric. If several of these areas are wrong, elastic tension may only be one small part of the correction.
Change one major variable at a time whenever the development schedule allows. If the pattern is narrowed, cups are moved, boning is shortened, and elastic is tightened in the same revised sample, the result may be better but the team will not know which change created the improvement. That uncertainty becomes expensive later when the style is graded, reordered, or converted into another fabric. A repeatable development process records the reason for each change. This turns fitting from a sequence of subjective adjustments into a technical history that can be used again when the same silhouette returns in another season.
Fit Across Sizes
The support rule that works in a core fit size should not automatically be copied unchanged across an entire size range. Grading increases bust, waist, and hip dimensions, but the body does not grow as a simple geometric enlargement. Bust volume, underbust circumference, torso length, and tissue distribution can change differently across sizes, especially in close-fitting strapless and corset-inspired designs.
If the same percentage reduction is applied to elastic in every size, the resulting wearing pressure may not feel identical. A small size and a large size can both use the same nominal percentage while placing different loads on the body because the installed length and elastic force relationship have changed. Cup sizes and boning positions may also need separate review, which changes how the elastic contributes to the overall system.
At minimum, verify the core fit size and meaningful points toward both ends of the planned range. Check whether the neckline stays secure, the waist remains anchored, cups remain correctly positioned, the closure does not become overloaded, and the wearer can breathe and sit comfortably. Wider size ranges and highly structured products benefit from additional verification rather than assuming the grading rule alone will preserve the same experience. The goal is not to make every internal component mathematically larger. The goal is to preserve the intended silhouette, stability, and comfort across sizes, even when that requires adjusted support specifications.
How Is Elastic Support Tested for Production?
Elastic support should be tested through material evaluation, sample fitting, movement checks, measurement verification, and production QC. The approved specification should identify the elastic reference, width, relaxed length, installed path, placement, and attachment method. Production checks should confirm that the support behaves consistently with cups, boning, lining, and closures rather than treating the elastic as an isolated trim.
Test the Material
Before a fitting problem is blamed on the pattern, the elastic itself should be understood. Professional textile testing provides standardized ways to evaluate tension, elongation, and recovery. ASTM D4964 addresses tension and elongation testing for elastic fabrics using constant-rate-of-extension equipment, while ISO 20932 includes methods for measuring textile elasticity. These references reinforce an important production principle: a stretch percentage has little meaning unless the test condition and applied force are also defined.
For many fast-fashion dress programs, not every elastic reference will be sent to a laboratory, but the sample room should still use controlled comparisons. Record the supplier, article number, nominal width, composition if supplied, relaxed sample length, working length, and behavior after repeated stretching. If an elastic is being used in a critical waist or strapless support application, compare candidate materials under the same extension rather than judging them only by hand feel.
A simple bench check can reveal obvious differences. Cut equal lengths, mark a reference distance, extend each sample to the same target, compare the force by hand, release, and observe recovery. Repeat several cycles and check whether the material returns consistently. This does not replace formal testing, but it helps prevent a weak or highly variable trim from entering the first fitting unnoticed. Once approved, the exact reference should remain part of the technical record. A replacement that looks identical in color and width should still be treated as a new performance material until its behavior has been compared.
Build a Sample Sequence
Structured dresses benefit from a disciplined sample sequence because support problems often appear only after the first fitting. The first sample answers whether the basic construction concept can work. A fit sample is used to correct proportion, cup position, neckline, waist, and support. A revised sample confirms those changes. The pre-production sample should represent the intended production combination of pattern, fabric, trims, and sewing method as closely as possible.
The garment should be tested on a person, not only on a mannequin. Standing, breathing, sitting, reaching, walking, torso rotation, and arm movement reveal whether the dress actually remains in position. After movement, check top-edge position, waist-support position, cup alignment, side-seam balance, zipper smoothness, elastic rolling, visible distortion, and wearer comfort. Photograph the front, side, and back, and use short videos if the movement issue is difficult to describe.
One anonymized structured-dress development program documented by Jinfeng Apparel used a sequence of first sample, fit sample, revised sample, PP sample, and golden sample across corset mini, structured mini, and strapless styles. The technical issues included cup shape, boning position, anti-slip control, upper-bust fit, and waist shaping. The example is useful because it shows that elastic support is normally reviewed together with the rest of the internal structure rather than approved as an independent trim. Once the final support system is accepted, the production team needs measurable records and an approved physical or visual reference. Instructions such as “same tension as sample” are not precise enough by themselves.
Turn Fit Into QC
Bulk production requires numbers and reference points that operators and inspectors can reproduce. The elastic specification should state the exact material reference, color, nominal width, relaxed cut length, installed path, attachment method, and placement. If the elastic is joined into a loop, the overlap or joining method should be defined. If it starts or ends at specific seams, those locations should be shown clearly in the construction file.
The specification should also explain how the elastic relates to nearby components. An internal waist band may need to align with the side seams. Upper-bust elastic may need to stop before a zipper, lace-up opening, or hook section. Elastic passing near boning channels should not twist around them or create unnecessary thickness. If the support is enclosed inside lining, the lining must have enough stability to carry the attachment without distorting.
Useful measurable QC points include elastic cut length in millimeters, installed path, distance from the elastic edge to the seam line, left-right attachment position, finished bust and waist measurements, cup position, boning location, and closure appearance. The acceptable tolerances should come from the approved product specification rather than from one universal number, because the sensitivity of a 10 mm neckline elastic is different from that of a broad concealed waist band. Jinfeng Apparel’s documented quality-control model covers incoming material checks, cutting QC, sewing QC, in-line inspection, finished-garment inspection, pressing review, and packing QC, with structured products such as corset and strapless dresses requiring product-specific checks. That layered approach is important because support consistency can be lost at several points, not only during final inspection.
Repeat Orders and Material Changes
Repeat orders often create a false sense of safety because the pattern has already been approved. In reality, the same pattern can behave differently when a new elastic batch, lining, shell fabric, or trim substitute is introduced. A new satin color can have a different hand or mechanical behavior, a replacement lining can stretch differently, and an elastic from another supplier can generate different force even when the width and color appear identical.
Before bulk production, compare the critical materials with the approved reference. For elastic, confirm supplier, article number, width, thickness, hand feel, extension behavior, and recovery. If a substitute is unavoidable, fit it into a controlled sample or trial rather than approving it from a trim card. This is particularly important for strapless and waist-supported designs, where a small change in force can be felt immediately by the wearer.
The same review should happen when a successful silhouette is extended into another fabric. A satin version, velvet version, lace-overlay version, and sequin version may share a pattern family, but their weight, friction, stretch, and surface sensitivity are different. The support package may need a new elastic length, wider internal band, altered lining, or different boning arrangement to achieve the same wearing result. Good repeat-order control preserves the relationship between pattern, fabric, lining, elastic, cups, boning, closures, and approved fit. That relationship, rather than the outer pattern alone, is what makes a structured dress feel the same when it returns in another color or season.
Conclusion
Elastic support may be hidden inside a structured dress, but its effect is easy to feel. When it is correctly selected and positioned, the wearer gets stability without unnecessary restriction, the neckline remains close to the body, the waist stays where it was designed to sit, and the garment recovers after normal movement. When elastic is used as a quick substitute for pattern correction, cup development, boning, or proper anchoring, the result is often a dress that feels tighter while still behaving unpredictably.
The most dependable approach is to treat the dress as a complete support system. Start with correct pattern geometry, decide where the garment should be anchored, establish bust shape, add vertical stability where it is needed, and then use elastic only in areas that genuinely require recoverable movement or controlled contact. Test the result on a moving wearer, not only on a mannequin, and convert the approved fit into measurable production specifications.
For brands developing strapless, corset-inspired, occasion, party, or other structured dresses, these internal decisions are worth resolving early in sampling. A manufacturer experienced in pattern development, trim sourcing, structured fitting, and bulk QC can help turn a visual concept into a construction that remains wearable and repeatable in production. The best engineering is often the kind the customer never notices; she simply puts the dress on, moves naturally, and trusts that it will stay where it belongs.
Share This Article :

Jerry Lee
Categories

Latest blogs


Table of Contents
Here, developing your OEM/ODM private label clothing collection is no longer a challenge—it’s an excellent opportunity to bring your creative vision to life.

