 Skip to content
Dress Buttons: What Materials and Sizes Should You Choose?

Your trusted Women’s Apparel Manufacturer from China

A dress button is small enough to disappear in a tech pack, yet important enough to change the way a finished garment looks, hangs, opens, closes, and survives repeated wear. A beautiful metal button can drag down a light placket. A shell button can elevate a linen dress but introduce natural shade variation. A resin button can deliver excellent consistency, yet still look cheap if its edges, polish, or thickness are poorly controlled. That is why experienced product teams do not choose buttons from a supplier card in isolation; they judge the button together with the fabric, construction, buttonhole, spacing, sewing method, care process, and intended retail appearance.
The best dress button is the one that matches the fabric weight, garment function, visual scale, care requirements, and production method. Resin works well for many everyday styles, shell adds natural luster, metal suits structured garments, and fabric-covered buttons create a softer tonal finish. Size should be specified in millimeters or ligne, then validated with the actual buttonhole and finished dress before bulk production begins.
The difference often becomes obvious only after the first sample is worn. A button that looked perfectly balanced on a flat swatch can suddenly feel too heavy at the bust, too small on a wide linen placket, or too shiny beside washed denim. The practical goal is not to find a universally “best” button. It is to build a repeatable decision process that makes the trim look intentional, function reliably, and remain consistent when a style moves from one sample to several thousand garments.
What Are the Main Dress Button Materials?
Dress buttons are commonly made from resin or polyester, shell, metal, fabric-covered constructions, and other natural or engineered materials. The most suitable option depends on fabric weight, surface texture, desired appearance, washing method, required consistency, and whether the button is functional or decorative. Material should be approved on the actual dress because the same button can look and behave very differently across fabrics.
Resin and Polyester Buttons
Resin and polyester buttons are among the most flexible choices for commercial womenswear because suppliers can control color, transparency, pattern, thickness, edge shape, gloss, and surface effect with relatively good repeatability. Depending on the formulation and finishing process, they can look deliberately minimal or imitate horn, shell, tortoiseshell, pearl, stone, or other natural surfaces. That versatility makes them practical for shirt dresses, office dresses, casual collections, printed styles, matching sets, and many private-label programs where the trim needs to be attractive without becoming the dominant design feature.
The material name does not tell you the quality level. Two 15 mm resin buttons can differ noticeably in edge smoothness, hole drilling, surface polish, thickness consistency, depth of color, and overall hand feel. On a busy printed dress, some of those differences may be visually forgiving; on a plain monochrome dress, every irregularity becomes easier to notice. When bulk consistency matters, compare several pieces from the intended production lot rather than approving one ideal sample, and retain the approved physical button as a reference for future production or replenishment.
Shell and Natural-Look Buttons
Shell buttons are valued for natural luster and subtle variation rather than perfect uniformity. They work especially well on linen dresses, resort collections, relaxed shirt dresses, natural-fiber styles, and premium casual products where a slightly organic surface supports the design story. The same natural character can become a production issue when a brand expects every piece to look identical. Tone, translucency, surface markings, and reflectivity can vary, so the acceptable appearance range should be agreed before bulk sewing begins.
Thickness and hole quality matter as much as the front surface. Very thin shell can chip around the perimeter or drilled holes, while rough inner holes can gradually abrade sewing thread. It is better to inspect a group of buttons from the intended lot than to approve a single perfect piece. When the collection needs the visual impression of shell but requires tighter repeatability, a well-made shell-effect resin button may provide a more stable compromise between appearance, cost, and bulk consistency.
Metal and Fabric-Covered Buttons
Metal buttons create stronger visual and physical weight, so they suit denim dresses, utility-inspired styles, tailored looks, structured casual dresses, and designs where hardware is intentionally visible. The first question should be whether the garment can support the weight without pulling, rolling, or sagging. Surface treatment also needs attention because uneven plating, rough casting marks, sharp back edges, oxidation, or scratches can make an otherwise premium-looking trim feel poorly finished or even damage delicate fabric during wear and packing.
Fabric-covered buttons work in almost the opposite way: instead of adding contrast, they can visually disappear into the garment. They are especially useful for occasion dresses, formal looks, tonal satin styles, tailored pieces, and vintage-inspired designs. Their quality depends heavily on the actual covering fabric and the button base. Slippery satin may wrinkle if it is not tensioned evenly, open weaves can fray around the back, and thick fabrics can create bulky edges. For that reason, covered buttons should be developed with the real production fabric whenever possible.
Custom Logo Buttons
Custom-logo buttons can add brand identity without adding another external label, but the logo needs to be designed for the physical scale of the trim. Fine lettering, narrow counters, shallow relief, and highly detailed symbols may look clear on a large screen and become muddy once reduced to a 12 mm or 15 mm button. A simplified monogram, icon, edge pattern, or short mark often produces a cleaner result than forcing a complex logo into a small surface.
Customization also changes sourcing. Jinfeng Apparel’s documented trim system includes resin, shell, metal, fabric-covered, and custom-logo buttons, with color, material, size, and logo among the variables that can be customized. Its current planning reference notes that custom-logo or special-material buttons commonly involve supplier minimums around 500-1,000 pieces, while regular and custom developments follow different lead-time ranges. Those figures are useful for project planning, but final MOQ and timing still depend on the exact supplier, material, finish, mold, and order schedule.
Button material | Typical dress applications | Practical strength | Main production concern |
Resin / polyester | Shirt, office, casual, printed dresses | Broad color and finish control | Edge finish, thickness, molded appearance |
Shell | Linen, resort, premium casual styles | Natural luster and tactile value | Chipping and acceptable natural variation |
Metal | Denim, utility, structured dresses | Strong visual identity and durable feel | Weight, plating, abrasion, corrosion |
Fabric-covered | Occasion, formal, tonal designs | Integrates closely with garment fabric | Wrinkling, fraying, covering consistency |
Custom logo | Private-label collections | Distinctive brand detail | MOQ, tooling, lead time, logo clarity |
How Are Dress Buttons Sized?
Dress buttons are mainly specified by diameter in millimeters, inches, or the traditional ligne system. One ligne equals approximately 0.635 mm, so 20L is about 12.7 mm and 24L about 15.2 mm. Diameter alone does not determine fit because thickness, dome height, shank design, fabric layers, and buttonhole construction also affect how the closure looks and operates.
Ligne and Millimeters
Ligne, usually abbreviated as “L,” remains widely used in the button trade even though designers and technical teams often work in millimeters. The conversion is simple: one ligne is approximately 0.635 mm, and about 40 ligne equals one inch. The real production risk is not the mathematics but incomplete specification. A tech pack that simply says “20 button” leaves room for interpretation because 20L is only about 12.7 mm, while a 20 mm button is closer to 31.5L and looks substantially larger on the garment.
A clearer trim specification records both units where practical, for example: “4-hole resin button, 20L / approximately 12.7 mm, matte finish, dyed to match.” That line gives design, merchandising, purchasing, sample-room, and bulk-production teams a shared reference. It also makes repeat orders easier because the approved size is documented independently of any supplier’s internal product name such as “small,” “medium,” or “shirt button.”
Ligne | Approx. diameter | Approx. inches | Typical visual scale |
14L | 8.9 mm | 0.35 in | Very small |
16L | 10.2 mm | 0.40 in | Small |
18L | 11.4 mm | 0.45 in | Small-medium |
20L | 12.7 mm | 0.50 in | Medium |
22L | 14.0 mm | 0.55 in | Medium |
24L | 15.2 mm | 0.60 in | Medium-visible |
28L | 17.8 mm | 0.70 in | Large |
32L | 20.3 mm | 0.80 in | Statement scale |
36L | 22.9 mm | 0.90 in | Prominent |
40L | 25.4 mm | 1.00 in | Very prominent |
Measuring the Button
For a conventional round button, measure straight across the widest point from edge to edge. A caliper is more reliable than a flexible tape, particularly for buttons below 20 mm where a one- or two-millimeter difference is visually meaningful. Irregular shapes need more information. An oval, square, rectangular, or novelty button should be recorded by width and height, while a thick or domed profile should also include thickness because that dimension affects how easily the button passes through its opening.
Shank construction is another variable. A shank holds the button away from the fabric, creating room for thicker plackets or layered materials to sit beneath it. That makes shank depth relevant when the dress uses heavy linen, tailored layers, or a substantial front facing. A robust specification can therefore include diameter, thickness, hole count or shank type, material, finish, color reference, logo orientation, and intended garment position rather than relying on a single diameter number.
Buttonhole Size
Button diameter and buttonhole length are related, but they are not the same measurement. The opening must be large enough for the button’s width and profile to pass through comfortably while remaining secure enough that the garment does not open during normal wear. A flat 13 mm button can work with a different opening from a deeply domed 13 mm button, and the same button may behave differently on a thin poplin placket than on a faced, interfaced denim front.
A common workshop starting point is to consider the button diameter plus allowance for thickness, then test the result in the real fabric construction. The physical sample is essential because stitch density, stretch, interfacing, washing, and multiple fabric layers all change the finished opening. Buttons around the bust and waist deserve extra testing because body tension can reveal gaping or tightness that is invisible when the dress is lying flat on a table.
Choosing the Right Scale
Numerical size is only the starting point because visual scale is relative to the garment. A 15 mm button can look prominent on a narrow satin placket and restrained on a broad linen front. A practical starting range for many light-to-medium functional dress buttons is roughly 10-15 mm, while visible or decorative options often move into the 15-25 mm range or beyond. Those figures are useful reference points, not fixed industry rules for every dress category.
Spacing changes perception just as strongly as diameter. Ten small buttons running down a long shirt dress create a strong repeated line, while three larger buttons can feel more graphic and tailored. When a size feels “almost right,” compare one option above and one below it on the finished sample. Placing 12 mm, 15 mm, and 18 mm candidates directly on the same front panel often reveals the best proportion faster than discussing the dimensions abstractly.
Which Button Size Works for Each Dress?
Button size should follow the dress construction, placket width, fabric weight, spacing, visual scale, and the amount of load the closure carries. Shirt and office dresses usually benefit from restrained functional buttons, while denim and structured styles can support larger hardware. Decorative buttons have more freedom, but their weight, attachment method, and orientation still need to match the garment.
Shirt and Office Dresses
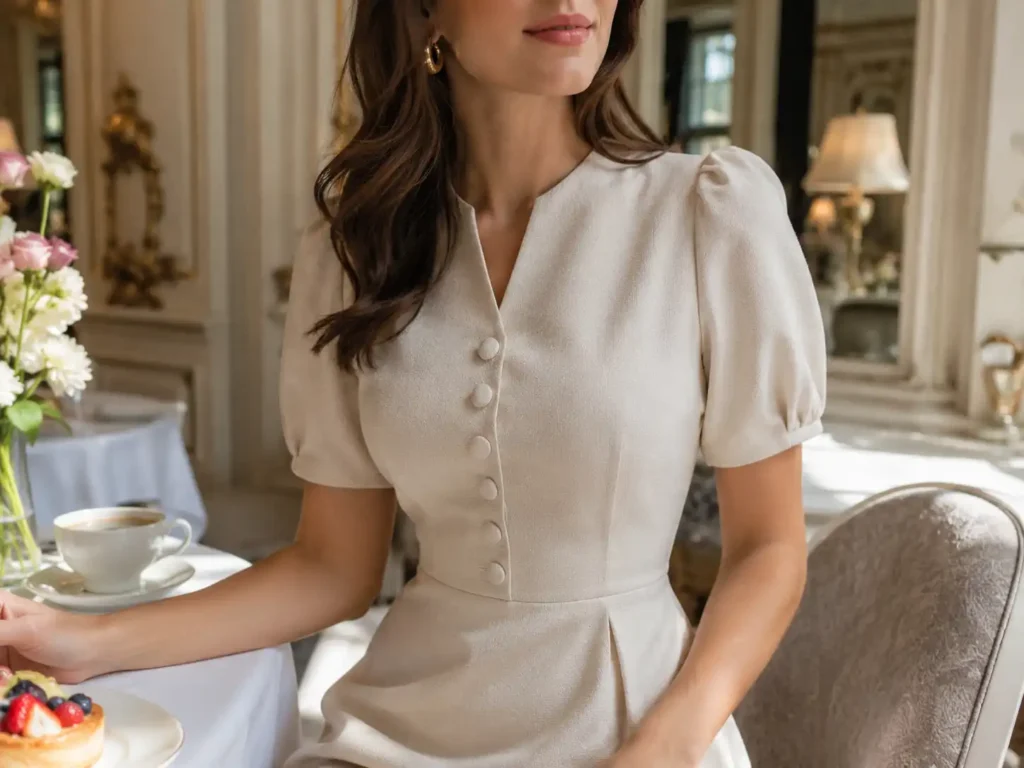
Shirt dresses usually need buttons that are easy to operate repeatedly and visually balanced across a long center-front opening. Small-to-medium resin, shell, or shell-effect buttons are common because they provide enough presence without making the front look crowded. A practical starting range around 10-15 mm often works for many lightweight and medium-weight shirt-dress constructions, although the placket width, number of buttons, fabric body, and overall garment scale should determine the final choice rather than the category name alone.
Bust placement can matter more than diameter. If one button sits directly at the fullest bust point, the closure experiences more outward tension and can gape even when the button itself is appropriately sized. Adjusting spacing, strengthening the placket, or correcting pattern balance may solve the issue more effectively than simply increasing the button. Office dresses follow a similar logic but often require a quieter visual result, using tonal resin, shell-effect, understated metal, or covered buttons that support the silhouette instead of competing with it.
Linen and Resort Dresses
Linen and linen-blend dresses can usually carry slightly more visible buttons than fine satin or chiffon because the fabric already has a noticeable surface texture and body. Shell, matte resin, horn-effect resin, corozo-style finishes, and covered buttons can all work, especially on relaxed shirt dresses, summer styles, and resort collections. The key is to match the button to the final fabric state rather than assuming every linen dress needs a natural-looking or oversized trim.
Fabric behavior after finishing matters. Linen and many viscose or rayon blends can shrink, soften, or change hand after washing, which may alter placket thickness and buttonhole performance. Jinfeng Apparel’s documented fabric-control system specifically identifies shrinkage, wrinkling, transparency, yarn irregularity, and color difference among linen-related inspection concerns. A buttonhole that operates perfectly on an unfinished sample can feel tighter after washing, so final trim approval should be made as close as possible to the production condition.
Denim and Structured Dresses
Denim can support larger and heavier buttons because the fabric itself has more physical and visual weight. Metal buttons, thick resin, tack-style hardware, branded pieces, and larger utility-inspired trims can all feel proportionate when used with visible seams and topstitching. A starting range around 17-25 mm may suit many visible denim dress details, but lightweight stretch denim and soft washed constructions often need smaller or lighter options than rigid, heavy denim.
The total hardware load also matters. A single 20 mm metal button may have little effect, while eight or ten of the same buttons running down a long front can change how the garment hangs. Wash and finishing processes should be considered as well because plating may react to garment washing, and stretch denim may move around a rigid trim point. Denim QC should therefore connect thickness, shrinkage, wash appearance, color difference, and hardware compatibility rather than evaluating each element separately.
Decorative Buttons
Decorative buttons are not constrained by a working buttonhole, so designers can use larger diameters, deeper domes, unusual shapes, jewelry-like surfaces, or more visible branding. This is common at shoulders, waist tabs, pocket flaps, cuffs, faux double-breasted fronts, and other areas where the button creates a visual accent. The absence of a functional opening does not remove technical requirements, however, because weight still needs to be supported and the attachment must remain secure.
Large metal or heavy resin buttons may need backing reinforcement, interfacing, or a small support button on the inside when they are sewn to soft fabric. Directional designs also require orientation control. A plain round button can rotate without anyone noticing, but a logo, crest, engraved line, or geometric face needs to sit at the same angle on every garment. For bulk production, orientation should be written into the sewing instruction instead of being left to individual operator judgment.
How Do Fabric and Design Affect Button Choice?
Fabric controls how much button weight, thickness, surface friction, and local stress a dress can tolerate, while design determines whether the trim should blend in, coordinate, contrast, function as a closure, or act mainly as decoration. Lightweight or delicate materials usually need smoother, lighter options or reinforced attachment areas, whereas denim and structured wovens can support more substantial buttons.
Fabric Weight and Structure
Fabric weight is a useful starting point, but it should not become a shortcut for button selection. A tightly woven 150 GSM material can sometimes support a button more securely than a loose, open 200 GSM fabric because yarn density, weave stability, stretch, interfacing, facing, and lining all affect how load travels through the garment. The real question is whether the finished construction can hold the button without rolling, sagging, enlarging stitch holes, or distorting the placket.
A simple sample-room check is to hang the finished garment for several hours with every button attached, then inspect for drag lines or front-edge roll before opening and closing the buttons repeatedly. This is especially useful on long button-front dresses because small amounts of trim weight accumulate. When a heavier button is essential to the design, reinforcement may be a better solution than reducing the diameter. Interfacing, facing construction, additional layers, or an internal support button can distribute force more effectively.
Satin and Delicate Fabrics
Satin, fine viscose, chiffon, mesh, and other delicate fabrics usually benefit from lighter, smoother buttons because these materials reveal distortion easily. A button sewn too tightly can create a visible depression around the attachment point, while a rough resin edge or metal burr can snag the surface. Glossy fabrics also make color matching more complicated because the apparent shade changes with light direction, viewing angle, and surface reflection.
Physical approval therefore matters more than digital matching. A button and satin fabric can share a similar nominal color yet still look different because one surface is matte and the other highly reflective. Jinfeng Apparel’s fabric QC documentation identifies satin color difference, snagging, gloss direction, stains, wrinkles, and pressure marks as inspection concerns. Those characteristics explain why controlled sewing tension, smooth edges, and careful packing are especially important when buttons are used on satin dresses.
Linen, Cotton, and Denim
Linen and cotton blends are versatile because they can carry resin, shell, natural-look, covered, and some metal buttons depending on the weave and garment structure. Crisp cotton poplin often pairs well with a clean, precisely finished button, while washed linen can look more natural with matte or subtly varied surfaces. The aim is not to match material names but to make the trim feel visually consistent with the fabric character and the intended retail position.
Denim expands the acceptable hardware range because heavier seams, visible topstitching, and a stronger surface can support bolder trims. Stretch denim still needs caution because the fabric may move considerably while the rigid button does not, increasing the risk of rotation or distortion if the placket is not stabilized. After-wash evaluation is also important for cotton, linen, and denim because shrinkage can tighten buttonholes, soften the supporting fabric, or change how hardware sits on the final garment.
Function, Color, and Design Intent
Before the button is approved, every position should be classified as functional, decorative, or both. Functional buttons must survive repeated opening, carry normal garment tension, and work with a correctly sized buttonhole. Decorative buttons can prioritize surface, scale, and shape, but they still need secure attachment and consistent placement. Confusion often appears when a button selected for appearance is later expected to perform a demanding closure function without changing its size, profile, or reinforcement.
Color usually follows one of three strategies: match, coordinate, or contrast. A matched button keeps a clean tonal look; a coordinated button adds subtle texture, such as cream shell on natural linen; a contrast button becomes an intentional graphic detail. Near-matches can be more dangerous than obvious contrast because a button that is only slightly off can look accidental. The same principle applies to metal trims, where buttons, sliders, hooks, chains, and zipper pullers should be reviewed together so that incompatible gold, nickel, gunmetal, or champagne tones do not weaken the overall finish.
What Should You Check Before Bulk Production?
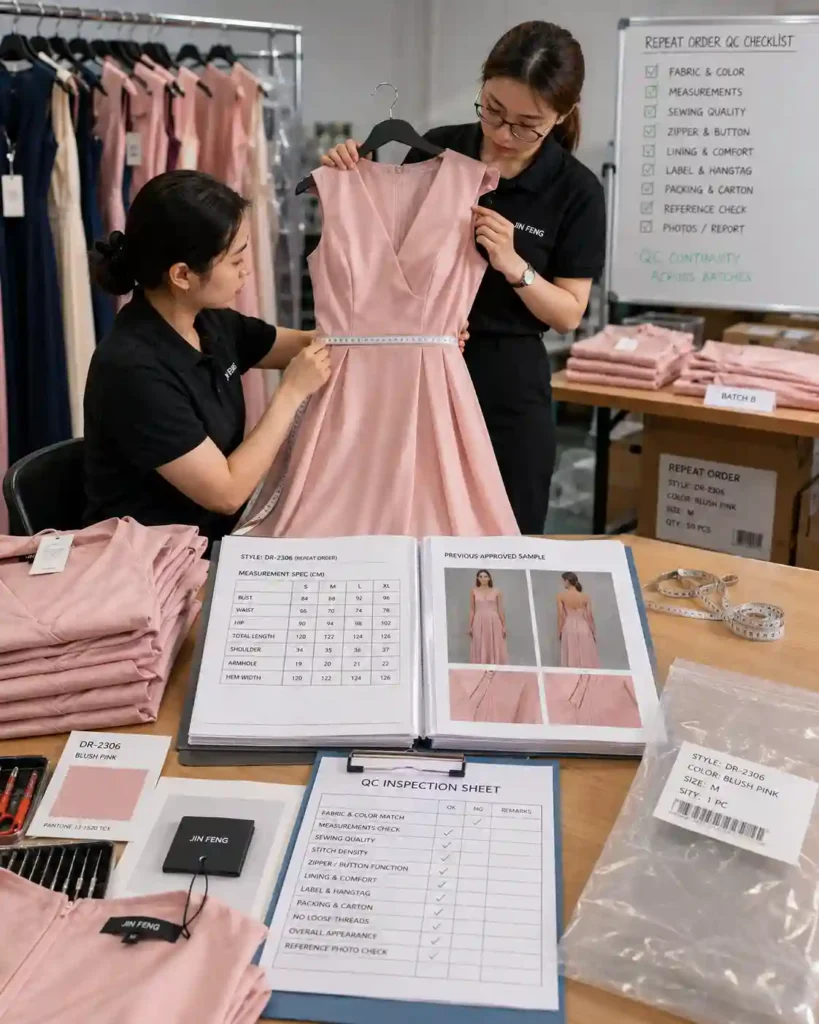
Before bulk production, inspect button size, color, quantity, surface finish, hole position, edge condition, attachment strength, placement, buttonhole operation, and spare-button requirements. The buttons should be checked both as incoming trims and on completed garments because a correct loose button can still fail after sewing if the thread tension, reinforcement, buttonhole, or garment construction is wrong.
Incoming Inspection
Incoming inspection should compare the production delivery with the approved physical standard rather than relying only on a supplier item code. Size, color, material, surface, hole position, and quantity are basic checks, and multiple pieces from different bags or cartons should be reviewed when the lot is large. This approach is particularly important for shell, pearl effects, plated metal, translucent resin, and other finishes where visual variation can appear even when the nominal specification is unchanged.
Jinfeng Apparel’s documented incoming-trim QC includes button size, color, quantity, surface, and hole position. The same principle is useful for any production team: check the front and back surfaces, inspect drilled holes, look for chips or burrs, and compare several pieces side by side. Natural materials should be judged against an approved acceptable range instead of rejecting every normal variation, while molded or plated products should show tighter consistency.
Attachment and Buttonholes
Button strength depends on the complete attachment system rather than the button alone. Thread, stitch program, sewing tension, hole spacing, garment reinforcement, and placement all affect whether the button remains secure during repeated use. High-tension positions such as the bust, fitted waist, or hip deserve extra attention because outward force can expose weaknesses that are not visible during flat inspection.
The buttonhole should be tested at the same time on the finished construction. A test made on a single fabric swatch does not reproduce a placket containing facing, interfacing, lining, seam allowances, and pressing. Repeatedly open and close the sample and check whether the buttonhole stretches, thread breaks, the button loosens, or the surrounding fabric deforms. Fitted dresses should also be tested on a fit model or correctly sized form because closures that operate smoothly on a hanger may become tight once body tension is introduced.
Surface, Placement, and Spares
Run a careful finger check around the button perimeter, holes, back, and shank because roughness that is difficult to see can still snag satin, lace, mesh, chiffon, or fine woven fabric. The risk increases during packing when buttons from one folded garment press against another for extended periods. A minor burr or chipped shell edge can create abrasion after transport even if no damage was visible immediately after sewing.
Placement should be checked for spacing, alignment, and orientation, especially when the face carries a logo or directional detail. Jinfeng Apparel’s button risk list includes loose buttons, color deviation, inconsistent size, inaccurate hole position, and edges that can scratch or catch fabric, while its QC points include strength, color, size, position, spare buttons, and closure performance. Spare buttons also affect purchasing quantities, so they should be included before the trim order is finalized.
QC point | Practical production check | Risk if missed |
Diameter / profile | Measure selected pieces and compare with approved sample | Poor proportion or buttonhole mismatch |
Color | Compare fabric and buttons across several production units | Visible lot-to-lot shade difference |
Surface | Check polish, plating, chips, scratches and burrs | Poor appearance or fabric damage |
Holes / shank | Check drilling, alignment and roughness | Crooked sewing or thread wear |
Attachment | Review sewing and apply the brand’s required strength check | Buttons loosening during wear |
Placement | Measure spacing and confirm logo direction | Inconsistent garment appearance |
Buttonhole | Repeated opening and closing on the finished dress | Tight closure or accidental opening |
Spare quantity | Confirm garment requirement and packing method | Missing replacement trim |
Quantity Planning
Trim consumption should be calculated from the garment specification rather than from the visible button count alone. If a dress uses ten functional buttons and the customer requires one spare, each finished unit already needs eleven before allowing for development samples, sewing loss, damaged pieces, QC replacement, or supplier defects. On a 5,000-piece order, one spare button per garment adds 5,000 buttons to the basic requirement, which is too large a difference to leave until packing.
Custom buttons make this calculation even more important because shortages may involve new molding, plating, color matching, or another supplier production run rather than a simple stock purchase. The practical purchasing formula is straightforward: buttons per garment multiplied by garment quantity, plus required spares and a controlled production allowance. The exact allowance should follow the project’s trim risk and supplier performance rather than a universal percentage that ignores material and production conditions.
How Do Custom Buttons Affect Production?
Custom buttons influence material choice, color, size, logo development, tooling, supplier MOQ, approval time, unit cost, and repeat-order consistency. They should enter product development early enough to be reviewed on the actual sample and recorded clearly in the BOM and trim approval files. Late customization can delay an otherwise finished garment because the button often has its own independent development schedule.
Material, Size, and Color
Customizing a button can range from selecting a special color in an existing mold to developing a proprietary shape, material, surface, or finish. The more a design moves away from standard supplier options, the more attention should be paid to feasibility, tooling, MOQ, timing, care performance, and future availability. Custom size should solve a real proportion or construction requirement rather than create unnecessary complexity when a visually equivalent standard size would work just as well.
Color development follows the same logic. A dyed-to-match tonal button may be worthwhile when the trim is highly visible on a minimalist dress, while a coordinated stock neutral can sometimes produce the same design value with easier sourcing. Collections also benefit from intelligent standardization. Reusing one approved button across several compatible styles can reduce separate purchase orders, sample approvals, QC references, and repeat-order risk without making the garments look less distinctive.
Logo Development
A custom logo should be developed at actual button scale. Fine lettering, narrow lines, and shallow detail that look clear on a large digital drawing may disappear after molding, polishing, plating, printing, or engraving. Small buttons usually benefit from a simplified monogram, symbol, short mark, or restrained edge pattern rather than a full wordmark forced into limited space. The approval process should include a physical prototype viewed at normal garment distance, not just an enlarged artwork file.
Manufacturing method affects design freedom. Resin can support molding, engraving, layered color effects, or printed details; metal can use stamping, casting, embossing, laser marking, plating, or enamel; covered buttons depend on the fabric surface rather than a molded face. Directional branding also needs an orientation plan because a beautiful logo loses value if it rotates differently from garment to garment. The sewing instruction should therefore specify the correct top, bottom, and stitch orientation where branding is visible.
MOQ, Timing, and Cost
Custom trims have their own economics. A stock button can often be supplied in modest quantities because the supplier produces the same style for many customers, while custom color, logo, material, plating, or molding requires a dedicated setup. Jinfeng Apparel’s current button-development reference lists custom-logo or special-material buttons commonly around 500-1,000 pieces at trim level, with regular button development around 3-10 days and customized versions around 10-25 days depending on the specification. These are planning ranges, not universal supplier promises.
Trim MOQ should not be confused with garment MOQ. A 1,000-button minimum theoretically covers 500 garments when each dress uses two buttons, 200 garments at five buttons, 125 garments at eight buttons, and 100 garments at ten buttons before spares or production loss are added. Cost works the same way. A small unit increase becomes meaningful when repeated across a long button front, so the commercial decision should consider the total trim cost per garment rather than judging the price of one button in isolation.

Repeat-Order Consistency
Repeat-order consistency depends on documentation rather than memory. The approved button sample, supplier reference, material, diameter, thickness, color, finish, logo artwork, garment placement, and QC notes should remain connected to the style record. Supplier item codes alone are not enough because resin formulas, metal plating, polishing, source materials, and even molds can change over time while a similar internal code remains in use.
The documented repeat-order process at Jinfeng Apparel retains button specifications as part of the trim record together with zippers, hooks, adjusters, elastic, cups, boning, labels, hangtags, and packaging details. That type of record is especially useful for seasonal drops, replenishment programs, and long-running core styles because a small visible change in button shade, thickness, logo depth, or surface can make the second production run look noticeably different from the first.
Conclusion
Choosing dress buttons well is not about memorizing one “correct” material or one standard diameter. The practical decision comes from connecting the button to the dress: fabric weight, surface texture, placket width, visual proportion, functional load, care method, buttonhole construction, quantity, and repeat-order needs all matter. A good button should look intentional from a normal viewing distance, operate naturally when the garment is worn, and remain stable when the style moves from sample development into bulk production.
For custom womenswear programs, the safest process is to compare real trim options on the actual garment, document the approved specification clearly, test the button and buttonhole together, inspect bulk trims before sewing, and preserve the reference for repeat orders. A few extra minutes spent on diameter, edge finish, placement, and attachment during sampling can prevent much larger problems later, from front-placket distortion and fabric snagging to shortages, inconsistent logos, and visible differences between production batches.
Share This Article :

Jerry Lee
Categories

Latest blogs


Table of Contents
Here, developing your OEM/ODM private label clothing collection is no longer a challenge—it’s an excellent opportunity to bring your creative vision to life.

