 Skip to content
What Are the Most Common Mesh Dress Defects and Their Root Causes?

Your trusted Women’s Apparel Manufacturer from China
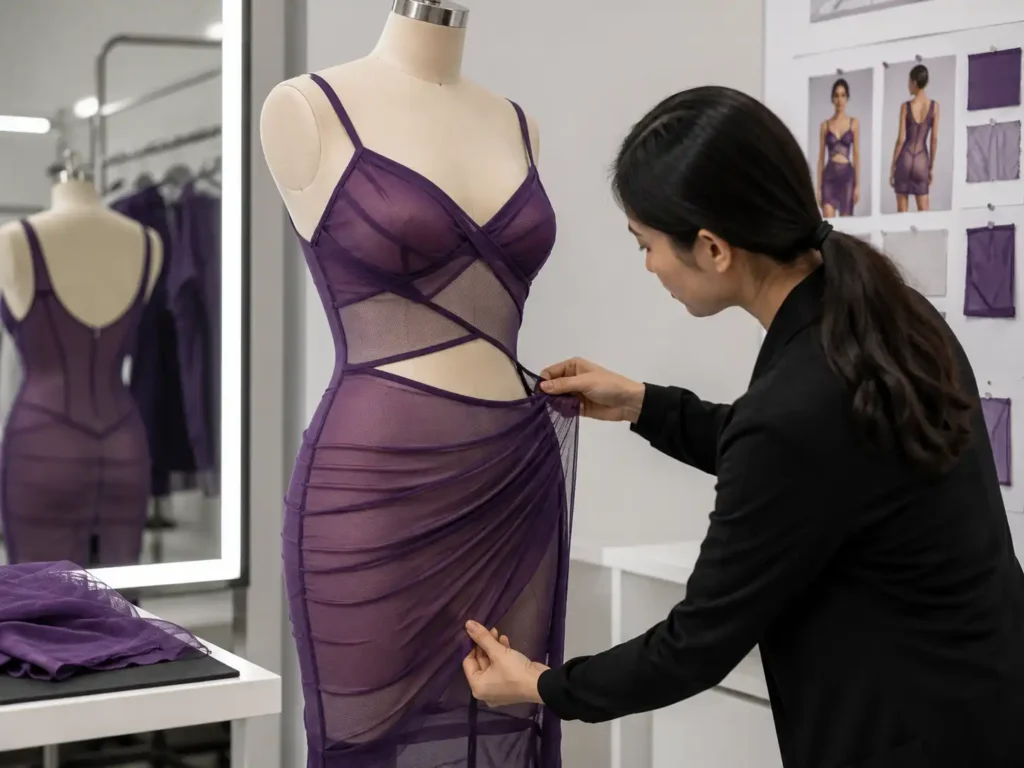
Mesh dresses have a way of exposing mistakes that heavier fabrics can hide. A seam that is only slightly overfed can look visibly wavy. A tiny damaged yarn can open into a hole when the dress stretches over the hip. A lining that seems correctly positioned on a hanger can suddenly show through the outer layer when the garment is worn. For fashion brands, these are not merely workshop imperfections; they can affect fit consistency, photography, customer reviews, return rates, and the confidence to repeat an order.
The most common mesh dress defects are holes, snags, runs, puckered or wavy seams, skipped stitches, stretched necklines and armholes, poor recovery, uneven transparency, visible lining, and print misalignment. Their root causes usually sit in one of five areas: the mesh fabric itself, cutting direction and handling, sewing setup, garment construction, or finishing. Effective diagnosis starts by finding the first production stage where the defect becomes measurable or visible.
A useful habit is to stop asking only, “How do we repair this garment?” and start asking, “At what stage did this condition first appear?” In one production run, a loose neckline may be blamed on sewing until cut panels are measured and found already stretched. In another, a hole discovered at final inspection may trace back to one needle operation repeated hundreds of times. The visible defect is often the last clue in a much longer story.
What Are the Most Common Mesh Dress Defects?
Mesh dress defects generally fall into three groups: material defects already present in the roll, defects introduced during cutting or sewing, and problems that become obvious only after the dress is assembled or worn under tension. Holes, snags, seam waviness, skipped stitches, distorted openings, poor recovery, uneven transparency, visible lining, and print-placement errors are among the most common production concerns.
Fabric Defects
Some mesh problems exist before the first pattern piece is cut. Fine mesh can contain broken yarns, irregular openings, local distortion, inconsistent density, contamination, shade variation, weakened areas, or printing irregularities that are difficult to see while the material lies relaxed. Once a fitted dress stretches across the bust, waist, or hip, a tiny structural irregularity can become much more visible because the openings in the mesh enlarge under tension.
Stretch mesh adds another variable: recovery. Two rolls can feel almost identical during hand inspection yet behave differently after repeated extension. One may return close to its original dimension, while another retains measurable growth. That difference can affect neckline stability, body length, hip fit, sleeve shape, and the way a lining sits inside the garment. For this reason, hand feel alone is not a reliable approval method for close-fitting mesh styles.
Incoming inspection should examine more than the surface. A practical review includes holes, mesh uniformity, color, print quality, stretch direction, recovery behavior, and transparency under representative extension. At Jinfeng Apparel, mesh-dress control points include transparency, mesh holes, stretch direction, recovery, neckline stability, lining length, printed-mesh placement, and seam flatness. Those checkpoints reflect a useful principle for any brand: mesh needs category-specific QC rather than the same generic checklist used for every dress fabric.
Sewing Defects
Sewing defects usually follow the construction line rather than appearing randomly across the garment. Typical examples include puckering, wavy seams, skipped stitches, needle damage, irregular seam allowances, twisted joining lines, and edges that have been stretched during assembly. Because mesh is light, open, and often elastic, a small difference in machine feeding or operator handling can create a visible change that would be much less obvious in a stable woven fabric.
One common mistake is to treat mesh as simply “a thin fabric.” Its real challenge is movement. The top and bottom layers may travel at different speeds, a lining may resist stretch while the outer mesh elongates, and the operator may pull the fabric slightly while trying to keep the edge aligned. A seam can therefore be correctly stitched in the narrow technical sense but still fail visually because the surrounding fabric no longer lies flat.
A useful production check compares the same seam before sewing, immediately after sewing, and after it has rested. If a 300 mm edge becomes 306 mm after sewing, the growth is 2%. On a short test strip that may look minor, but across a neckline, side seam, or long curved opening it can alter fit and appearance. Measuring growth makes troubleshooting more objective than relying only on phrases such as “a little wavy.”
Fit and Shape Defects
Finished mesh dresses often reveal problems that cannot be judged accurately on a flat table. A neckline may gape away from the body, an armhole may flare, a side seam may rotate forward, or a hem may hang unevenly because different panels have stretched by different amounts. These defects can appear even when the garment is technically within a relaxed measurement tolerance, especially on bodycon or highly fitted silhouettes.
This is why mesh fit should be assessed in two states: relaxed and under realistic wearing tension. A bodycon mesh dress may measure correctly on a table but become excessively transparent at the hip because the fabric is extending farther than expected. A double-layer panel may also develop unequal tension if the two layers were not cut in the same direction or if one layer stretched more during sewing.
The stronger approach is to combine measurement, visual inspection, and wear behavior. Bust, waist, hip, neckline, armhole, and length measurements remain important, but they should be interpreted alongside stretch direction, recovery, lining tension, and on-body balance. A mesh dress is acceptable only when the pattern and material behave as one system rather than merely meeting isolated dimensions.
Transparency and Placement Defects
Transparency is often part of the intended design, but uncontrolled transparency is a quality problem. A mesh dress can become unexpectedly sheer at the bust, hip, seat, or side seam because the fabric openings enlarge under extension. Uneven layering can make one area look darker or more opaque than another, while an unsuitable lining color can change the entire visual character of the outer mesh.
Printed mesh introduces another layer of risk. A motif that appears centered on a relaxed cutting panel can shift once the dress is assembled and stretched on the body. Large florals, directional graphics, border prints, symmetrical motifs, and central design elements require particular attention because small placement differences are easy to see in product photography and on symmetrical dress shapes.
| Visible defect | Typical first check | Evidence that helps isolate the cause |
| Hole or run | Fabric and sewing | Check unused roll material and whether damage repeats beside stitches |
| Snag | Handling and finishing | Look for random damage near trims, zippers, tables, bins, or hangers |
| Puckered seam | Sewing setup | Compare seam length before and after sewing and inspect thread balance |
| Wavy seam | Feeding and stretch | Check whether the edge grows after sewing and whether layers feed equally |
| Skipped stitches | Needle and machine | Check whether the issue repeats at one operation or thickness change |
| Gaping neckline | Cutting and sewing | Compare pattern edge, cut edge, sewn edge, and finished edge |
| Armhole distortion | Cutting and construction | Compare left and right sides and measure before and after sewing |
| Poor recovery | Fabric | Compare original length with post-stretch and post-rest length |
| Uneven transparency | Stretch and layering | Compare relaxed, stretched, lined, and worn appearance |
| Visible lining | Pattern and construction | Check lining length, width, attachment, and stretch compatibility |
| Print misalignment | Marker and cutting | Compare approved motif position with the finished garment on-body |
What Causes Holes, Snags, and Runs?
Holes, snags, and runs can start in the mesh roll or be introduced during cutting, sewing, trimming, pressing, movement, or packing. The damage pattern usually provides the fastest clue. Random defects across unrelated areas often suggest handling or material weakness, while repeated damage at the same seam, stitch interval, or operation point more strongly indicates a process-related cause.

Fabric Weakness
A small opening in mesh is not automatically a sewing defect. The yarn may already be weakened, broken, or distorted before cutting. Because the structure is open, one damaged yarn can allow neighboring openings to enlarge when the material is stretched. The defect may look insignificant in relaxed fabric but become obvious when the same area is pulled across a fitted section of the dress.
The most useful first check is unused material from the same roll or lot. If similar holes, irregular openings, or weak points can be found before sewing, changing the needle or machine settings will not remove the underlying problem. Roll identification and defect marking are valuable because they help determine whether the issue is concentrated in one area, one roll, or an entire lot.
For fitted mesh, suspicious areas should also be viewed under controlled extension. A weak point that looks stable when relaxed may open noticeably at normal garment stretch. This does not mean every factory needs a complicated laboratory test for every style. It means the material should be evaluated in the condition in which the customer will actually see it: stretched over a body, lining, or contrasting background.
Needle Damage
Needle damage often creates a more recognizable pattern. Tiny holes may appear immediately beside the seam, at regular stitch intervals, or repeatedly after one specific operation. Possible causes include a blunt or damaged needle, an unsuitable size or point, repeated penetration in the same area, excessive stitch density, or unstable fabric movement while the needle is entering the mesh.
The correct troubleshooting method is controlled testing. If the needle, thread, stitch length, presser-foot pressure, and machine settings are all changed together, the defect may disappear, but the team still does not know what caused it. The same problem can return later on another machine or during a repeat order because the actual relationship between material and setup was never established.
A better trial uses the production fabric and changes one variable at a time. After each test seam, inspect the stitch line in the relaxed state and again under moderate extension. If small openings appear only after stretching, the risk may be greater than the initial seam appearance suggests. Once an acceptable combination is identified, the setup should be recorded rather than left as unwritten operator knowledge.
Handling Damage
Some of the most serious-looking mesh holes are created away from the sewing machine. Rough cutting tables, damaged plastic bins, exposed metal edges, zipper teeth, hooks, pins, jewelry, broken hangers, and neighboring embellished garments can catch the open structure. Fine mesh, glitter mesh, embroidered mesh, and very soft stretch mesh are particularly vulnerable when they move through several production departments.
Handling damage is often more random than needle damage. One garment may have a snag near the hem, another at the side body, and another on a sleeve, with no consistent relation to a seam. When that pattern appears, the production route should be inspected from cutting through finishing and packing. A good machine adjustment cannot solve a sharp edge on a transport cart.
Simple controls can reduce risk substantially: smooth work surfaces, clean bins, protected zipper areas, separation from rough sequin garments, careful trimming, and fewer unnecessary handling steps. These controls are not glamorous, but they are often what separates a clean bulk shipment from an order containing dozens of apparently “mysterious” random holes. They are especially valuable on styles that move repeatedly between sewing, fitting, pressing, and packing stations.
Damage That Grows
One of the most frustrating mesh defects is a tiny damaged opening that appears harmless during sewing but becomes much larger during fitting. Mesh dresses often operate under significant extension across the bust, waist, hip, shoulder, or sleeve. A weakened point can therefore remain almost invisible in its relaxed state and then open when the garment is placed under normal wearing tension.
The surrounding structure matters as much as the original hole size. A stable 2 mm irregularity may be less risky than a 1 mm opening that doubles or triples under moderate extension. For internal troubleshooting, a team can mark the damaged area, apply a consistent stretch, release the fabric, and compare the opening before and after the test. The point is not to create a universal acceptance standard but to identify unstable damage.
Repeated needle penetration at seam intersections deserves special attention because several operations may concentrate stress in one small area. If a defect expands during stretch, repairing only the visible hole may not be enough. The team should review the local seam construction, stitch density, trimming, and fabric condition so the same stress concentration does not recur throughout the order.
What Causes Puckering and Wavy Seams?
Puckering and wavy seams usually develop when mesh, thread, lining, elastic, or another joined material moves and recovers at a different rate. Excessive thread tension, unequal feeding, operator pulling, unsuitable stitch construction, or stretch incompatibility can all contribute. The seam should be judged after it leaves the machine and after the material has had time to relax.
Thread Tension
Thread tension directly affects how much the stitch pulls the seam together. If the balance is too tight for a lightweight mesh, the seam can contract when it leaves the machine. The material between stitch points then gathers slightly, creating puckering that may become more obvious under side lighting or when the garment is stretched on a mannequin.
Reducing tension blindly is not the answer. A setting that is too loose can create unstable stitch formation or weak seam security. The target is a balanced seam that remains flat while still performing the required structural function. This balance changes with fabric weight, stretch, lining, thread, stitch type, and the number of layers passing through the machine.
A practical trial should use the actual production combination rather than a generic test fabric. Sew several short samples, allow them to relax, then compare appearance, stretch, recovery, stitch security, and surface damage. If the approved result depends on a particular setup, keep that information with the production instruction. Repeatability across machines and operators matters more than one perfect sample produced by trial and error.
Fabric Feeding
Unequal feeding is one of the most common reasons a mesh seam becomes wavy. The top mesh layer, lower mesh layer, and lining may move through the machine at slightly different speeds. An operator can also stretch the material unconsciously while trying to control a soft edge, particularly around curves, narrow panels, and long side seams.
The difference becomes more visible when stretch mesh is joined to a relatively stable lining. The mesh elongates during sewing and then tries to recover, while the lining remains close to its original length. The result can be a rippled seam even when the stitch itself is technically secure. Pressing may flatten it temporarily, but the wave can return during wear or after the garment relaxes.
Measuring the edge before and after sewing makes the issue easier to diagnose. If a 400 mm opening becomes 408 mm after sewing, the growth is 2%. On a curved neckline or armhole, a few millimeters can be enough to change how the edge sits on the body. Recording growth turns a subjective complaint into a process variable that can be adjusted and checked.
Stitch Construction
Stitch type, stitch density, thread behavior, seam allowance, and the number of layers all influence how flexible a sewn area becomes. If the seam is much less flexible than the surrounding mesh, the fabric and seam will recover differently after extension. That mismatch can create visible waviness even when the actual stitching is neat and consistent.
The problem becomes more complex when three or more materials meet. A neckline may combine stretch mesh, a lining, elastic, binding, or a stabilization tape. Each component may have a different modulus and recovery behavior. A construction that performs well on one mesh may become too rigid on another fabric that is lighter or more elastic.
A useful approval test considers four outcomes together: flat appearance, required stretch, recovery after extension, and comfort. A seam that looks perfectly flat but breaks under normal dressing is not acceptable. A seam that stretches easily but leaves a permanently rippled neckline is also not acceptable. The construction should support the intended silhouette without becoming the stiffest element in the garment.
Skipped Stitches
Skipped stitches occur when the machine fails to form complete stitches consistently. Stretch mesh can make this more likely because the material may move vertically and horizontally during needle penetration. Needle condition, needle type, thread compatibility, machine timing, fabric thickness, and the amount of stretch introduced during sewing can all influence stitch formation. The risk can increase further where mesh passes over seam intersections, elastic, binding, or multiple lining layers.
The location of the skipped stitches provides useful evidence. If they appear primarily at bulky seam intersections, the machine may be reacting to a sudden thickness change. If they continue along a long stretch-mesh seam, the relationship between the needle, fabric movement, and machine setup deserves closer attention. One isolated missed stitch and a repeating pattern should not be investigated in the same way.
Repeatedly sewing over the skipped area is rarely a good production solution. Extra penetration can weaken delicate mesh and create holes next to the repair. The better approach is to stabilize stitch formation before the bulk order continues, then document the approved method so the correction remains consistent when the style moves between machines or operators.
How Do Stretch and Recovery Distort Fit?
Stretch determines how far mesh expands around the body; recovery determines how closely it returns afterward. Incorrect direction, excessive handling, weak recovery, or unstable edge construction can create gaping necklines, enlarged armholes, length growth, side-seam movement, and inconsistent sizing. Fit therefore needs to be evaluated in both the relaxed garment and under realistic wearing tension.

Neckline Stretching
A mesh neckline often grows through several small events rather than one dramatic mistake. The edge may stretch during cutting, transport, sewing, binding, fitting, or pressing. By the time final inspection discovers the neckline gaping away from the body, the original cause may be several operations earlier and the finished measurement alone will not reveal where the growth began.
The fastest diagnosis compares the edge at different stages. Consider a pattern neckline measuring 420 mm. If the freshly cut edge is also 420 mm but the sewn edge becomes 428 mm, the increase is roughly 1.9%. That points more strongly toward sewing or handling than pattern development. If the cut edge already measures 428 mm, the investigation should move upstream to spreading, cutting, or fabric relaxation.
Reinforcement can help, but it should not be used to hide a fundamental mismatch between pattern and fabric behavior. The correct edge treatment depends on how much the mesh stretches, how much the neckline must open during dressing, and how firmly it must sit against the body. The objective is controlled flexibility rather than making every mesh neckline as rigid as possible.
Armhole Distortion
Armholes are vulnerable because they are curved and pass through several fabric directions. Parts of the edge may behave almost like a bias area even when the main body remains stable. A distorted armhole can flare away from the body, become larger than specification, differ from left to right, pull the side seam forward, or create unexpected tightness at the underarm.
Cutting should be checked before sewing is blamed. If the mesh is stretched while spreading or cutting, the armhole can change dimension when the panel relaxes. Likewise, if the lining and outer mesh are cut with different directional behavior, one layer can pull the other after assembly. Comparing mirrored left and right components is a quick way to identify inconsistencies.
A useful diagnostic sequence is pattern, fresh cut panel, sewn opening, and finished garment. If the cut panel is correct but the finished armhole is larger, review feeding, operator handling, and stabilization. If all measurements are correct but the armhole still looks poor on-body, the issue may involve pattern balance, lining tension, shoulder position, or the relationship between the armhole shape and fabric stretch.
Stretch Direction
Stretch direction can change the entire fit of a mesh dress. Many stretch meshes extend much more across the width than along the length. Rotating a pattern piece can therefore create a garment that behaves very differently even though the same fabric, pattern, and sewing method are used. The effect can show up as tightness across the body, excessive length growth, twisting, or inconsistent transparency.
A simple 100 mm gauge makes stretch easier to communicate. If a marked 100 mm section reaches 130 mm under the chosen test force, the extension is 30%. If it reaches 150 mm, the extension is 50%. These figures are not universal specifications for dresses; they are a practical way to describe fabric behavior so design, pattern, cutting, and production teams are discussing the same material condition.
Original gauge | Extended length | Calculated extension | Typical development meaning |
100 mm | 110 mm | 10% | Limited stretch; fit depends heavily on pattern ease |
100 mm | 125 mm | 25% | Moderate extension; common in semi-fitted stretch constructions |
100 mm | 130 mm | 30% | Noticeable stretch; direction control becomes important |
100 mm | 150 mm | 50% | High extension; transparency and recovery need close review |
100 mm | 175 mm | 75% | Very high extension; pattern reduction and recovery behavior are critical |
For fitted dresses, horizontal extension across the bust, waist, and hip often matters most, while vertical stretch can influence garment length, shoulder stability, and hem level. Printed mesh adds another concern because motifs distort differently depending on the direction and amount of extension. Stretch direction should therefore be confirmed before marker planning, not discovered after bulk cutting.
Poor Recovery
A fabric can stretch well and still recover poorly. That distinction matters because a new sample may fit beautifully during the first fitting yet become loose after repeated try-ons or several hours of wear. Necklines, waist areas, armholes, elbows, seat areas, and hems can all show residual growth if the mesh does not return sufficiently toward its original dimension.
A simple internal comparison uses the same 100 mm marked section. Stretch it to a defined length, release it, allow a consistent recovery period, and measure again. If it returns to 102 mm, residual growth is 2%. If it returns to 108 mm, residual growth is 8%. These numbers should not be treated as universal pass/fail limits because acceptable recovery depends on the mesh construction and garment design.
The real value is comparison. The approved sample fabric and the bulk lot should behave in a reasonably consistent way under the same internal test method. If bulk material shows materially greater residual growth, changing the pattern alone may create a tighter first fit without solving long-term shape loss. In that situation, the fabric specification or construction may need to be reconsidered.
Which Transparency and Placement Defects Matter?
The main visual risks are excessive sheerness, uneven transparency, visible lining edges, inconsistent layer density, and printed motifs that shift away from the intended position. These problems often appear only after the dress is stretched on the body. Mesh density, color, layer count, lining shade, stretch direction, and print placement should therefore be approved as one visual system.
Mesh Density
Mesh density strongly influences coverage, but density is only one part of the visual result. Yarn thickness, opening size, fabric color, number of layers, lining color, and the amount of stretch all determine how much skin or lining can be seen. Two fabrics with a similar relaxed appearance can look very different once one is extended across the body.
This is why approval from a small flat swatch can be misleading for fitted styles. The material should be viewed relaxed, over the proposed lining, under representative extension, and in the completed sample. Those four conditions reveal how the design will behave much more accurately than a simple “sheer” or “not sheer” judgment made at a sourcing desk.
Lighting also changes perception. Strong backlighting, flash photography, stage lighting, and direct sunlight can reveal coverage issues that are not obvious under soft showroom lighting. For party, occasion, festival, and club styles, this deserves attention because the dress may be photographed in conditions that exaggerate transparency. The intended visual level should be agreed during sampling rather than left for final inspection to interpret.
Uneven Transparency
Uneven transparency can make one garment look as if different fabrics were used even when every panel comes from the same roll. The usual cause is unequal tension, layering, orientation, or lining rather than an actual shade change. The bust and hip often look more transparent than the waist because the mesh is extending farther over those areas.
Other causes include inconsistent layer count, local gathering, different stretch direction between panels, uneven seam tension, or lining that has shifted away from its intended position. Before treating the issue as a color problem, compare how each area is being stretched. What looks like a shade difference may simply be a structural difference that changes the size of the mesh openings.
Photographs of the approved sample under controlled lighting are useful references for bulk production. Front, back, and side images help communicate the intended degree of transparency more clearly than phrases such as “slightly sheer.” This is especially important when the desired effect sits between fully covered and deliberately transparent, because human interpretation of those terms varies widely.
Lining Visibility
Lining affects more than modesty. It changes perceived color, stretch, comfort, silhouette, opacity, and the way the outer mesh moves. A lining that is only 20 or 30 mm shorter than intended can create a strong horizontal line under sheer mesh, particularly on a mini dress or fitted skirt area where the edge is easy to see.
Stretch compatibility also matters. A stable lining beneath very elastic mesh can restrict movement and pull the outer layer inward. A lining with excessive stretch or weak recovery can sag, shift, or become longer than the outer construction after wear. The lining should therefore be selected and patterned as part of the mesh system rather than treated as a generic internal fabric.
Useful checks include lining length, width, color, stretch direction, recovery, attachment points, bust coverage, seat coverage, side-slit relationship, and hem visibility. On a sample, these areas should be reviewed both on a mannequin and during movement. The lining may look correct while standing still yet ride up or become exposed after sitting, walking, or stretching.
Printed Mesh Placement
Printed mesh combines apparel pattern placement with fabric stretch, which is why alignment can become complicated quickly. A floral motif centered on a relaxed front panel may move outward after the garment is worn. Likewise, left and right pieces cut from different points in a repeat can produce obvious asymmetry even if the seam lines match perfectly.
The first step is to identify which motifs actually need controlled placement. Center-front graphics, large bust motifs, waist borders, neckline details, and symmetrical side elements usually deserve more attention than small random prints. Attempting to match every tiny element can increase marker waste and cutting time without creating a meaningful visual improvement. Defining the visually critical zones in the approved sample gives the cutting team a realistic target.
After sewing, the finished garment should be judged on-body rather than only against the flat cutting marker. Stretch can move a motif several centimeters across a fitted panel depending on the fabric and body area. The approved sample should therefore establish both the relaxed placement and the acceptable visual result when worn, particularly for e-commerce styles where symmetry is obvious in front-facing photography.
How Are Mesh Dress Root Causes Identified?
Root-cause analysis works best by locating the earliest production stage where a defect can be observed. Start with unused fabric, then compare cut panels, sewn components, finished garments, and pieces after pressing or packing. Repeating patterns provide stronger evidence than isolated defects and help separate material, cutting, machine, method, handling, and construction variables. This stage-by-stage comparison also prevents the last operator who touched the garment from being blamed automatically.

Check the Fabric
Unused material from the same roll is one of the strongest references when a defect is suspected. If the same hole, density irregularity, recovery problem, shade variation, or print defect can be found before cutting, the evidence points toward the material. This simple comparison can prevent hours of machine adjustment aimed at a problem that the sewing department did not create.
Roll and lot traceability make the investigation faster. Imagine that 12 defective garments can all be traced to one roll, while pieces from three other rolls remain acceptable under the same sewing operation. Material variation becomes a strong suspect. In a different case, defects may appear across every fabric roll but only after one machine operation, shifting attention toward the process instead.
The purpose of traceability is not paperwork for its own sake. It reduces the number of variables that must be tested. Useful records include roll identification, lot, shade, width position, stretch direction, print repeat, and marked defective areas. When these references are preserved, the production team can isolate the problem rather than treating every damaged garment as an unrelated event.
Check the Cutting Stage
Cutting defects often disguise themselves as sewing or fit problems later. Incorrect stretch direction, inaccurate pattern placement, distorted spreading, damaged panels, and mismatched lining can all enter the sewing line looking acceptable enough to escape immediate attention. Once the garment is assembled, the same mistake becomes more expensive to identify and correct. On sheer or printed mesh, a cutting error may also become much more visible after the dress is stretched on a mannequin.
A strong diagnostic sequence is pattern, cut panel, sewn component, and finished garment. If a neckline is correct on the paper pattern but already too long on the cut panel, there is little value in adjusting thread tension first. If the cut panel is accurate but grows after sewing, the investigation can move downstream with more confidence.
For mesh styles, practical cut-panel checks include size, color, fabric direction, stretch direction, print direction, panel completeness, visible damage, shade, holes, and lining compatibility. The economic logic is straightforward: replacing one defective cut panel is normally easier than opening seams and rebuilding a completed dress, and far easier than discovering the same problem after a large quantity has reached final inspection.
Check the Sewing Operation
A repeating defect at one construction point is a strong clue. If ten consecutive dresses develop tiny holes beside the same seam, or multiple garments show identical waviness after the same operation, that process should be isolated before production continues. One random defect can be accidental; a repeated pattern is information. Repetition links the defect to a controllable variable and gives the technical team a much better starting point for testing.
For line-side troubleshooting, a small consecutive sample of perhaps five to ten pieces can help establish whether the issue is systematic. This is a diagnostic check, not an AQL acceptance standard. Record the machine, operator, operation, needle, thread, stitch type, seam length before sewing, seam length after sewing, and the visible defect, then change one variable at a time.
Operator technique should be reviewed without automatically assuming the operator is the root cause. A person may be compensating for unstable cutting, excessive presser-foot pressure, a difficult seam design, or a lining that does not feed with the mesh. Good root-cause work separates human handling from upstream constraints so corrective action fixes the system rather than merely moving the defect to another operator.
Check Finishing and Handling
If garments leave sewing in acceptable condition but defects appear after pressing, trimming, hanging, inspection, or packing, finishing should be investigated. Mesh can be affected by sharp trimming tools, rough pressing surfaces, excessive pressure, inappropriate heat, exposed metal hangers, zipper teeth, neighboring embellished garments, and rough packing tables. The later a defect appears, the more useful it becomes to compare garments immediately before and after each finishing handover.
Timing is useful evidence. If a group of garments is photographed after sewing with no visible snagging but shows damage after the pressing area, the investigation becomes much narrower. Handover checks between departments can be particularly valuable for delicate styles because they show when the condition changes rather than forcing the team to reconstruct the process later.
First stage where defect is found | More likely investigation area | Useful comparison |
Unused fabric | Material or fabric lot | Compare rolls, lots, width positions, and stretch behavior |
Fresh cut panel | Spreading or cutting | Compare pattern dimensions, direction, print placement, and panel damage |
Immediately after one seam | Sewing operation | Compare machine, needle, thread, feeding, and operator handling |
After lining assembly | Construction compatibility | Compare layer stretch, feed rate, and attachment method |
After pressing | Finishing | Compare heat, pressure, surface condition, and handling |
After transport or packing | Handling | Inspect bins, hangers, trims, zippers, tables, and stacking |
Only when worn | Fit and material behavior | Compare stretch, recovery, balance, lining tension, and body extension |
A structured QC flow makes this process much easier. Incoming material inspection, cutting QC, sewing QC, in-line inspection, finished-garment review, pressing checks, packing checks, and final inspection each create a point where the condition of the garment can be compared. The earlier the first abnormal stage is identified, the smaller the number of possible causes.
How Can Mesh Dress Defects Be Prevented?
Mesh dress defects are best prevented through fabric approval, documented sampling, pre-production confirmation, cut-panel inspection, in-line QC, and written corrective records. Final inspection is still necessary, but its role should be to confirm quality rather than discover the same repeating problem across a large finished quantity. Earlier control reduces rework, material loss, inconsistent fit, and sample-to-bulk variation.
Sample Validation
A mesh sample should be treated as a production experiment, not only as a visual representation of the design. It reveals how the selected mesh behaves with the pattern, lining, stitch construction, trims, and body tension. This is the stage where problems are cheapest to understand because changes can still be made without affecting hundreds or thousands of cut components.
Sample comments are more useful when they describe measurable behavior instead of only appearance. “Neckline is loose” identifies the symptom. “Cut neckline matches the pattern but grows 7 mm after binding” points toward a much narrower group of causes. Likewise, “lining shows” becomes more actionable when the comment identifies whether the issue is lining length, color, coverage, attachment, or movement during wear.
For complex mesh styles, development may require more than one revision before the construction becomes stable. The exact number depends on fit, fabric, trims, and design complexity, so a rigid promise is not useful. What matters is that every approved correction moves into the actual production files: revised pattern, updated measurements, fabric approval, sewing instruction, and QC checkpoint.
PP Sample Control
The pre-production sample is valuable when it represents the direction that is intended for bulk production. For mesh dresses, the PP sample should confirm the approved mesh, lining relationship, stretch orientation, seam construction, neckline and armhole treatment, print placement, key measurements, trims, and overall visual transparency before bulk cutting begins. It should be close enough to the intended production standard that operators and QC staff can use it as a practical reference.
PP approval creates a common reference. Without it, production teams may compare bulk garments with early development samples, outdated photographs, or memory. If a bulk neckline begins to grow, the team should be able to compare the actual construction with the approved reference. If transparency changes, the mesh lot, lining, layering, and stretch behavior can be checked against an agreed standard.
A useful PP review covers fabric and color, stretch direction, lining construction, critical measurements, neckline and armhole behavior, seam flatness, print position, transparency, trims, and packaging requirements. For a brand working with a custom mesh dress manufacturer, this stage is also the right time to ask how production instructions and quality checkpoints are transferred from the sample room to the bulk line.
In-Line QC
In-line QC catches repeating problems while the production method can still be changed. If a line has completed only 20 or 30 pieces and several show the same wavy neckline, there is still time to isolate the operation. If the same problem is discovered after 800 finished garments are packed, the technical issue has become a rework, scheduling, and delivery problem as well.
For mesh styles, line checks can focus on seam flatness, needle damage, holes, neckline dimensions, armhole symmetry, lining position, stretch-related size changes, print placement, and visible distortion. The exact frequency should match the order size, operation risk, previous defect history, and the quality plan rather than relying on one arbitrary interval for every style. High-risk operations may justify more frequent checks during line start-up and after machine or operator changes.
Trend matters as much as a single measurement. If the approved neckline is 420 mm and early pieces remain close to the agreed tolerance, production may be stable. If later pieces progressively increase toward 428 or 430 mm, the direction of change is important even before every garment becomes visibly unacceptable. Catching drift early is one of the strongest reasons to inspect production while it is still running.
Corrective Records
The most valuable defect is the one that does not return on the next order. Once a root cause has been identified, the correction should be recorded in the production system. Otherwise, the same problem can reappear when a different operator runs the style, when a new fabric lot arrives, or when the design returns six months later as a repeat order.
Useful records include approved fabric references, stretch direction, recovery notes, revised patterns, seam construction details, lining specifications, print-position references, PP comments, defect photographs, and QC checkpoints. Where machine setup is critical, needle, thread, stitch, or handling notes can also be retained. The level of documentation should match the risk and complexity of the style rather than becoming paperwork for its own sake.
For brands, a useful supplier question is not simply, “Do you have strict QC?” A stronger question is, “How do you identify where a defect begins, how is the correction transferred into bulk production, and how is that information preserved for repeat orders?” Jinfeng Apparel’s mesh dress workflow is built around this kind of stage-by-stage control, from material and cutting review through sewing, garment inspection, and production records.
Mesh is unforgiving, but that is also what makes it manageable. The defects tend to leave clues: a repeated needle mark, a neckline that grows between two measured stages, a motif that shifts only after stretch, or a hole pattern concentrated in one roll. When fabric behavior, cutting direction, sewing conditions, lining, fit, and handling are reviewed as connected parts of the same product, quality becomes easier to control. For brands developing custom mesh dresses, the most reliable production conversation starts before bulk cutting, when there is still time to test the material, stabilize the construction, and turn every important sample correction into a repeatable production standard.
Share This Article :

Jerry Lee
Categories

Latest blogs


Table of Contents
Here, developing your OEM/ODM private label clothing collection is no longer a challenge—it’s an excellent opportunity to bring your creative vision to life.

