Skip to content
Shirts can be ruined by one thing—buttons that fall off too soon. That small detail reflects the quality of the entire garment. For brands like mine, every button is a branding moment. Let’s make sure they’re done right.
The key to durable, neat button sewing1 lies in mastering both the tools and technique—whether it’s for hand-sewing or machine-sewing, this guide breaks down each critical step.
I still remember the first time I lost a shirt client due to buttons falling off in the first wash—it changed how I viewed “small” quality issues. Since then, I’ve taken button sewing seriously. Here’s everything I’ve learned.
Button sewing is more than just attaching a fastener. It defines how your shirt wears, functions, and feels. It also sets apart fast fashion from quality craftsmanship.
Properly sewn buttons enhance both the function and perception of quality in any shirt—retail or custom-made.
 Sewing Button on Fabrichand-sewi
Functional vs Decorative Buttons
Buttons are either used daily or serve purely aesthetic purposes. Each type requires different stitch strength, placement precision, and thread reinforcement.
| Type | Primary Use | Recommended Stitching |
|---|---|---|
| Functional | Opening/closing | Strong cross or parallel stitch |
| Decorative | Style accents | Light anchoring, no shank needed |
Decorative buttons can be sewn lighter. But functional buttons need solid anchoring and consistent alignment to avoid popping off after wear.
Quality Implications in Retail and Custom Shirts
For mass retail shirts, buttons must survive shipping, folding, and customer trials. For custom shirts, a loose button can ruin a high-end impression.
- Retail: Buttons face stress in bulk production and must pass QC tests.
- Custom: Button finish must match premium stitching and fabric quality.
I’ve seen brands lose high-value buyers over a single crooked button. Never underestimate what this tiny detail represents.
What tools and materials do you need?
Having the right setup makes sewing smoother and the final result stronger. Even if you’re hand-sewing, having professional tools changes everything.
You’ll need sharp needles, durable thread, precision scissors, a thimble, and a selection of button types to match your shirt’s use and design.
Needles, Threads, Scissors, Thimble, and Button Types
Always match your needle size to your fabric weight and buttonhole size. Use polyester or waxed cotton threads for strength.
- Needles: Fine (size 9–10) for lightweight shirts, heavier (size 7–8) for denim
- Threads: Polyester for machine-washable shirts, silk for delicate
- Buttons: 2-hole, 4-hole, or shank—each needs different techniques
Carry a variety of button shapes and materials in your sampling room. It helps clients visualize options.
Choosing the Right Thread Color and Thickness
Contrast threads are trendy, but classic shirts need subtle tones. Color matching matters just as much as thread strength.
Use thicker thread for durability and lighter thread weights for precision. Always color-match to the fabric for a clean finish.
For white shirts, I always use an optical-white thread. For black shirts, deep charcoal hides better than jet black on stitching.
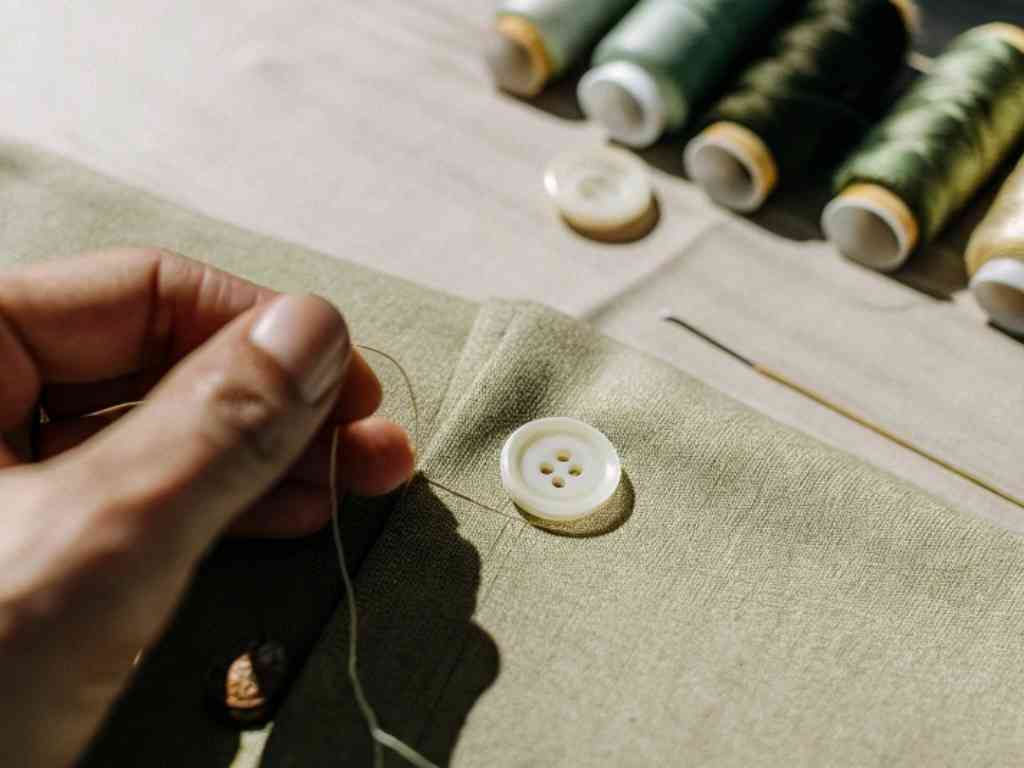
Hand-sewing gives control and precision, especially for shank buttons or custom placements. Here’s how I teach my team to do it right.
Start by preparing the needle and thread, position the button correctly, stitch it securely using your preferred method, then finish it off cleanly.
Preparing the Needle and Thread
Use 18–24 inches of thread. Double it if needed. Waxing the thread helps prevent tangling and adds strength.
Thread the needle, knot the end firmly, and pre-stretch the thread slightly to prevent slack after sewing.
Positioning the Button (Flat and Shank Types)
Flat buttons go flush with fabric. Shank buttons need to be centered over the stitching point. Mark your placement using tailor’s chalk.
- Flat buttons: Sit directly on the fabric surface
- Shank buttons: Leave a gap under the shank for movement
Always mark before sewing—eyeballing leads to misaligned rows.
Sewing Technique: Cross Stitch vs Parallel Stitch
Cross stitches give stronger hold. Parallel stitches look cleaner for minimal designs.
| Stitch Style | Look | Best For |
|---|---|---|
| Cross (X) | Secure hold | Workwear, thicker fabric |
| Parallel (II) | Clean and subtle | Dress shirts, fine fabric |
I alternate styles depending on shirt type. For menswear, cross stitching adds ruggedness. For women’s blouses, parallel looks neater.
Creating a Thread Shank for Flat Buttons
To allow space for fabric overlap, you need a thread shank under flat buttons.
Wrap the thread 3–5 times under the stitched button before tying off—it creates a small stem that prevents puckering.
This small trick massively improves button functionality, especially around plackets and collars.
Securing the Thread and Finishing Cleanly
The knot should be hidden. Pass the needle under previous stitches to lock it. Trim with sharp scissors.
Tie a tight knot close to the fabric, hide it under the button if possible, and trim neatly to prevent fraying.
Avoid long tails—they catch and weaken over time.
Durability is everything in shirts meant for daily wear. A good button must survive 50+ washes and constant pulling.
Use a backing button and reinforce knots to prevent loosening or thread breaks over time.
Using a Backing Button
A backing button (hidden inside the shirt) shares the tension from wear.
| Type | Where to Use |
|---|---|
| Plastic disc | Thin fabrics |
| Spare button match | Heavy outerwear shirts |
I always add these on coats and heavy cotton shirts. It’s invisible from the outside but makes a big difference.
Thread Knot Techniques and Fray Prevention
Lock stitches into place with figure-8 knots and apply a dab of clear nail polish to prevent frays.
Double-knot and pass the needle under 2–3 loops before trimming—secure knots are the secret to longevity.
A single weak knot could mean re-sewing hundreds of buttons in a failed batch. Avoid that.
Machine-sewn buttons work for scale. But they need proper setup and care, or it becomes a liability in bulk orders.
Use button-sewing machines for speed, but only with precise settings for hole alignment, tension, and speed.
Industrial Button-Sewing Machines (Lockstitch)
These machines anchor buttons fast using zigzag lockstitch, perfect for production lines.
| Machine Feature | Importance |
|---|---|
| Stitch type | Lockstitch or zigzag |
| Clamp type | Ensures no shifting |
| Preset cycles | Saves time and consistency |
I always test run machines on scrap fabric first, especially after changing thread tension.
Settings, Buttonhole Alignment, and Speed Tips
Alignment is critical. Use jigs or laser guides. Don’t rush.
Keep machine speed moderate, use the correct presser foot, and ensure buttons line up with buttonholes before running.
We’ve lost shirts in production because of a single misaligned batch. It’s costly—double-check everything.
Once buttons are on, the real work starts: checking their strength, alignment, and comfort.
Ensure buttons are spaced evenly, aligned precisely with buttonholes, and tightly sewn without puckering the fabric.
Button Placement Relative to Buttonholes
Spacing should follow a shirt’s pattern. Most brands space buttons 3–3.5 inches apart from center.
- Top to bottom alignment: Use a pattern marker
- Critical zones: Collar, chest, waist, and hem
Even a 2mm shift throws off the visual line on placket shirts. That’s why I always do final checks with a measuring grid.
Avoiding Puckering and Uneven Spacing
Too-tight stitching causes fabric puckering. Too-loose leads to wobble.
Leave slight thread shank for movement, and press gently post-sewing to flatten fabric without warping.
Puckering kills the look of luxury. Always iron and inspect.
What does quality control3 look like in professional factories?
Factory-level button sewing needs structured checks to maintain brand integrity across thousands of units.
Use detailed QC checklists, conduct pull and friction tests, and follow OEM/ODM sewing standards for global compliance.
QC Checklists: Stitch Count, Pull Test, Friction Testing
Every button should meet checklist criteria:
| QC Point | Standard |
|---|---|
| Stitches per hole | 6–8 |
| Pull resistance | 10–15 lbs |
| Friction test | 50 cycles minimum |
Teams perform these checks before packing. I train QC staff to use digital pull testers and friction wheels.
OEM/ODM Standards You Should Know
Most buyers expect international QC standards. That includes AQL levels for defects and button fatigue ratings.
- ISO 4915: Stitch classification
- ASTM D1683: Seam strength and slippage
Knowing these helps your factory earn trust with global clients. Our buyers in the US and UK often require detailed reports on button strength alone.
Conclusion
Sewing buttons well is more than just a task—it’s a skill that protects your shirt’s quality and your brand’s reputation. Follow the right steps, use the right tools, and never skip final checks.
-
Explore this resource to master button sewing techniques that enhance garment quality and durability. ↩
-
Learn effective methods to reinforce buttons, ensuring they withstand wear and tear for longer-lasting garments. ↩
-
Understanding quality control in garment manufacturing is crucial for maintaining high standards and customer satisfaction. ↩