Skip to content
Struggling with leaky zippers that ruin your outdoor gear? You’re not alone. Many people don’t realize how technical sewing a waterproof zipper can be — until water sneaks through.
To sew a waterproof zipper properly, you need the right materials, careful fabric preparation, and a precise sewing method that preserves the waterproof coating.
I learned this the hard way during a hiking trip when my self-made jacket failed under rain. Since then, I’ve tested and perfected a method that keeps every drop out.
What Makes a Zipper Waterproof and Why Does It Matter?
Waterproof zippers look similar to regular ones, but there’s a big difference under the surface. Let’s uncover what makes them so effective.
Waterproof zippers have a rubber or PU coating that seals the teeth and prevents water from passing through. This makes them essential for items exposed to rain, snow, or moisture.
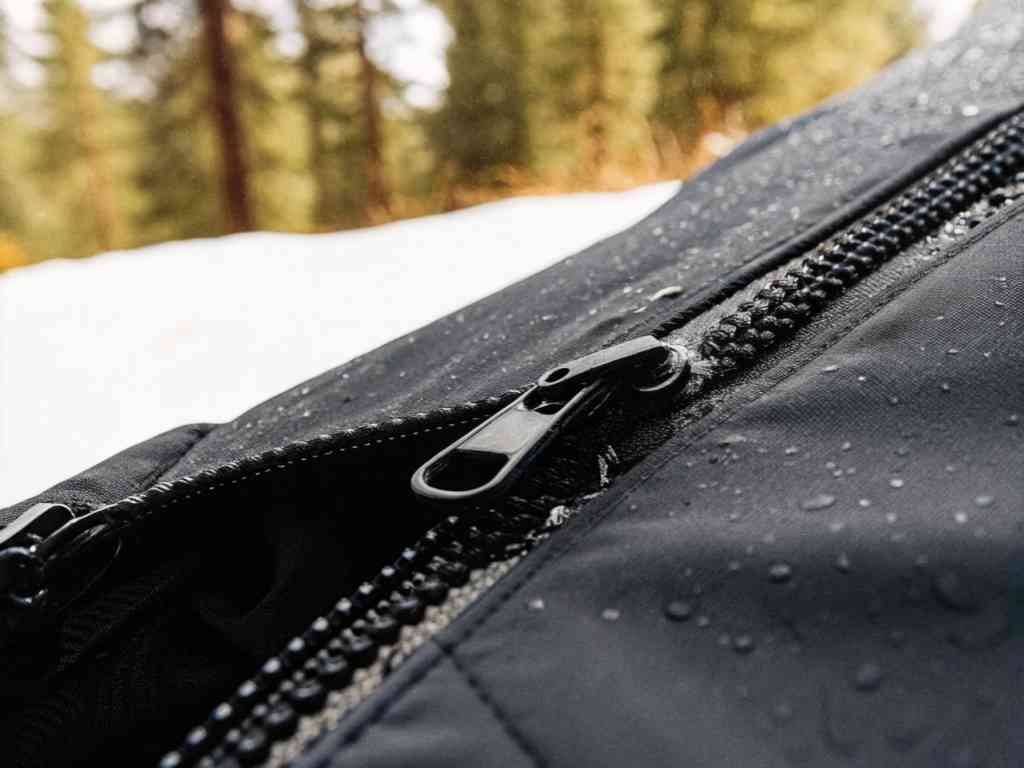 Wet Gear Zipper
What is the difference between regular and waterproof zippers1?
Regular zippers are usually made from plastic or metal teeth with no protective layer. Waterproof zippers, on the other hand, have a laminated coating that acts as a seal.
| Feature | Regular Zipper | Waterproof Zipper |
|---|---|---|
| Coating | None | PU, TPU or rubberized |
| Water Resistance | Low | High |
| Applications | Everyday clothing | Outdoor gear, jackets |
Why are waterproof zippers essential for outdoor gear and jackets?
When you’re hiking, camping, or working outdoors, keeping dry isn’t optional — it’s crucial. Waterproof zippers prevent water from entering key gear like jackets, backpacks, and tents. Without them, even the best fabric won’t protect you.
Tools and Materials You Need to Sew a Waterproof Zipper
Not every sewing machine is ready for this task. Let’s make sure you’ve got what you need before you begin.
You’ll need a walking foot sewing machine, polyester thread, a sharp needle, and a waterproof zipper. Don’t forget clips instead of pins to avoid punctures.
Which sewing machine settings are best for waterproof zippers?
Use a longer stitch length (around 3-4mm) and reduce the foot pressure if possible. This prevents the fabric from stretching or puckering while sewing.
What types of needles and threads work best for waterproof fabrics?
Use a size 90/14 needle for heavier fabrics and a strong polyester thread that resists moisture. Avoid cotton thread—it absorbs water and can weaken over time.
Step-by-Step Instructions to Sew a Waterproof Zipper Like a Pro
With the right technique, you can make your zipper installation watertight and professional-looking.
Start by preparing the fabric edges with seam tape, align the zipper carefully, and stitch using clips and a walking foot. Avoid piercing the waterproof layer unnecessarily.
How do you prepare the fabric before inserting the zipper?
Iron waterproof seam tape on the raw edges to prevent fraying and maintain the seal. Mark your sewing lines with a chalk pencil, not pins.
What’s the correct method to sew without damaging the waterproof seal?
Sew from the top down in one motion, using clips to hold the zipper. Never backstitch at the ends — instead, tie off the threads by hand. This keeps the seal intact.
Common Mistakes When Installing a Waterproof Zipper and How to Avoid Them
Even small mistakes can lead to big leaks. Let’s cover how to sidestep the most common pitfalls.
Skipping seam sealing2, using pins, or backstitching over the coating are the most common errors. Each of these can compromise the zipper’s waterproof seal.
Why does the zipper sometimes leak after sewing?
Leaks happen when the waterproof coating is punctured or when the zipper isn’t sewn tightly enough. Using the wrong needle or backstitching can also be to blame.
How to fix misaligned or puckered waterproof zippers?
If your zipper is puckering, unpick it carefully and resew using a longer stitch. Use fabric clips and apply even tension. Press lightly with a cool iron if needed (test first).
Tips to Make Your Waterproof Zipper Last Longer
Installation is just the start — how you maintain the zipper matters too.
Clean the zipper regularly with a soft cloth, avoid harsh chemicals, and store gear away from direct sunlight. Inspect often for wear.
How should you maintain and clean a waterproof zipper?
Wipe with a damp cloth after each use. Use zipper lubricant designed for waterproof coatings. Never use bleach or high heat on it.
What are signs that your waterproof zipper needs replacement?
Cracked coating, difficulty zipping, or visible teeth separation are all warning signs. Replace the zipper before it completely fails during use.
Conclusion
Sewing a waterproof zipper takes precision, the right tools, and a bit of practice — but it’s worth it to keep your gear watertight.