 Skip to content
Lace Dress Sample Development Guide: How Do You Move From First Sample to PP Approval?

Your trusted Women’s Apparel Manufacturer from China
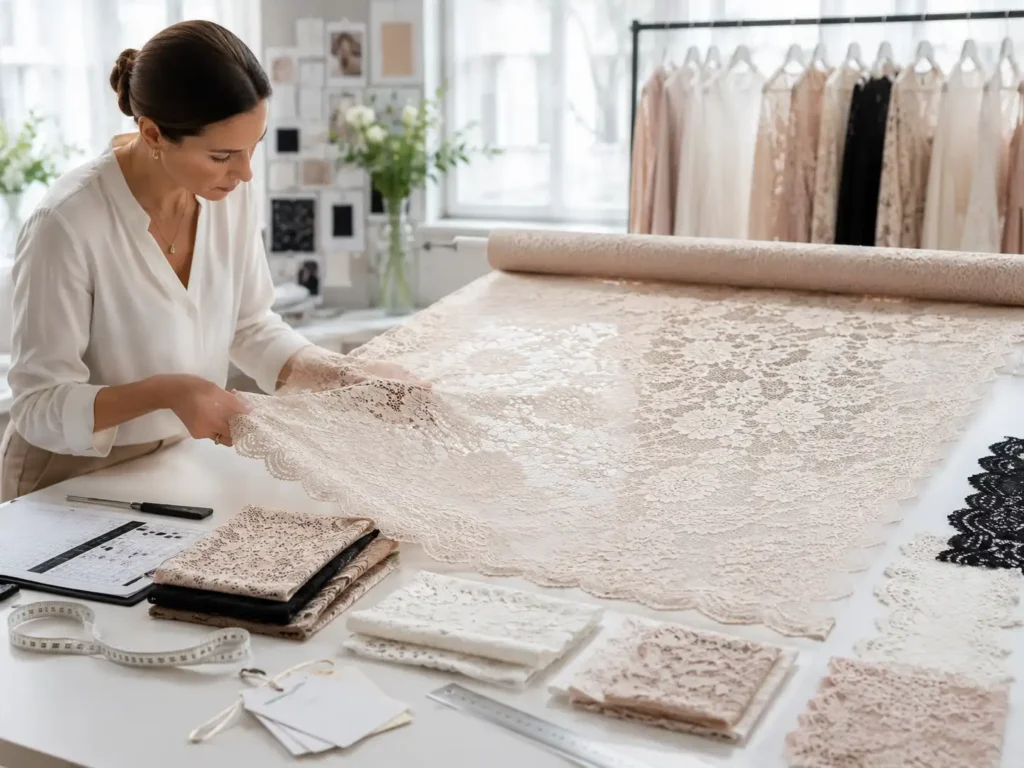
A lace dress can look almost finished on a hanger and still be far from ready for production. The floral pattern may be attractive, the silhouette may photograph well, and the measurements may appear close to the tech pack, yet a misplaced motif, an overly rigid lining, a stretched neckline, or a bulky zipper seam can change the entire garment once it is worn. Sampling is where those hidden problems become visible. For fashion teams working on occasionwear, party dresses, wedding-guest styles, fitted minis, or lace-heavy seasonal collections, the real purpose of a sample is not to prove that a factory can sew one attractive piece. It is to prove that the design can be repeated with controlled fit, materials, construction, visual placement, and quality when production moves beyond the sample room.
A reliable lace dress sampling process moves from clear development inputs to a first physical sample, fit and construction review, documented revisions, PP approval, and a final production reference. The dress should not enter bulk production until the main pattern, lace, lining, trims, measurements, motif placement, sewing methods, and appearance are stable enough to reproduce consistently across the planned order.
The most expensive sampling mistakes often start with something that looked small. A scalloped border shifts the finished hem by 12 mm. A final lace has less recovery than the development lace, tightening the hip. A flower that looked harmless on the roll lands directly on one bust point but not the other. None of these issues is dramatic during a quick sample-room review, but multiplied across hundreds or thousands of garments they become real commercial problems. A disciplined development process catches them while they are still cheap enough to change.
What Should Be Confirmed Before Lace Dress Sampling Starts?
Before sampling starts, confirm the design files, target fit, lace specification, lining coverage, trims, critical measurements, construction expectations, and visually sensitive placement points. The factory needs enough information to understand not only how the dress should look, but also how it should behave on the body and which details must remain controlled when the style moves into production.
Design Inputs
A lace dress can begin from a detailed tech pack, an original sample, a sketch, a line sheet, or even a well-chosen reference image, but the amount of interpretation required changes dramatically with the quality of the starting information. For commercial development, the factory should know the intended size, bust-waist-hip relationship, finished garment length, neckline depth, strap or sleeve dimensions, slit position, closure type, lining coverage, and the areas where transparency is intentional. If those decisions are missing, they do not disappear; they simply move into the sample room, where the pattern maker and merchandiser have to make assumptions that may not match the brand’s intention.
Reference images deserve special care because they show appearance much better than construction. A photograph rarely reveals the internal seam allowance, exact lining depth, stretch behavior, boning layout, zipper length, or measurement balance that creates the visible silhouette. A useful development team converts the image into measurable garment information before cutting begins. If a floral motif must sit below the neckline, mark the intended zone. If a scalloped border must become the finished hem, state it. If the lining should finish 80 mm above the lace hem to create a sheer lower section, record the target instead of relying on visual memory.
Lace Specifications
The phrase “floral lace” is too broad for serious product development. Two laces with a similar appearance can behave completely differently once they are stretched, sewn, lined, pressed, and placed around the body. The development record should therefore include the usable width, motif scale, repeat direction, stretch direction, recovery, embroidery density, border structure, scallop depth, hand feel, and any noticeable weight differences between open and heavily embroidered areas. These details influence pattern placement, fit, marker efficiency, seam bulk, and the way the dress hangs after several hours on a hanger.
Rigid embroidered lace generally needs more shaping from seams or darts because it cannot absorb body contour through stretch. Stretch lace gives more fitting flexibility, but poor recovery can allow the neckline or waist to grow during wear. Large motifs create another problem: they reduce the cutter’s freedom because panels may need to be shifted away from the most efficient marker position to protect symmetry or visual balance. Whenever the approved production lace is different from the first development lace, the team should compare stretch, weight, motif scale, and border behavior before assuming the same pattern will perform identically.
Pre-Sampling Item | Useful Specification to Record | Development Impact |
Lace usable width | Actual measured width in cm | Marker layout and consumption |
Motif repeat | Length x width in mm | Symmetry and panel placement |
Stretch direction | Width, length, both, or none | Ease and fit decisions |
Scallop depth | Actual depth in mm | Hem and neckline measurements |
Lining extension | Compared with outer lace | Comfort and movement |
Zipper length | Exact finished length in cm | Back seam construction |
Lining coverage | Full, partial, or zone-specific | Transparency control |
Critical fit points | Bust, waist, hip, length, neckline | Pattern priorities |
Lining and Trims
Lining should be treated as part of the garment structure rather than a hidden finishing layer. A stretch lace paired with a rigid woven lining can appear flexible in hand but feel restrictive on the body because the lining becomes the real fit limiter. A very soft lining under a dense lace may create too much movement between layers, while a stiff lining can flatten the drape that made the lace attractive in the first place. The first material review should therefore compare not only color, but also stretch, recovery, weight, surface friction, opacity, and how the two layers move together after sewing.
Color has a strong visual effect on lace. Ivory over warm nude can appear soft and skin-like, while the same ivory over white produces a sharper contrast and over black becomes more graphic. Trims also need early confirmation when they affect structure. Invisible zipper length, hook position, elastic width, cups, boning, binding, buttons, and decorative pieces can all change fit or seam thickness. A corseted lace mini dress with cups and boning behaves very differently from a lightly lined lace midi, even if both use the same outer fabric. When trims are likely to change the shape of the garment, they should be present before the fit is treated as final.
Fit Targets
Fit becomes easier to manage when the intended silhouette is defined before the first sample instead of being negotiated after it arrives. A bodycon lace dress, a soft A-line wedding-guest midi, and a corseted lace mini may share similar body measurements, but their ease, support, neckline tension, and waist shaping are not interchangeable. The development team should identify the measurements that control the silhouette first, then use secondary measurements to refine the details. For most fitted dresses, bust, waist, high hip, full hip, body length, and finished garment length are the first group to stabilize.
Comments should be measurable whenever possible. “Raise the neckline” is weaker than “raise center-front neckline 8 mm.” “Shorten the lining” is less useful than “reduce lining length by 15 mm from the current sample.” Those numbers are not universal standards; they are examples of how to remove ambiguity from one specific style. For strapless or corseted dresses, neckline height, cup position, underbust, boning placement, and top-edge security may matter as much as the conventional bust and waist measurements. For long lace dresses, hem balance should also be checked after hanging, because heavier embroidery can subtly change vertical drape.
How Do You Build the First Lace Dress Sample?
The first lace dress sample should test whether the pattern, lace, lining, construction, and target fit can work together as one garment. It is not expected to be perfect. Its value comes from revealing structural, visual, and material problems early enough that the pattern, fabric choice, placement, or sewing method can still be changed without disrupting production.
Pattern Development
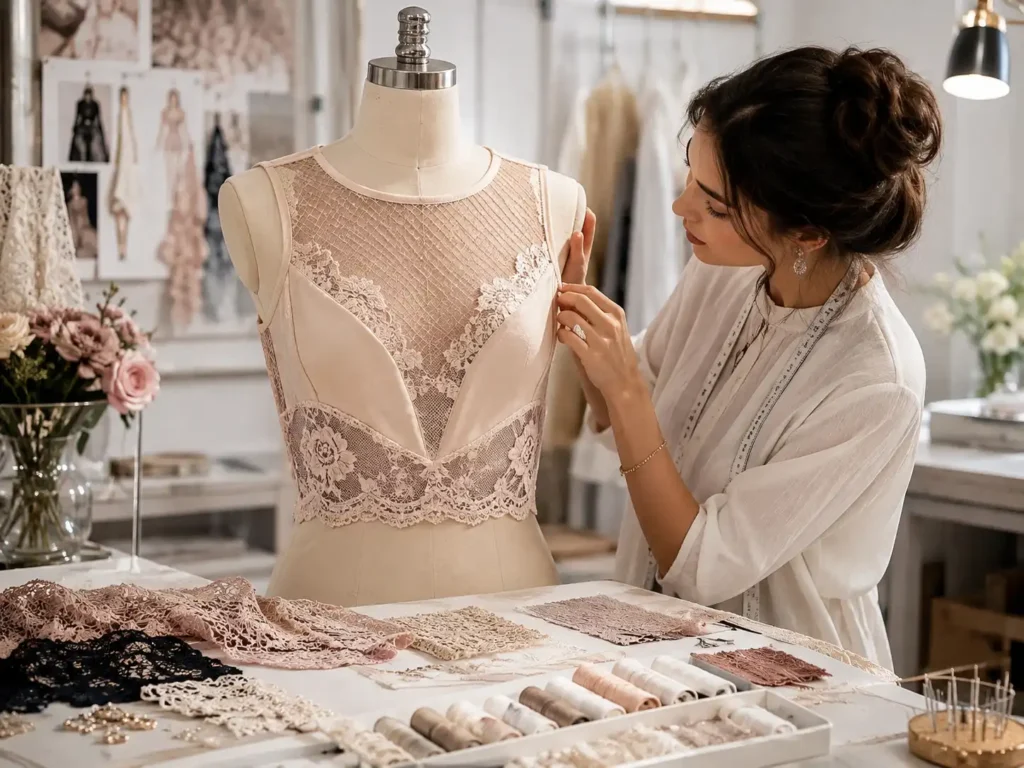
Pattern development starts with body proportions, but lace adds a second layer of geometry because the fabric itself contains visible shapes. A princess seam, waist seam, side seam, or center panel can look perfectly reasonable on plain fabric and awkward once it cuts through a large flower or a strong embroidered border. Pattern makers therefore need to look at the body and the lace at the same time. Rigid lace may need more contour shaping from darts or panel seams, while stretch lace can allow less ease but still requires careful recovery testing so the garment does not grow after wear.
Grading should also be considered during the first pattern, especially when the dress depends on symmetrical motifs. A placement that looks balanced in the development size may drift in smaller or larger sizes if the visual reference is not tied to stable points such as center front, neckline, waist seam, or sleeve cap. The first sample does not need a complete graded marker, but it should reveal whether the chosen seam positions and motif controls can survive size changes. If a small seam shift improves both visual continuity and material efficiency without changing the design language, the sample stage is the right time to make that decision.
Lace Cutting
Lace cutting should begin with a placement plan rather than with marker efficiency alone. The eye naturally focuses on the center front, neckline, bust, waist, sleeves, and hem, so those zones deserve first attention. A prominent flower that falls directly over one bust point but not the other can make a technically symmetrical dress look visually crooked. The same thing happens when a strong motif is cut abruptly at one princess seam but flows continuously through the opposite side. These are not measurement problems; they are placement problems, and they need their own controls.
Scalloped borders further reduce cutting freedom because the border may be part of the finished design. If the scallop forms the hem, the pattern must sit against the border at a controlled position, which can increase fabric use. For repeatable production, important placement points should be recorded with photographs and a few practical dimensions. A center motif might be referenced from center front and neckline, sleeves from the cap, and scallop valleys from side seams. The objective is not to make every flower identical across every garment, but to control the zones where uncontrolled variation would visibly change the style.
Lace and Lining
The first sample should show how the lace and lining behave once they are sewn into the same silhouette. Some fitted dresses work better when the layers are controlled closely so the lace does not shift during wear. Softer occasion styles may drape more naturally when the lining moves more independently. Sleeves, upper chest, side panels, or back sections may remain unlined while the body is fully covered. The correct choice depends on the design, but the relationship between layers needs to be tested physically rather than decided only from swatches.
A common problem appears when the lining stretches less than the lace. The outer material looks flexible, yet the wearer feels restriction at the bust or hip because the lining carries the tension. The opposite can happen when an elastic lining moves too freely beneath a more stable lace, creating wrinkles or shifting seams. Seam thickness also needs attention: two lace allowances, two lining allowances, zipper tape, and dense embroidery can create a bulky center-back seam. The first sample should reveal whether trimming, seam grading, alternate construction, or reduced embroidery bulk is needed before the method becomes difficult to change.
First-Sample Review
A first sample is successful when it gives the development team enough information to make better decisions, even if the garment still needs correction. Review the dress on-body from the front, side, and back, then separate comments into fit, lace placement, fabric, lining, construction, trims, visual proportion, and production risk. That separation matters because a distorted neckline may come from sewing tension rather than the pattern, while a tight hip may come from the lining instead of the outer lace. Changing the wrong variable creates another sample without solving the real problem.
The sample should answer whether the silhouette resembles the intended design, whether the base pattern is viable, whether the lace behaves as expected, whether the lining supports the target fit, and whether the main sewing methods can be repeated. Jinfeng Apparel’s sampling workflow follows this progression from development inputs through pattern work, sample sewing, fit checking, revision tracking, PP approval, and Golden sample control rather than treating a first sample as a production standard. Its development setup includes two sample rooms and more than 20 sample machinists supporting complex womenswear development.
Which Lace Details Need the Most Sample Control?
Motif placement, scalloped edges, transparency, appliqué work, and seam behavior usually need the closest control because small inconsistencies are highly visible on lace. The purpose is not to force microscopic uniformity across every garment, but to identify the zones where variation would noticeably alter the style and then define a practical visual or measurable reference for production.
Motif Placement
Motif placement should be treated as part of the design specification. Large or recognizable motifs attract the eye immediately, so uncontrolled positioning can make a dress look uneven even when the sewing and measurements are technically correct. Center front is usually the first zone to review, followed by neckline, bust, waist, major bodice panels, and sleeves. A strong vertical floral element can visually lengthen the torso, while an awkward horizontal cluster across the waist can change the perceived proportion of the garment. These effects are subtle in a fabric swatch and much more obvious once the lace is wrapped around a body.
Perfect matching across every seam is rarely necessary and can raise fabric consumption significantly. The sample stage should decide where matching adds commercial value and where controlled variation is acceptable. Center-front panels, feature necklines, and visible sleeve pairs often deserve more control than hidden side seams. Once the arrangement is approved, use both photography and stable measurements. A photograph shows the overall visual relationship, while a dimension from center front, neckline, waist seam, or sleeve cap gives the cutting team something repeatable. Together they create a more useful reference than an instruction such as “match lace like sample.”
Scalloped Edges
Scalloped lace can remove the need for a conventional turned hem and create a refined natural finish, but the border becomes part of the garment’s geometry. If the scallop forms the hem, finished length depends on the exact border position. The cutter cannot simply move the pattern upward or downward to improve marker efficiency without changing the visible length. The same principle applies when scallops are used at a neckline or sleeve edge: depth, repeat, and position all influence the final shape, and the sample must show how the border meets at seams.
Side seams are particularly revealing. If one deep scallop peak meets a shallow valley, the hem may look uneven even though the side seam lengths measure correctly. Necklines need an additional stability check because open lace borders can stretch during sewing or wear. Light stabilization may be useful, but overly stiff support can destroy the softness that made the lace attractive. The approved sample should therefore be worn, moved, and handled before the border is treated as final. Once accepted, scallop position should be captured in the cutting reference rather than left to operator judgment.
Transparency and Coverage
Transparency should be evaluated on a body, under normal indoor light, and under stronger directional light because lace can become more revealing when stretched over the bust or hip. Instead of asking whether the entire dress is “too sheer,” divide the garment into zones. The bust, underbust, waist, hip, upper thigh, sleeve, back, and slit area may each need a different level of coverage. A design can intentionally leave shoulders and sleeves transparent while maintaining full coverage through the body, or use a shorter lining under a midi lace skirt to create a controlled sheer lower section.
Lining color changes the perception of coverage as much as opacity. Warm nude can soften ivory lace, white increases contrast, and black can make every motif look sharper. The sample should also be checked during movement because lining can ride upward when the wearer sits or walks, and side slits can expose more than expected. For ecommerce-oriented collections, studio lighting is worth considering because bright front lighting can reveal areas that appear acceptable in normal room light. A lace dress is not truly approved when it looks good for a static fitting; it should maintain the intended balance of coverage and transparency during realistic wear.
Seam Distortion
Lace contains open areas and dense embroidered areas, so tension is not distributed evenly during sewing. That is why a seam can measure correctly and still appear wavy, puckered, or raised. Heavy embroidery inside a seam allowance can create bulk at invisible zippers, fitted waist seams, and princess seams. In some styles, carefully reducing excess embroidery inside the hidden allowance helps the seam lie flatter, but the method should be tested so the visible motif is not damaged and the edge remains secure.
Stretch lace brings a different set of risks. If the seam is stretched while being sewn, it may remain wavy after pressing; if the seam is too rigid, the garment can feel tight even though the lace itself stretches comfortably. Curved necklines and armholes can distort simply from handling before stitching. Stabilization, feed control, stitch choice, and seam structure all affect the result. A neat stitch line is therefore not enough. The construction needs to preserve the intended shape, stretch, and visual smoothness of the lace around the seam, particularly in the most visible fitted zones.
How Do You Evaluate Fit and Revise the Sample?
Evaluate the sample by separating garment measurements, body balance, lace behavior, lining restriction, seam tension, and visual placement. Diagnose the cause before changing the pattern, then convert every accepted correction into the appropriate pattern, size chart, BOM, sewing instruction, or placement record so the next sample clearly proves whether the original problem was actually solved in practice.

Critical Measurements
Fit review should start with the measurements that control the entire silhouette. Bust, waist, hip, body length, and finished garment length generally come before smaller details because changes in those areas can move the neckline, strap position, waist seam, and hem balance. If the waist sits 15 mm too low, shortening the skirt first can waste a revision because the lower proportion changes again after the bodice is corrected. The same logic applies to bust shaping: poor cup or front-body balance can make straps appear too long and the neckline too low even when both measurements match the specification.
| Sample Observation | First Area to Diagnose | Example of Clear Revision Language |
| Neckline gapes | Pattern shape and edge stretching | Raise or reduce neckline by a measured mm amount after checking stability |
| Waist looks loose | Finished waist and ease | Reduce total waist by a measured amount across agreed seams |
| Side seam pulls forward | Front/back body balance | Rebalance front and back width after fitting |
| Lining feels tight | Lining extension vs lace | Change lining or adjust lining pattern |
| Slit opens too much | Slit height and overlap | Lower opening by a measured mm amount |
| Zipper area ripples | Seam bulk and embroidery | Reduce hidden bulk before changing body pattern |
Revision comments should state the intended change rather than only the visual complaint. “Tighter waist” leaves too much room for interpretation; “reduce finished waist by 20 mm total” is clearer. “Lower slit” becomes more useful when the team records the exact amount from the current sample. Those figures are examples of communication style, not universal fit standards. The important point is traceability. Once a measurement changes, the team should know whether the pattern, size chart, grading rule, and later QC tolerance also need updating so the correction survives beyond one manually altered sample.
Fabric Behavior
Measurements alone cannot explain fit because lace does not behave like a uniform plain fabric. Embroidered areas may be firmer than open areas, widthwise extension may be much greater than lengthwise extension, and recovery can change after sewing or hanging. A garment can match the size chart and still feel wrong because the final lace or lining behaves differently from the material used during pattern development. That risk becomes especially important when a substitute lace is used for the first sample and the production lace arrives later.
Weight also matters in long or densely embroidered styles. A lace maxi can relax vertically after hanging, subtly changing strap length, neckline height, or hem balance. The lining should be evaluated separately because it may become the real limiting layer. If the outer lace stretches comfortably but the lining does not, the wearer experiences the lining, not the theoretical stretch of the shell. A useful fitting therefore asks two questions: does the garment measure correctly, and does the material behave correctly at that measurement? The second question often explains problems that a tape measure alone cannot solve.
Pattern or Construction?
Correct diagnosis can remove an entire sample round. A wavy side seam may result from sewing tension rather than the pattern. A gaping neckline may be caused by stretching during assembly instead of excessive pattern length. A tight hip can come from a rigid lining, and an apparently twisted waist may simply be a strong motif sitting asymmetrically across a level seam. When the visible symptom is treated as the root cause, the next sample may introduce new problems without fixing the original one.
A practical diagnostic sequence is to check the measurement first, then body balance and seam position, then lace and lining behavior, then sewing tension and construction, and finally motif placement before changing the pattern. When the cause remains uncertain, change one major variable at a time. If the pattern, lace, and lining are all changed together, the next sample might look better, but the team will not know which correction actually worked. That missing knowledge becomes costly when the style is reordered or extended into another color, fabric, or season.
Revision Records
Sample comments should become production records rather than living only in email threads, messaging apps, or marked-up photos. Pattern changes belong in the updated pattern. Measurement changes belong in the size chart. Fabric and trim changes belong in the BOM or material record. Sewing changes belong in the construction instruction. New quality risks belong in the QC checklist, while lace placement changes should be supported by photographs, reference measurements, or a simple placement diagram.
This discipline is especially important when several styles are developed at once. A ten-style occasionwear collection can generate dozens of comments involving lace, lining, straps, slits, zippers, and fit. One correction can easily appear on the next physical sample but disappear from the production file unless someone formally closes the loop. In Jinfeng Apparel’s development process, revision feedback is transferred into updated tech packs, patterns, size charts, measurement tolerances, BOMs, fabric and trim records, sewing instructions, QC checkpoints, and PP comments before bulk production. That kind of documentation is what turns a good revised sample into a repeatable manufacturing decision.
How Many Sample Rounds Are Needed Before PP Approval?
There is no universal number of lace dress sample rounds. A straightforward style may move from first sample to one revised sample before PP, while fitted, corseted, sheer, heavily appliquéd, or structurally complex lace dresses may need additional rounds. PP sampling should begin only when the main fit, materials, construction, and appearance are stable enough to act as a bulk-production reference.
Sample Stages
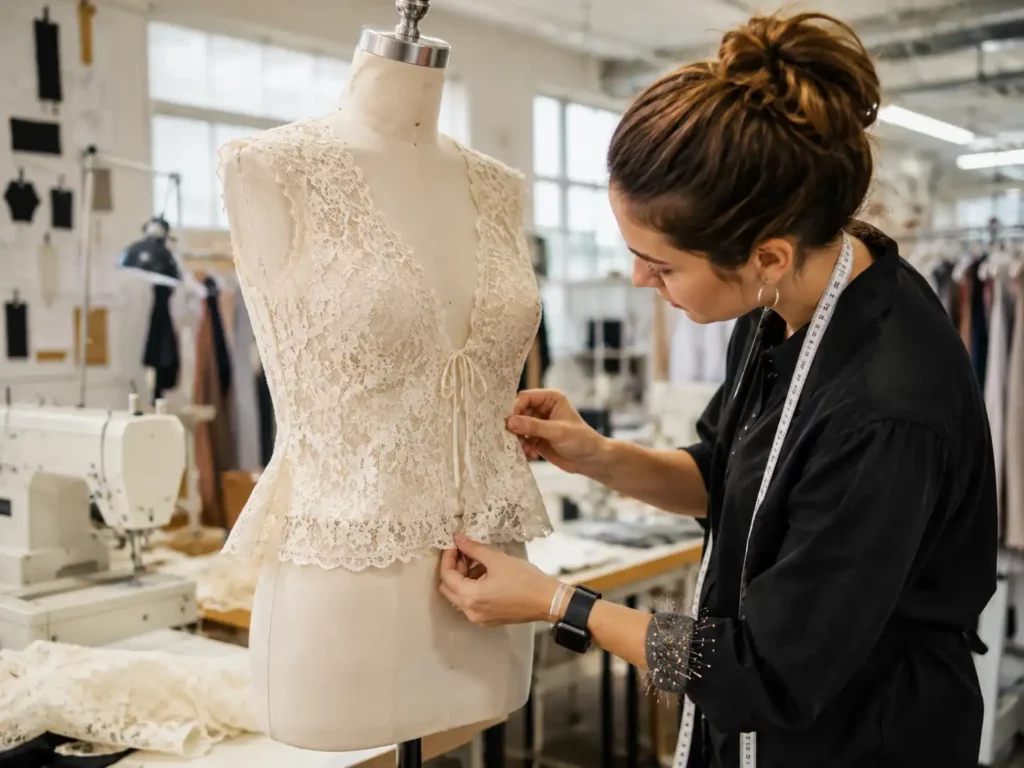
Different samples answer different questions, so the names should describe their purpose rather than simply the order in which they were made. The first sample tests the physical design and basic construction direction. A fit sample focuses more closely on body measurements and balance. The revised sample checks whether agreed comments were carried out correctly. A photo-ready sample supports campaign, ecommerce, or showroom needs, while the PP sample confirms the standard that production is expected to follow. The Golden sample preserves the final physical reference after approval.
For planning, a simple dress may use one first sample and one revised sample before PP review, while more complex structures can require additional revisions. Jinfeng Apparel commonly plans one first sample plus one revised sample for simple dresses, one to two revised samples for medium-complexity styles, and around two revised rounds for complex corset, strapless, evening, sequin, lace, or mesh styles depending on the actual construction. These figures are useful planning references rather than guarantees, because design changes, fabric substitution, and fit sensitivity can extend any development cycle.
Photo Sample vs PP
A photo sample and a PP sample are not the same object even when they look nearly identical. A photo sample is made to support imagery, showroom presentation, internal sales, or launch preparation. In a time-sensitive calendar, it may use an available lace close to the final quality, temporary labels, or a construction detail that has not yet been optimized for production. The garment can still be excellent for photography, but it should not automatically control bulk manufacturing.
A PP sample needs stricter alignment with final materials and production instructions. Final or formally approved lace, lining, trims, measurements, construction methods, labels, and important workmanship details should be represented. Lace makes this distinction especially important because motif scale, stretch, weight, and lining color can change both fit and appearance. A sample machinist may also make a one-off hand adjustment that looks perfect for the camera but has not been converted into a repeatable operation. The safest workflow is to state clearly what each sample is approved to control and what remains open.
Another Revision
Another revised sample is justified when an unresolved change can still affect fit, appearance, comfort, construction, or production consistency. Major neckline changes, bust corrections, new lining, different lace, altered zipper construction, significant motif repositioning, or changes to internal support usually deserve physical confirmation. Several small corrections can also interact. Raising a neckline, moving a strap inward, and changing lining tension may each look minor, but together they can materially alter the bust fit.
Material replacement is another common trigger. If the final lace has different recovery, weight, or motif scale from the development lace, the approved pattern may not behave the same way even when the sketch remains unchanged. The useful question is not how to avoid one more sample; it is what production risk remains if the style is approved now. One additional sample has a visible cost and lead-time impact, but a wrong bulk cut affects far more garments. When the correction touches the structure or the final material behavior, physical verification is usually the safer commercial choice.
PP Readiness
A style is ready for PP sampling when the major decisions have stopped moving. The silhouette should be accepted, critical measurements stable, final lace and lining selected, color approved, trims defined, construction settled, and important motif or scallop placement documented. Previous fitting comments should be closed or reduced to minor points that do not change the fundamental fit or appearance. The BOM and latest pattern version should also agree with the physical garment that the team expects to approve.
Before PP, the team should be able to answer which exact lace quality is being used, which lining and color are approved, which pattern version is active, whether bust-waist-hip and length measurements are stable, whether the zipper and closure method are confirmed, and whether the agreed construction can be reproduced at the expected cost. If the team is still debating a new lace, changing the neckline, or redesigning the internal support, the style is still in development. Calling the next garment a PP sample does not make it production-ready; the real gate is technical stability.
How Do You Turn an Approved Sample Into a Bulk Standard?
An approved sample becomes a reliable bulk standard only when the physical garment and the production documents agree. The final pattern, measurements, lace, lining, trims, construction, placement references, and QC points should all match the approved PP sample, while a Golden sample can preserve the accepted visual and physical standard for production, inspection, repeat orders, and future reference.
PP Confirmation
The PP sample should represent the garment the production line is expected to reproduce, not merely a visually similar version of the development sample. For a lace dress, review the final lace article, shade, usable width, motif scale, lining, zipper, trims, neckline stability, scalloped edges, appliqué, seam construction, and intended transparency. Critical measurements such as garment length, lining length, neckline depth, slit height, waist position, and strap length should be checked against the latest approved specification rather than an earlier sample comment sheet.
The garment should also be reviewed on-body because lace placement and construction can change when tension is introduced. A center motif that appears balanced when flat may shift visually across the bust, a zipper can close smoothly on a hanger but become difficult under body tension, and a neckline can relax after the dress hangs. PP approval therefore needs three references to agree: the physical garment, the technical file, and the intended appearance. If any one of those three conflicts with the others, the discrepancy should be resolved before bulk cutting starts.
Production Files
A physical sample cannot carry every instruction needed by cutting, sewing, finishing, and QC teams, so the approved style needs a complete production file. That package normally includes the final pattern, graded measurements, measurement tolerances, BOM, approved lace reference, lining, trims, color information, sewing instructions, label positions, placement references, and QC checkpoints. Lace-heavy styles often need additional photographs or diagrams showing motif position, scallop balance, appliqué zones, or acceptable visual variation.
Version control becomes critical when several styles or revisions are moving at the same time. A new pattern combined with an old size chart is enough to create a major production error. Style code, issue date, sample version, and approval status should make the active file unmistakable. Every important correction discovered during sampling should appear somewhere in the final record. If a change exists only on the physical sample, the factory is relying on memory; if it exists only in the document but not on the approved garment, the two standards are already in conflict before production begins.
Golden Sample
The Golden sample is the sealed physical reference kept after final approval. It is especially useful for lace because some qualities are difficult to describe completely with numbers: hand feel, lining-color interaction, scallop balance, motif density, appliqué appearance, neckline character, and overall drape are easier to compare physically. Production and QC teams can use the Golden sample to judge whether the bulk garment still looks and feels like the approved product rather than relying only on isolated measurements.
The Golden sample should reinforce the technical file, not replace it. If the size chart states one finished measurement and the physical sample measures differently, the discrepancy needs to be resolved rather than silently choosing one. The same reference becomes valuable for repeat orders months later, when a new lace dye lot or lining batch may technically match the purchase specification but look slightly different beside the original garment. Preserving the pattern, BOM, material references, and Golden sample together also reduces redevelopment work when a successful style returns in a new color or season.
Bulk Consistency
Bulk control begins with incoming lace and lining rather than at final inspection. Materials should be compared with the approved reference for shade, motif, usable width, obvious defects, and general behavior before cutting. Cutting teams then need clear orientation and placement rules, particularly when the center front, sleeves, or scalloped hem have controlled visual references. During sewing, inspection should focus on areas that are difficult to correct later, including neckline distortion, zipper bulk, waist seams, fitted curved panels, appliqué attachment, and lining movement.
Bulk Control Point | Approved Reference | Practical Production Check |
Lace shade | PP / Golden sample | Compare under consistent lighting |
Motif direction | Placement photo or marker instruction | Check before cutting |
Garment measurements | Final size chart | Measure critical points by size |
Lining coverage | Approved sample | Review flat and on-body |
Scallop balance | Golden sample | Compare hem and side-seam meeting points |
Zipper area | Sewing standard | Check seam bulk and smooth closure |
Transparency | Approved appearance | Review under normal and stronger light |
Appliqué placement | Photo or placement guide | Check position and secure attachment |
Final workmanship | Golden sample + QC checklist | Inspect before packing |
The objective is controlled consistency, not an unrealistic promise that every floral element will sit in a microscopically identical position. Commercial garment production always includes some variation, especially with large repeating lace patterns. The important question is whether the variation changes the intended appearance, fit, or function. When visual limits are defined during sampling, production and QC teams can spend their time controlling what actually matters rather than rejecting harmless differences or overlooking the details that make the dress feel inconsistent with the approved sample.
Conclusion
Lace dress development works best when the sample is treated as a decision-making tool rather than a beautiful one-off garment. The strongest process begins with clear design and material inputs, tests the real behavior of lace and lining, separates fit problems from construction problems, documents every meaningful revision, and moves to PP only when the main variables have become stable. By the time bulk cutting begins, the pattern, measurements, motif placement, sewing method, trims, lining, and visual standard should tell the same story.
For fashion teams preparing a new lace collection, the most useful conversation with a manufacturing partner is often not “Can you make this dress?” but “How will you prove that the approved result can be repeated?” A capable development team should be able to explain what will be checked on the first sample, what changes require another physical revision, how PP approval is controlled, and how those decisions reach cutting, sewing, QC, and repeat orders. For a new lace program, a team can send Jinfeng Apparel a tech pack, reference sample, material direction, and planned quantity to discuss the development route before committing the style to bulk. That approach reduces unnecessary sample rounds without rushing approval, and it gives the final collection a much better chance of arriving in production with the same fit and visual character that made the sample worth approving in the first place.
Share This Article :

Jerry Lee
Categories

Latest blogs


Table of Contents
Here, developing your OEM/ODM private label clothing collection is no longer a challenge—it’s an excellent opportunity to bring your creative vision to life.

